Reset Data – Overview
The Reset Data module in ARMember allows you to remove membership data, payment records, login history, security logs, and other plugin-related information from your membership site.
This feature is useful when preparing a website for launch, removing test records, or starting with a fresh ARMember setup.
Additionally, you can choose which data you want to remove by using individual switches. Before starting the reset process, ARMember also shows the selected settings and the number of records that will be deleted to make sure you only reset the right data.
How to Access Reset Data Settings
- Log in to your WordPress admin dashboard.
- Navigate to
ARMember→General Settings→Reset Data. - Click on the Reset Data tab to open the Reset Data settings page.
Reset Data Options
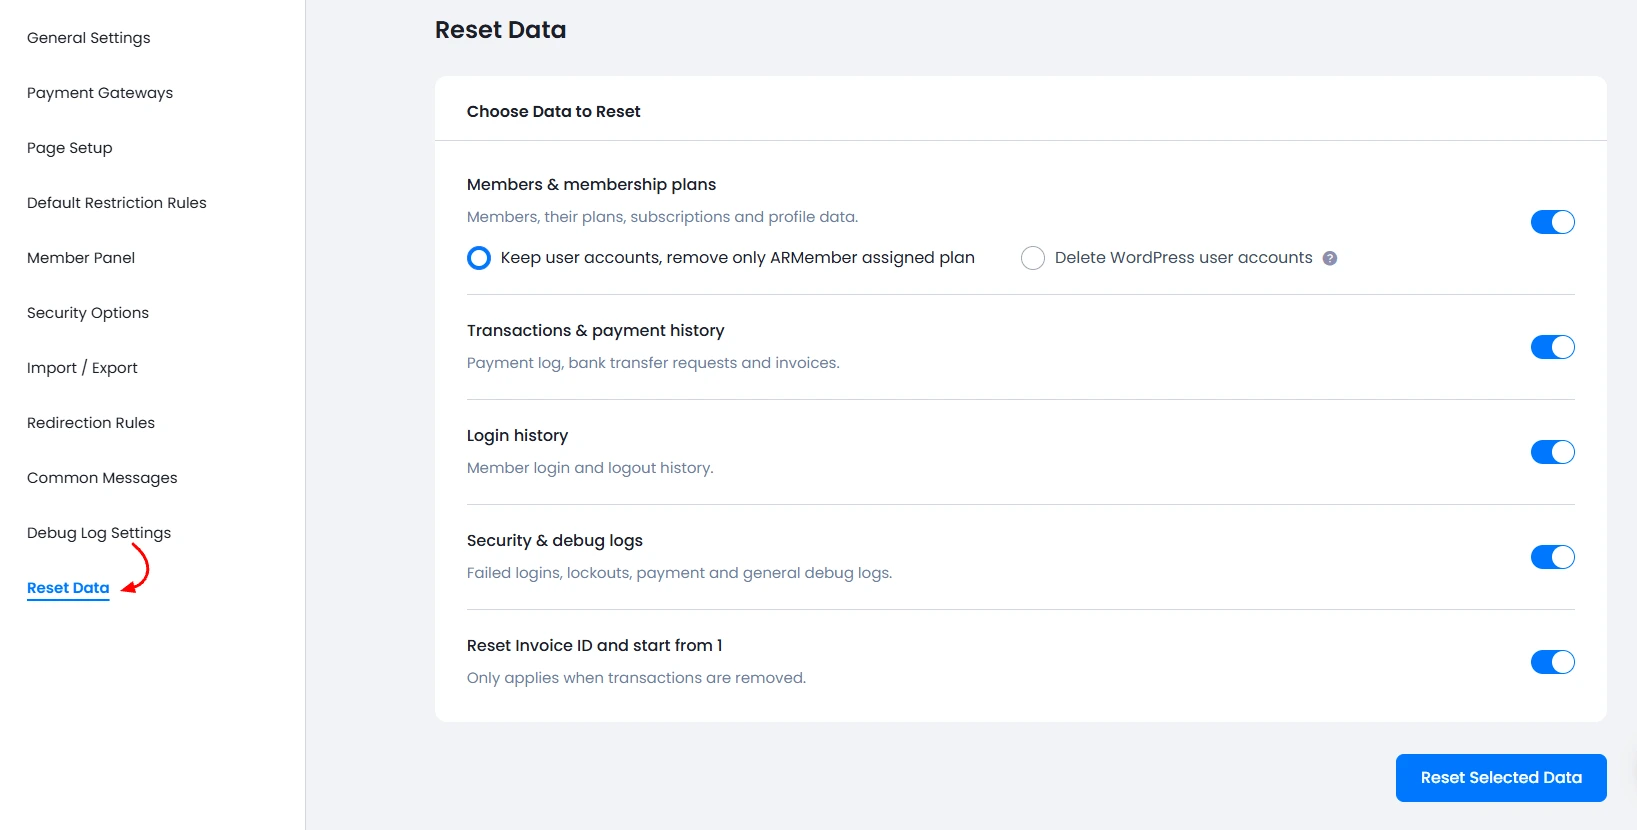
ARMember provides several options to remove different types of website data. You can enable or disable each option using its respective switch. This way, you can choose exactly which information you want to remove.
The available reset options are explained below:
-
Members & Membership Plans
This option allows you to remove member information and membership plan assignments. ARMember provides two sub-options for this purpose:
- Keep User Accounts: Select this option to remove only the ARMember membership plan data while keeping existing WordPress user accounts. As a result, members will remain registered on your website, but their membership plan information will be removed.
- Delete WordPress User Accounts: Select this option to remove ARMember membership plan data and permanently delete the associated WordPress user accounts. Therefore, the selected users will no longer exist in your WordPress user list.
-
Transactions & Payment History
This option allows you to clear transaction and payment-related information from ARMember. When you enable this option, ARMember removes the following records:
- Payment transaction logs.
- Bank transfer requests.
- Generated invoices.
Additionally, this option helps you clear old payment records and prepare your membership website for a fresh launch.
-
Login History
This option allows you to clear the login and logout history of your members. Once you enable this option, ARMember removes all previously recorded member login and logout activities.
Therefore, you can start with a clean login history without removing the existing member accounts.
-
Security & Debug Logs
This option allows you to clear security records and debug information stored by ARMember. When you enable this option, ARMember removes the following information:
- Failed login records.
- Account lockout records.
- Payment logs.
- General debug logs.
Additionally, this option is useful when you want to remove testing-related security records and clear old debug information from your website.
-
Reset Invoice ID and Start From 1
This option allows you to reset the invoice numbering sequence. After enabling it, ARMember resets the invoice ID sequence to start again from
1.Important Note: You must enable the Transactions & Payment History option before using this setting. Otherwise, ARMember will not allow you to reset the invoice ID.
Reset Data for ARMember Pro Add-ons
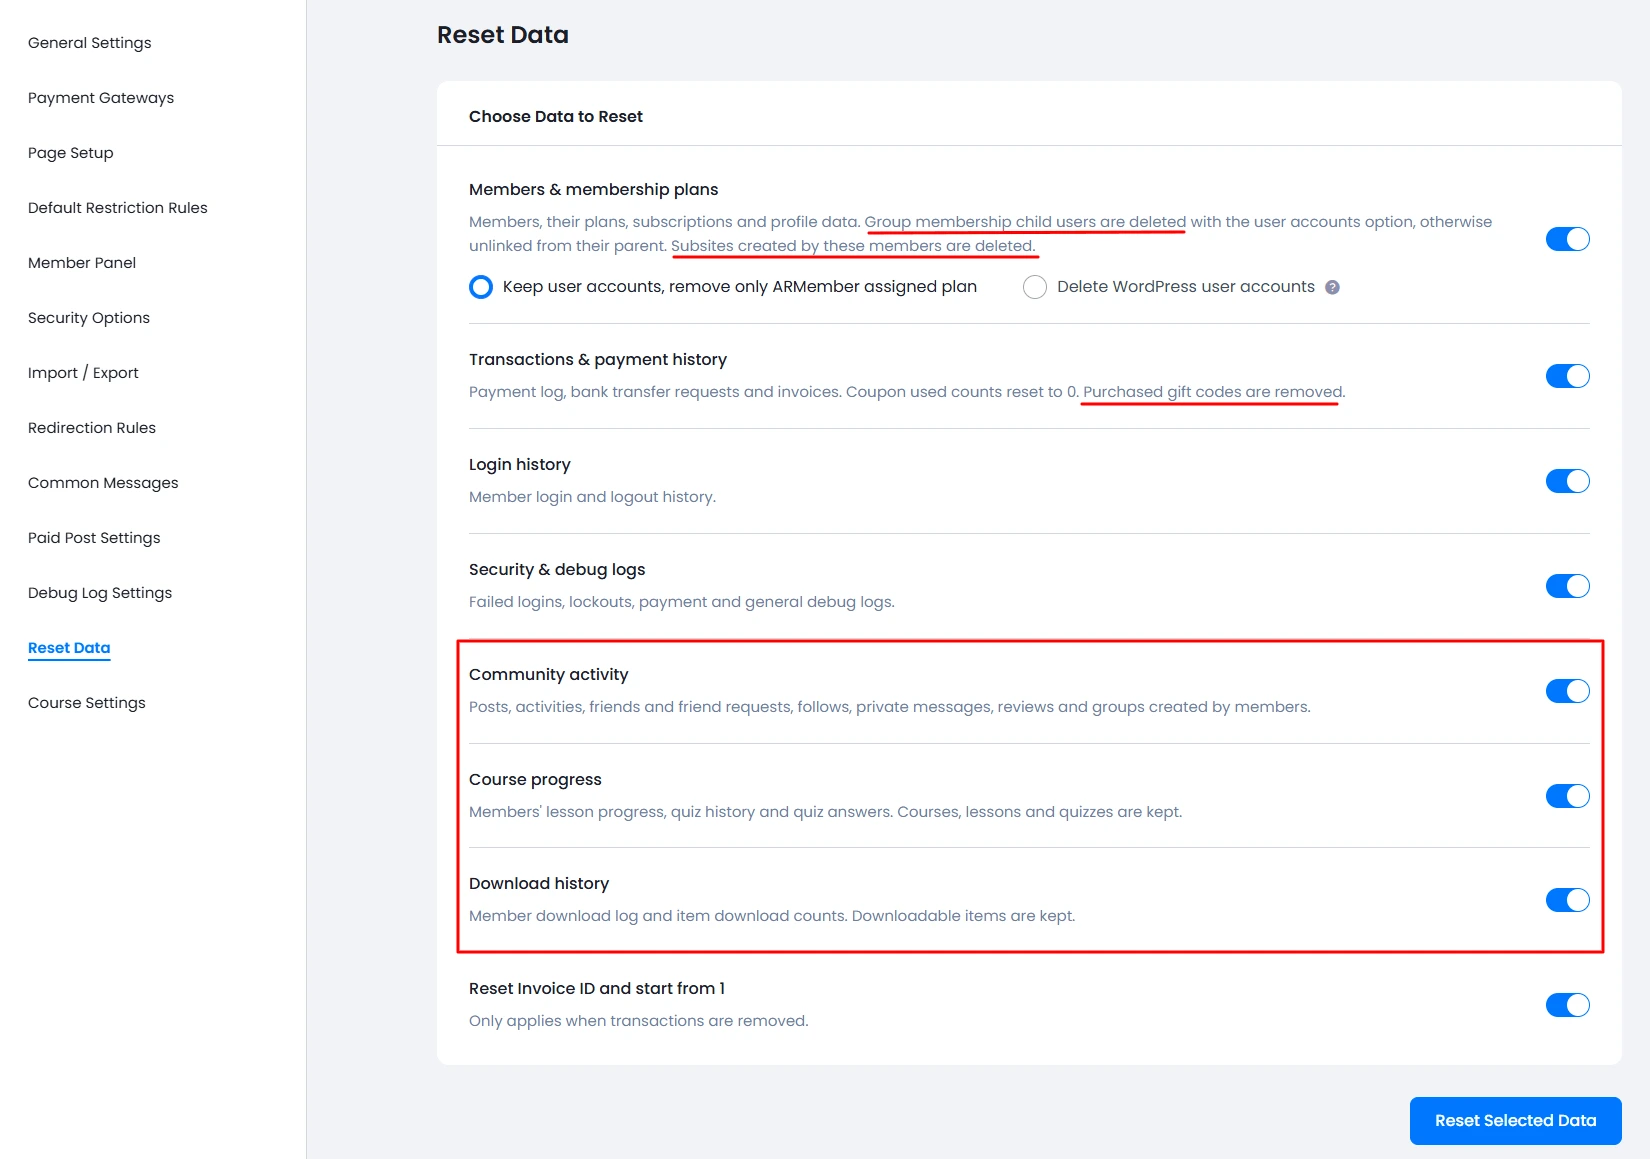
ARMember Pro also allows you to reset data related to supported add-ons. When you activate an ARMember add-on, its individual reset option appears under the Reset Data settings.
You can enable or disable each add-on switch according to your requirements. This gives you more control over which add-on information you want to remove.
Supported ARMember Pro Add-ons
The following add-ons support the Reset Data feature:
- ARMember Courses
- ARMember Social Community
- ARMember Network Site
- ARMember Digital Download
- ARMember Gift
- ARMember Group Membership
How to Reset Selected Data
After selecting the required reset options, you can start the reset process using the Reset Selected Data button. ARMember guides you through four simple steps. These steps include data selection, confirmation, live progress, and a completion summary.
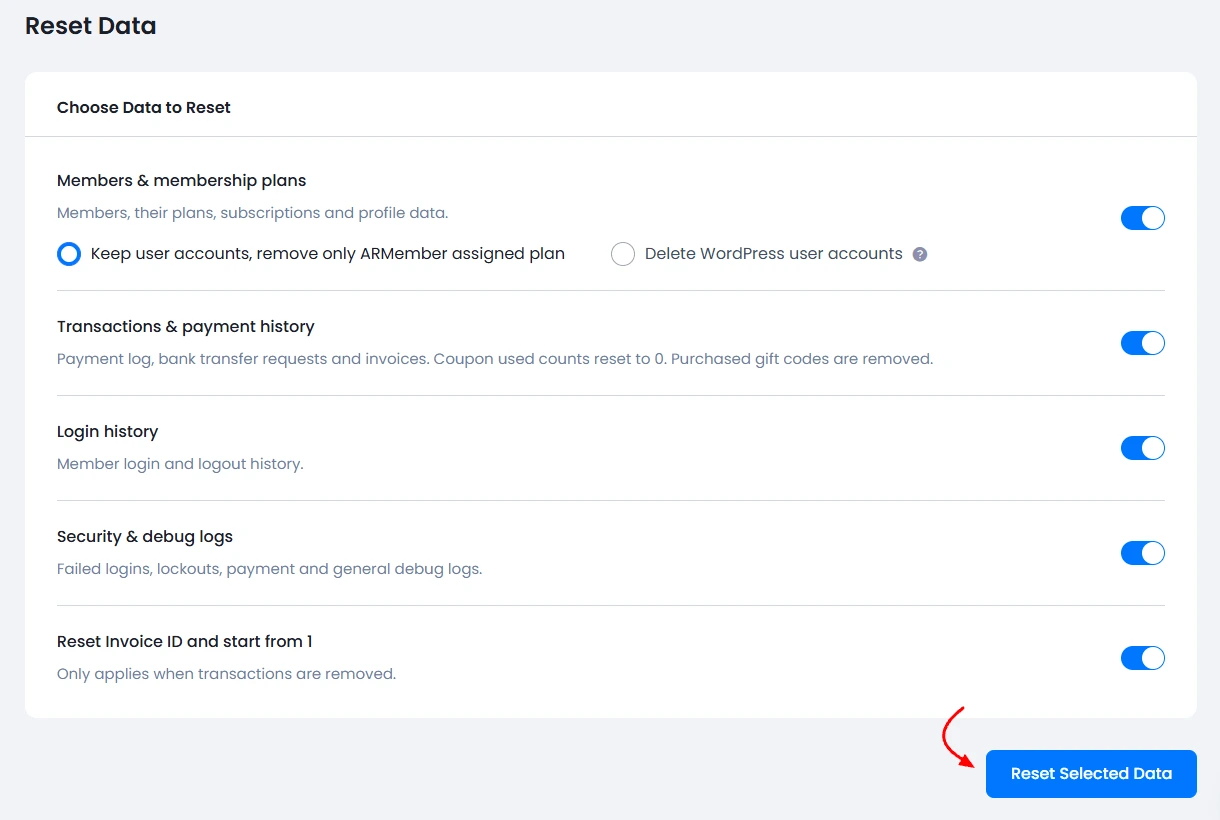
Step 1: Select Data and Click Reset Selected Data
First, enable the switches for the data categories you want to remove. You can select one or more options according to your requirements.
Once you have selected the required options, click on the Reset Selected Data button to continue.
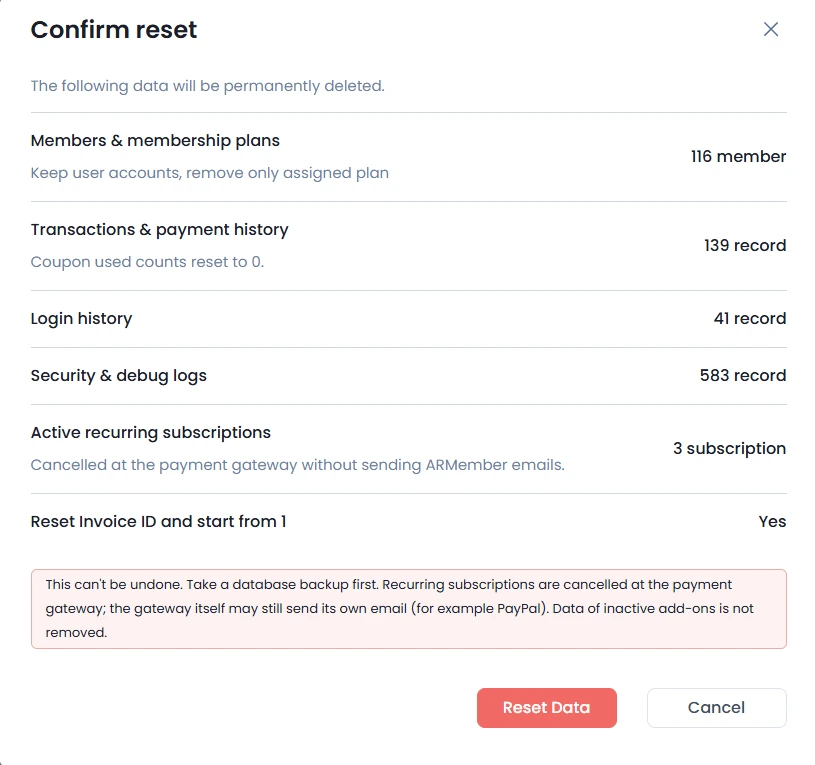
Step 2: Review the Confirmation Popup
After you click the Reset Selected Data button, ARMember displays a confirmation popup. This popup shows the selected reset options and the number of records that ARMember will delete from each selected category.
Before proceeding, carefully review the selected settings and record counts. This helps you make sure that you have selected the correct data for removal.
Once you have checked all the details, confirm the reset operation to continue.
Step 3: Track the Reset Progress
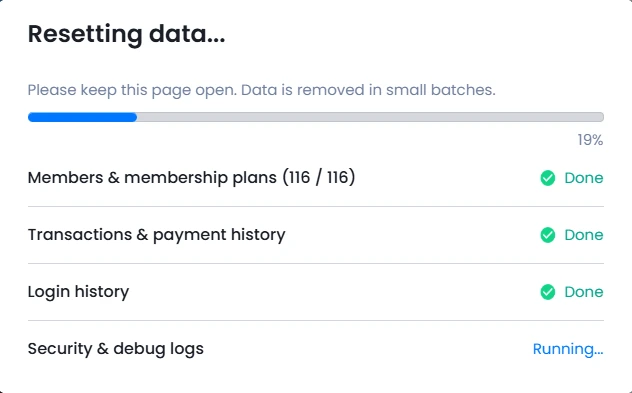
Once you confirm the operation, ARMember starts removing the selected data. During this process, a progress popup displays the live status of the reset operation.
Additionally, you can use this popup to track the progress while ARMember clears the selected records. Wait until the operation finishes before continuing.
Step 4: Review the Completion Summary
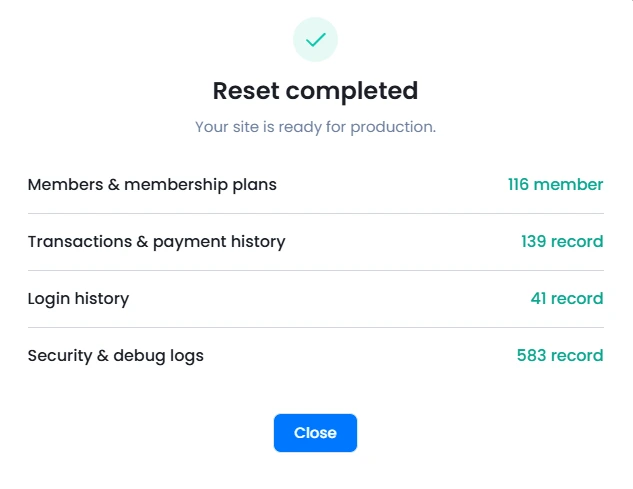
After ARMember completes the reset operation, it displays a completion summary popup. This popup shows the number of records deleted during the process and confirms the completion of the selected reset operation.
Finally, review the summary to check the reset results. Your website is now ready for further configuration, testing, or launch with the selected data removed.