

Detailed Guide to Download & Activate the ARMember Add-on

How to Install and Activate the ARMember License?
How to Download & Activate the ARMember Addon Setup?
If you have purchased a single or a few ARMember add-ons individually, here are the detailed steps to activate the ARMember add-on license. This is your step-by-step ARMember add-on setup guide.
Step 1: Login
Log in to your account. If you have logged in to the account and then purchased the add-ons, you can log in to the same account. If you didn’t have an account and purchased the add-ons, use the similar details to log in that were used at the time of purchase.

Step 2: My Account
Once you are logged in successfully, you will see a dropdown on the top right. Click on the icon and select My Account to navigate to your account and move ahead with the ARMember add-on setup.

Step 3: Download the Add-On
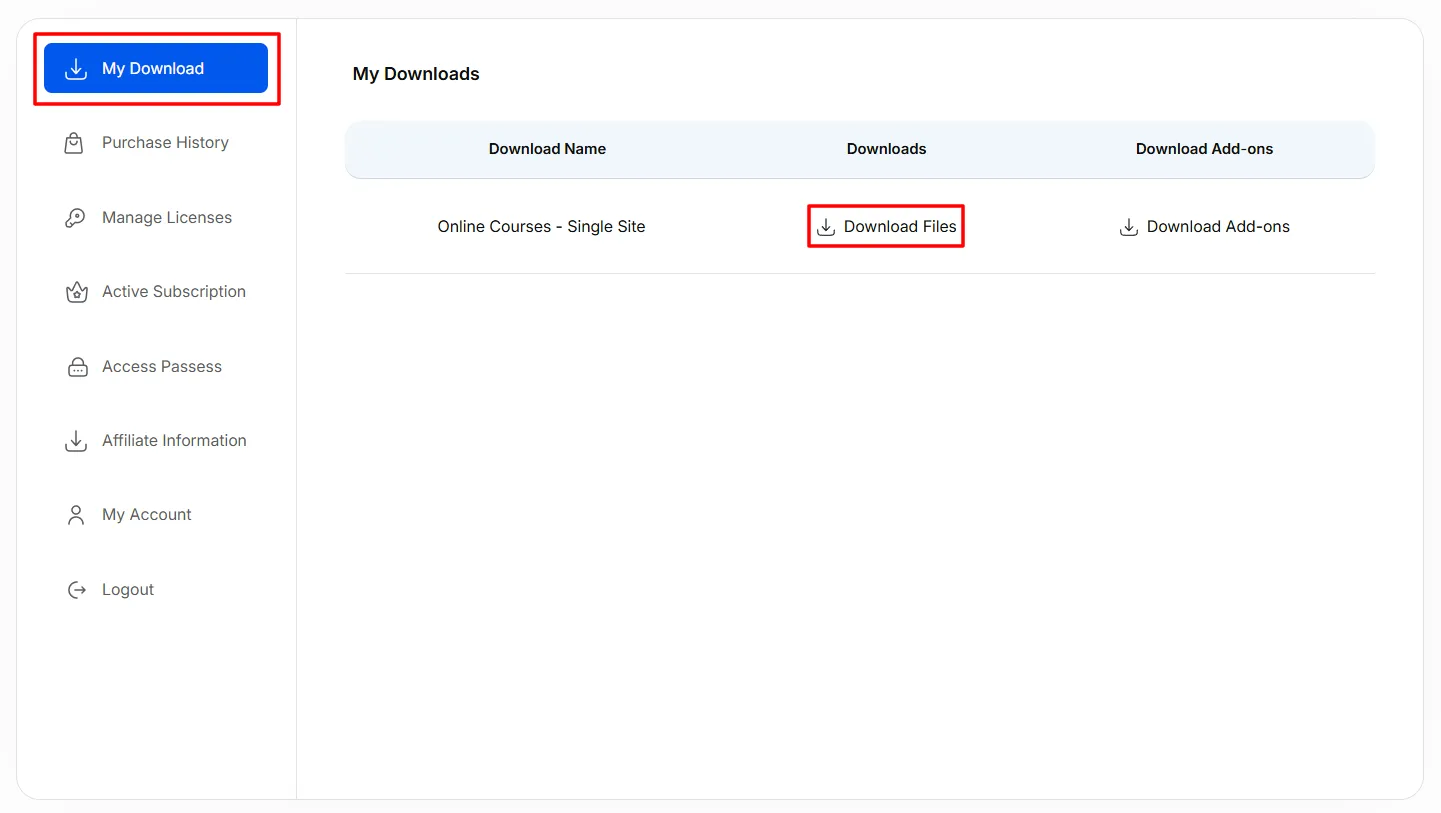
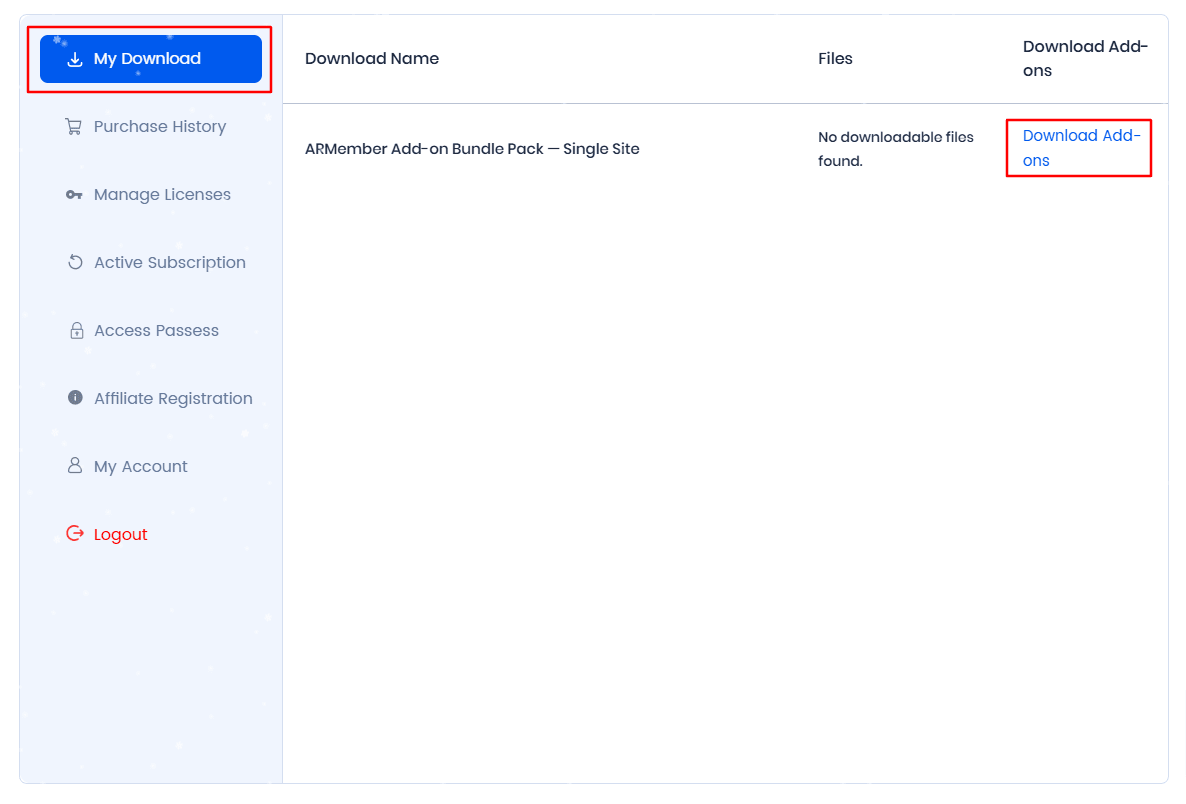
In your account, check the Download History left. By clicking on Download History, you will see all the add-ons available in your account.
Click on the download arrow to download that particular add-on. A .zip file will be downloaded to your device, which you need to save.
Once you have the file on your device, upload the .zip file at the Admin Panel ⇾ Plugins ⇾ Add New Plugin ⇾ Upload Plugin.
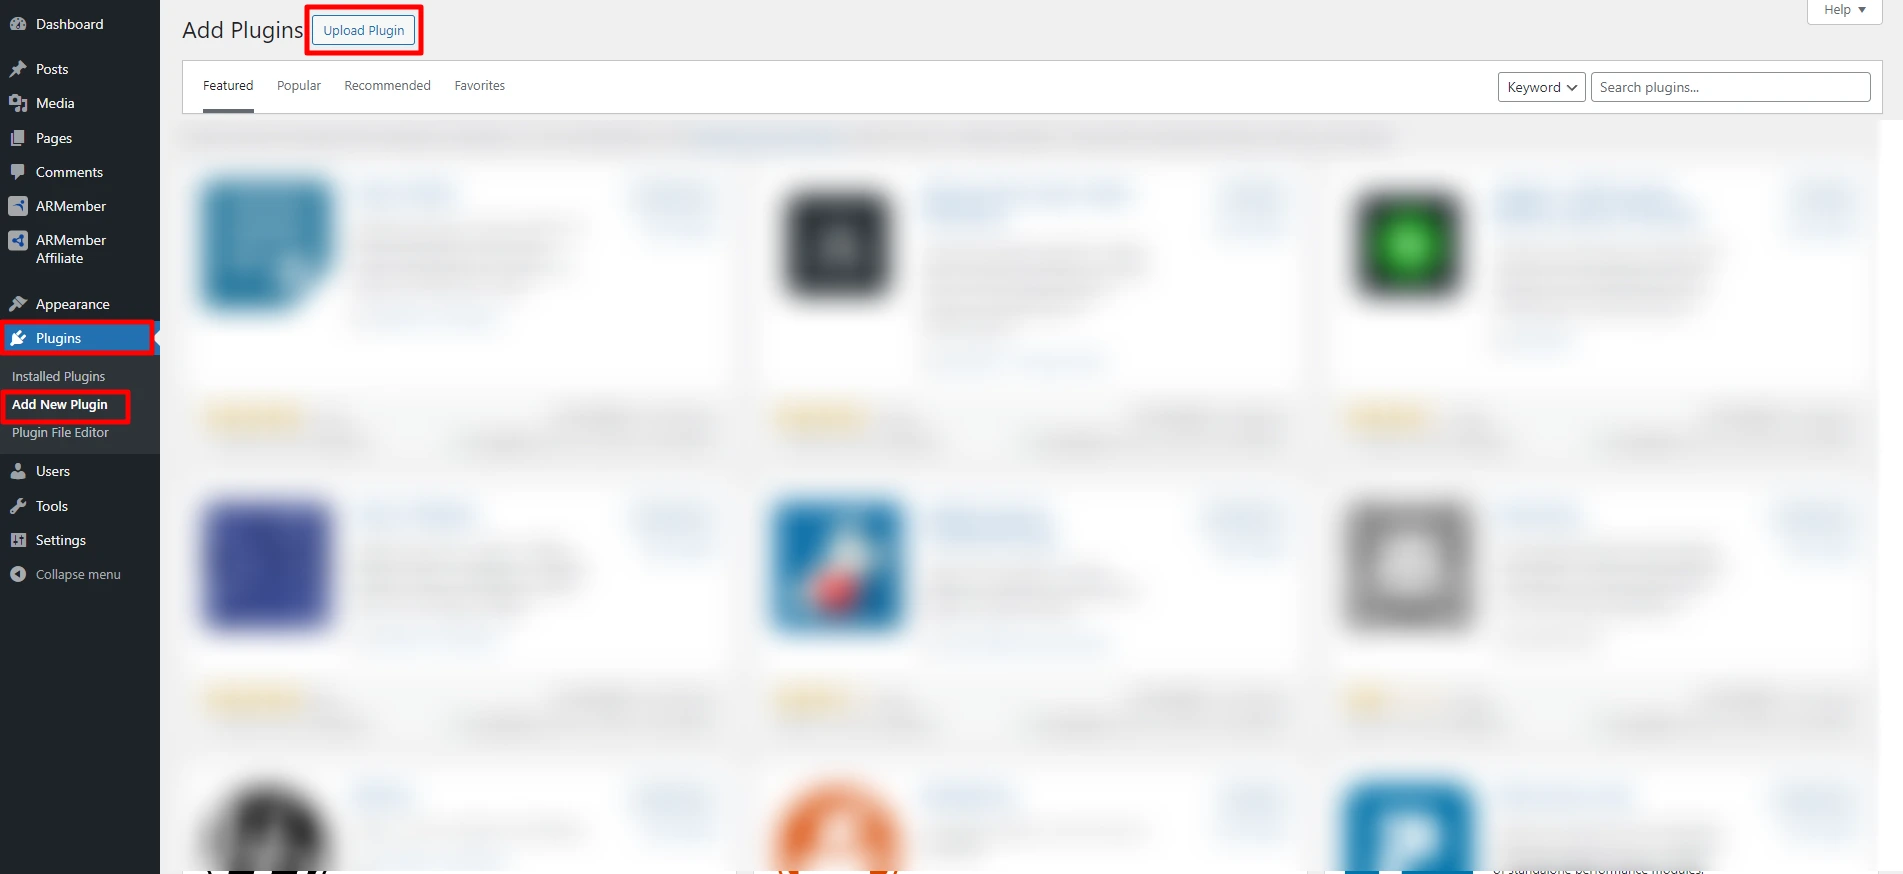
Upload and install the addon just like any other plugin on WordPress.
Step 4: Add Licence for ARMember Add-on Setup
After downloading the add-on and installing it to your WordPress, activate the license to access the add-on features. Follow these ARMember add-on setup steps to activate the license:
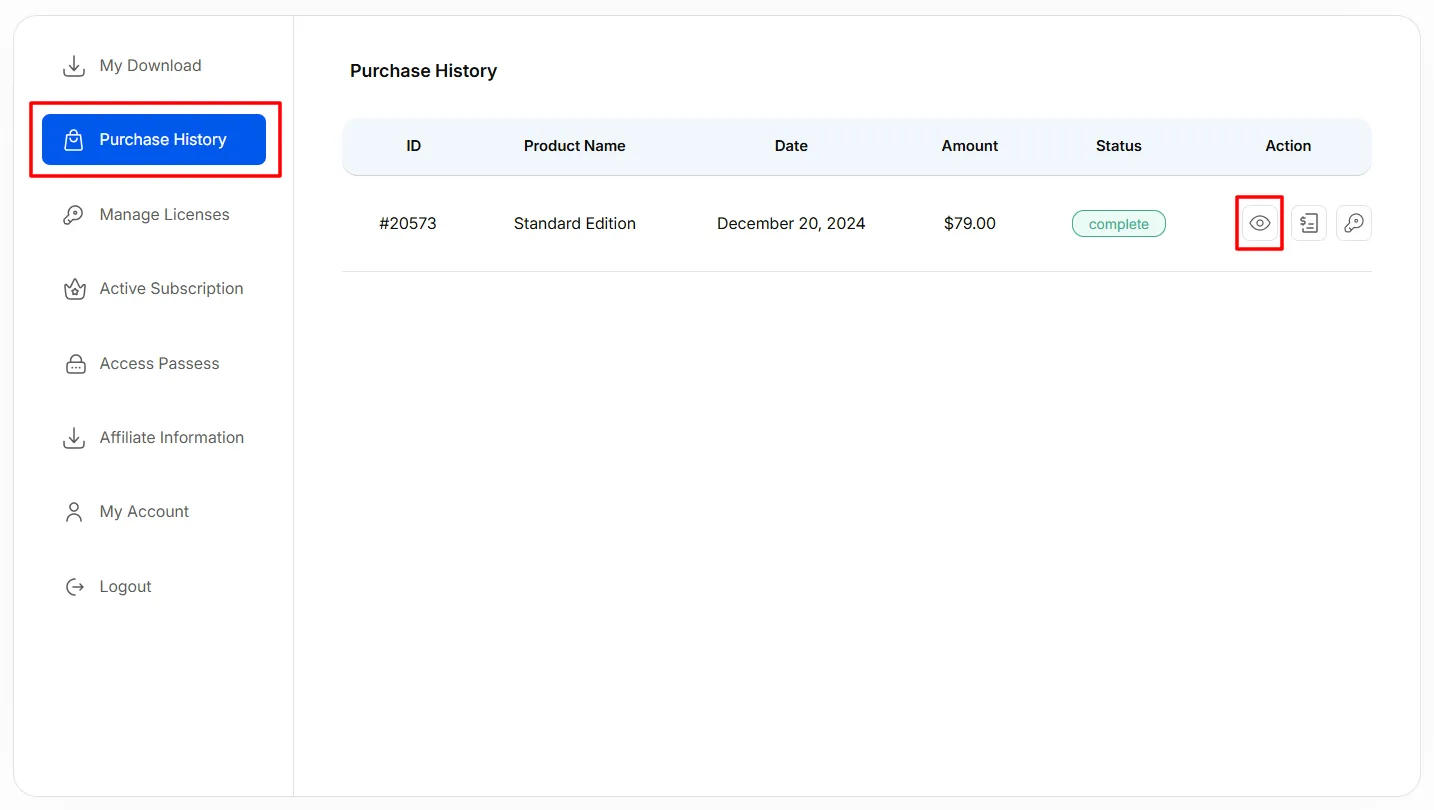
- Navigate to Purchase History in your account.
- Click on the eye icon under the Action label to view more information for the individual add-on.
- Activate the addon you downloaded from
ARMember⇾Addons. Once activated, you can activate the license for that particular add-on. - Navigate to
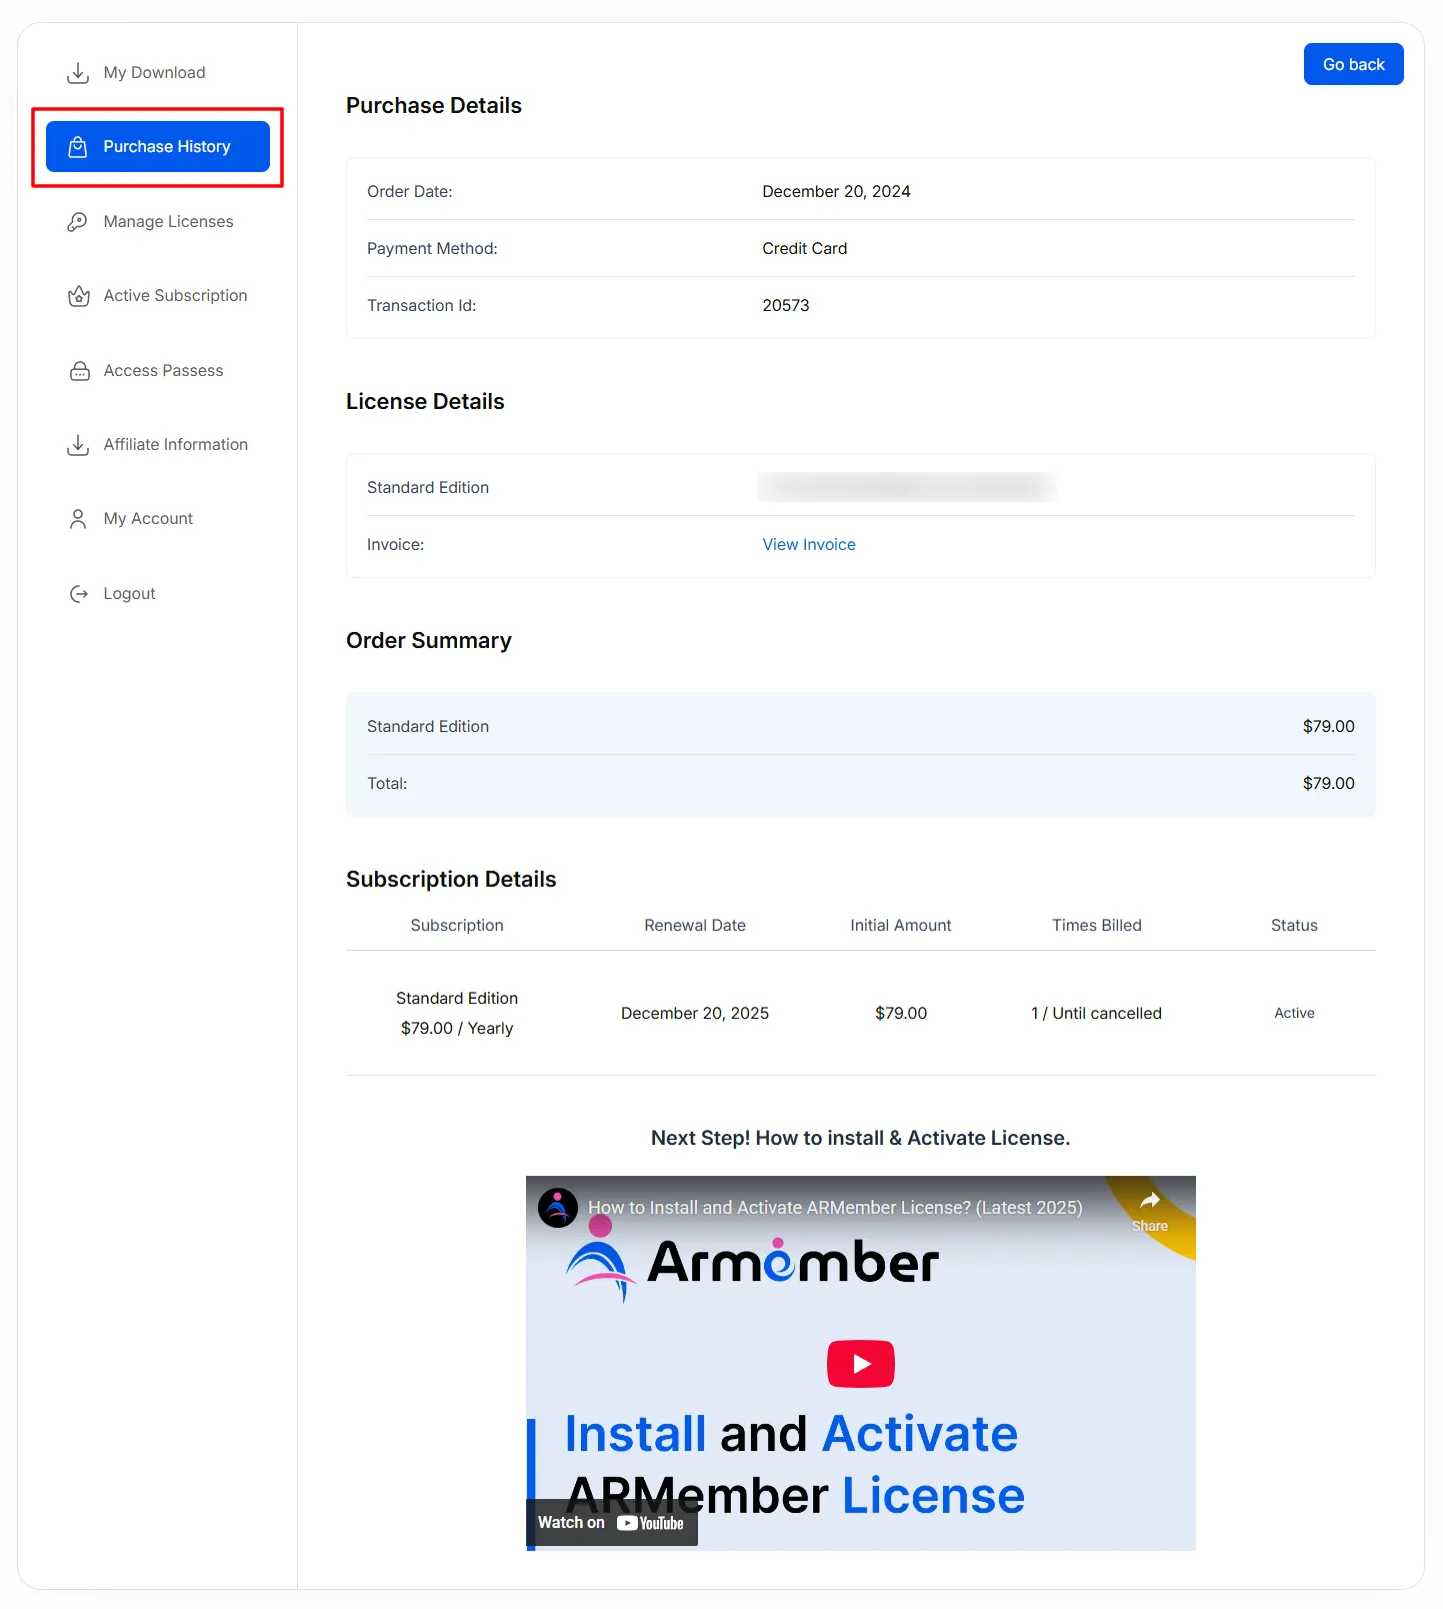
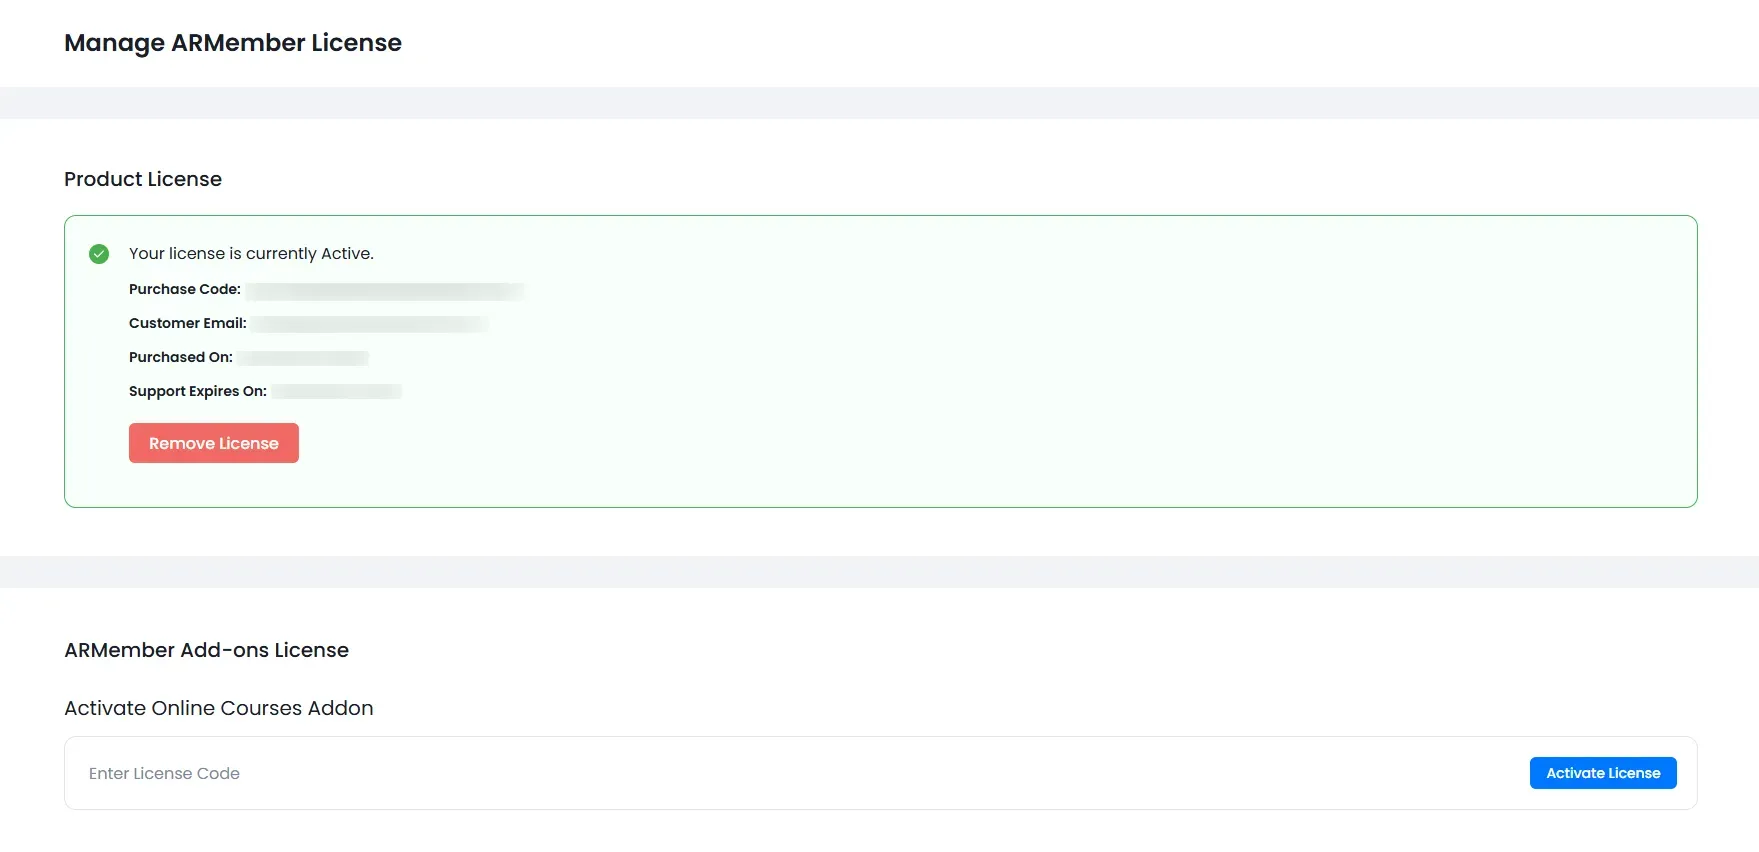
ARMember⇾Licensing, and you will see an option to add the license key for the particular add-on. - Add the licence key you checked from the Purchase History to activate the ARMember add-on license and click on the
Activate Licensebutton to complete the ARMember addon setup.
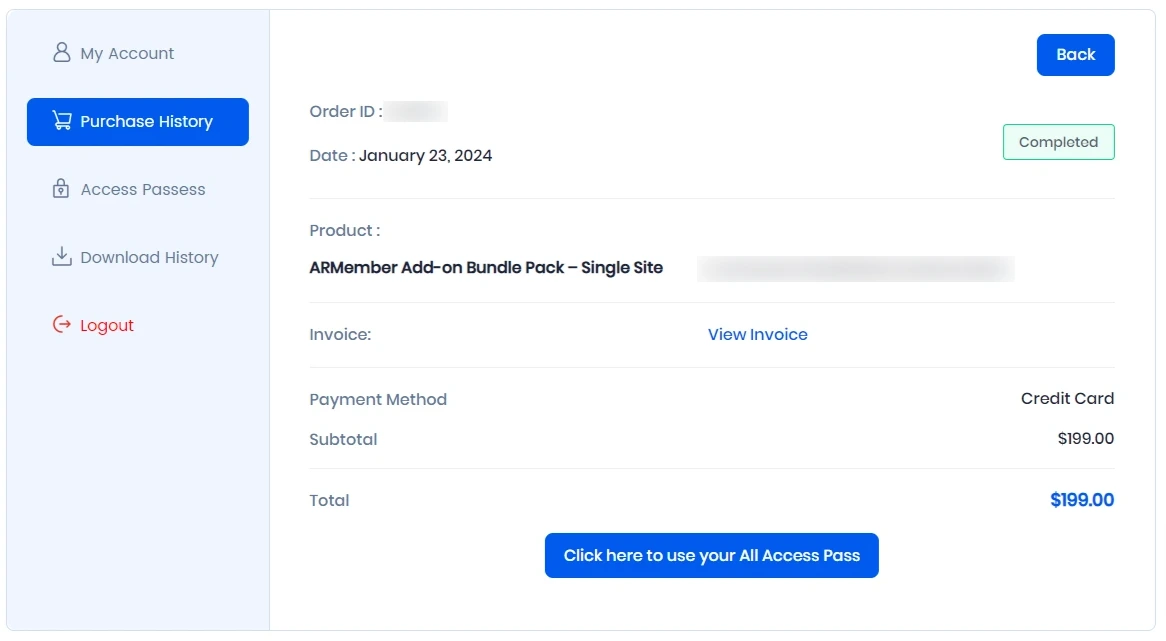
You will see details including invoice, billing details, subscription information, license key, etc. Furthermore, you can also download the add-on directly from here as well.
How to Download & Activate ARMember Addon Licence for Bundle Pack?
Kindly note that the Addon Bundle Pack selling is now discontinued. This guide is for users who previously purchased the Addon Bundle Pack.
If you have purchased the ARMember Addon Bundle Pack, follow the detailed steps below to use, install, and activate it:
Step 1: Login
Log in to your account. If you have logged in to the account and then purchased the add-ons, you can log in to the same account. If you didn’t have an account and purchased the add-ons, use the similar details to log in that were used at the time of purchase.
Step 2: My Account
Once you are logged in successfully, you will see a dropdown on the right. Click on the icon and select My Account to navigate to your account.
Step 3: Check the Download History
Here, you can check out the Addon Bundle Pack in your Download History before beginning the ARMember addon setup…
Step 4: Access Passes
Navigate to the Access Passes on the left to check out all the add-ons. You can also download the add-ons as per your requirements.
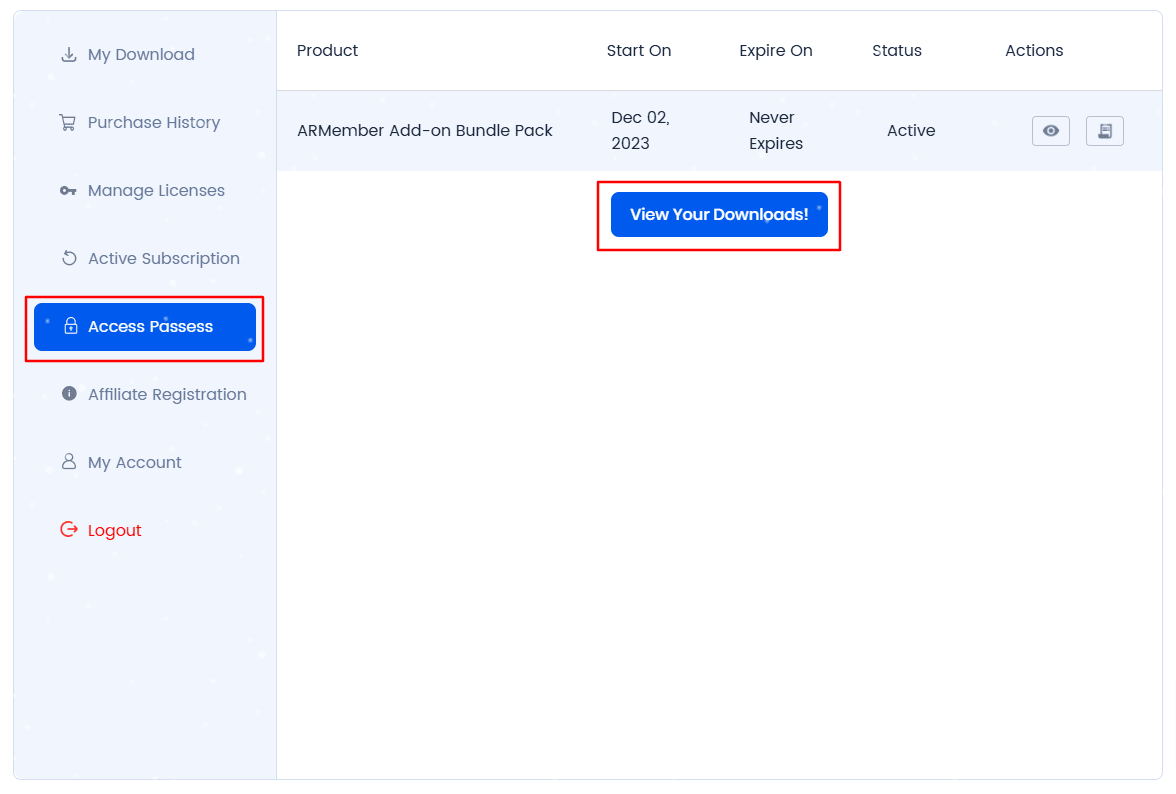
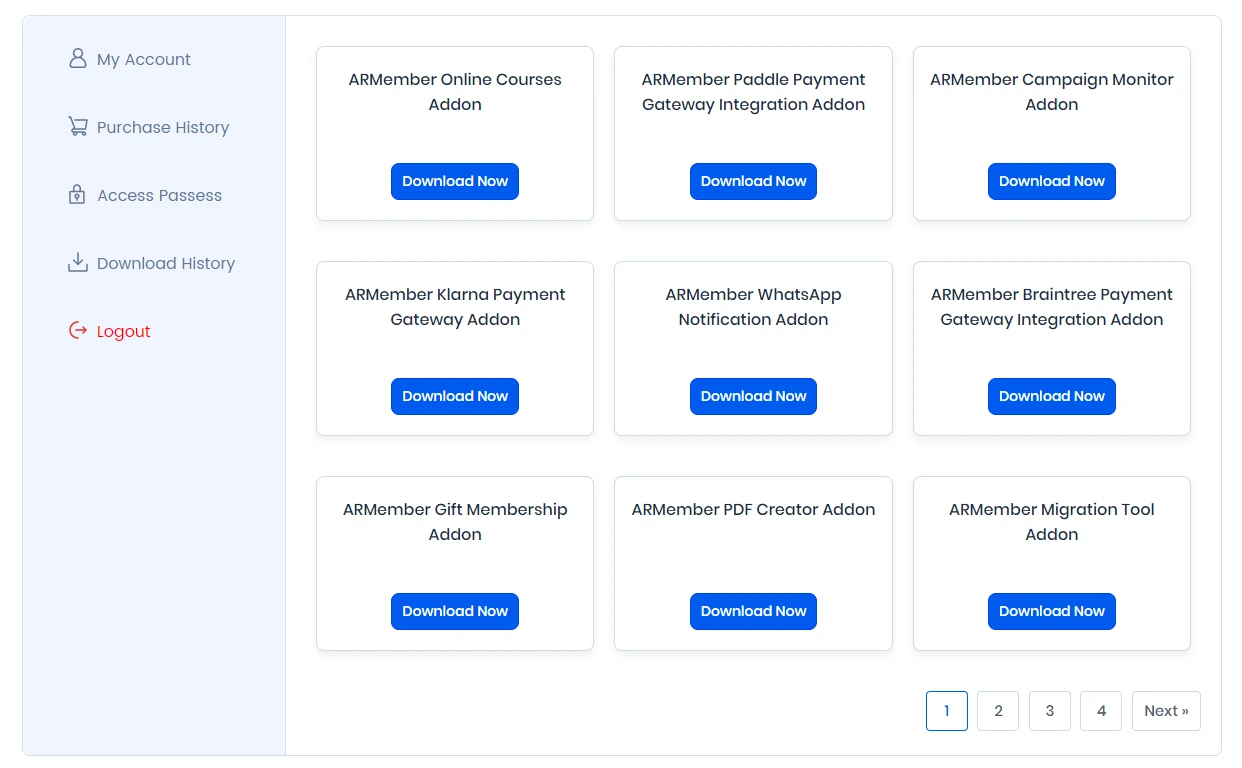
Once you click on the download button, a .zip file will be downloaded. Save the file to your device. After saving the .zip file, simply upload the addon through the Admin Panel ⇾ Plugins ⇾ Add New Plugin ⇾ Upload Plugin.
Step 5: Purchase History
Navigate to the Purchase History in your account. Here you will see the Addon Bundle Pack Eye Icon beside it. Click on it to view the license key for the Addon Bundle Pack.
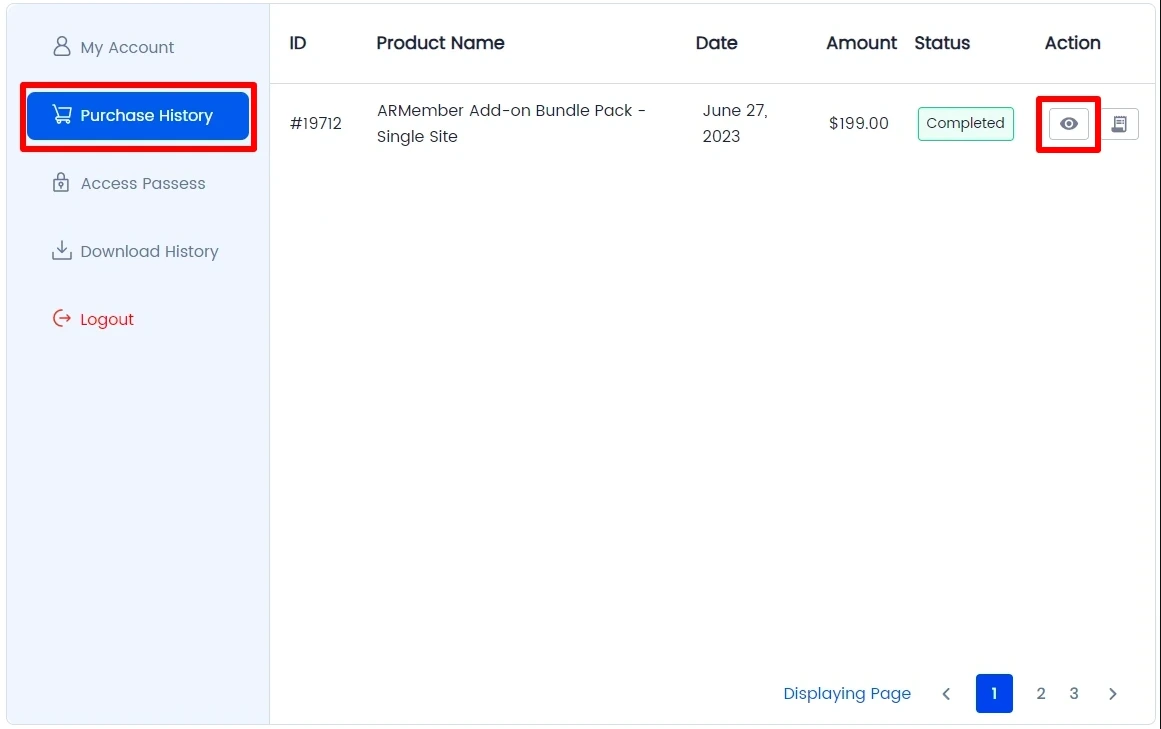
Along with the license key, you will find other details such as billing information, invoice bill, subscription information, etc. of the ARMember addon setup.
Step 6: Activate ARMember Addon License
After adding the add-on and activating it in ARMember, you need to add the license key for that particular add-on.
To add the license key, navigate to ARMember ⇾ Licensing. Here, you can enter the license key available in your Purchase History, which is the same for all the add-ons in the ARMember Add-on Bundle Pack.
Note: If you have the Addon Bundle Pack, the license key will be the same for all the addons included in the ARMember Addon Bundle Pack.