
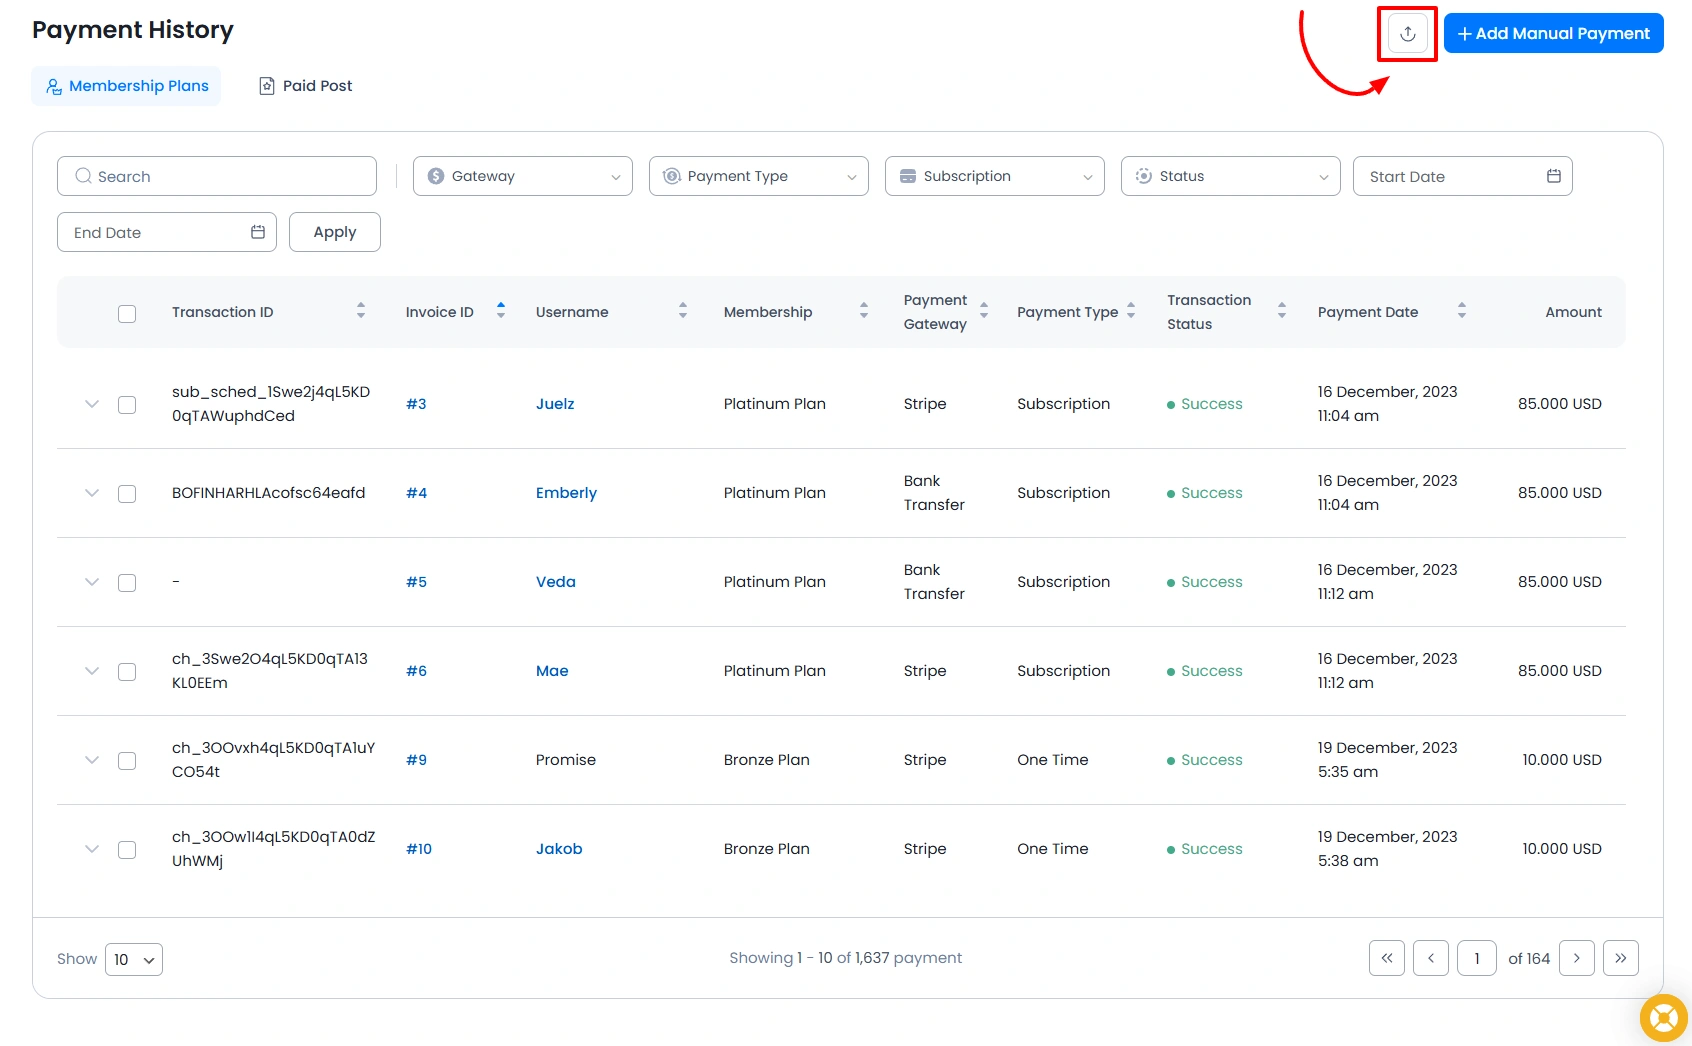
Payment History Management
You can track all members’ payment history, view transaction details, and manage records efficiently. The system also allows you to add manual payments for better tracking of external or missed transactions.
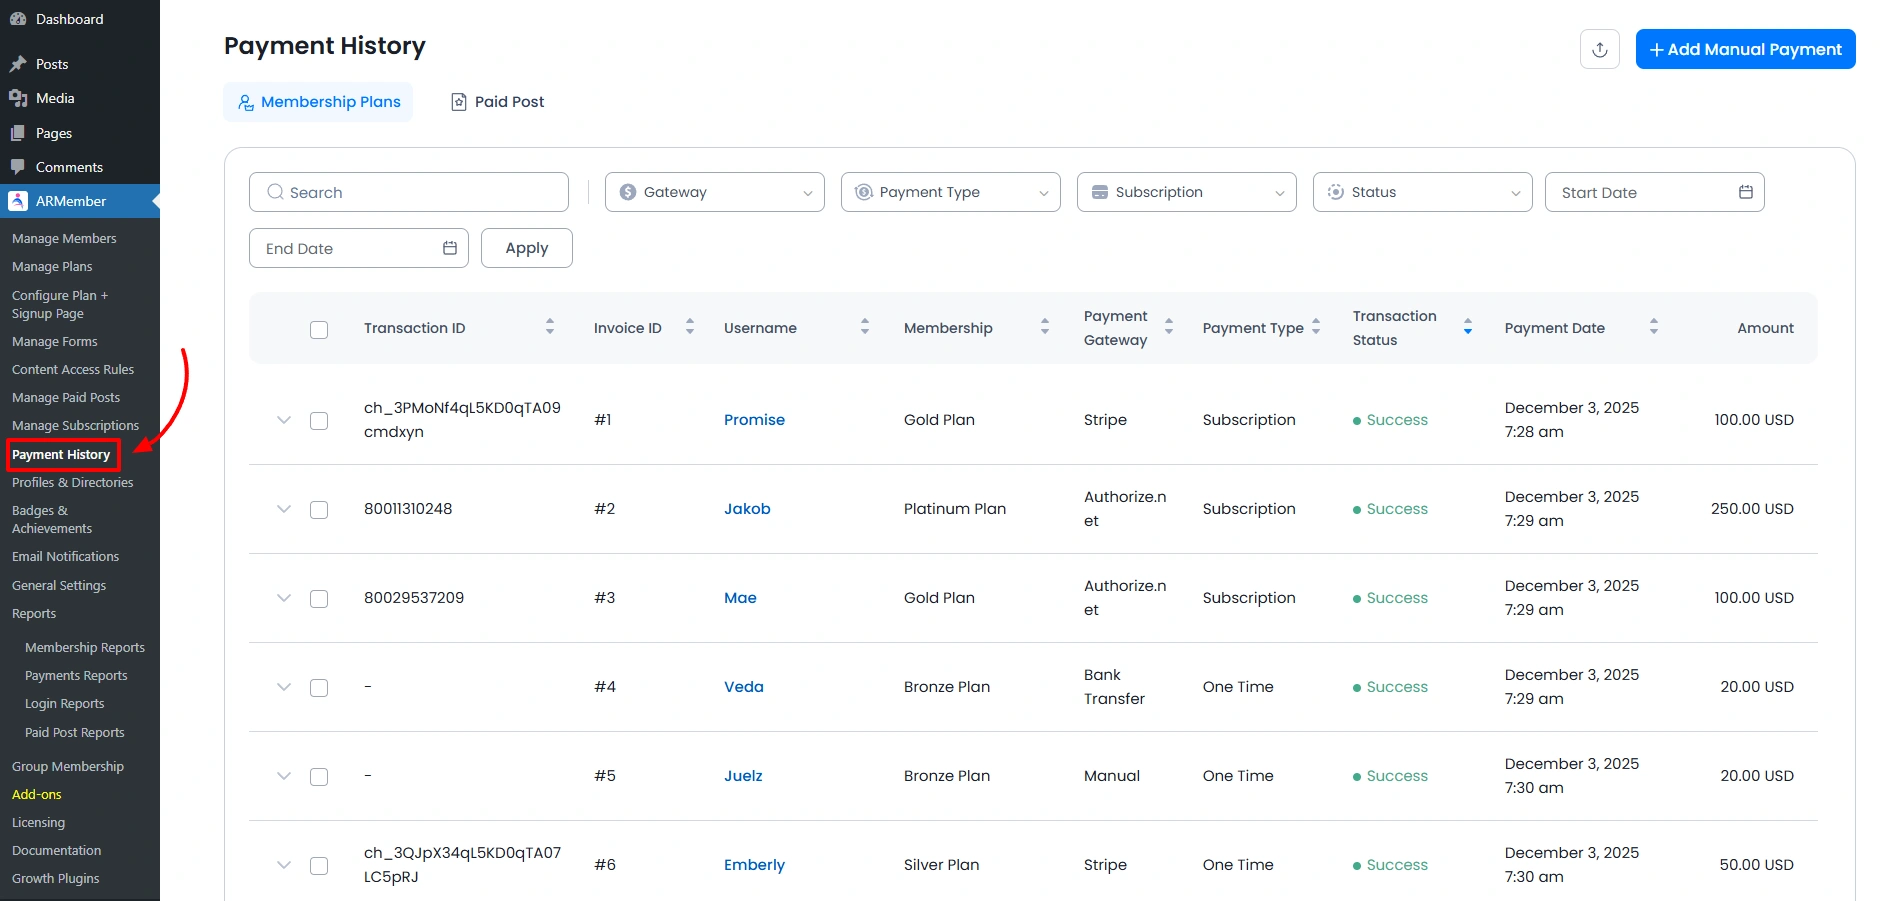
Payment History Management Page
To access the Payment History Page, navigate to the Admin Panel ⇾ ARMember ⇾ Payment History. Here there are 2 tabs available: one is for the Membership Plans and the other is for Paid Posts (this tab will be available if the Pay Per Post add-on is activated).
Available Actions
The transaction records include a few of the grid options like View Invoice, View Transactions, Delete Transactions. The following action buttons are as shown below:
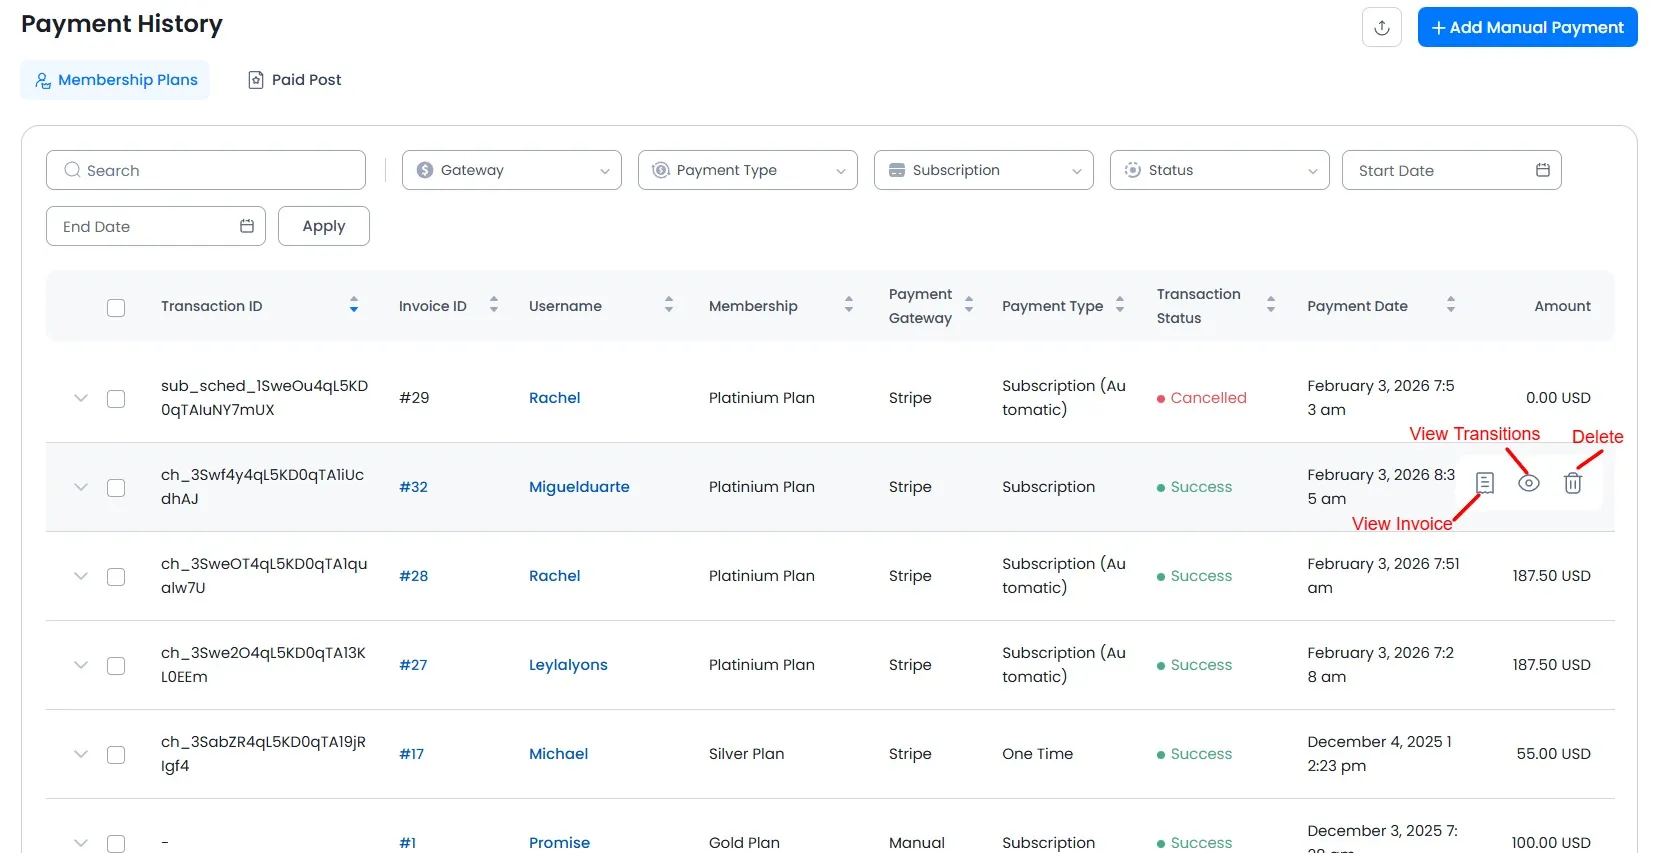
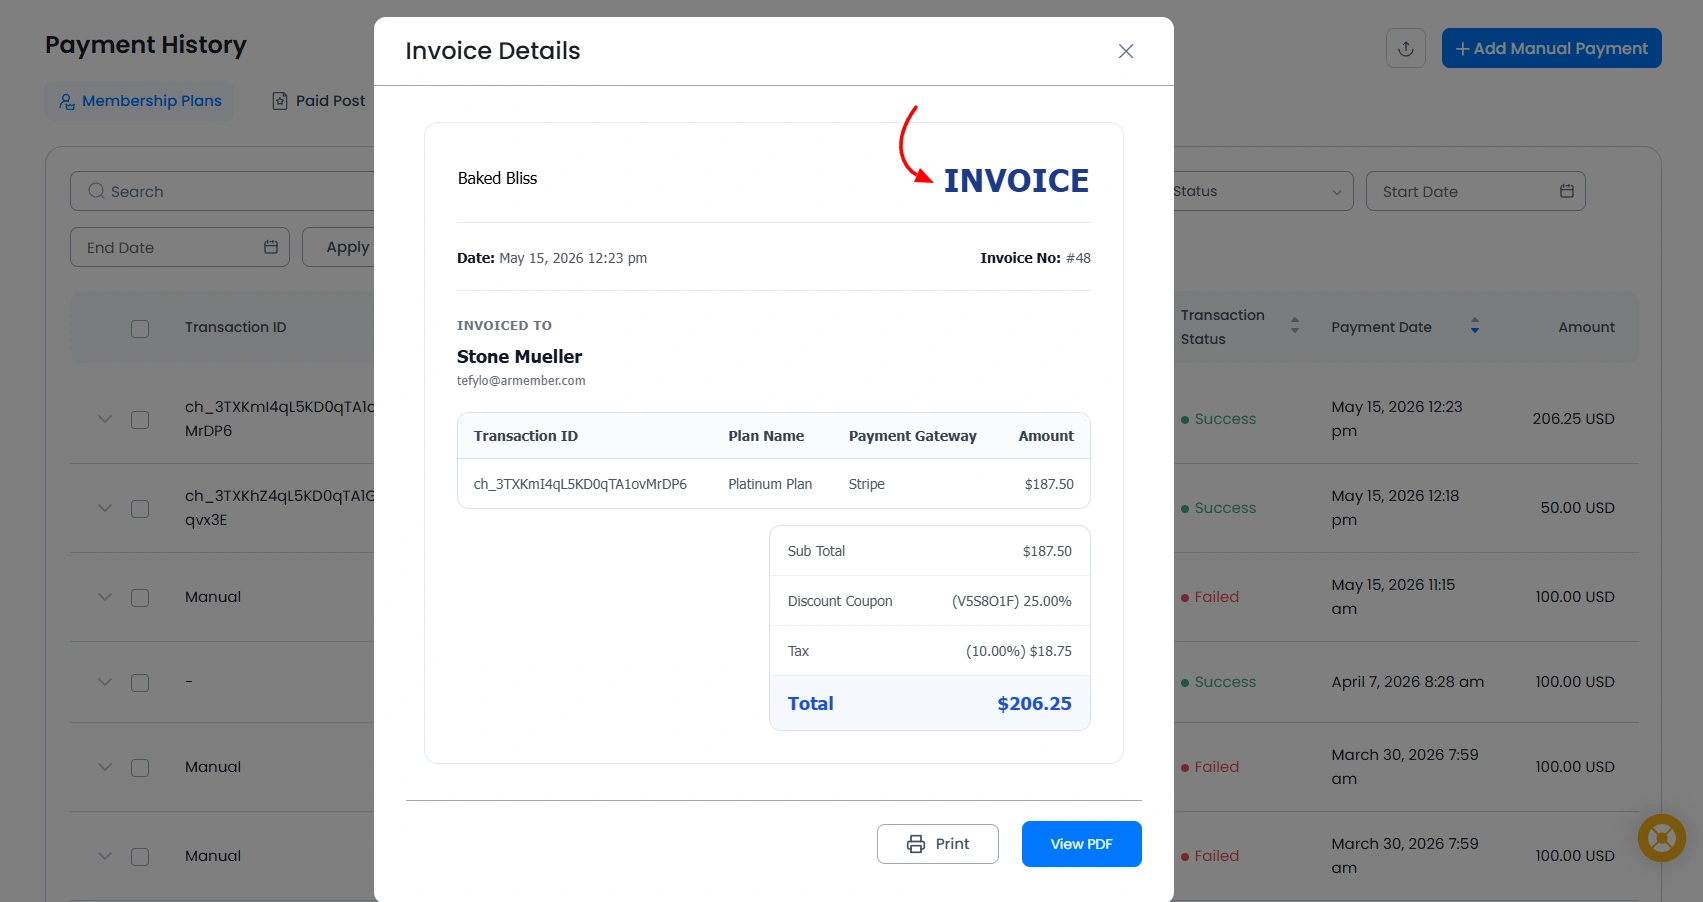
- View Invoice – When the View Invoice icon is clicked, a popup showing the invoice will appear. You can access and print the invoice for the transaction. The invoice shows the fields like
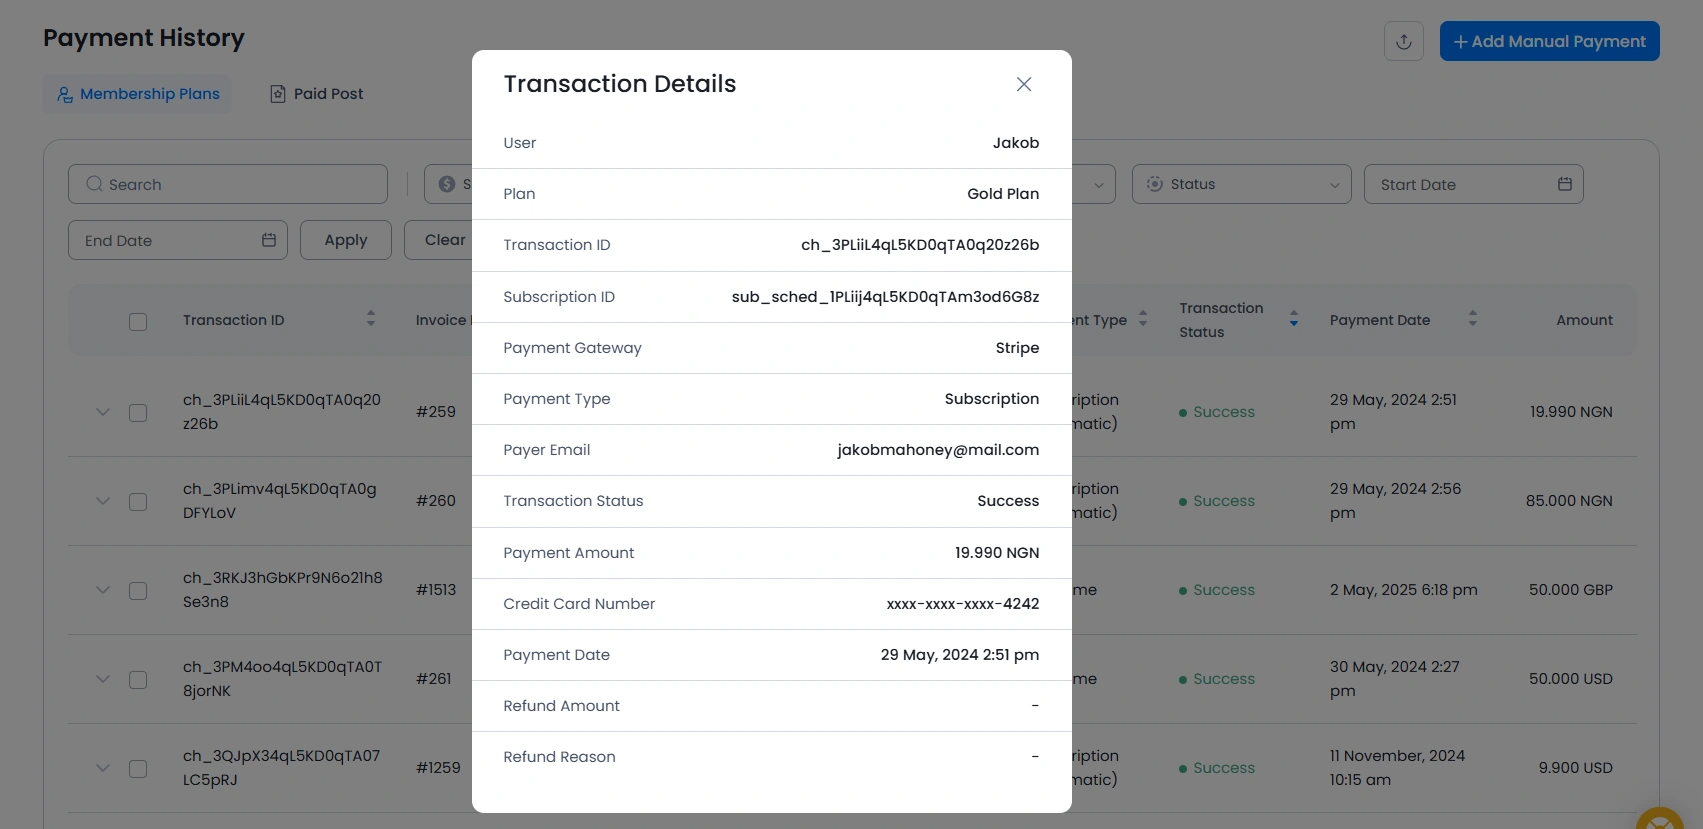
Invoice To,Plan Name,Plan Amount,Transaction ID,Subscription ID, etc. - View Detail – Click on the View Transactions icon to open a popup and show information for the whole transaction made. The details show the Transaction ID, Subscription ID, Payment Gateway, Payment ID, Payer Email, etc. See complete transaction details like below.
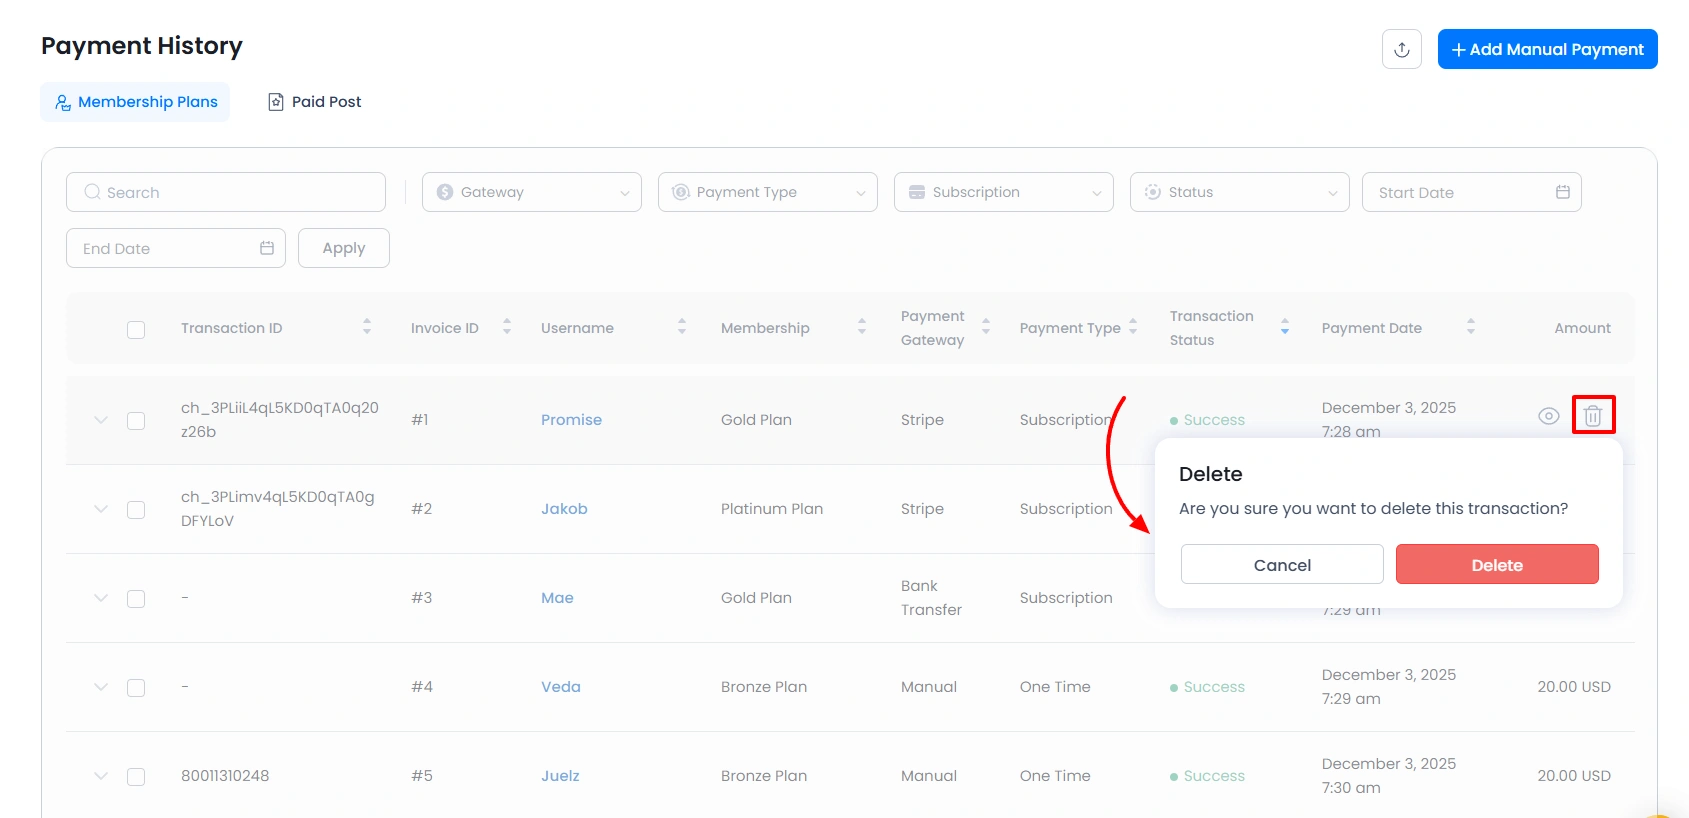
- Delete Transaction – The payment history page offers an icon to delete the transaction completely. This can be used when you wish to remove the test entries. Once clicked on the delete icon, a confirmation popup will appear where you can confirm and delete the transaction from the records.
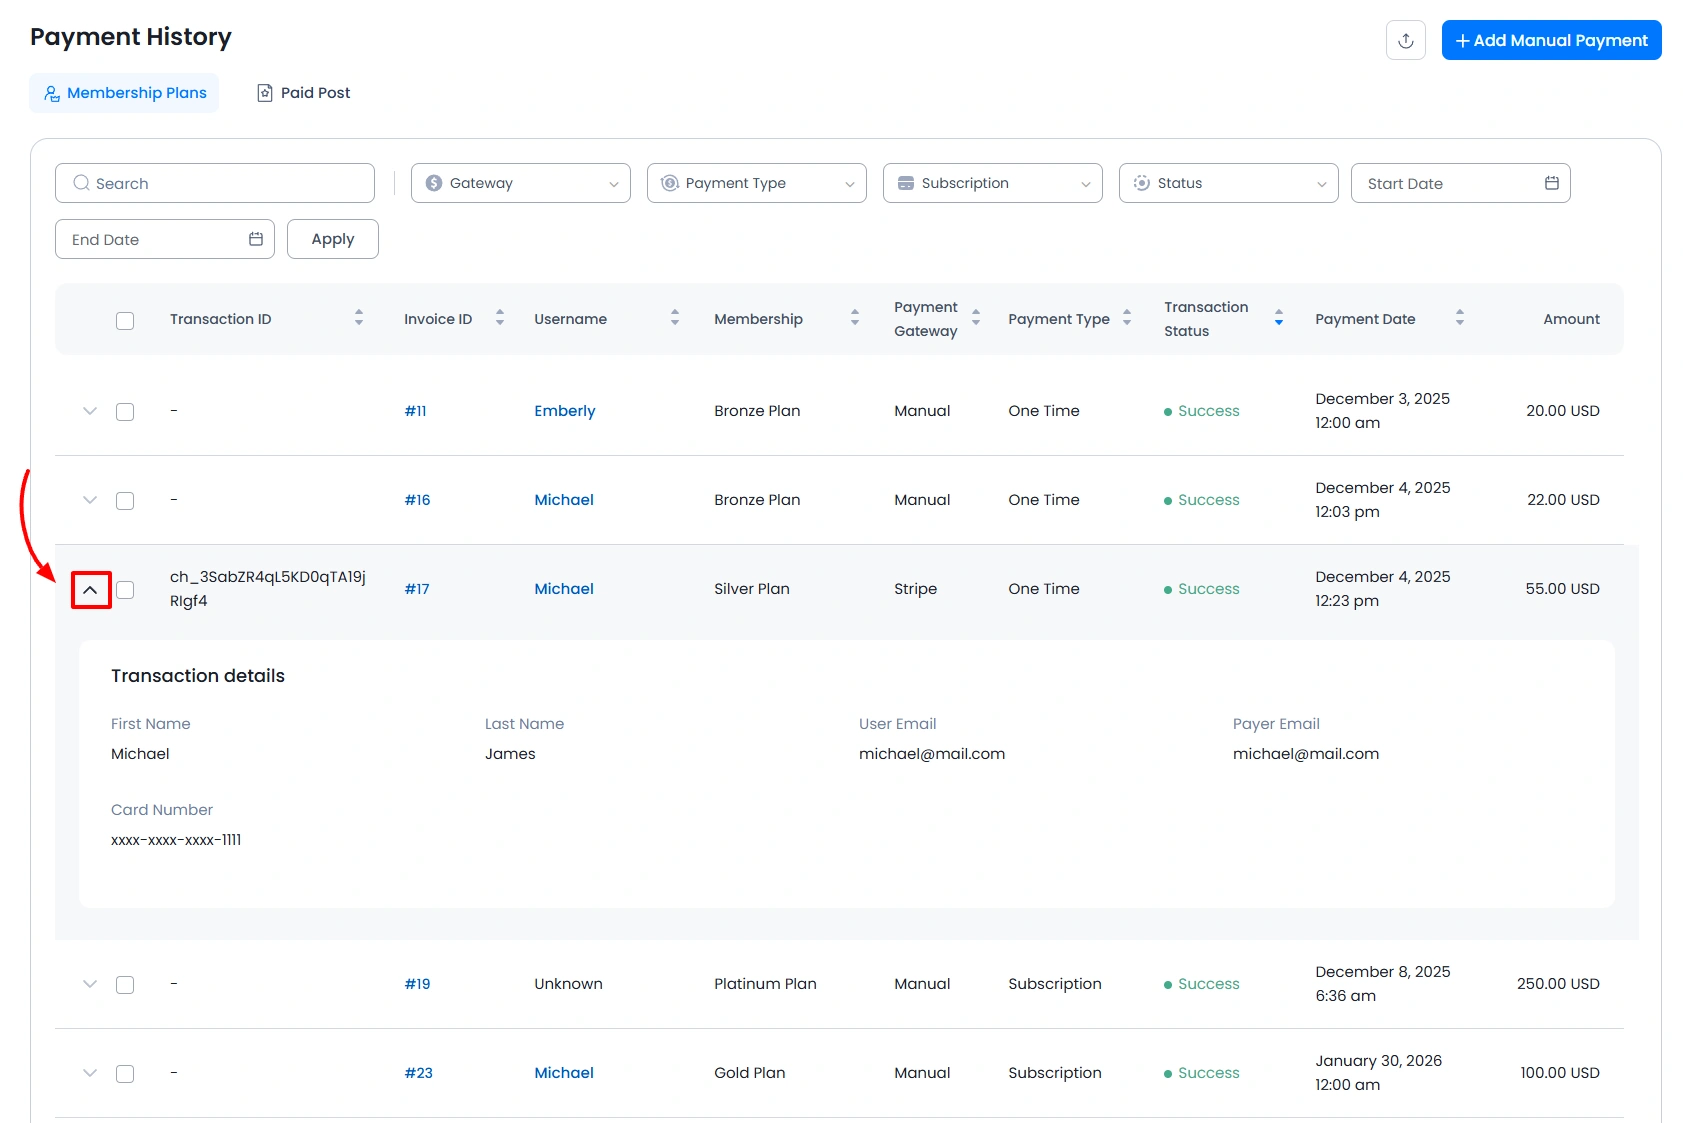
- Expand row – One can check the additional information of the transaction and member’s information, like First Name, Last Name, User Email, Payer Email, and Credit Card Number, by expanding the column.
Filter Options
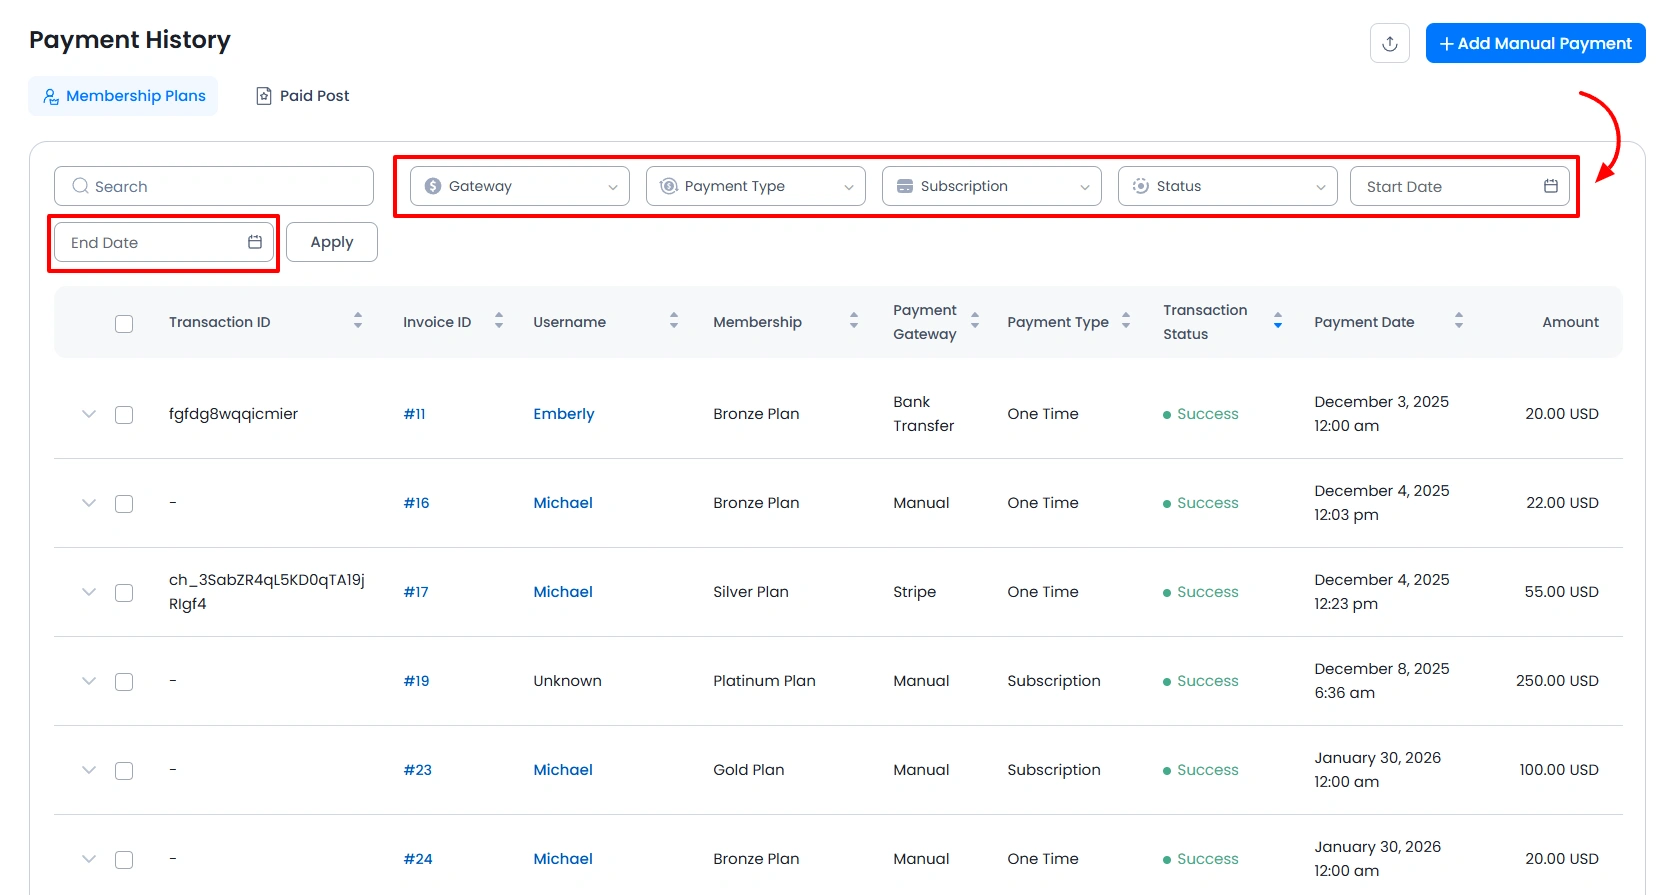
The ARMember Payment History Page allows you to apply filters as per your requirements. There are multiple options to filter the records accordingly. The below are the filters available.
- Gateway
- Payment Type
- Subscription
- Status
- Start & End Date
Export Data
You can export the transactions; in order to export them, click on the top right corner at the icon of export, and the data will be exported. In order to export all the transaction records, do not apply any filter and then export; however, if you wish to export the filtered records, then apply the filter and then export the records.
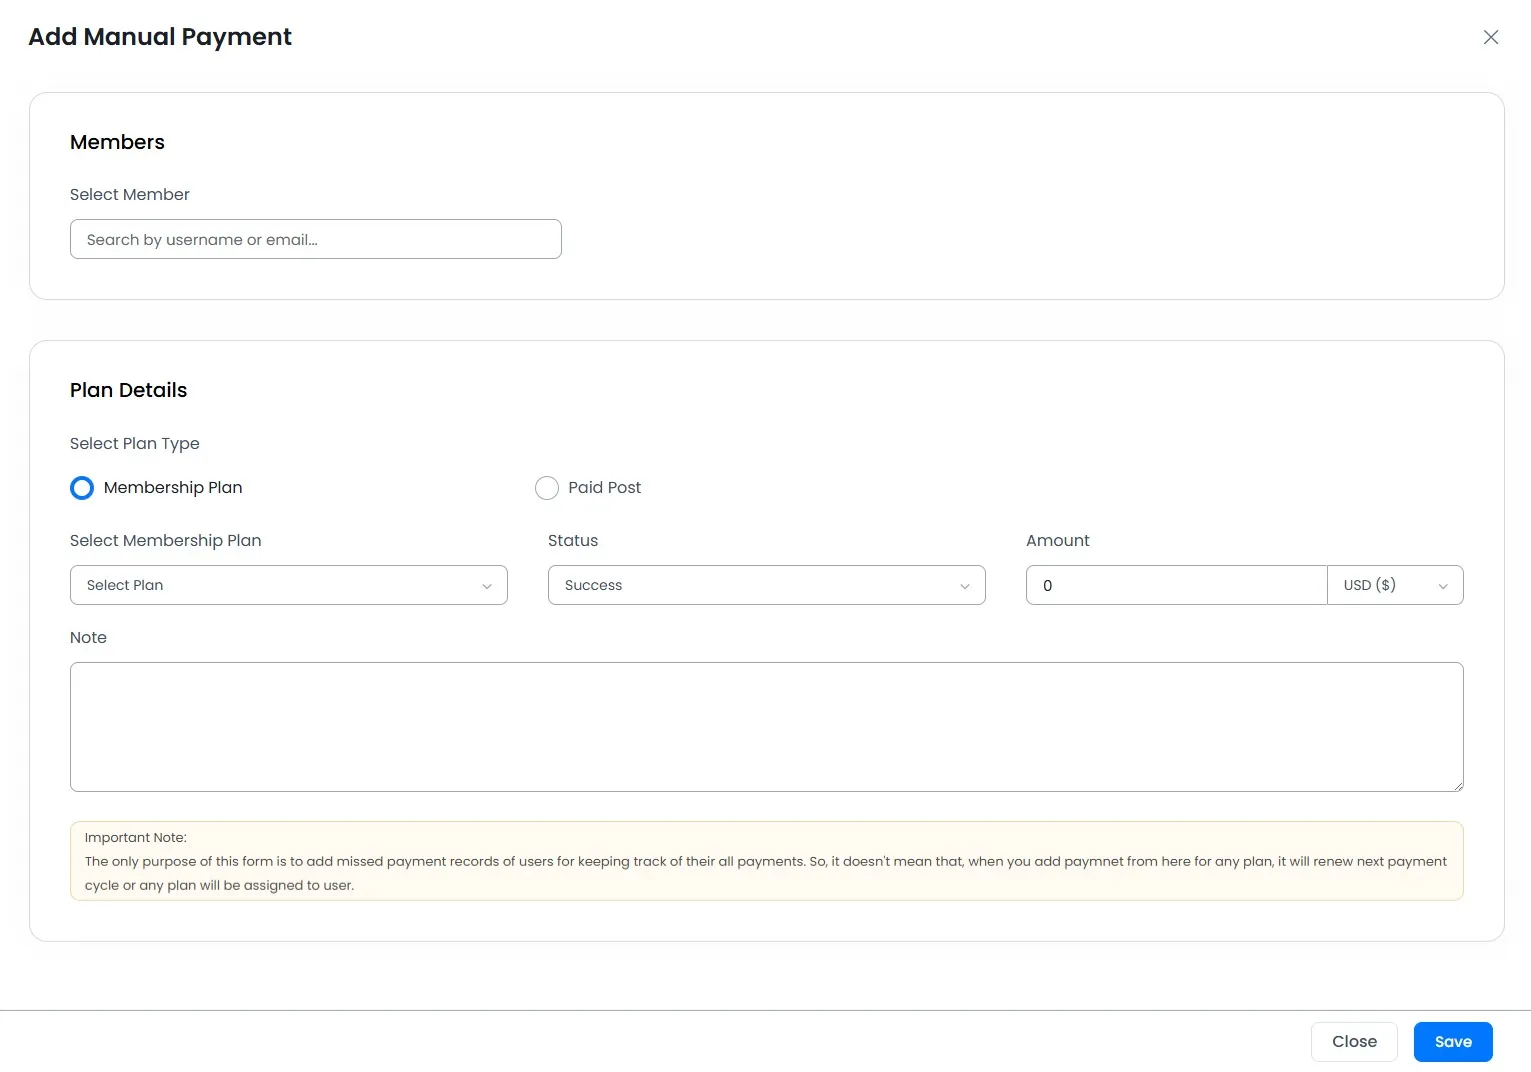
Add Manual Payment
You can add your manual payment by clicking on the Add Manual Payment button. If you accept payment through an external source and want to keep track of the user’s payment history, then this will be helpful.
Important Note: Use this form to record any missed user payments and maintain accurate payment tracking. Please note that manually adding a payment for a “Subscription” membership plan does not impact or reset its billing cycle. Adding a payment for a missed cycle will not renew or extend the subscription period.
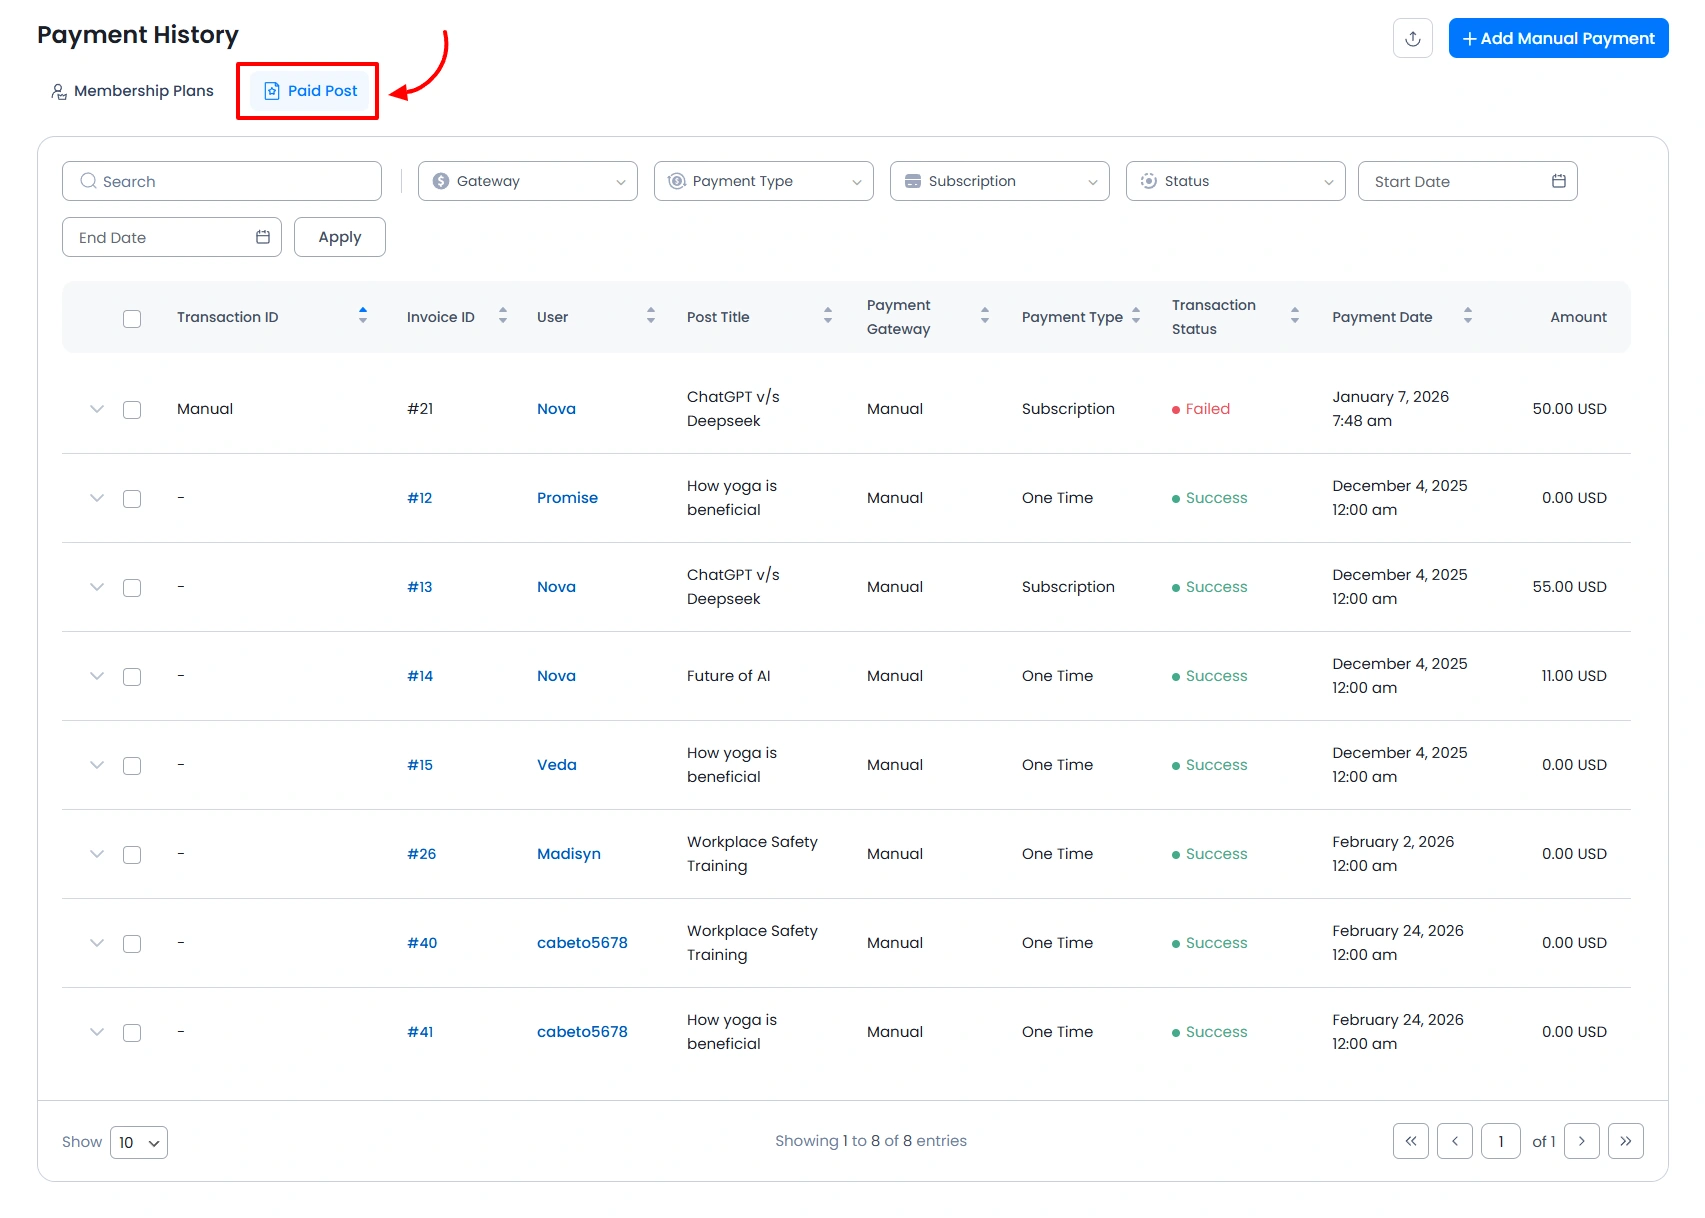
Payment History for Paid Post
The second tab is for Paid Post. Here all the transactions related to the paid post will be visible. This tab will be visible only when the Pay Per Post add-on is activated from the ARMember ⇾ Add-ons page.