ARMember provides shortcode to add Login With LinkedIn social connect button. But for this first you need to configure LinkedIn Client ID and Client Secret under ARMember ⇾ General Settings ⇾ Social Connect
Social Connect tab will be displayed only if
ARMember ⇾ Social Connect module is enabled.
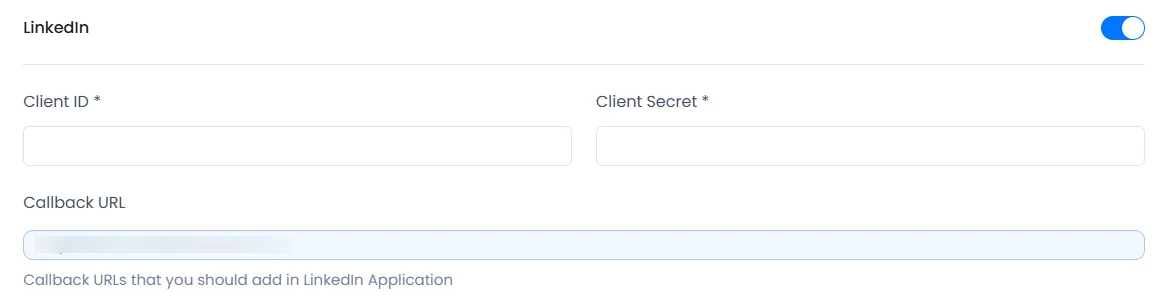
Client ID and Client Secret
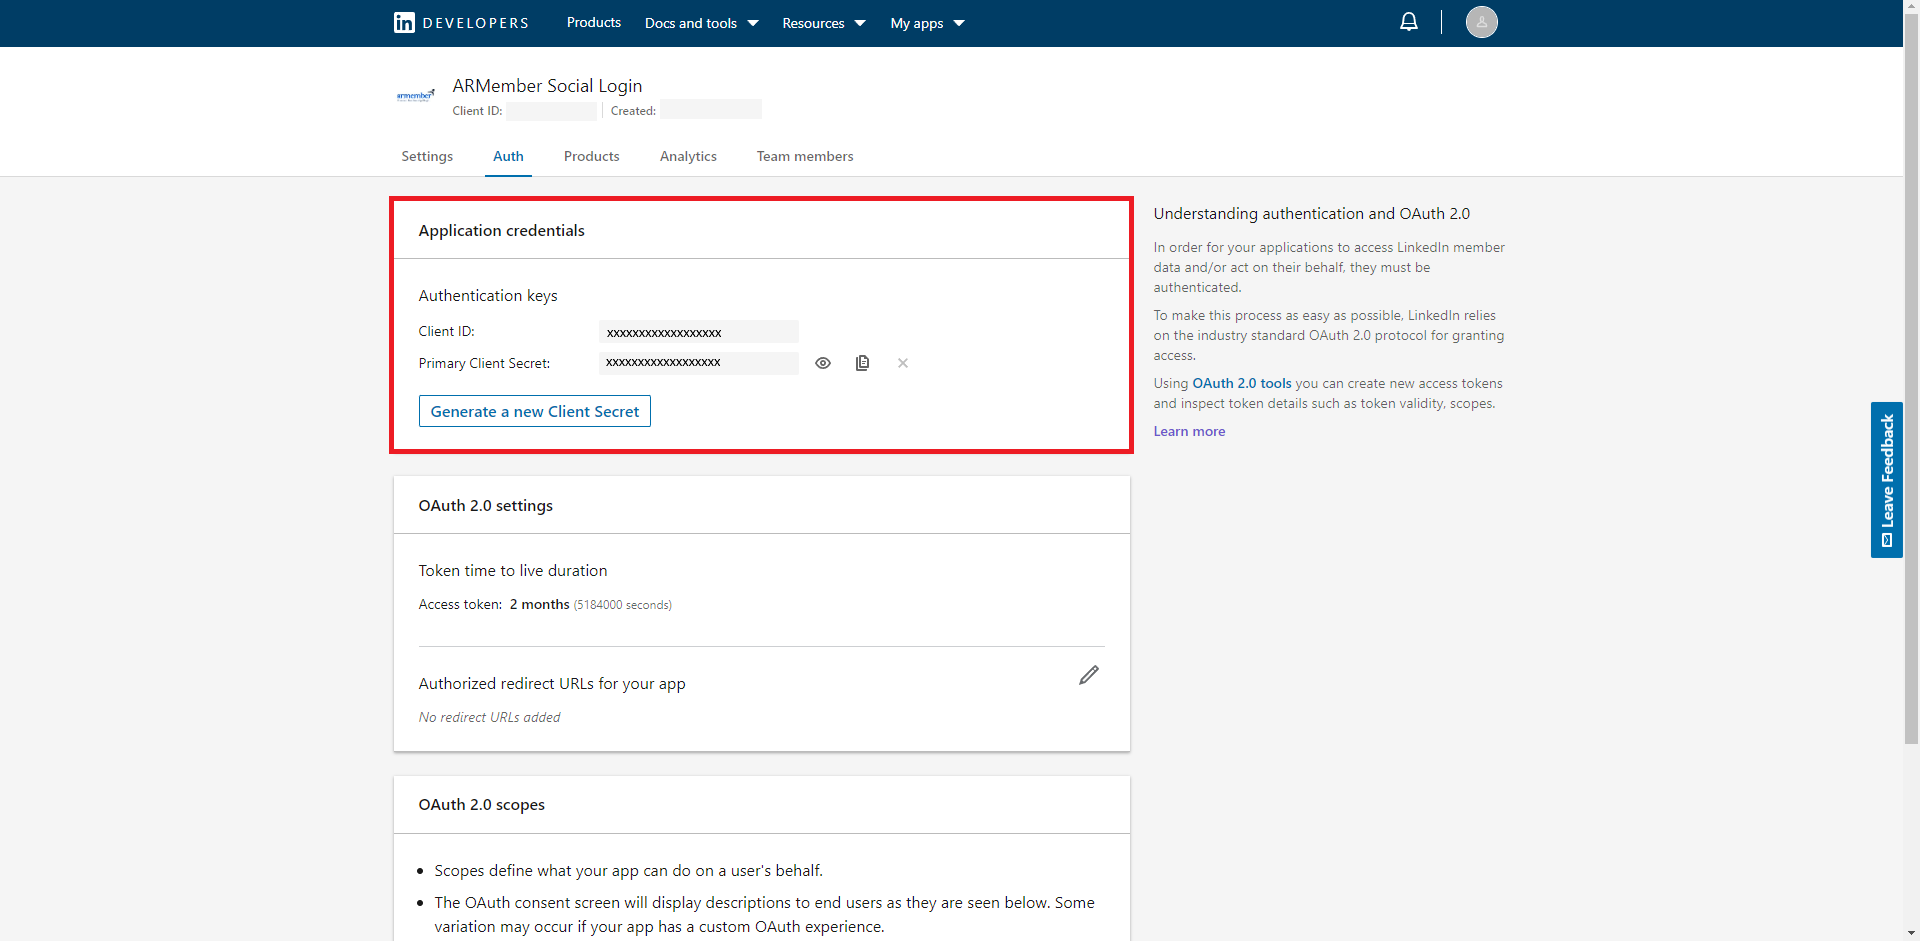
Now you can get Client ID and Client Secret from next page after creating new application.
Copy that keys and use them in our ARMember plugin where needed.
In order to get Client ID and Client Secret for LinkedIn, you have to follow steps given below.
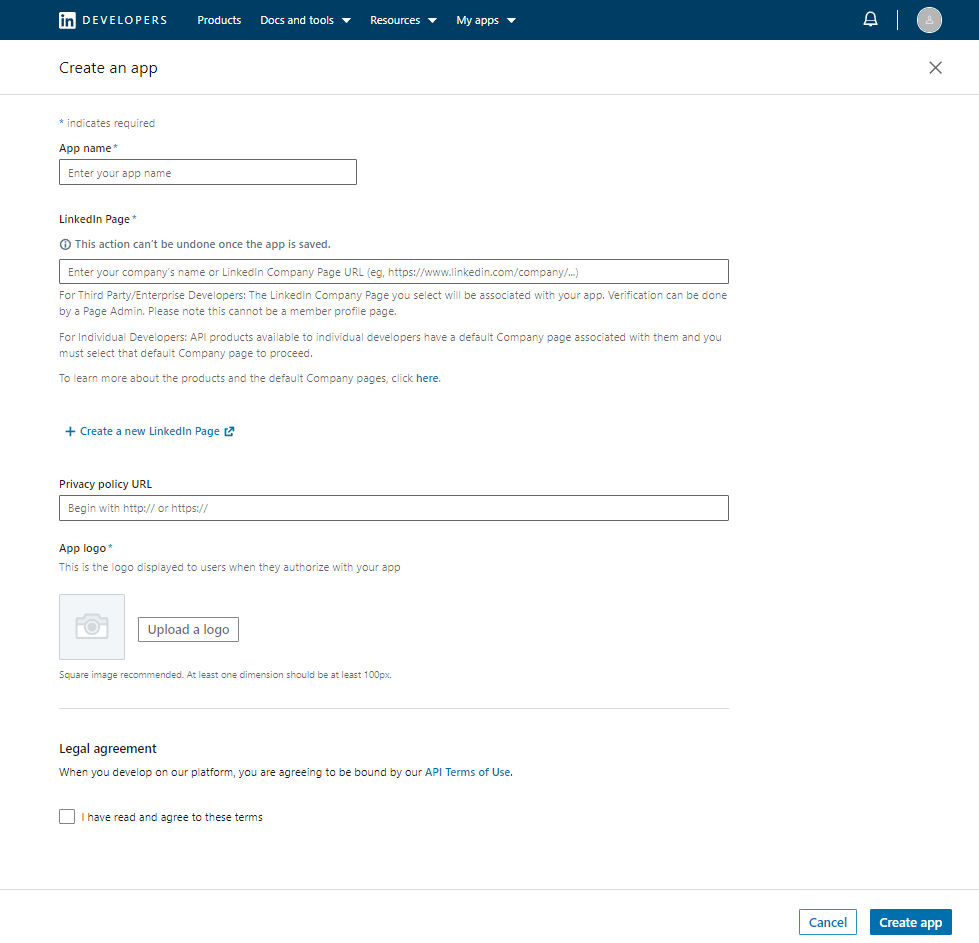
Create an application
- Firstly Login to LinkedIn and go to www.linkedin.com/developers/apps/new.
- Click on Create app from the top right-hand side.
- Provide all information asked to fill here. You can use dummy data except for Website URL, provide an absolute URL and click on Create app.
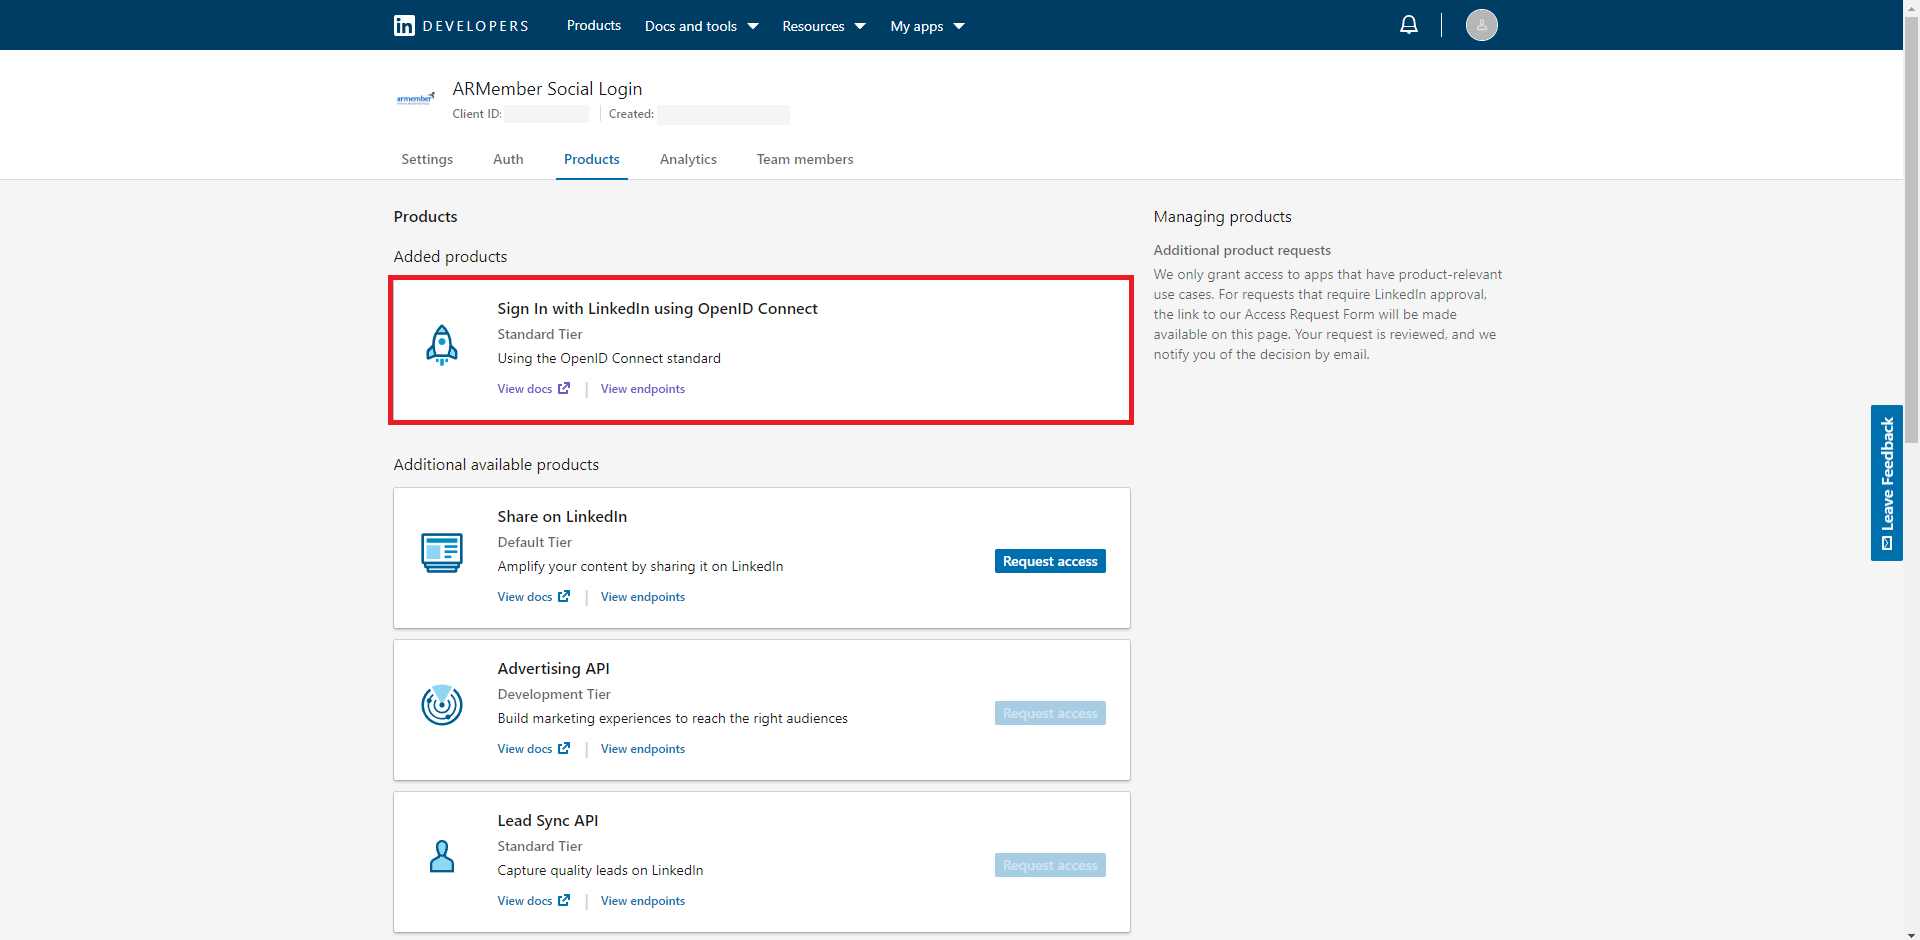
- After follow above all step please configure new “Sign In with LinkedIn using OpenID” connect to your
LinkedIn App⇾Select or add App⇾Products“Sign In with LinkedIn using OpenID” click on “Request Access” - Now you can get Client ID and Client Secret from Auth tab. Copy that keys and use them in our ARMember plugin where needed.
Please see below screenshot.

Please see below screenshot
Please see below screenshot
For more information please refer to LinkedIn documentation
Click Save button on Social Connect page.
Once settings are saved, you can use the following shortcode in any page/post to display the Login with LinkedIn button.
[arm_social_login network="linkedin"]To add Login with LinkedIn button in Login Form follow steps given below:
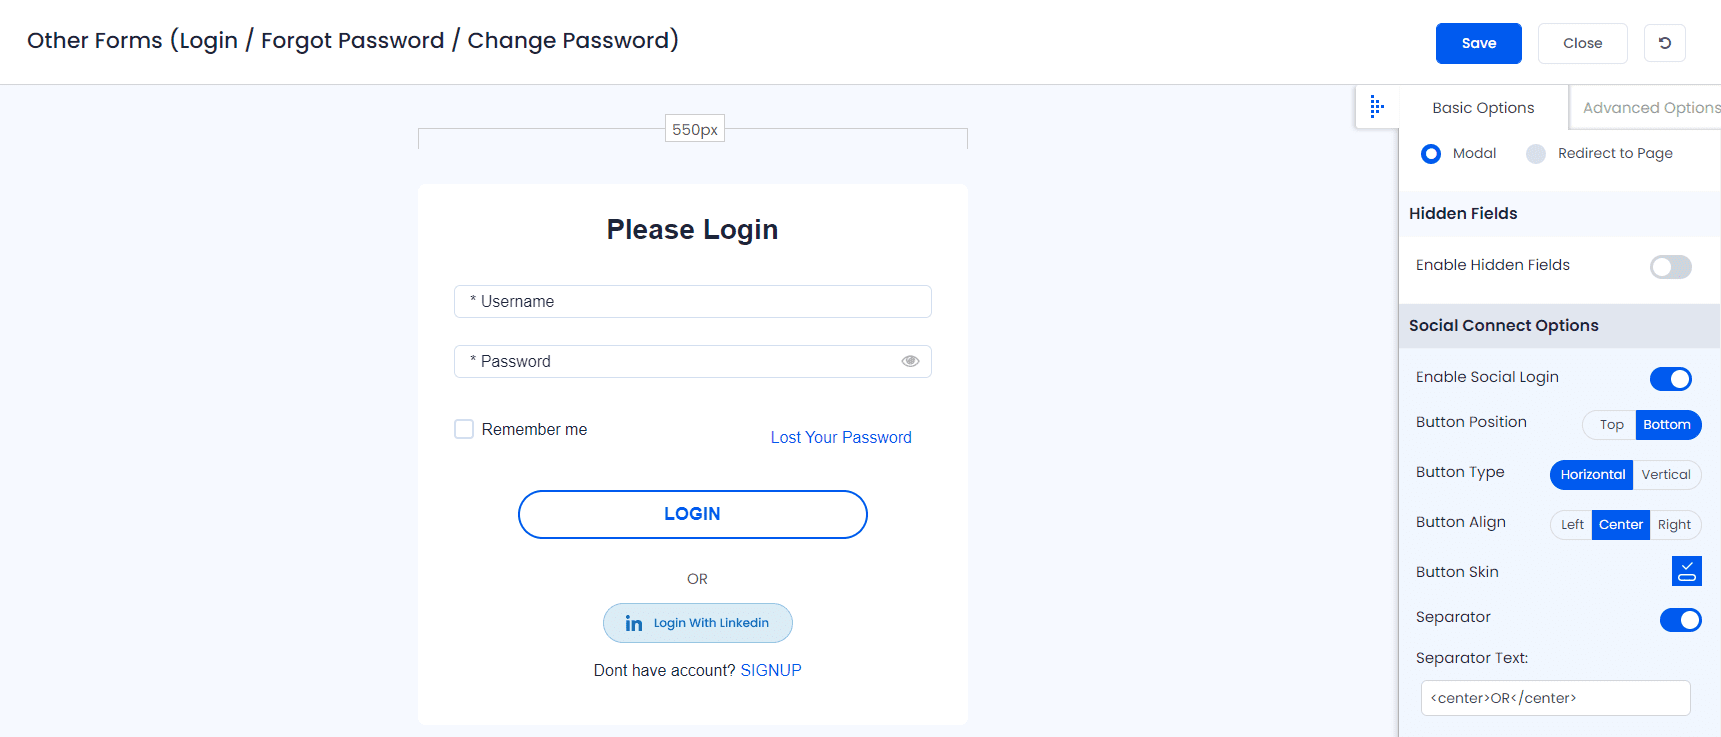
- Edit your login form set.
- You will find a section Social Connect Options in right panel under Basic Options.

- From here, you need to Enable Social Login switch to add social connect button with Login Form.
- You will see a Button Skin option in the above image. Click there to add more social connect buttons.
- Also you will be able to upload your custom image for displaying Login with LinkedIn.
- Save Form