


How to Customize Registration Pages with Custom Fields using the ARMember Pro Plugin
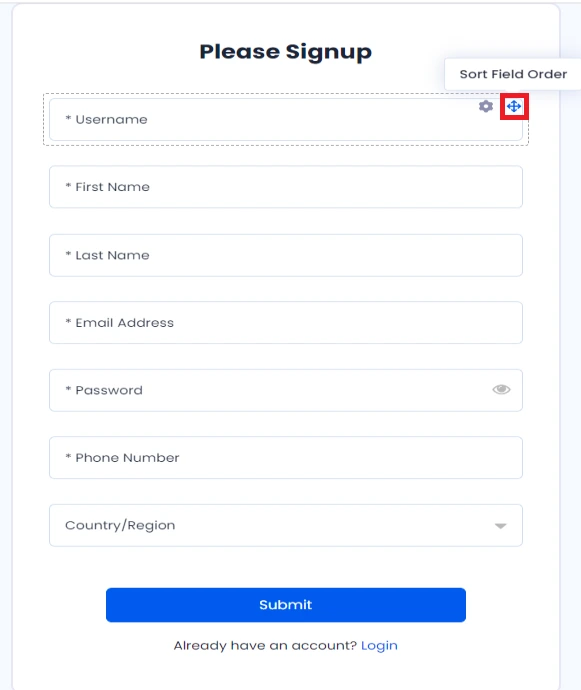
There are three icons (Edit Field Options, Sort Field Order & Delete Field) at right side of each field which are displayed there, on hover of specific row.
Edit Field Options
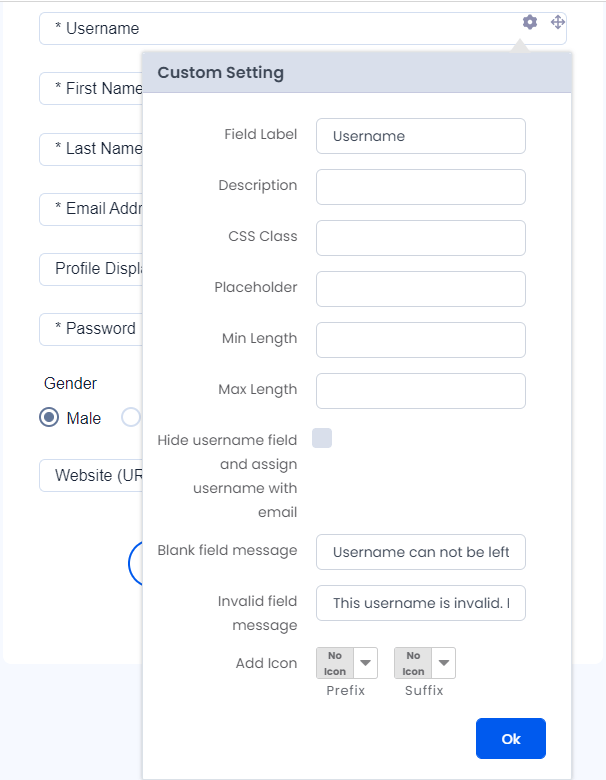
Clicking on the edit icon will open a popup that displays various field options. These options include the ability to add a label, a placeholder, checkbox options, radio buttons, and a select box. Users can also designate whether the field is required or not, add a meta key, specify a message for blank or invalid fields, and include prefix/suffix icons. Additionally, there are options to map the field with BuddyPress or BuddyBoss fields.
Field Validations
Hide username field and assign username with email: If you will check this option, the username field will get hidden from the registration form and edit profile form in the front end and the Email value will be taken as a username.
Hide First Name: If you will check this option, First Name field will get hidden from the registration form at front end. Please note that, First Name will not be get hidden from edit profile form even if it is hidden in the registration form.
Hide Last Name: If you will check this option, Last Name field will get hidden from the registration form at front end. Please note that, Last Name will not get hidden from edit profile form even if it is hidden in the registration form.
If you hide First Name any Last Name fields at Sign up Form then these fields will also be hide at Edit Profile Form at front.
Enable confirm Email Address: If you enable this option, then the users have to add the email address twice to confirm the email address.
Password Field Validation
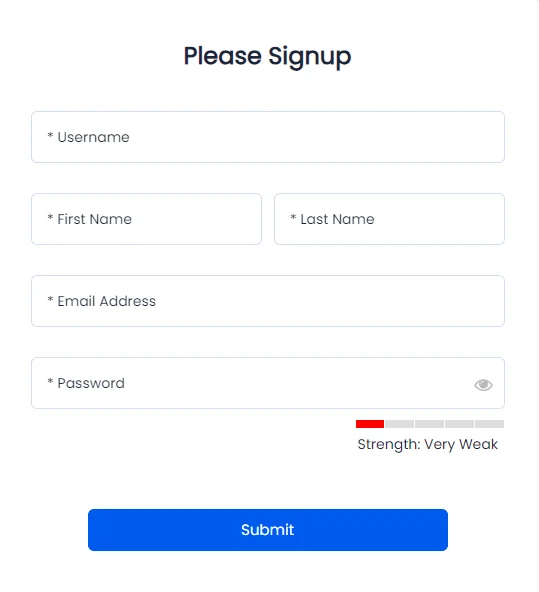
Display Strength Meter: If you enable this option, then at the front-end side the users will be able to see a meter under the password field that indicates the password strength.
Strong Password: When you enable this option, then the users forcefully have to enter a password which is strong instead of a weak password.
Enable Confirm Password: When the admin enables this option at that time the users registering to the site will need to enter the password twice to get the password confirmed and both the password fields must match else an error message will be displayed.
Other Common Validations:
The users can edit and set a validation option for that specific field. The drop-down options for validation include "Only Numbers", "Only Alphabets", "Only Numbers and Only Alphabets", and "Regular Expression".
This validation option is not available for username, email address and password fields.
If you select the “Regular Expression” validation, then you can add any regular expressions, as per your site requirements. Below provided is a list of some commonly used Regular Expression.
- Email validation
- Phone number validation
- URL validation
- Zip Code Validation:
Regular Expression: ^[a-zA-Z0-9]+@[a-zA-Z0-9]+.[a-zA-Z]{2,}$
This regular expression can be used to validate email addresses. For example, it will match “john.doe[@]example.com” but not “john.doe[@]example”.
Regular Expression:^+?[0-9]{1,3}[0-9]{10}$
This regular expression can be used to validate phone numbers. For example, it will match “+1234567890” but not “123456789”.
Regular Expression:^\(\d{3}\) \d{3}-\d{4}$
This regular expression can be used to match a phone number in the format (XXX) XXX-XXXX.
Regular Expression:^(http|https)://[a-zA-Z0-9-.]+.[a-zA-Z]{2,}(/\S*)?$
This regular expression can be used to validate URLs. For example, it will match “https://www.example.com” but not “www.example.com”.
Regular Expression: ^\d{5}(-\d{4})?$
This validation can be used to validate the zip code format as XXXXX-XXXX, further you can modify the regular expression as per your requirements.
Multi-column Fields
Many sites requires displaying multiple fields in the single row, then ARMember offers the facility to add the predefined class through which you can add up to 6 columns into one single row.
This functionality can be achieved easily by adding this predefined class at Form Field Options .
Please go to the ARMember ⇾ Manage Form ⇾ Add/Edit Form ⇾ Click on the form field option, here you will be able to check the option of ‘CSS Class’
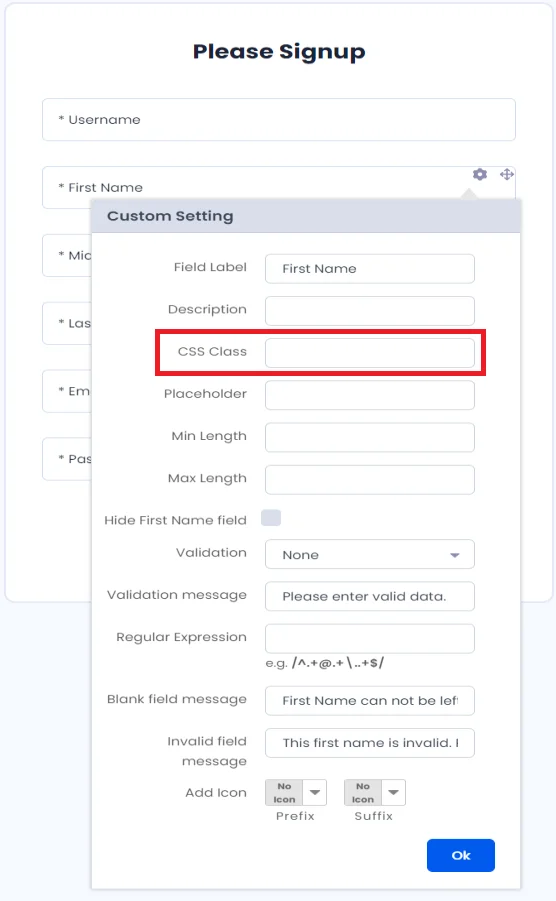
Now suppose you wish to display ‘First Name’ and the ‘Last Name’, then you can add the CSS class “arm_field_col_2” at both the fields. Once you add this class with the digit ‘2’ then the row will be divided in two equal halves, you can divide a row up to ‘6’ columns.
In the front end side check the screenshot below, the fields are divided into the equal half.
Similarly, you can add ‘arm_field_col_3’, ‘arm_field_col_4’, ‘arm_field_col_5’, ‘arm_field_col_6’ in order to divide the field into six equal parts.
Sort Field Order
Using this icon, you can arrange (sort) field position. You need to drag & Drop field to set field position.
Delete Field
By clicking on this icon, you will be asked for conformation about deletion of that specific item. If you want to delete the field then click Delete button, otherwise cancel.
You will be given rights to delete your custom fields. You can not delete default fields.

Font-Awesome Support
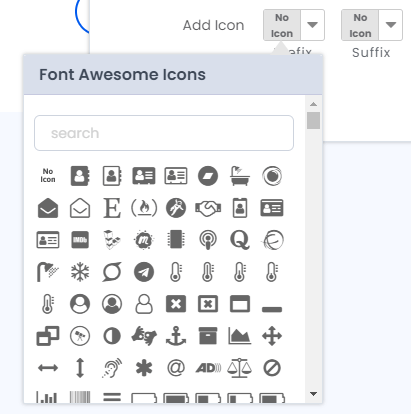
With the Font Awesome Support you can add any icon from the list provided to any field either in the starting or at the end, you can get multiple icons listed in the dropdown.