
Please note that while uninstalling ARMember, if any user has auto recurring subscription then that will be canceled from payment gateways.
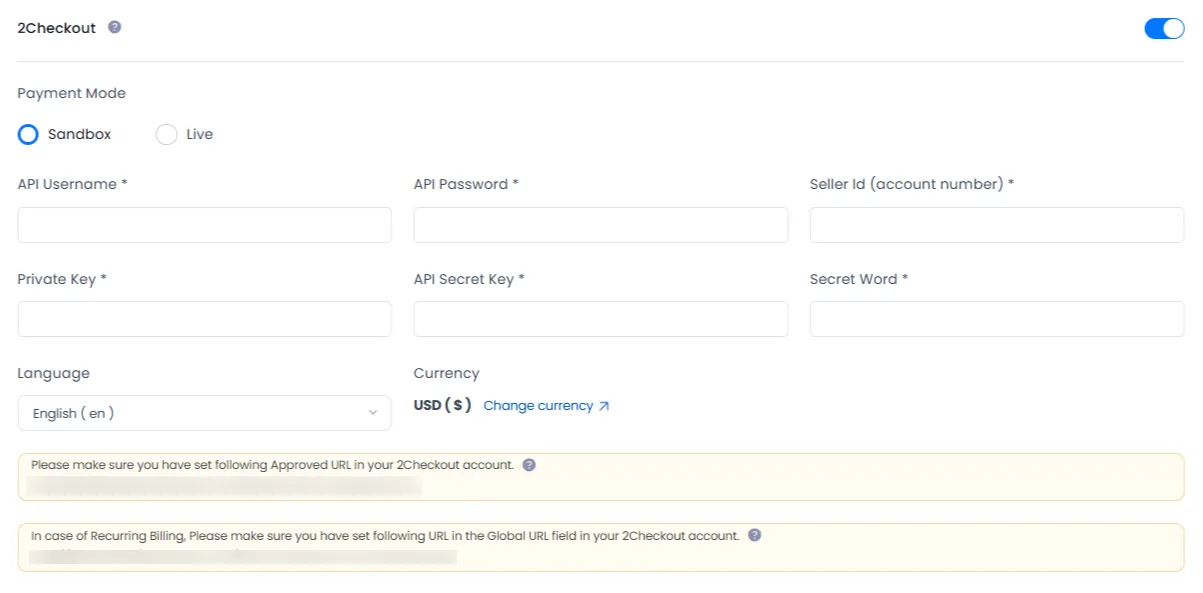
To activate 2Checkout gateway, you must require API Username, API Password, Seller ID, Private Key, Publishable Key and Secret Word.
API Username and API Password
Follow below steps to create username:
- Log in to your 2Checkout account.
- Click the Dashboard ⇾ Settings icon.
- Click the User management.
- Click +Add user
- Enter the required details for: username, email, first name, last name and password. You should enter an unmonitored or “no-reply” email if you do not wish to receive additional email from 2Checkout regarding sales and other actions.
- Click Save.
For more detail about API username & password, please click here.
Seller ID (account number)
Your 2Checkout account number (also known as: Seller ID (SID), vendor ID, merchant ID, account ID, merchant code) can be found in Integrations ⇾ Webhooks & API sub-menu.
Private keys
Follow below steps to get Private keys:
- Log in to your 2Checkout account.
- Click the Integrations ⇾ Webhooks & API sub-menu.
- Here You will find your Private keys.
Note: If you do not see your Private keys in the API section, this indicates your account is not approved to use the Payment API.
For more detail about private keys, please click here.
API Secret Key
Follow below steps to get API Secret key:
- Log in to your 2Checkout account.
- Navigate to Integrations ⇾ Webhooks & API tab.
- Here You will find API Secret key in the API section.
Secret Word
To set up the Secret Word, follow the steps below:
- Log in to your 2Checkout account.
- Click the Integrations ⇾ Webhooks & API sub-menu.
- Scroll down to find the Secret Word field
- You will be able to enter the Secret Word in the Instant Notification Service (INS) secret word.
- Click the Generate to generate secret word.
For more detail about Secret Word, please click here.
In order to set callback URL for payment process, Go to Integrations ⇾ Webhooks & API:
Follow these steps to activate Redirect URL:
- In the Redirect URL section check “Enable return after sale”
- For Return method, select Link in the Thank You, Page
- In the Approved URL field set the URL where you want your customer to be sent after successful Payment.
2Checkout does not support “Day” in billing cycle and free trial.
2checkout supports only first occurrence of billing cycle as trial duration. So if you want to give trial, then set same parameters in “Billing cycle” and “Trial Period Duration”, otherwise plan expiration will not work properly with 2checkout.
In Case of Automatic subscription, If total payable amount will be 0 (Zero), then 2checkout gateway will not work.
You must need to enable Instant Notification Service (INS) URL URL for recurring billing.
To set up your notification URL(s) click on the Webhooks tab in your account to be directed to the Settings page. On the Settings page you may then enter a Global URL to have all notifications sent to the same URL, or you may provide a specific URL for each notification type.
Below are instructions for setting the notification URL(s) for your account.
- Enter
http://yoursite.com/?arm-listener=arm_2checkout_apia URL in the Global URL field. - Click the orange Apply button to the right of the Global URL field.
- To receive all notification types to that URL, click on the green link (Enable All Notifications) located above to Global URL fields
- Click on the black colored “Save Settings” link which is located above the Global URL field or at the bottom of the page.
NOTE: After clicking Save Changes the URL will no longer be visible in the Global URL field, but will be listed in the URL field for each notification type.