

How to Manage Subscriptions, Activities & Upcoming Subscriptions using ARMember Pro Plugin
Follow this step-by-step guide in order to manage subscriptions at the ARMember.
Add Subscription
Step – 1:
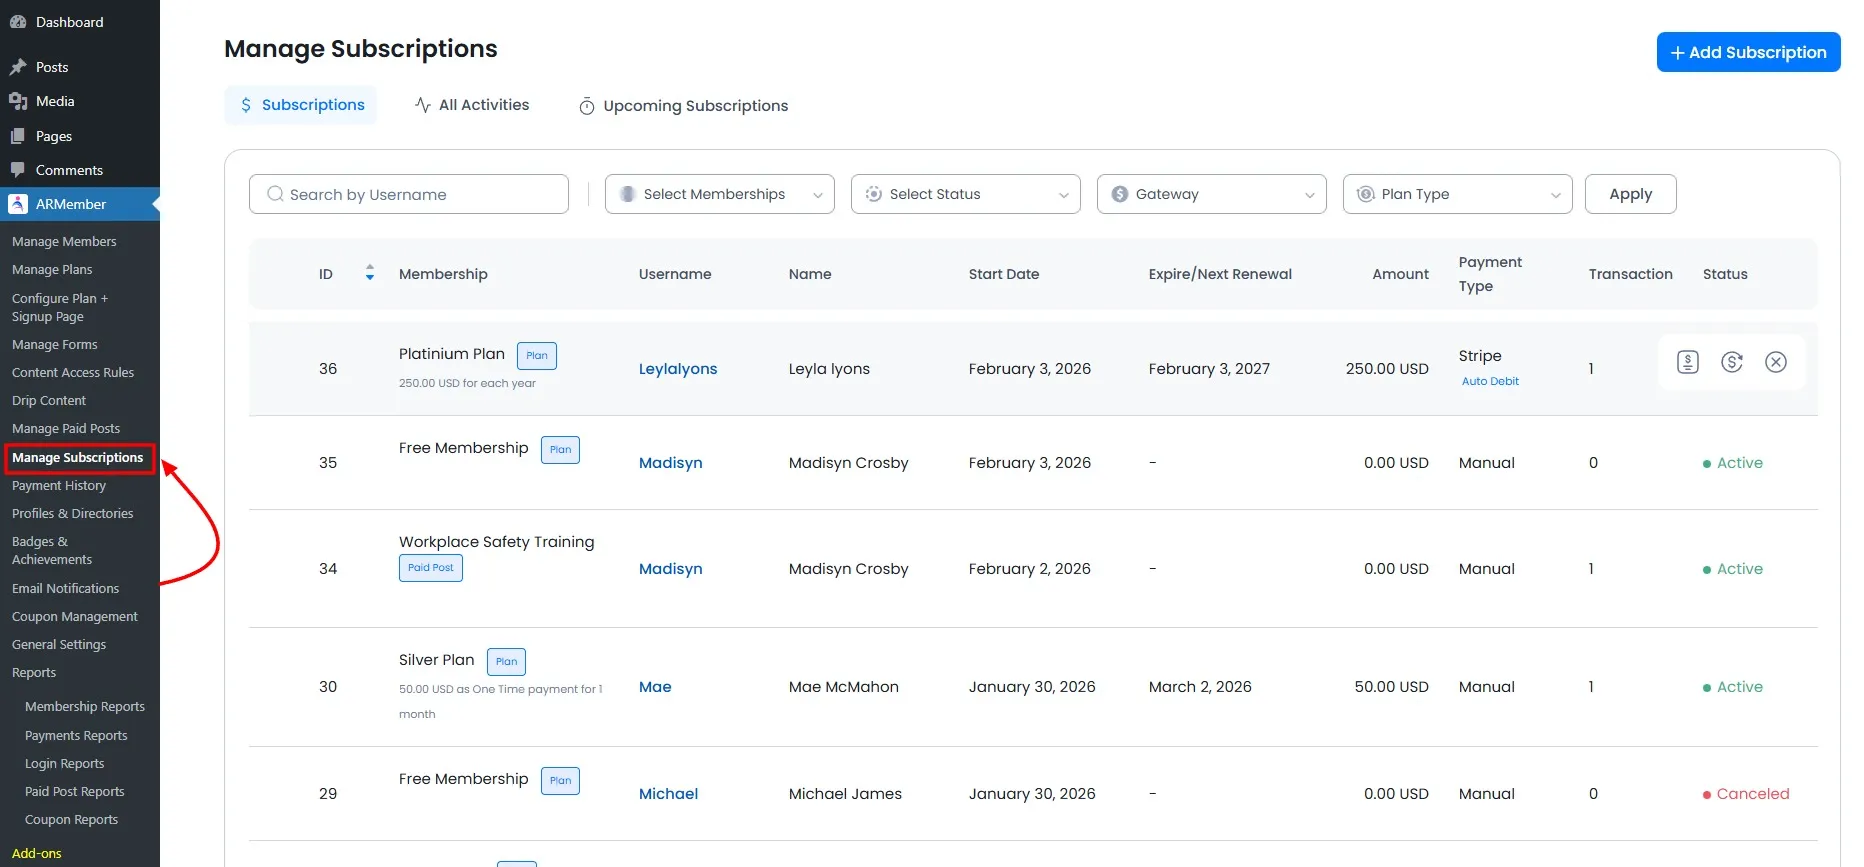
Navigate to ARMember ⇾ Manage Subscriptions in your WordPress dashboard, as shown in the below screenshot.
Step – 2:
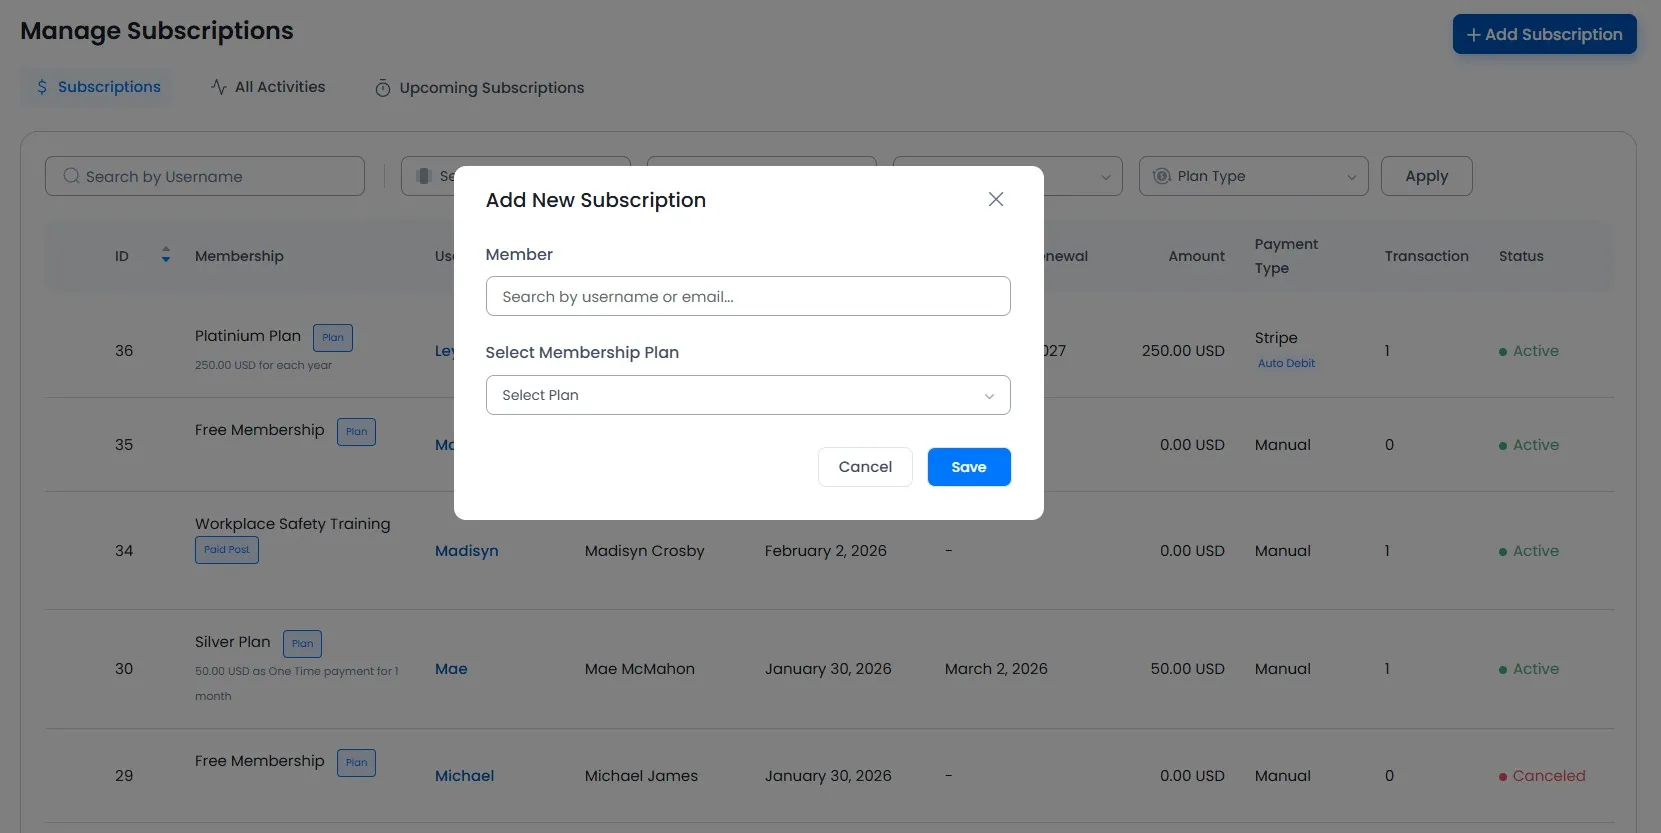
Click on the Add Subscription button that you will find in the top right corner of the Manage Subscriptions window.

Step – 3:
When you click the Add Subscription button, then you will get a popup window titled “Add New Subscription”. Here, you can search the member by the username or email address, and then you can assign the member the plan as per your requirements.
After clicking on the Save button, you will find the newly added subscription entry, as shown in the following screenshot:
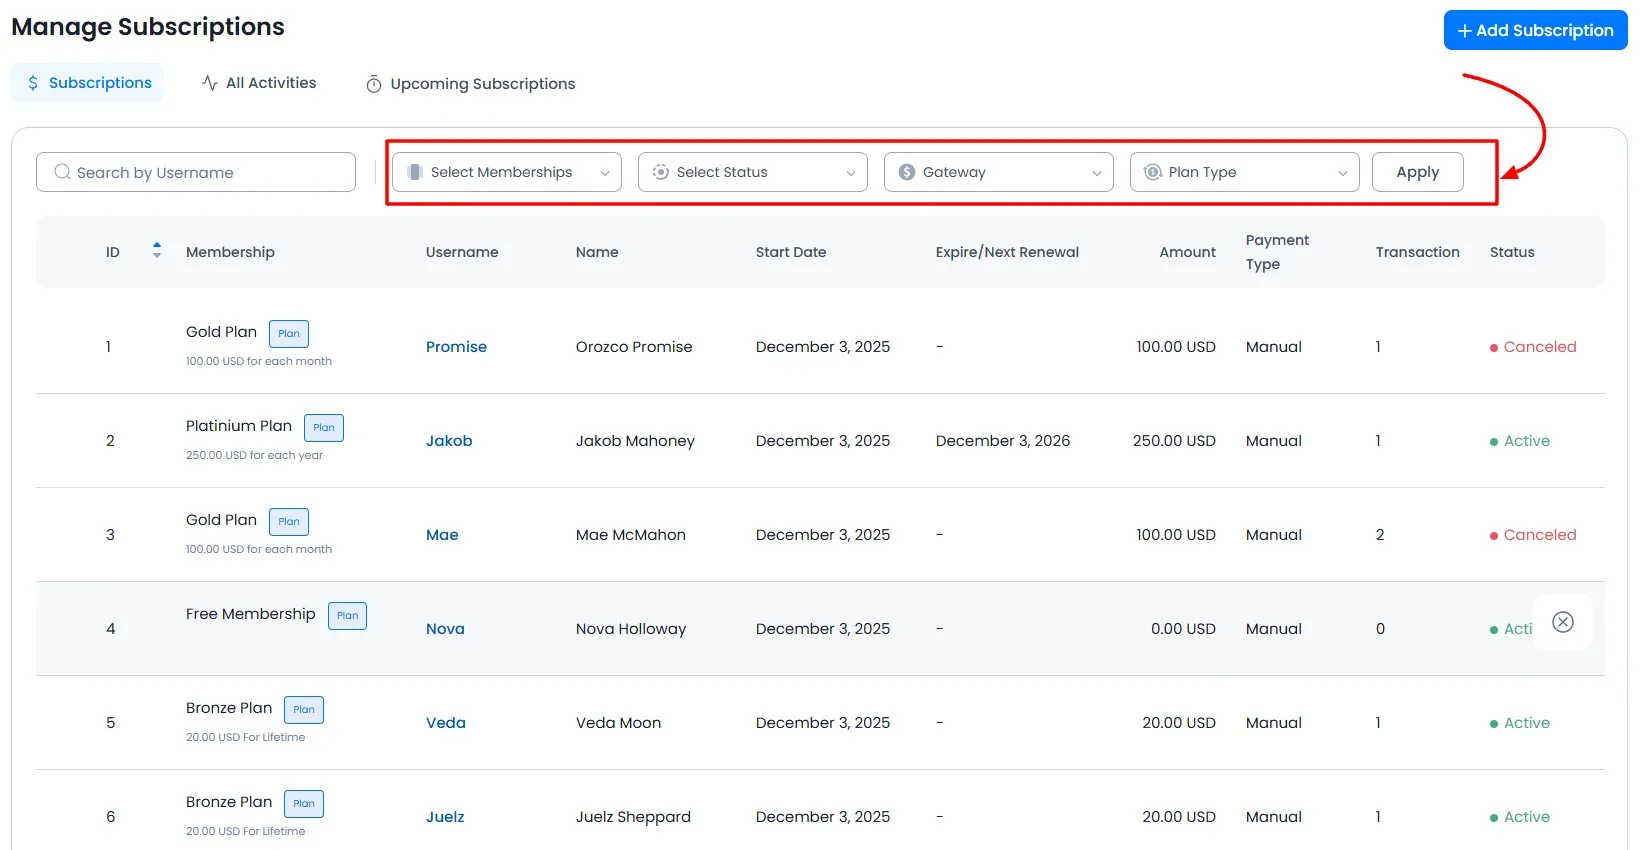
Thus, you can find all relevant information such as user ID, membership plan assigned to the member, username, membership start date, expire/next renewal (in case of finite or recurring plans), total payment amount, payment type, transaction, and current status.
If you notice, you will find an “+” icon at the start of each row. When you click on that button, it will expand and give you further relevant information pertaining to that member. When you click on that button again, it will collapse the expanded section.
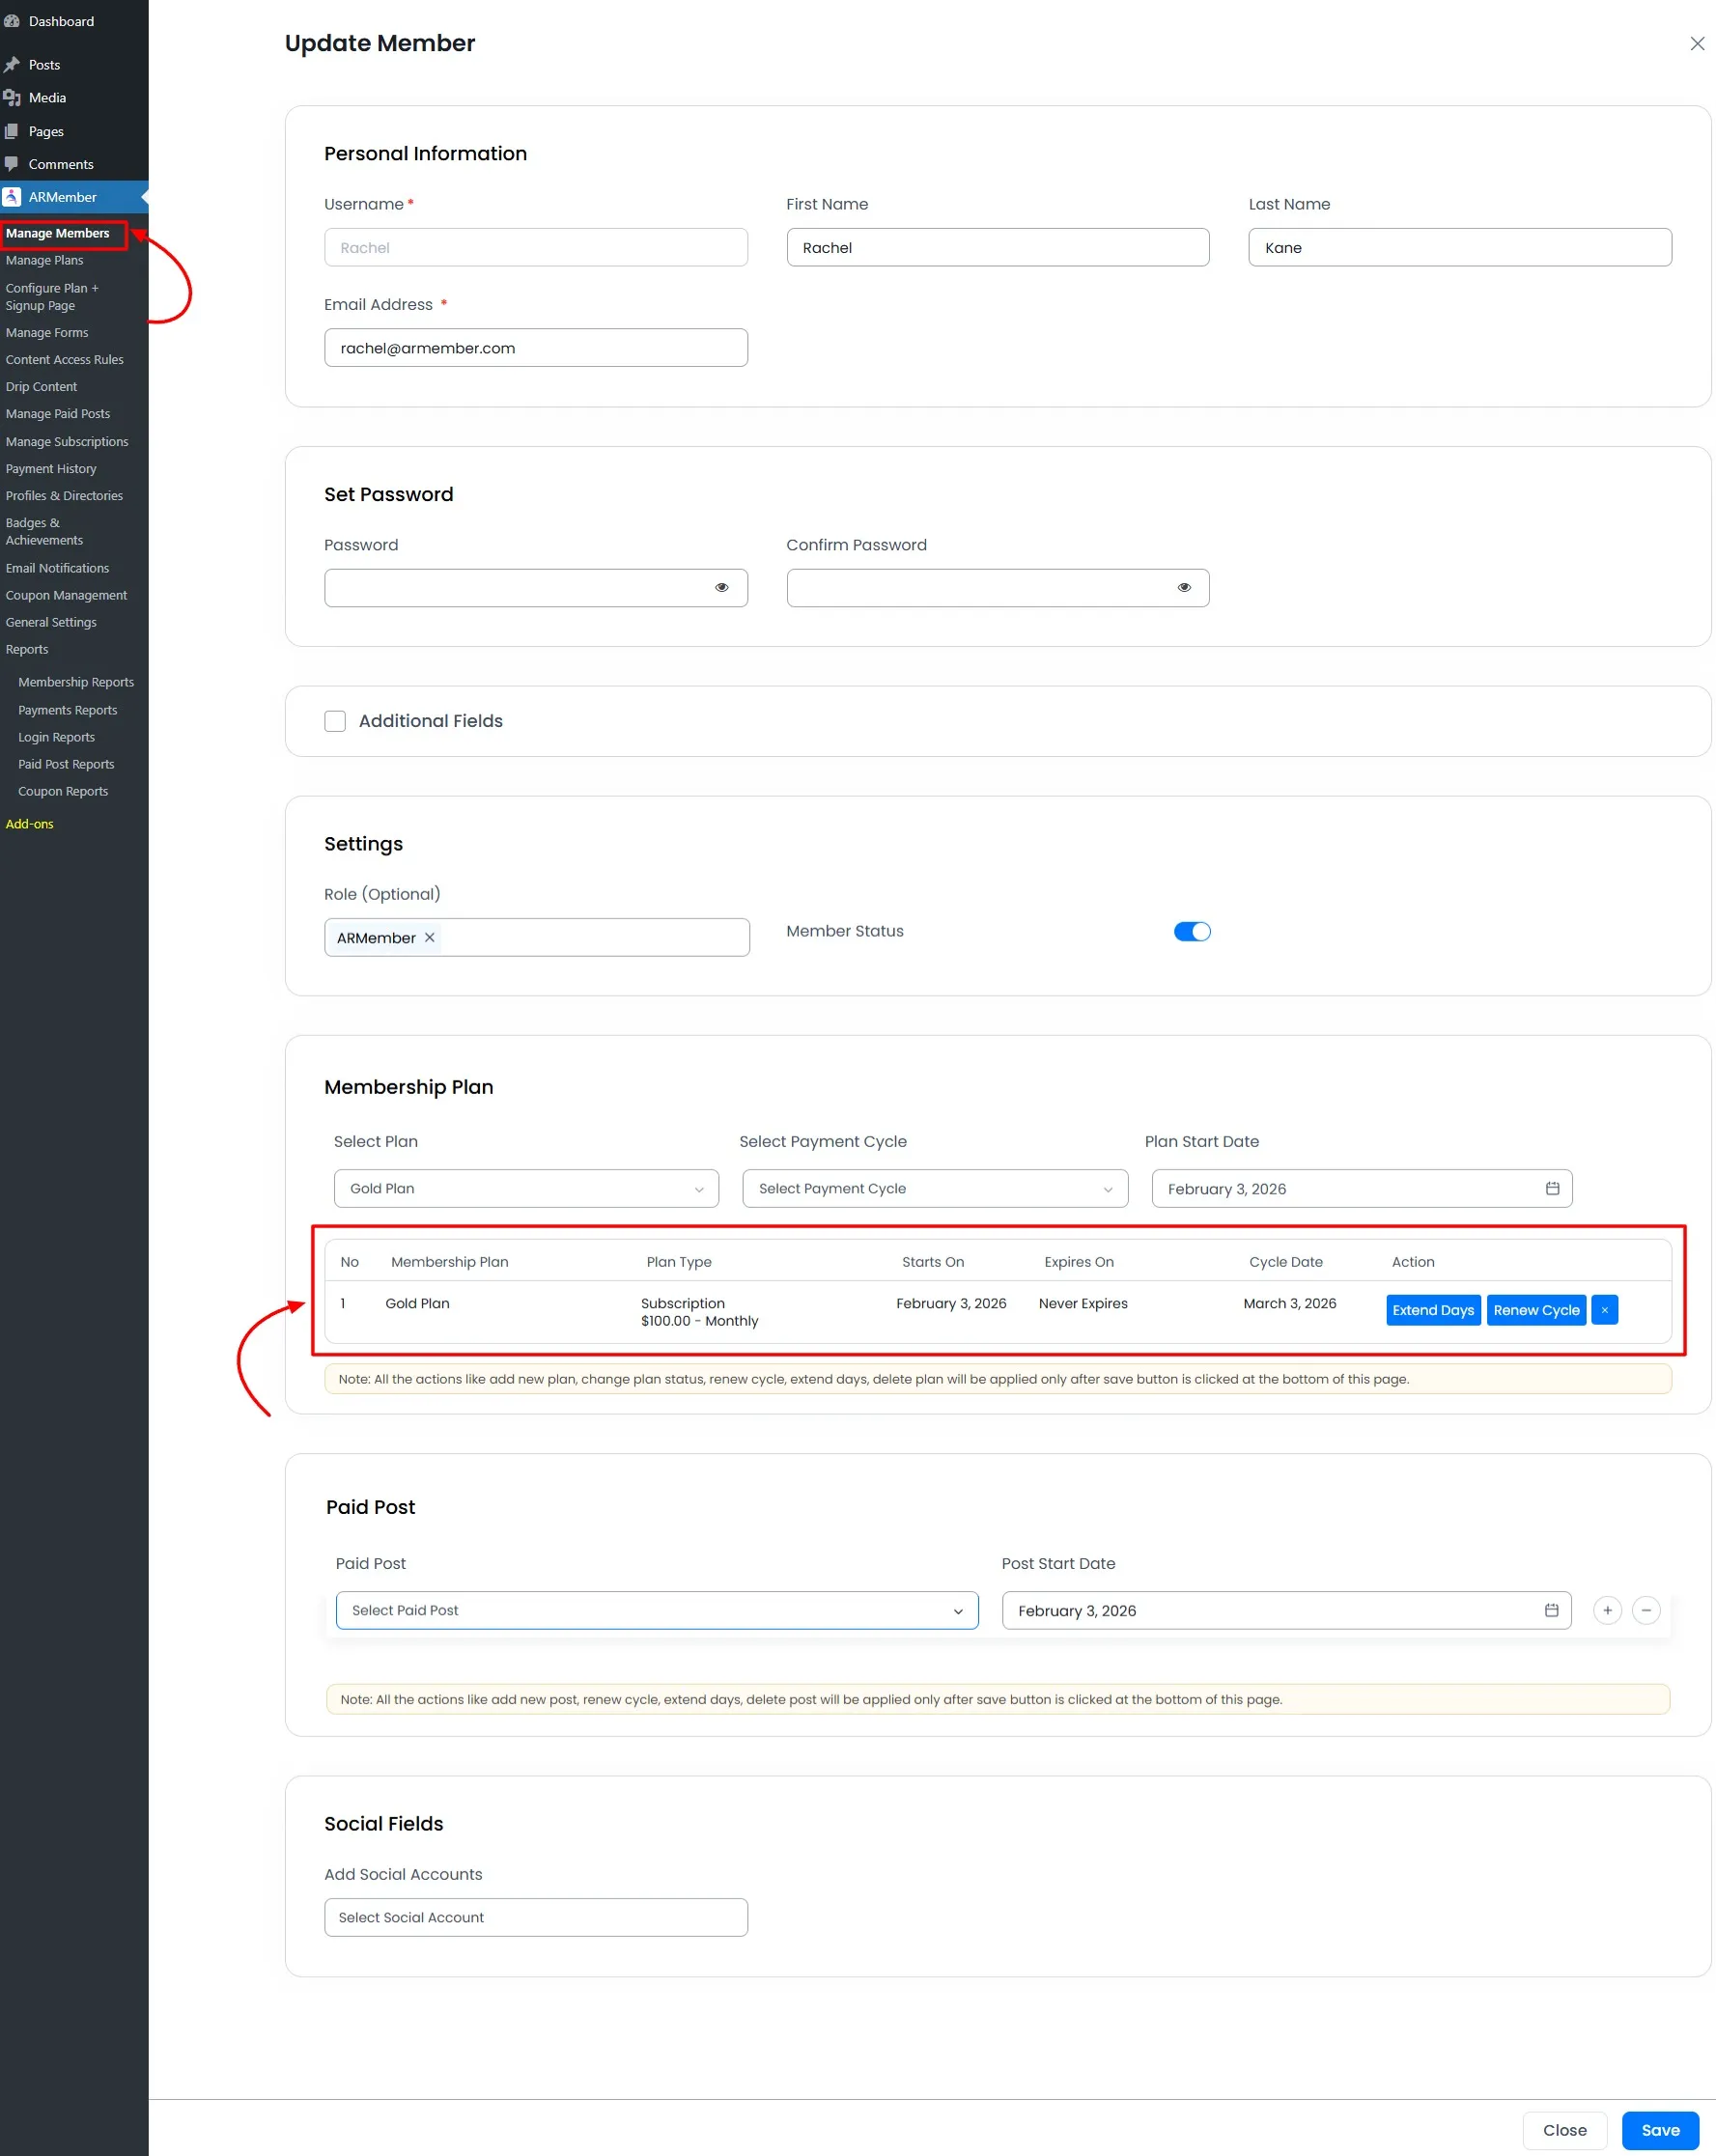
Impact on The Manage Members Window:
When you assign the subscription plan from the “Manage Subscription” option, you will find that the assigned membership subscription will be automatically updated under the “Manage Members” window.
Cancel & Refund Subscription
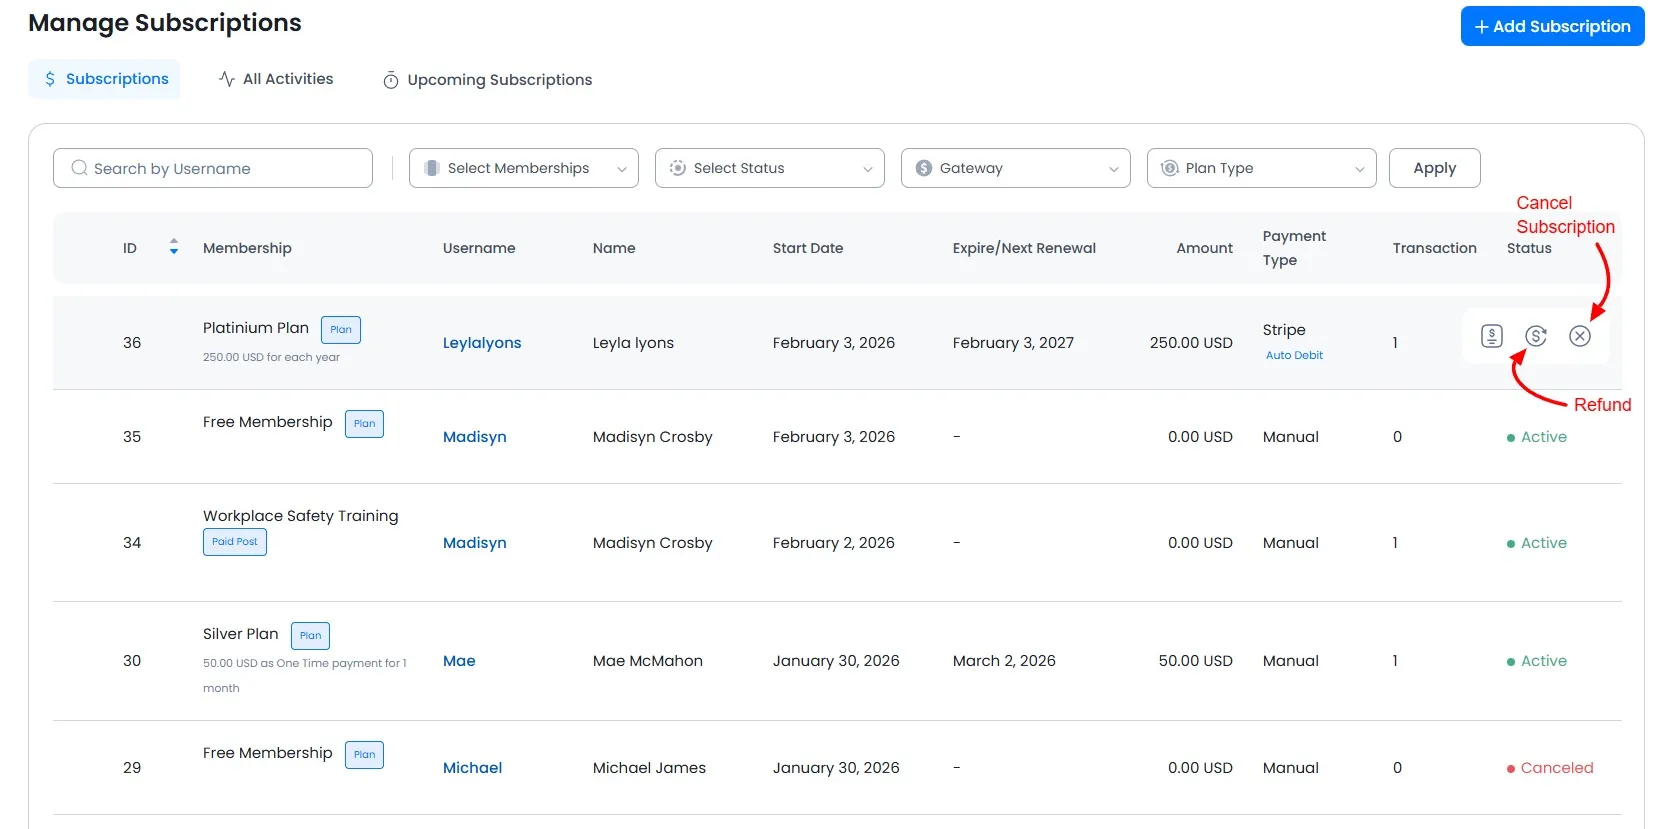
Now, if you wish to cancel the subscription plan of a particular member, simply hover on that particular entry. You will find a “Cancel” and “Refund” icon there, as shown below:
Upon clicking on that “Cancel” icon, it will ask and confirm, “Are you sure you want to cancel this subscription?”
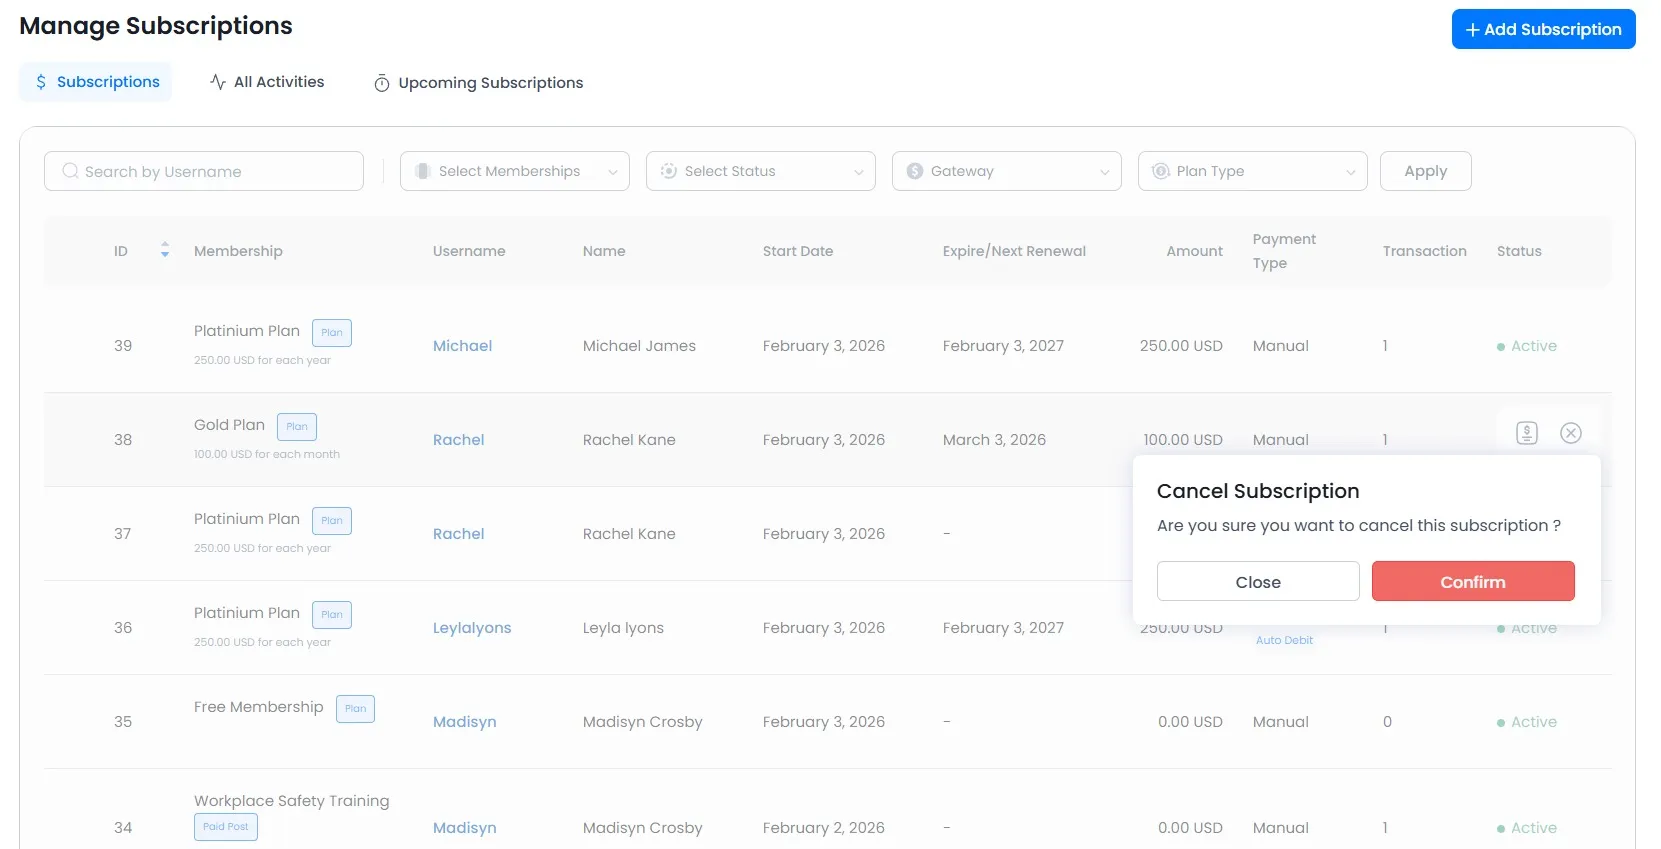
Click that “Delete” button, and that’s all, folks!
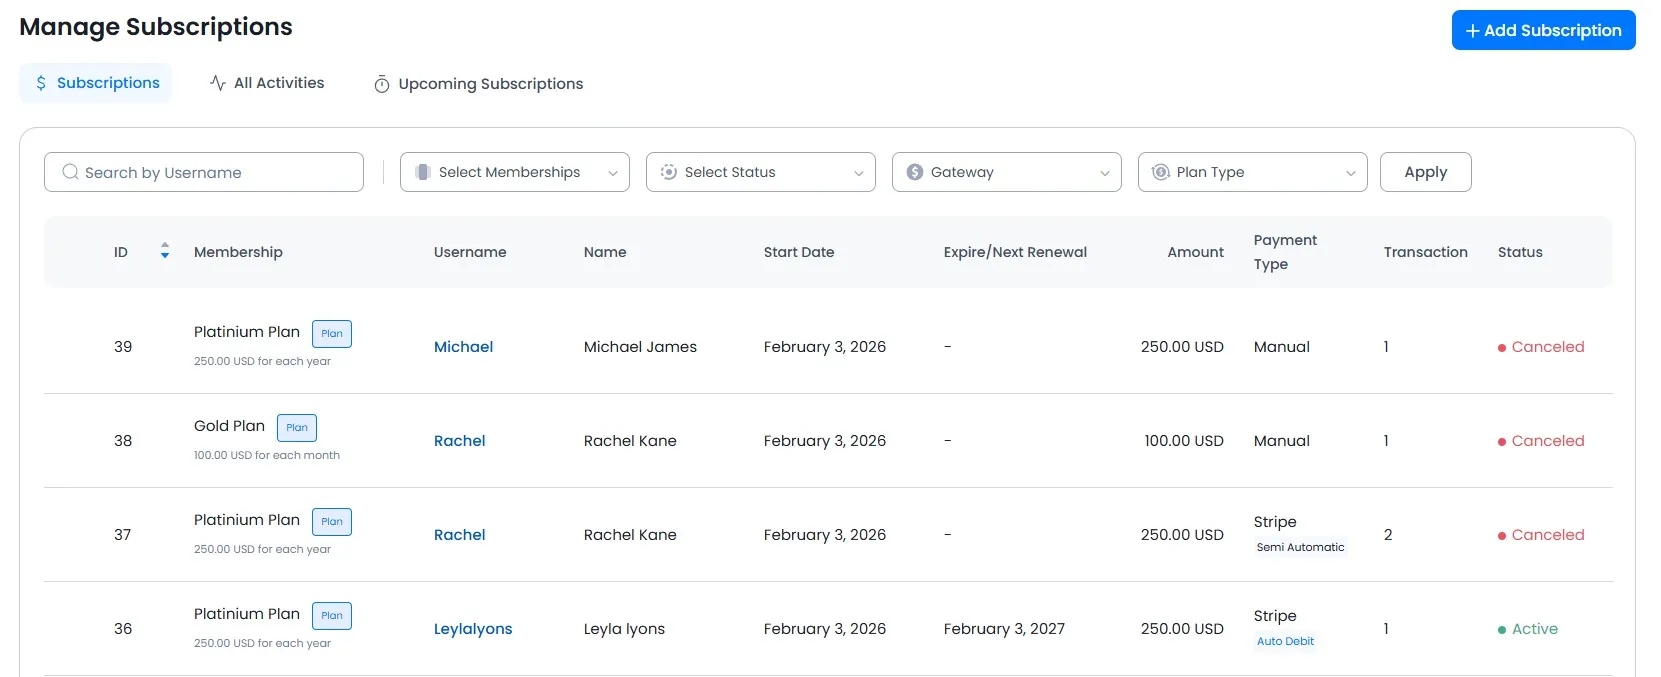
You will find the confirming notification stating you have successfully cancelled the subscription plan, and its status will immediately change from “Active” to “Cancelled”, as you can see below:
As shown above, you will also find the “Refund” icon next to the “Cancel” icon. Clicking on the “Refund” button will show you a popup showing full and partial refunds along with asking for the reasons for this refund.

Check out this guide to explore the complete refund process in ARMember.
All in all, “Manage Subscription” lets you manage and analyse all the aspects of the subscription plans and also lists out the members subscribed to the particular plan.
Filter Subscriptions Details:
Apart from that, the “Manage Subscription” window also provides you with a comprehensive filter bar where you can filter out the data based on various parameters, such as:
– Membership Plan
– Status
– Gateway
– Plan Type
Subscription, All Activities & Upcoming subscriptions
Just below the filter bar, you will find two options:
1. Subscriptions
2. All Activities
3. Upcoming subscriptions
The Subscriptions option will show you the details like User ID, Membership Plan, Username, Start Date, Expire/Next Renewal, Amount, Payment Type, Transaction, and Status.
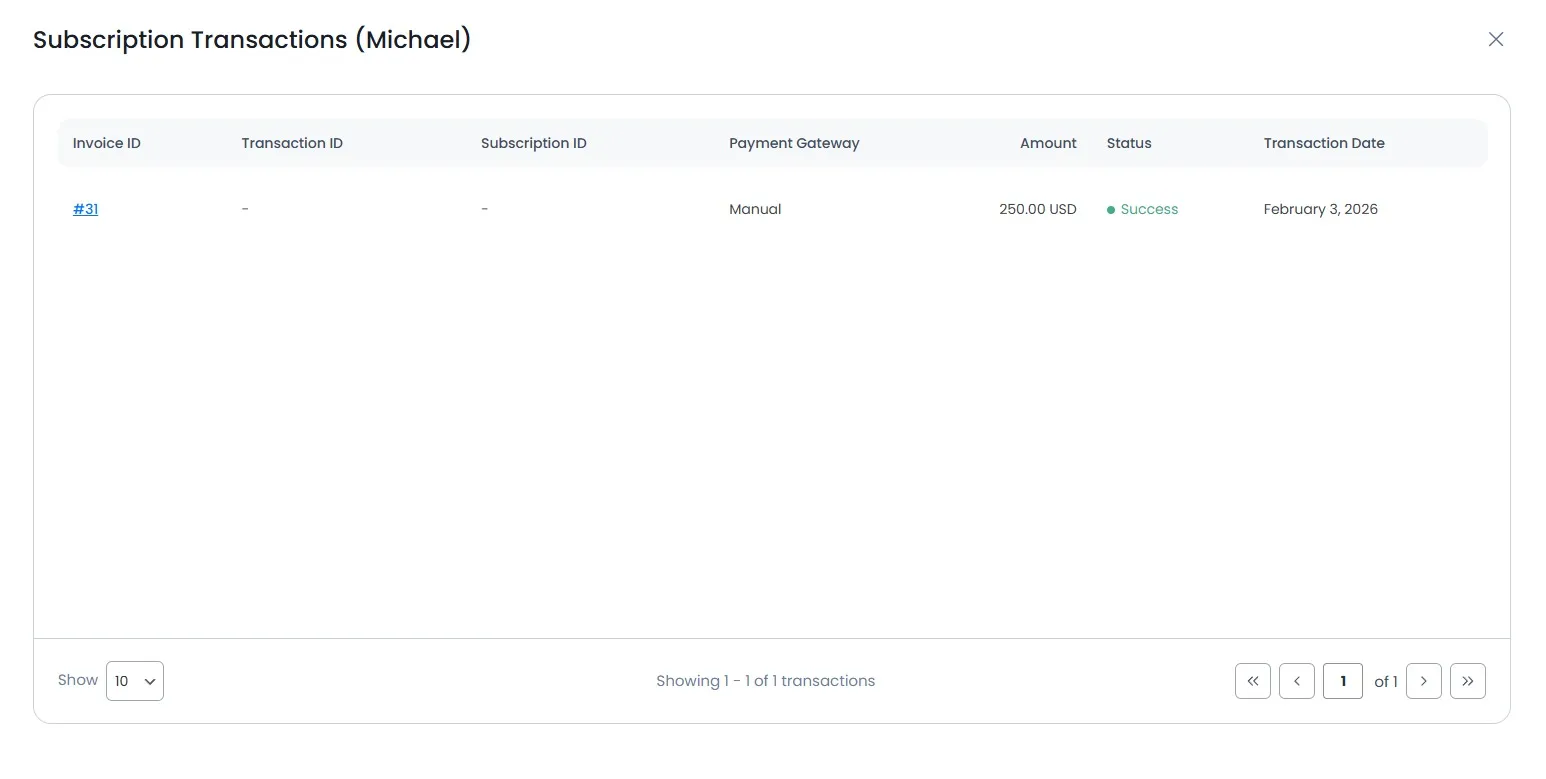
However, navigating to the “All Activities” option will show you details of all the transactions, including payment details, like User ID, Invoice ID, Membership Plan, Username, Payment Date, Amount, Payment Type, and Status.
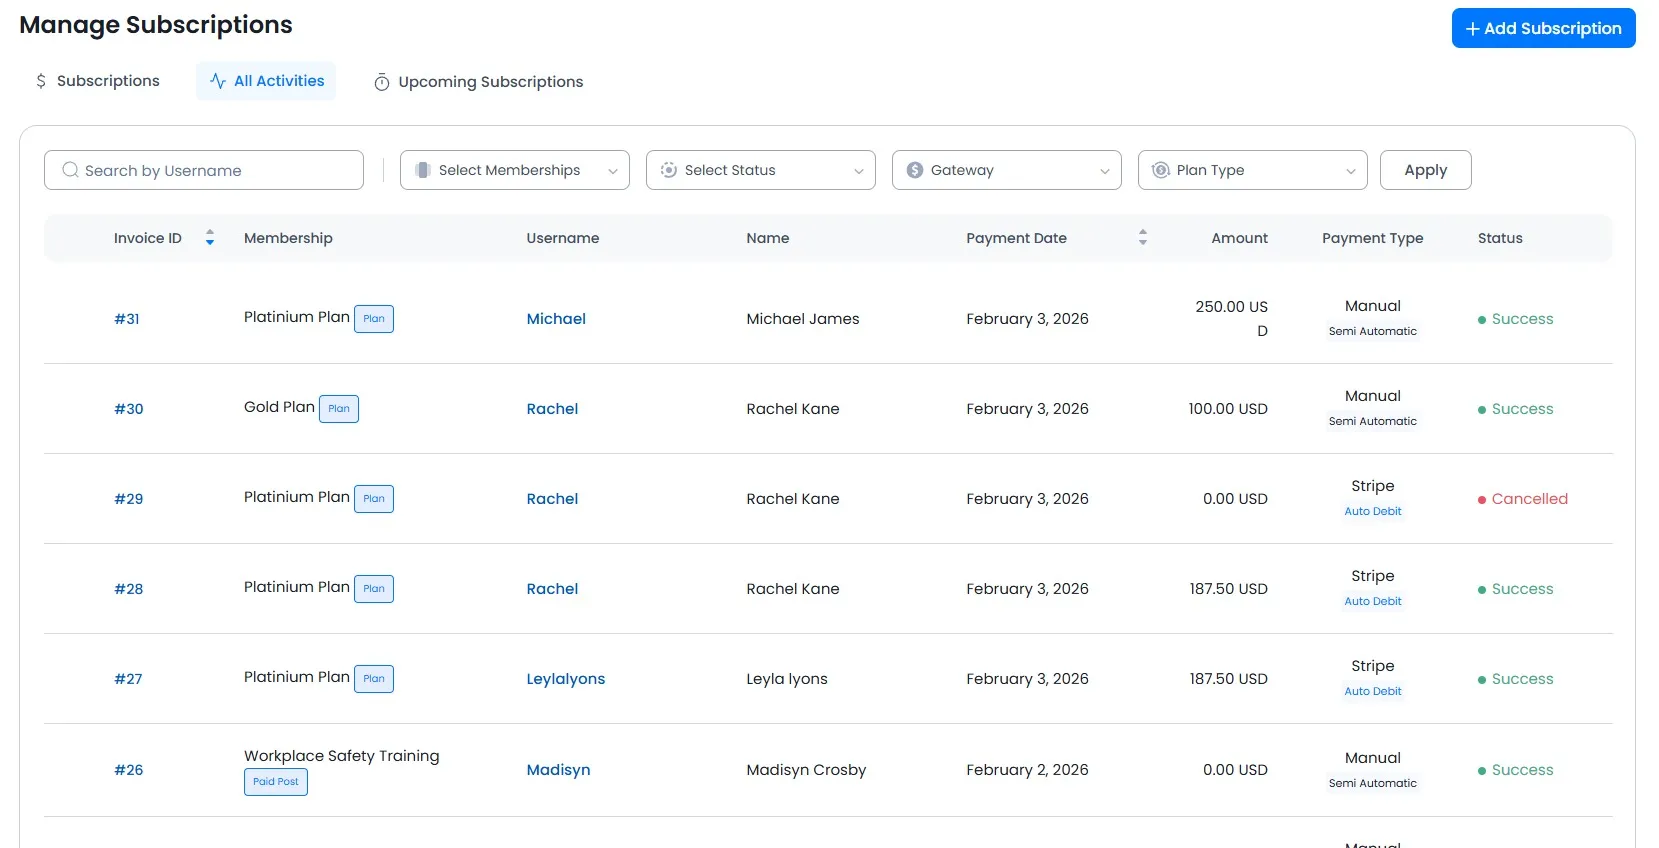
Also in the “All Activities”, the admin can check out the payments which were failed so if any member’s payment is failed than it be shown as transaction failed. Refer to the screenshot provided below.
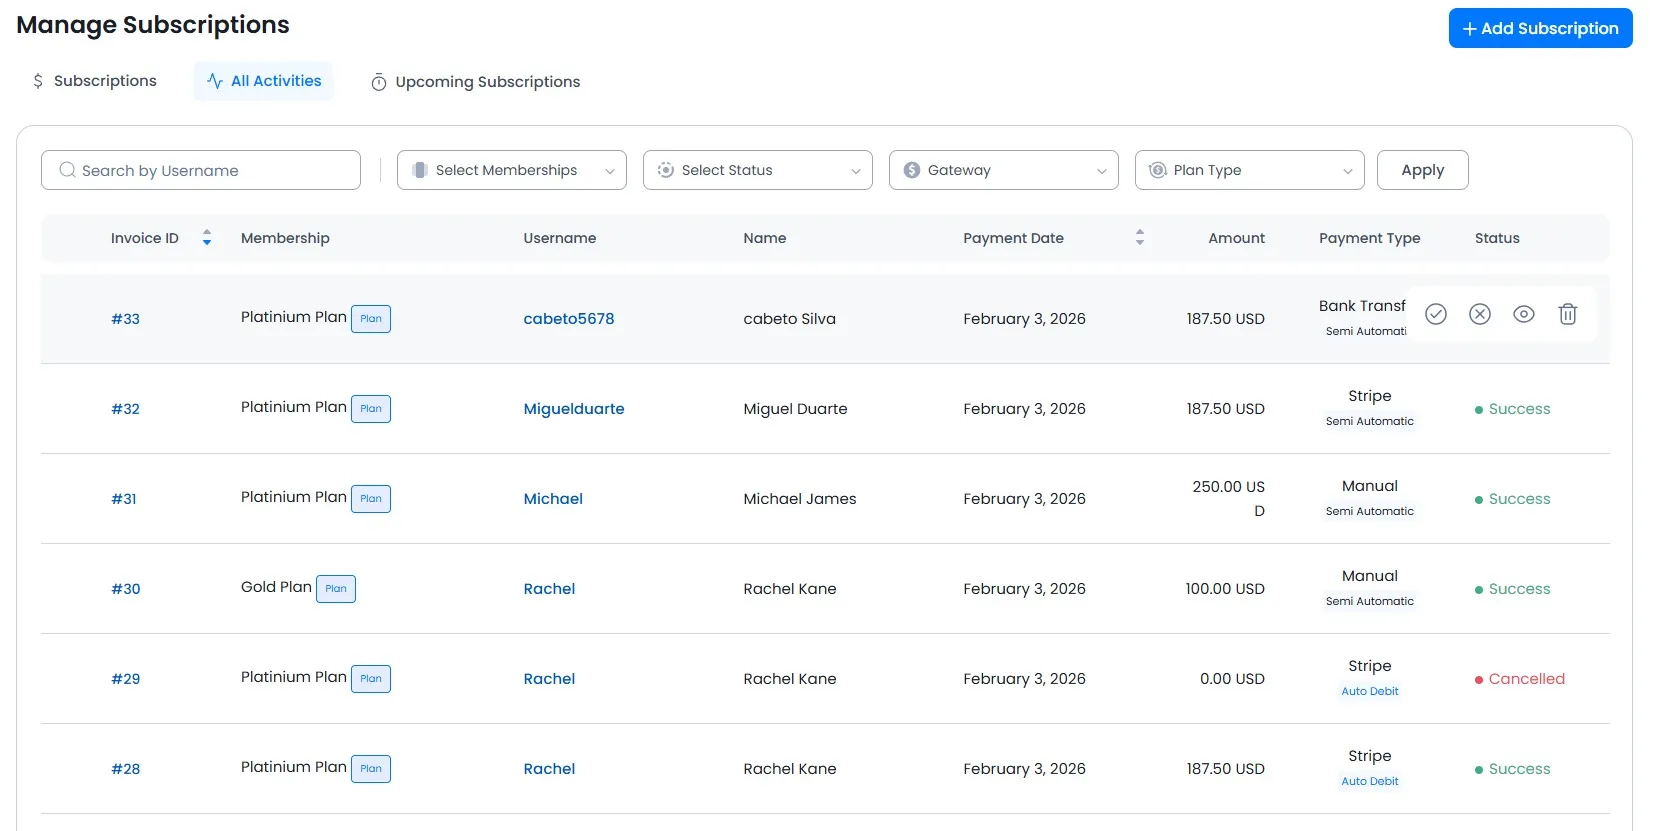
If you have chosen 'Bank Transfer', as the payment gateway at your site then the payments received from the members need to be approved by the admin. You can approve/reject the payments from All Activities. Refer to the screenshot provided below
ARMember "Upcoming Subscriptions" tab does show all the future subscriptions to be charged either in the auto-debit or in the semi-automatic payment method.
