
Security Options
How to Use Security Options with the ARMember Pro Plugin
Overview
ARMember provides a comprehensive set of security features to help protect your membership website from unauthorized access, spam registrations, and malicious activities. From brute force login protection to blocking specific usernames, email addresses, IP addresses, and URLs, these security options allow you to strengthen your site’s protection and improve user safety.
You can also monitor user login activity with login history tracking and configure custom restriction messages for blocked access attempts. All these settings can be managed easily from the Security Options tab under General Settings.
Brute force login protection:
Login pages are highly protected by brute-force prevention mechanisms. ARMember is providing a very secure login mechanism.
- Provides a setting for a temporary blocking mechanism.
- Provides a way to set the allowed number of login attempts.
- Manage the blocked member’s blocking time interval.
Enable Login Security For Failed Login Attempts
If you enable this option, ARMember will keep record of IP address and timestamp of each failed login attempt. If more than a certain number of attempts are detected within a short period of time from the same IP range, then the login function is disabled for all requests from that range of IP addresses.
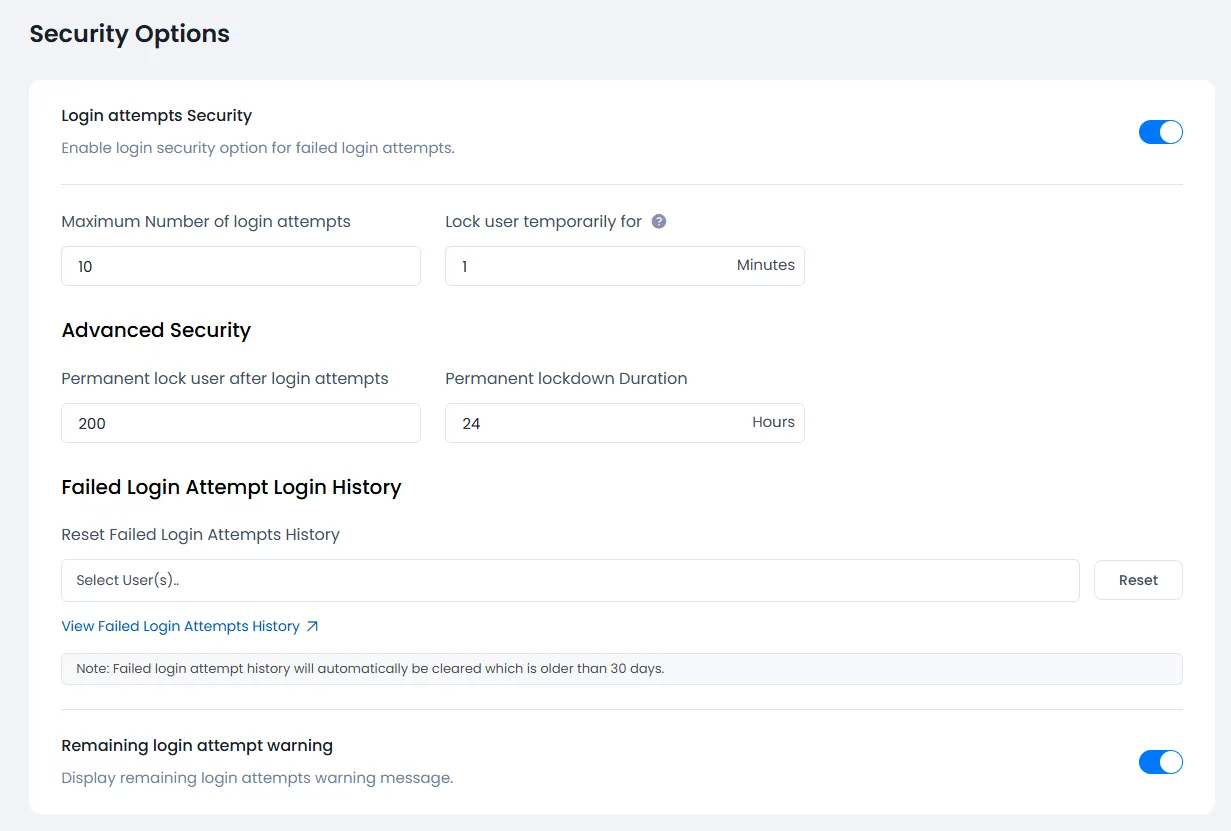
- Maximum Number of login attempts: Number of allowed login attempts
- Lock user temporarily for : Temporary lock down Duration in minutes
- Permanent lock user after login attempts : Number of allowed login attempts
- Permanent Lockdown Duration : Lockdown Duration in Hours
- Reset Failed Login Attempts History : You can clear all failed login attempts for every user. Also, with the View Failed Login Attempts History link one can view the failed login attempts.
- Remaining login attempt warning : If this option is enabled, then it will show the front-end user how many login attempts are remaining as a warning.
When a user exceeds the maximum number of login attempts, he/she will be blocked for a temporary lock downtime duration.
Block Username
You can restrict specific keywords from being used as username in the registration form with this option.
When the user tries to register with a blocked username, an error message will be displayed. Also, you can display a specific error message with the Blocked Username Message option.
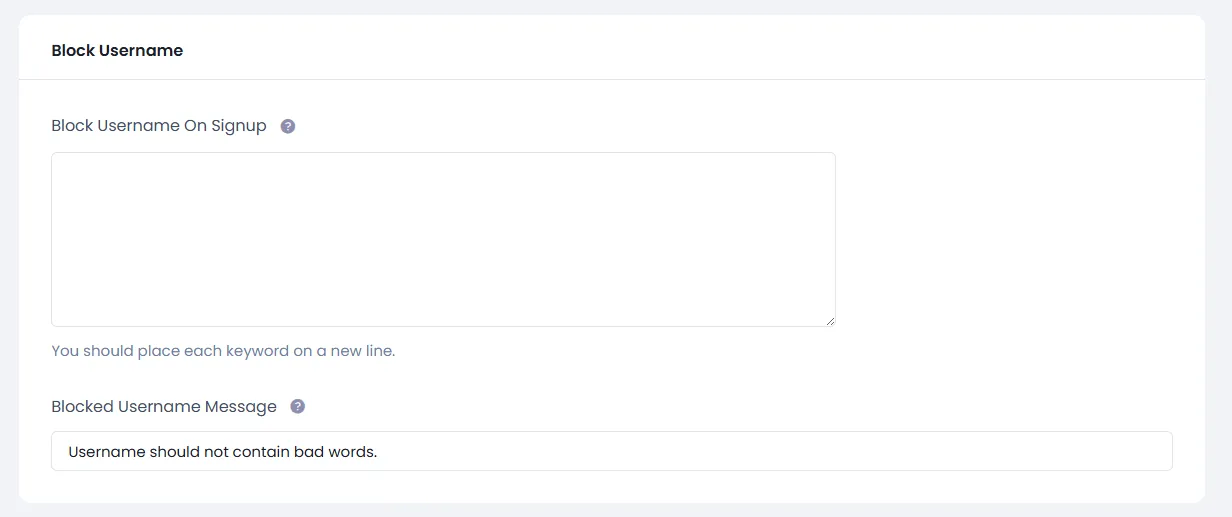
Note: You should place each Username on a new line.
Block Email Addresses
You can restrict specific keywords from being used in email address at the time of registration.
When someone tries to register with a blocked email address, for that you can set a custom error message from the Blocked Email Addresses Message option.
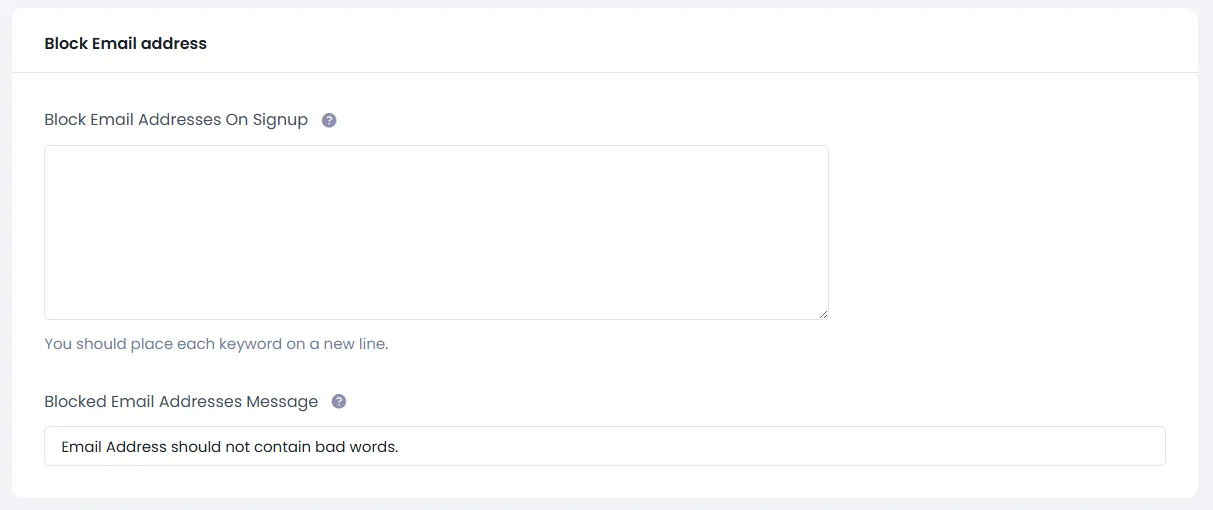
Note: You should place each Email Address on a new line.
Instead of blocking the email address, ARMember does provide a facility to validate the email address on signup. If you wish to set this up, then navigate to the ARMember ⇾ General Settings ⇾ New User Approval section. Here, select the Email Verified Approval option and save the changes. With this option selected, the member will be sent a validation link through an email when they sign up, and then they can click on it and validate their accounts.
Block IP Addresses
You can block site access for specific IP addresses with this option.
If anyone tries to access the site with the mentioned blocked IP address, an error message will be displayed. Also, you can display a specific error message with the Blocked IP Address Message option.

Note: You should place each IP Address on a new line.
Block URLs
You can block site access to specific URLs or URL patterns requested from users.
You can use it wildcard(*) for a specific pattern.
For Example
http://www.example.com/*some_text*/page
Note: You should place each URL “or” URL Pattern on a new line.
You will be able to block URLs plan-wise too. You can add as many conditions as you want.
You will find two blocked URL options, whether you want to display a message or redirect to a page when the requested URL is blocked.
- If you select Display Message, you will have input to add a message to be displayed when the requested URL or URL pattern is blocked.
- If you select Redirect to page, you will have input to add a specific URL where you want to redirect users when the requested URL or URL pattern is blocked.
Display Login History
You can keep track of login history in the database for all users if the display login history switch is on.

Reset Login History You can clear the login history log from the database for all users with one click.