

How to Configure & use the Pay Per Post inbuilt addon with the ARMember Pro plugin
Introduction and Key Points
This guide provides a comprehensive overview of how to configure and use the Pay Per Post Shortcodes in the ARMember Plugin. Whether you’re using the Gutenberg Editor or the Classic Editor, this documentation will walk you through the steps required to set up, manage, and display paid content to your users using ARMember shortcodes.
With ARMember’s built-in functionality, you can:
- Integrate a “Buy Now” button for individual posts.
- Display a list of posts purchased by users.
- Show detailed transaction history for paid posts.
- Customize action buttons like Renew, Cancel, and Update Payment Methods.
Gutenberg Editor
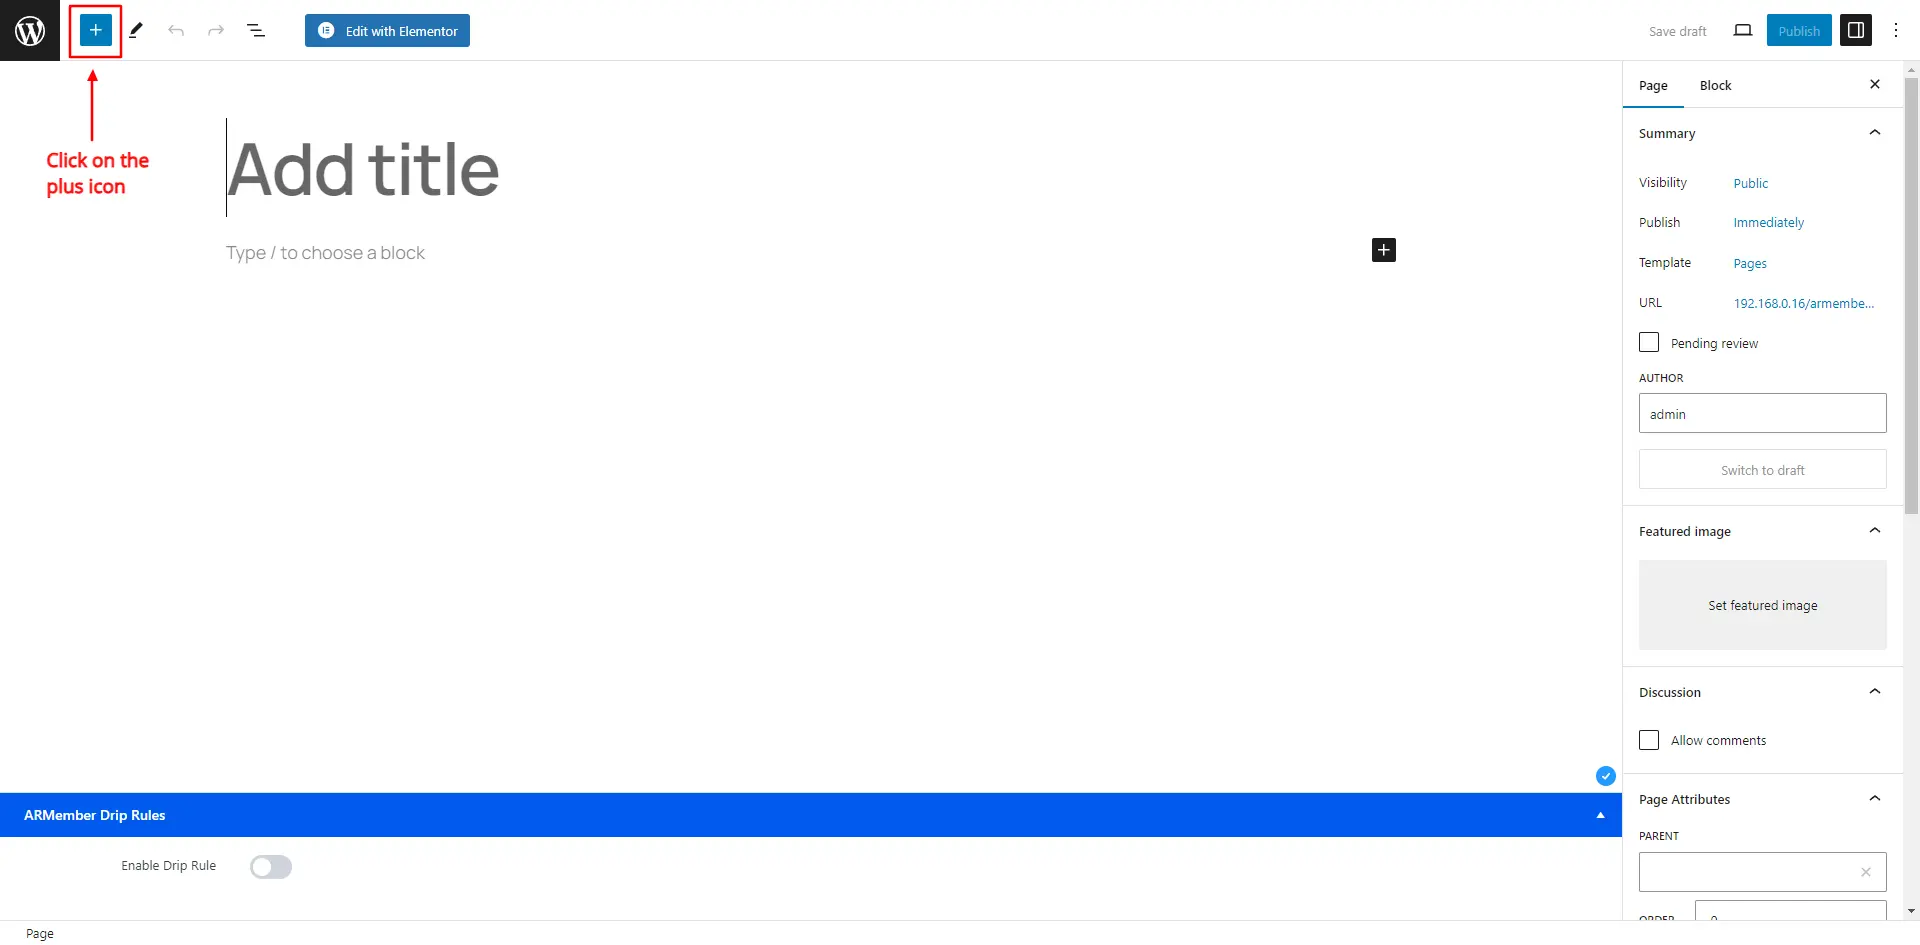
For, WordPress Gutenberg Editor, you can add ARMember Pay Per Post Shortcodes by navigating to Admin Panel ⇾ Pages ⇾ Add/Edit New page.
At the page, click on Plus Icon in order to search the required block.
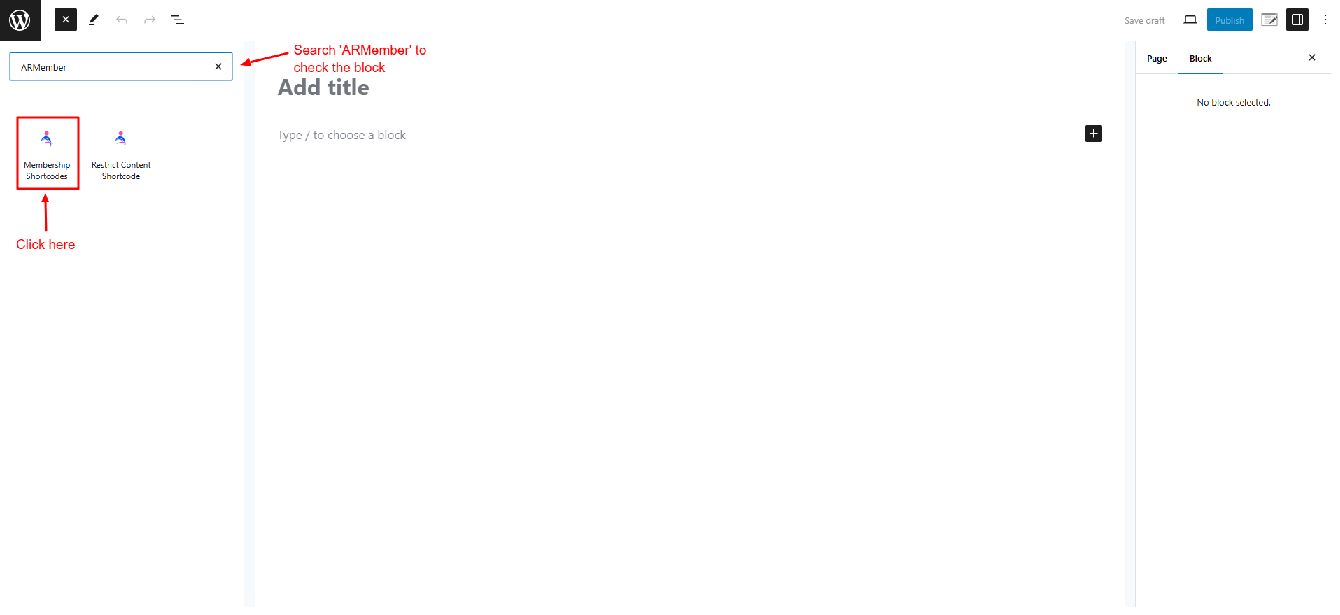
Here you will be able to search for the Membership Shortcode at the search bar.
Classic Editor
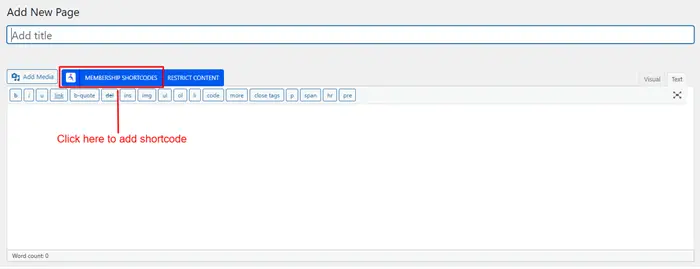
In WordPress Classic Editor you can add ARMember Pay Per Post shortcodes by navigating to Admin Panel ⇾ Pages ⇾ Add/Edit New page.
Now once you get the popup for the Membership Shortcode you can add the Pay Per Post Shortcodes for purchased paid post list, paid post payment transactions and Add Buy Now Button shortcodes.
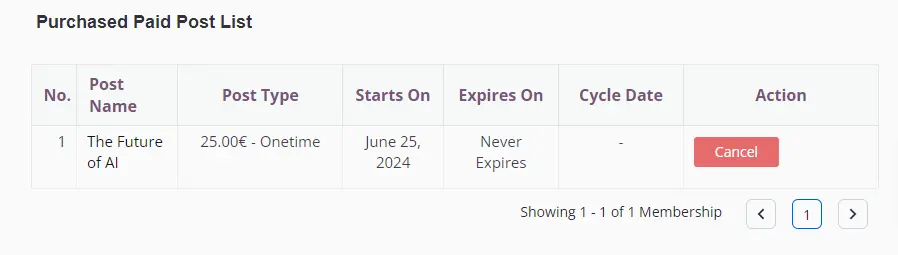
Purchased Paid Post List
This Pay Per Post Shortcode displays list of the purchased paid post to the current logged in member.
To begin, in the Membership Shortcode popup, select the tab Others, after that you can select Purchased Paid Post List option at the dropdown. Give a title for Purchased Paid Post List grid and select your Paid Post Setup which you created at the Configure Plan + Signup Page.
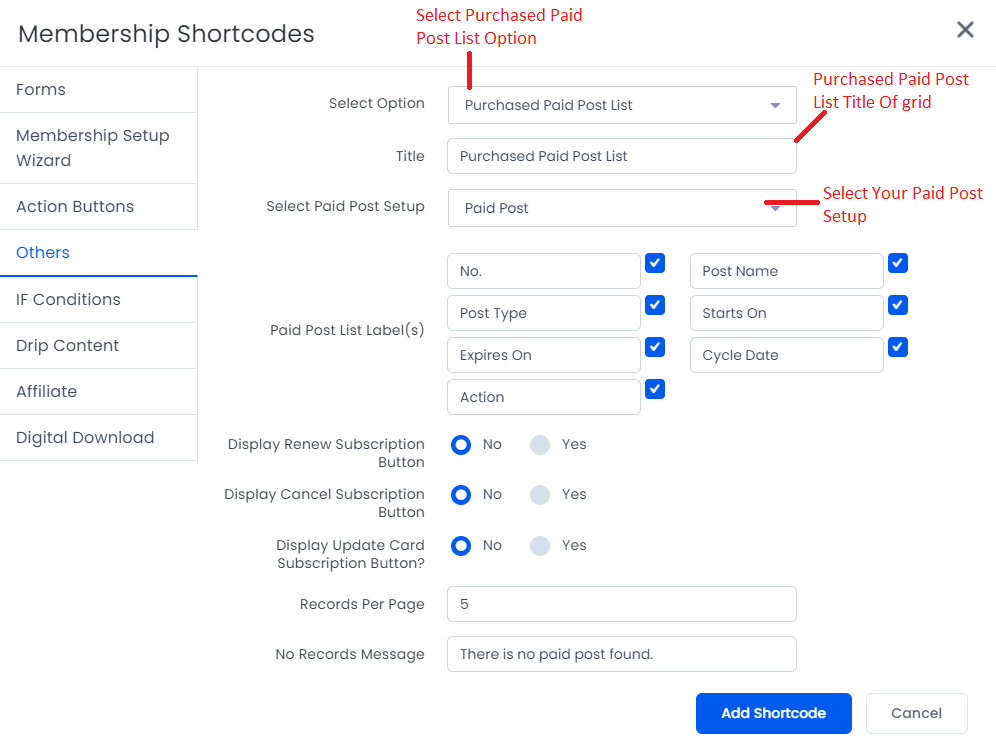
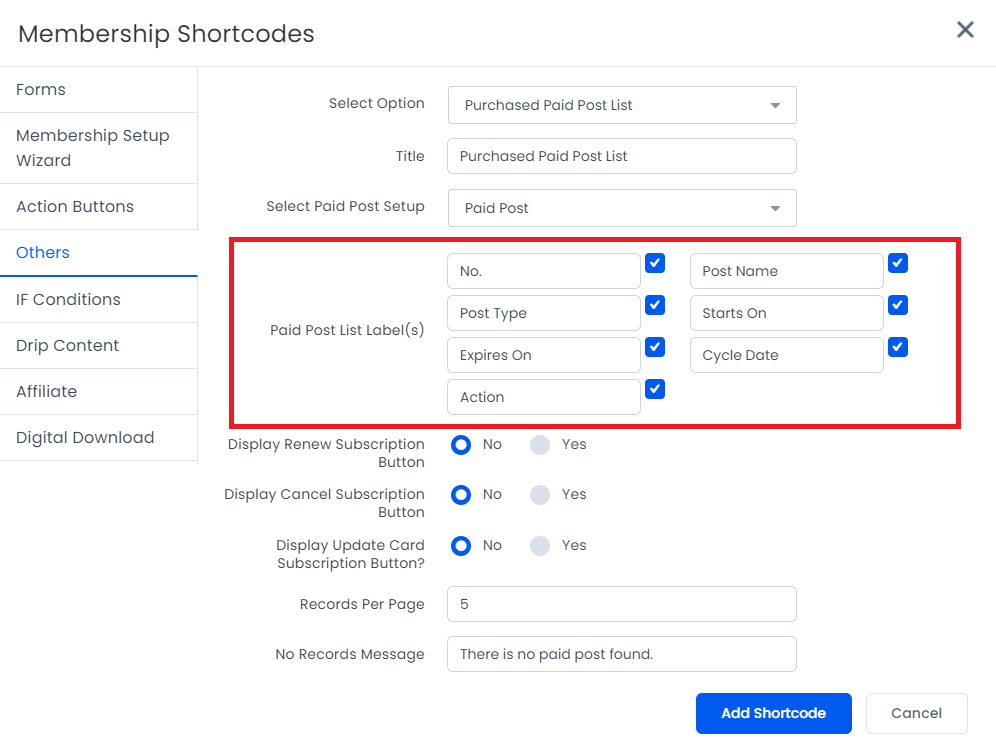
Afterward, you’ll be able to pick which columns to show in the list and customize the grid column labels at the Paid Post List Label(s).
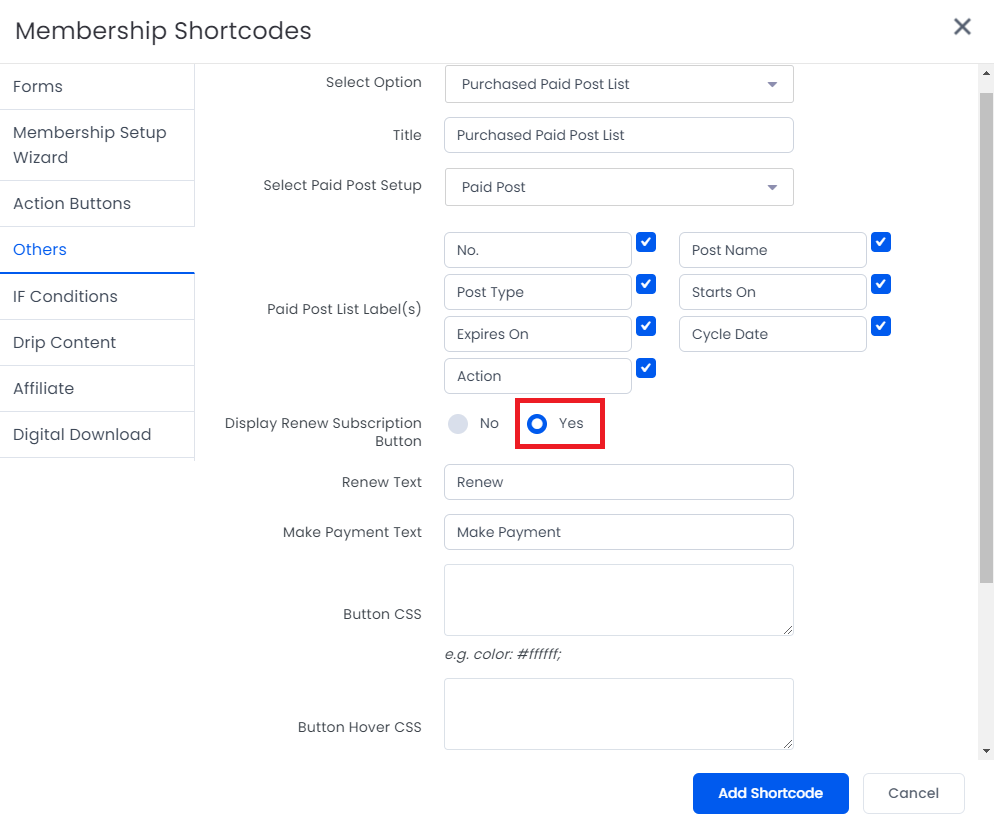
Additionally, to include a Renew Subscription button, set the Display Renew Subscription Button option to Yes.
This button will be shown up as per the post type the member has, for the subscrition/recurring posts after the fixed recurring cycles are over, and for the fixed duration posts the renew button will show up however the button will not be visible to Lifetime posts.
You can change Renew and Make Payment button text and also add button & button hover CSS.
Next up you have the option to Display Cancel Subsciption Button, you can select yes to display Cancel Subscription Button in front.
You can change button text, subscription cancelled message and also add button and button hover CSS.

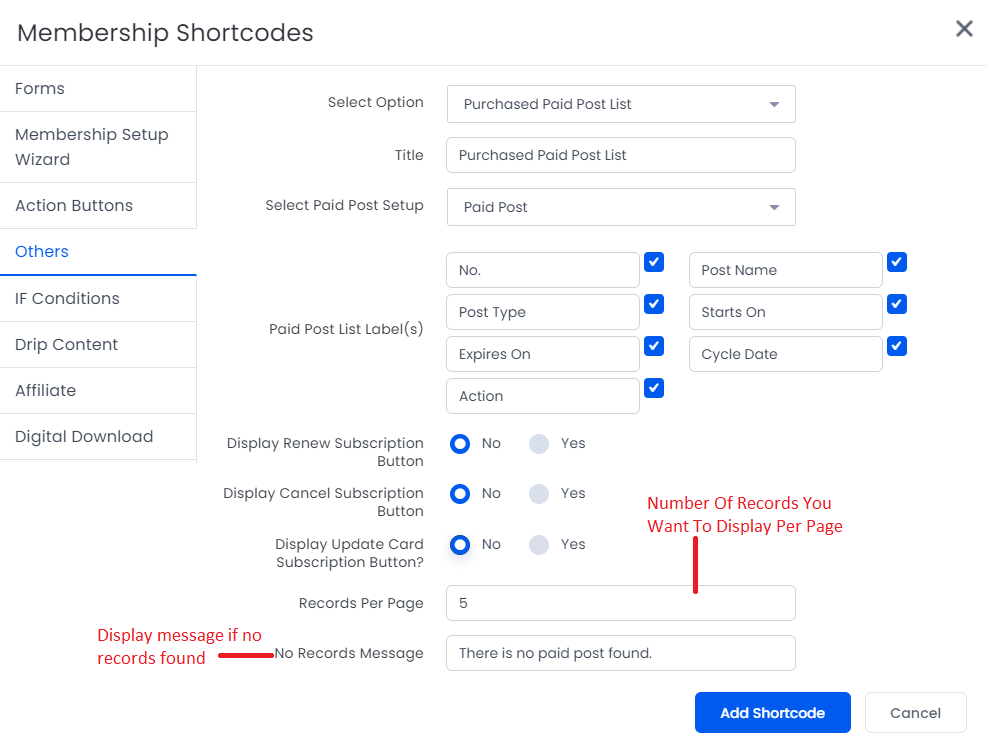
Moving forward you will be able to see option to enter number of records you want to display per page and message if no records found.
Shortcode Example
[arm_purchased_paid_post_list]Preview of the Purchased Paid Post List
Here is the screenshot reference for the Purchased Paid Post List.
| Possible Arguments: | ||
|---|---|---|
title |
Title of grid Default: Purchased Paid Post List | |
setup_id |
Paid Post Setup Wizard ID of which you want to inherit settings( except payment gateways selected) in setup that will load when user clicks on Renew/Make Payment button. | |
membership_label |
Purchased Paid Post – Grid Column Label | |
membership_value |
Purchased Paid Post – Grid Column Label Value | |
display_renew_button |
true/false Default: false | |
renew_text |
Renew Button Text Default: Renew | |
make_payment_text |
Make Payment Button Text Default: Make Payment | |
renew_css |
CSS for Renew Button | |
renew_hover_css |
CSS for Renew Button Hover | |
display_cancel_button |
true/false Default: false | |
cancel_text |
Cancel Button Text Default: Cancel | |
cancel_css |
CSS for Cancel Button Hover | |
cancel_hover_css |
CSS for Cancel Button Hover | |
cancel_message |
Message that will be displayed when user’s paid post is canceled successfully. | |
message_no_record |
Display Message if no records found. | |
per_page |
Number of Records per Page | |
post_pagination_label |
Change the label of pagination | |
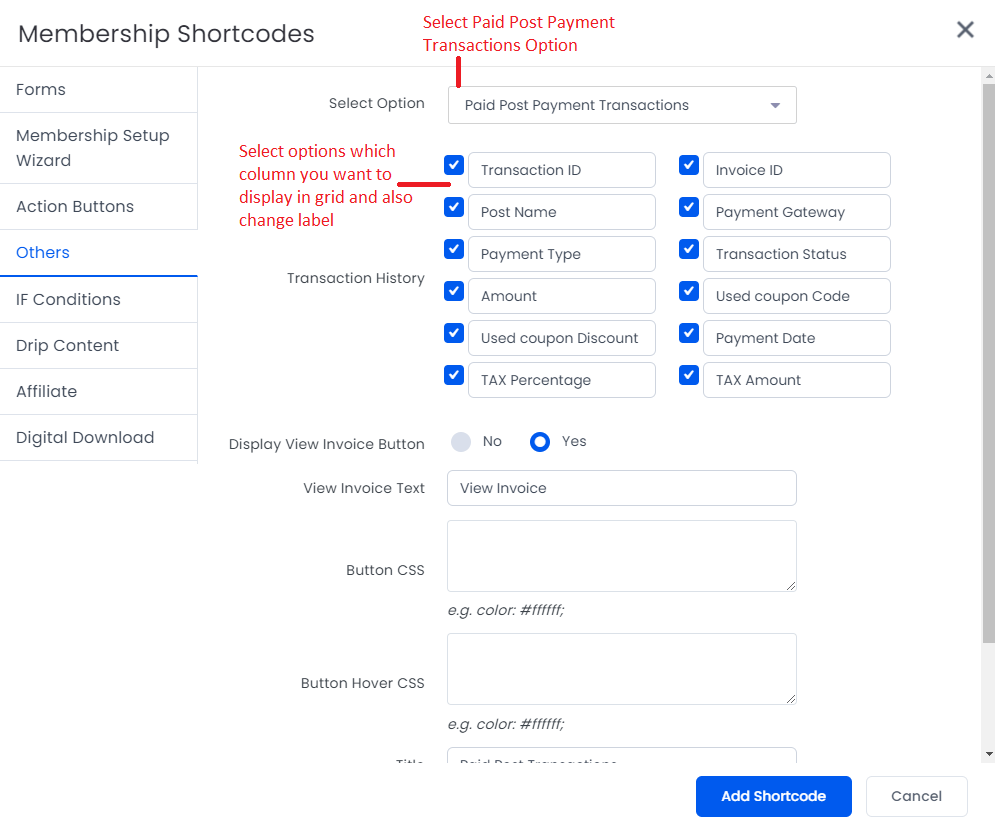
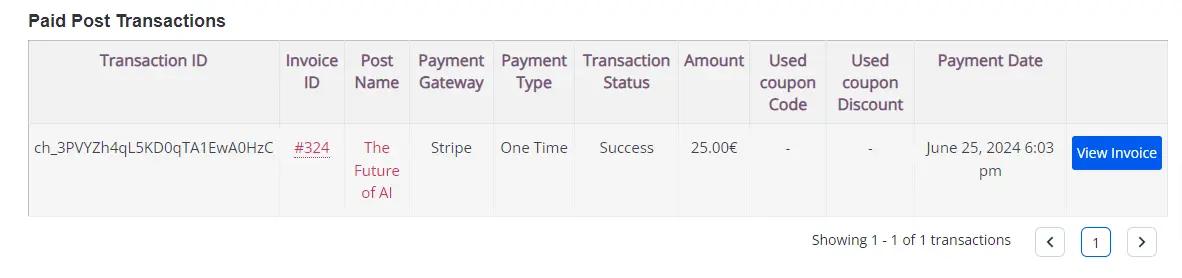
Paid Post Payment Transactions
This Pay Per Post Shortcode displays Paid Post Transaction Details for the logged-in member.
Firstly, at the popup of Membership Shortcode select the tab Others, after you can select Paid Post Payment Transactions option.
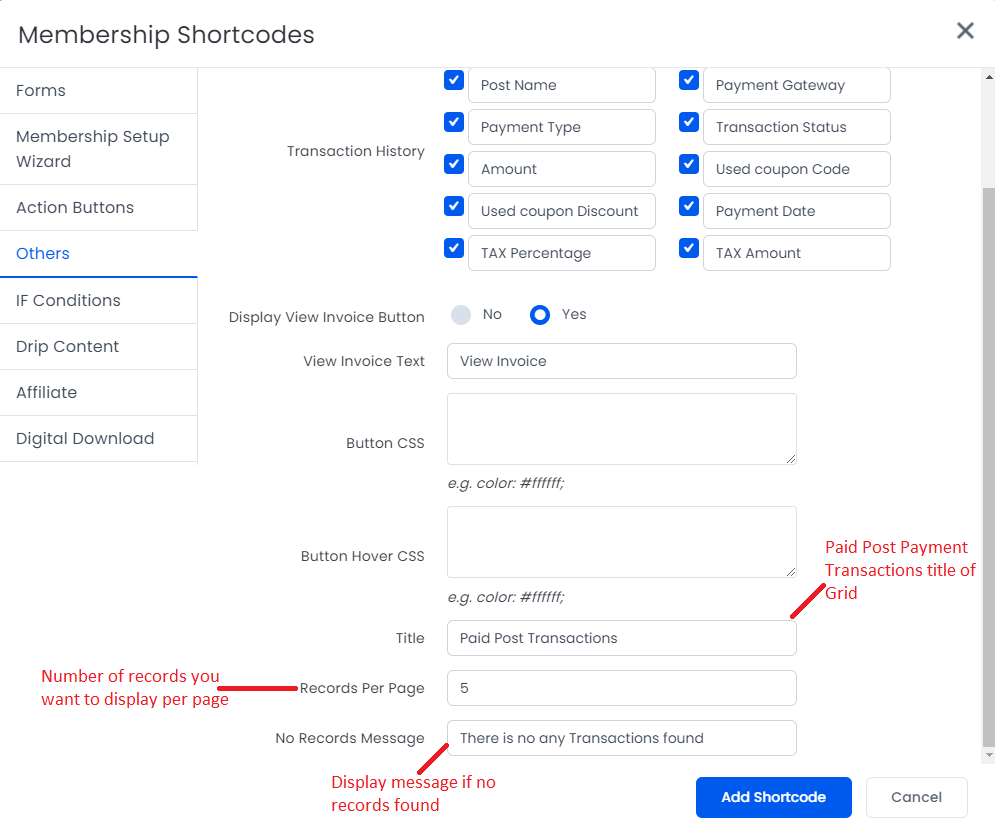
For the Transaction History you can select which column you want to display in grid and also change grid column label.
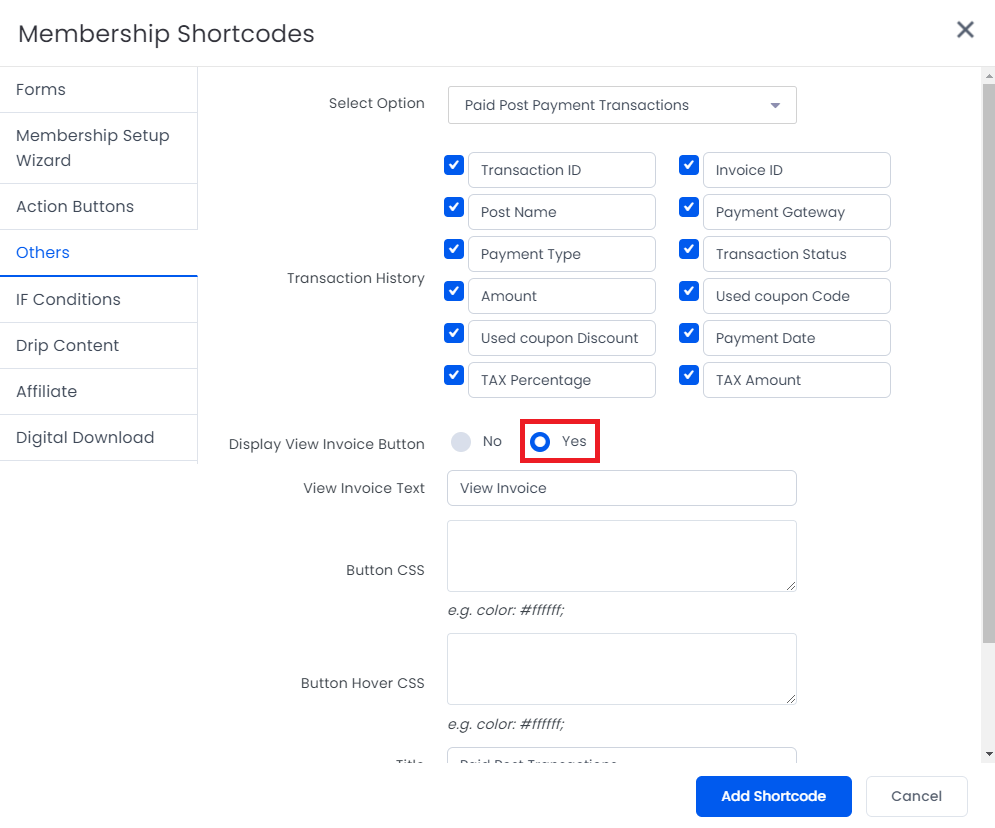
After which you will have an option to Display View Invoice Button, here select yes if you wish to display View Invoice Button at the front.
You can change View Invoice button text and also add button and button hover CSS.
Finally, you can enter Paid Post Payment Transactions title of grid, number of records you want to display per page and message if no records found.
Shortcode Example
[arm_paid_post_member_transaction]Preview of the Paid Post Transactions
| Possible Arguments: | ||
|---|---|---|
title |
Section Heading. | |
per_page |
Number of Records per Page | |
message_no_record |
Display Message if no records found. | |
label |
Paid Post Payment History – Grid Column Label | |
Value |
Paid Post Payment History – Grid Column Label Value | |
post_pagination_label |
Changes the label of the post pagination | |
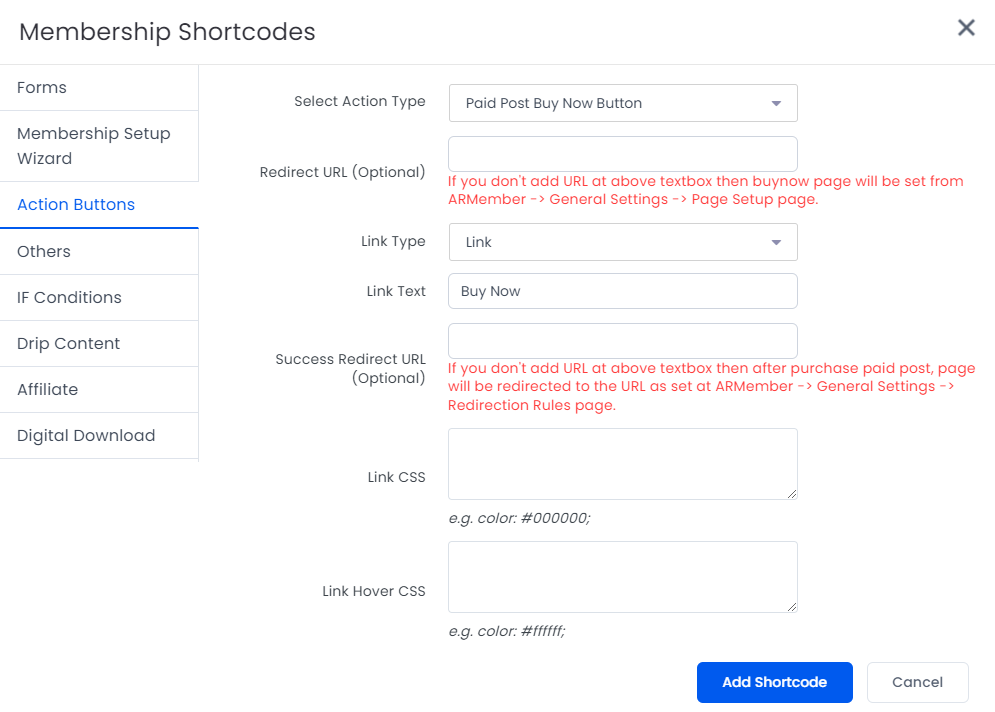
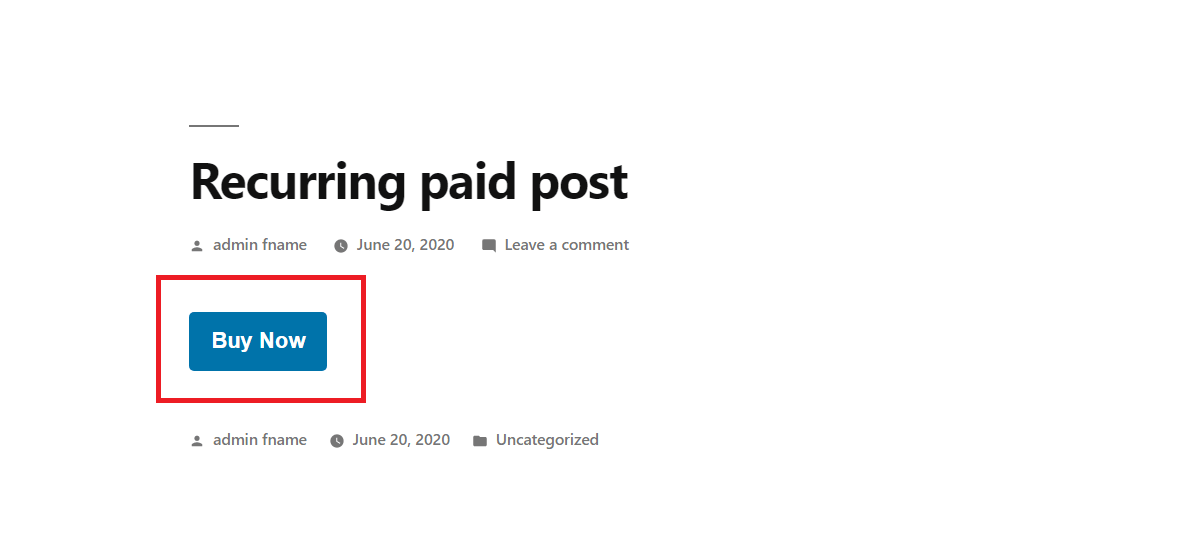
Buy Now Button
This shortcode displays the Buy Now Button in order to purchase the post.
In order to add this shortcode navigate to the Admin Panel ⇾ Pages ⇾ Membership Shortcode
Here, select the option Action Button and at the dropdown you will be able to check the option “Paid Post Buy Now Button”, kindly select this option.
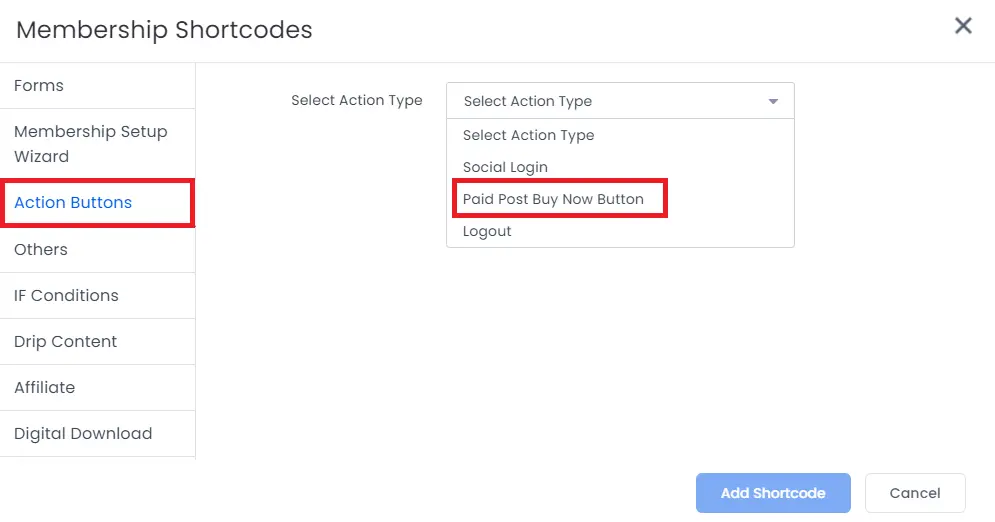
Now add the shortcode as per your requirements.
Preview of Buy Now Button
Shortcode Example
[arm_paid_post_buy_now]| Possible Arguments: | ||
|---|---|---|
redirect_url |
Paid post setup URL. | |
type |
Set the type link or button. | |
label |
Set the label of the button or link. | |
success_url |
After the purchase redirect URL. | |