


Overview of the ARMember Plugin’s General Option
After installation and activation of the plugin, check about the basic configuration of the ARMember plugin. Go to the General Settings menu from the admin interface. Here you will get a number of tabs such as General Options, Payment Gateways, Page Setup, etc. Let’s check each option in detail:
Hide Admin Bar
This option is providing you with a choice of whether you want to show an admin bar for non-admin users or not. If you have enabled this option, then the admin bar will be hidden from all users except those who have either an ‘Administrator’ role OR selected roles in the ‘Exclude role..” select box.

Rename wp-admin Folder
Here you have the facility to rename the wp-admin folder to prevent hacking and security issues. You need to be careful while changing this option.
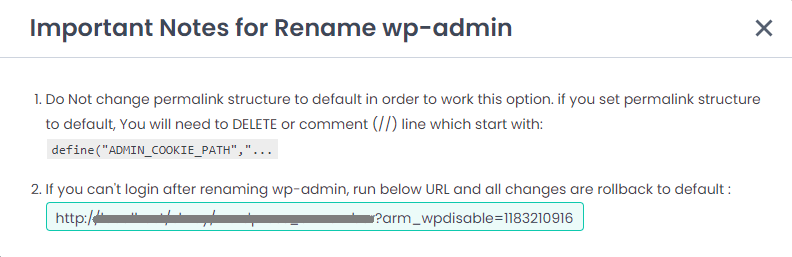
When you enable this option, a popup with important notices will open as shown in the below image. Please read all the notices before proceeding. You will see one URL in this popup. Do not forget to save that URL. It will help you to roll back this change to default in critical situations. When you will run this URL, the new wp-admin path will revert to the default path /wp-admin.
After enabling the switch, you will have another option for “New wp-admin Path” where you are able to write new path or name for wp-admin (e.g. panel, CP).
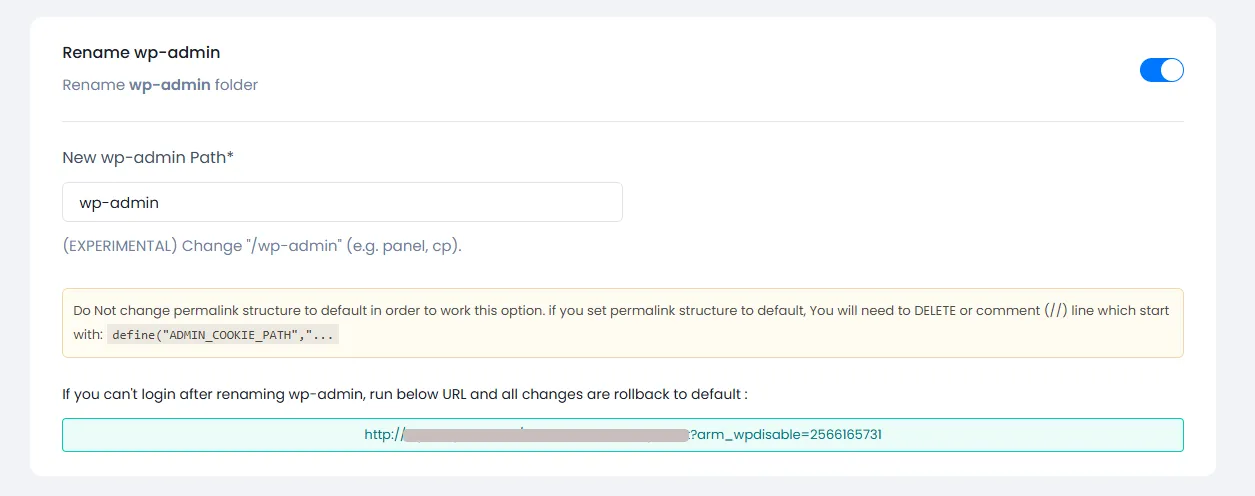
Before you enable this option, you should check your wp-config.php file and .htaccess file write permission. If both files will have written permission, then you don’t need to do an extra effort, just enable this option, change the wp-admin name if you want and save the settings. You will be logged out automatically. Now you website admin panel can be accessed by only new name or https://yoursiteurl.com/wp-login.php
But, if any of the two files will not have write permission then in such case when you rename wp-admin and try to save settings, then a popup will open containing file change instructions as shown in below.
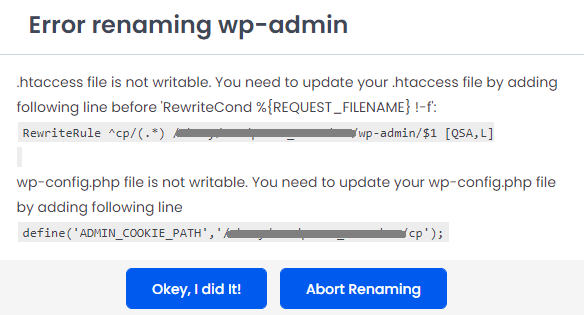
You must need to follow each instruction strictly and only then after clicking the ‘OK, I did it’ button. After this, you will be logged out. If you press this button without doing changes in files, then you will not be able to log in again. If you press the ‘Abort Renaming’ button, then the ‘Rename wp-admin’ settings will not be saved, but all other settings will be saved.
If you have renamed wp-admin from other plugins, this setting will remain disabled. Also, it will not work with Multisite.
Hide wp-login.php Page
Another option is provided if you wish to hide the default WordPress wp-login.php page for all users. If you have enabled this option, WordPress default login page will be hidden from all users and all users will be redirected to the front end page which is mapped with the login page under ARMember ⇾ General Settings ⇾ Page Setup

Hide Register Link
This option will Hide/Remove registration link from wp-login.php page.

Disable ARMember styling on wp-login page
When this option is enabled, the default WordPress wp-login.php page design will come instead of the ARMember wp-login.php design.

Auto Lock Shared Account
When you turn ON this switch, it will clear all sessions except the current session of the logged-in user from the front end. Please note that this functionality will not apply to previously logged-in user from now.

Enable Gravatars
Here you have a switch to enable or disable feature of Gravatar. If this feature is enabled, the plugin will handle profile pictures for all members.
If this is enabled then you will be able to see profile pictures of members on the manage members page as well as the individual member details page. Even also at the front-end at members directory & profile pages, profile pictures of all members will be shown to users.
We also provide BuddyPress and Buddyboss support.
![]()
Allow image cropping
When you turn ON this switch, in the front end when a user uploads his avatar or profile cover photo, he will get the facility to crop the picture. The skip option is available on the crop box. So if you have enabled crop from here and any user wants to skip crop, then he can click on skip.

Enable Spam Protection
ARMember does provide a strong mechanism to set spam detection, It’s to prevent your site from unnecessary spam entries. You can enable this option if you want to stop the spam entries. If this option is not enabled then anybody can register at your site. For more information on Spam Protection you can click here.

New User Approval

You are able to manage the approval of new registered users here. There are three ways provided to approve new users which are as follows

How to Setup Various Methods of New User Approval for Registering a Member
You are able to manage the approval of new registered users here. There are three ways provided to approve new
users which are as follows,
-
Automatic approve
You will find, by default this option is selected, which follows the default WordPress registration process where no need to approve users manually, they will be approved by default.
Process where no need to approve users manually, they will be approved by default.
-
Email verified approve
If this option is selected, then all new users who will register on the website will have
Pendingstatus by default and will get an email withactivation linkand they must have to go through instructions mentioned in an email to complete registration. After clicking on the activation link, the user will be active. -
Manual approve by admin
By this method, When a new user registers for the site, the user will get created with
Pendingstatus.At the same time Administrator will get an email for new user registration. Then, the Administrator will have the rights whether to approve users for the site or not.
Only Active users will be allowed to log in to the site. Users with Pending, Inactive, or Terminated status will not be able to log in to the site.
Each user that exists before the plugin has been activated will be treated as an approved ( Active ) user .
Default Currency
Here you can select payment currency out of available currencies for payment processes.
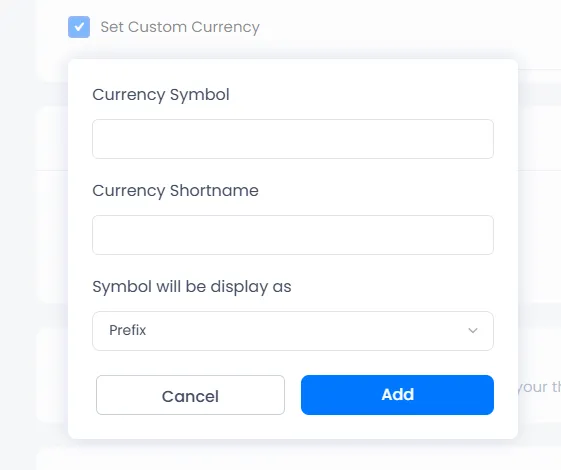
ARMember provides you the facility to add your custom currency by clicking on Set Custom Currency. When one click on a popup will appear as shown in the below provided image, and there you can add the symbol of the custom currency you want to add. Further you have to add the short name for the currency for ex. INR, USD according to this, and then you can set a preference as to do you want to add the currency symbol at the Prefix or at the Suffix.
Number of decimals
From here, you will be able to select the numbers of decimals that you want to display after the separator with the main amount.

Profile Permalink Base
Profile Permalink Base section will only available if you activate Social Features from Add-ons.
You can select what slug appears in the URL while checking user’s profiles. You can select either username or user ID.
Load JS & CSS In All Pages
To include ARMember related JS and CSS in your whole site, is totally depend on you. We are including js/css only in those pages/posts which are having related functionality of ARMember. But, if you want JS and CSS universally activated in your site, then you may go for this option.
Badge icon size
The dimensions for badge image/icon will be set here and this will be applied to member badges in profile template or member directory template.
Email Settings
From / Reply to Name
Here you can set From / Reply to Name to be displayed in email notifications. By default, you will find your site name here.
From / Reply to Email
Here you can set From / Reply to Email address from which email notifications will be sent. By default, you will find the administrator’s email ID here.
Admin email
This field will have the value of the site admin email address set in default WordPress General settings. You can add multiple email addresses with comma separated email ids. So, all those email holders will get admin related email notifications.
Email Notification
You have four options here to select how your system supports sending emails to notify admin/users.
Select WordPress Server to send email using the default WordPress functionality, the other two options are SMTP Server and PHP Mailer.
-
WordPress ServerBy default WordPress Server is selected here. This option uses wordpress default functionality to send email. It will send emails using WP mail wordpress function.
-
SMTP ServerSelect to send emails using secure mail transfer protocol. If you choose SMTP servers as a mailer, you would be prompted to add the SMTP server’s configuration settings. Here we see how to configure SMTP mail service for Gmail, but you can set it up for any other outgoing service that supports SMTP for a mail client.
- Authentication – Check to Enable SMTP authentication
- Mail Server – smtp.exampleserver.com
- Port – Usually 465 for SSL and 587 for TLS. So, you need to add port as per your SMTP configuration
- Login Name – Email address of your SMTP Server
- Password – Password of your SMTP Server
- Encryption – SSL, TLS or None
Test SMTP After configuring SMTP Setting, send test mail by providing To (email address), Message (content) of email. and then click on
Send test mailbutton. -
PHP MailerThese Settings will allow you to send the email notification with the
PHP MailerLibrary. -
Google/GmailThis settings will allow you to send email using Gmail SMTP configuration. To Configure Google/Gmail server please refer
Gmail SMTP configurationdocumentation Click here
Sales Tax

How to Integrate Invoice and Tax Inbuilt Addon with the ARMember Plugin
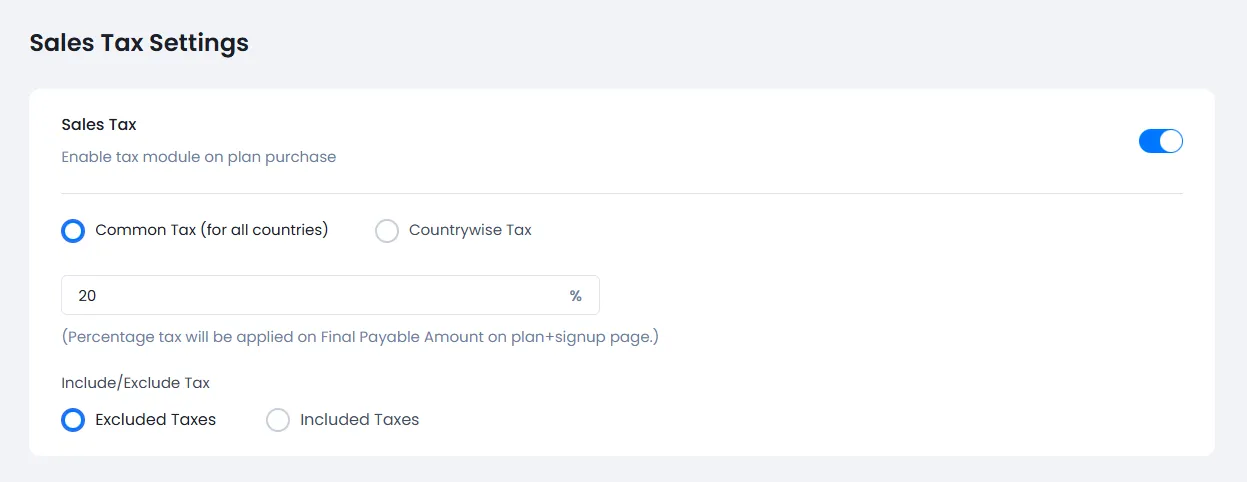
To set the sales to be applied to the plan, simply navigate to ARMember ⇾ General Settings ⇾ General Options ⇾ Sales Tax Settings
If this switch is enabled, then you can set percentage sales tax that will be applied on final payable amount on Configure Plan + Signup Page. If coupon is applied on plan amount, then tax will be applied on (final payable amount = plan amount-coupon amount). If the membership plan is of recurring type, then tax will be applied on every recurrence.
By default Common Tax option is selected which means common sales tax will be applied for all countries. You can also select country wise tax.
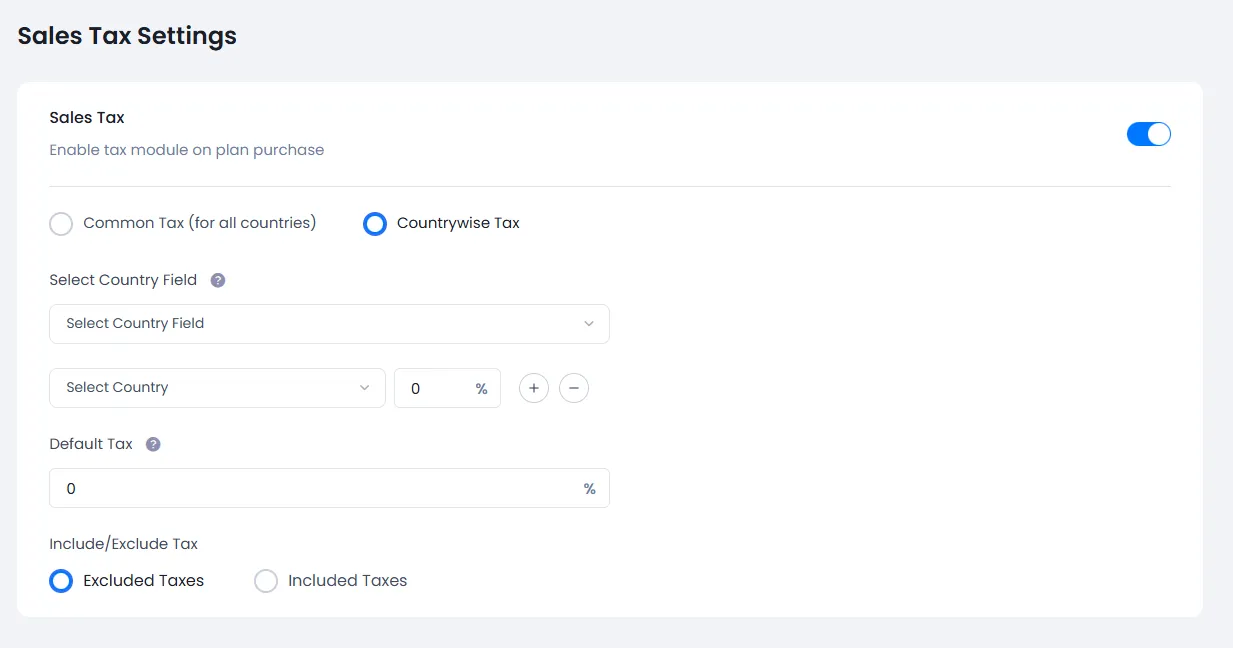
By selecting Country wise Tax Option, you can set different percentages of tax for different countries.
Here Select Country Field have list of Dropdown or Radio type fields only from signup form. So if you are trying to set the Country Wise tax without creating a field for the Country at the Signup form then it will not be possible to set as, the ARMember will verify the Country selected by the member and then accordingly apply the tax as set in the settings for that particular country.
Field Default Tax indicates the percentage of tax of other countries apart from the country which is listed above.
Include / Exclude Tax

How to Integrate Tax Inbuilt Addon with the ARMember Pro Plugin (Latest)
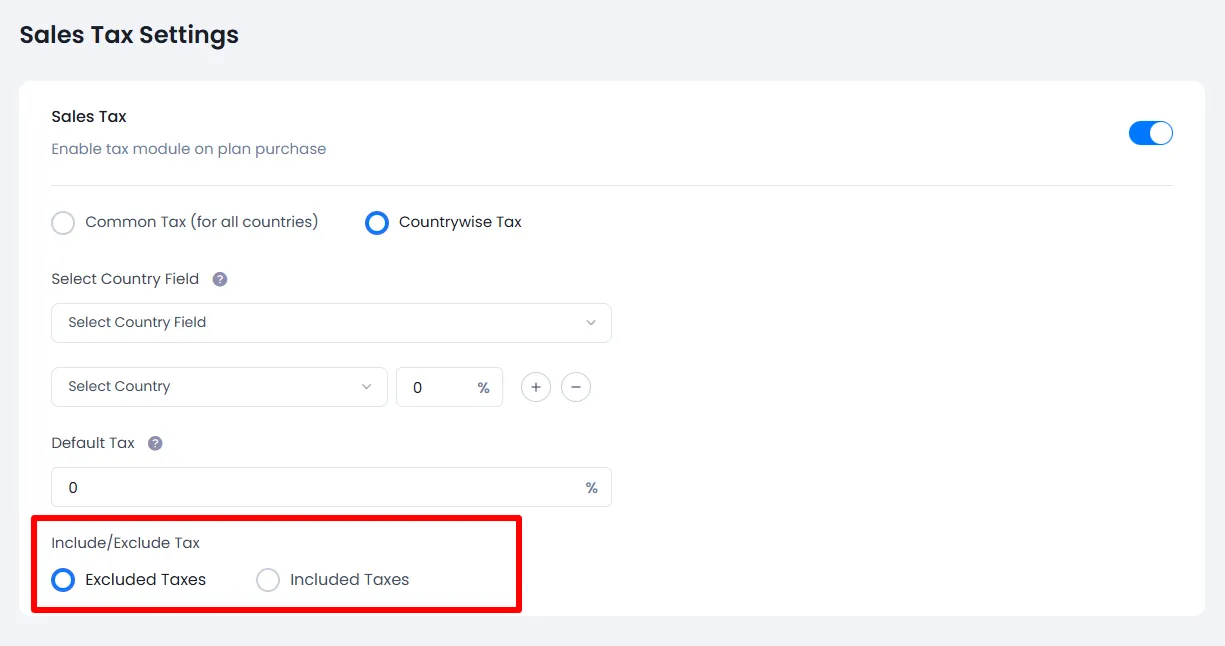
ARMember does provide two options to set the tax
- Included Tax
- Excluded Tax
-
Included Tax
By selecting the
Included Taxoption, you will be able to set the tax which will be included in the final amount payable by the user.For example, if you are having a subscription plan of $700 and the tax is set to 10%, then the final payable amount will be $700 (including 10% tax i.e, $63.64).
Including Tax amount will be calculated as per the given formula:
tax_amount = price - ( price / ( ( tax_rate / 100 ) + 1 ) ) -
Excluded Tax
By selecting the
Excluded Taxoption, tax will be calculated excluding the final amount.For example, If the final amount is $700 and the if tax to add is 10%, then after adding the tax, the new
Total Payable Amountwill be $770 (with 10% tax).Excluding Tax amount will be calculated as per the given formula:
tax_amount = price * ( tax_rate / 100 )
Any change in sales tax rate will not affect already started subscriptions.
If you want to add tax percentage and total amount applied on the final payable amount in the payment summary, then you can add [TAX_AMOUNT] and [TAX_PERCENTAGE] shortcode in the payment summary from the ‘Configure Plan + Sign up page’ settings.
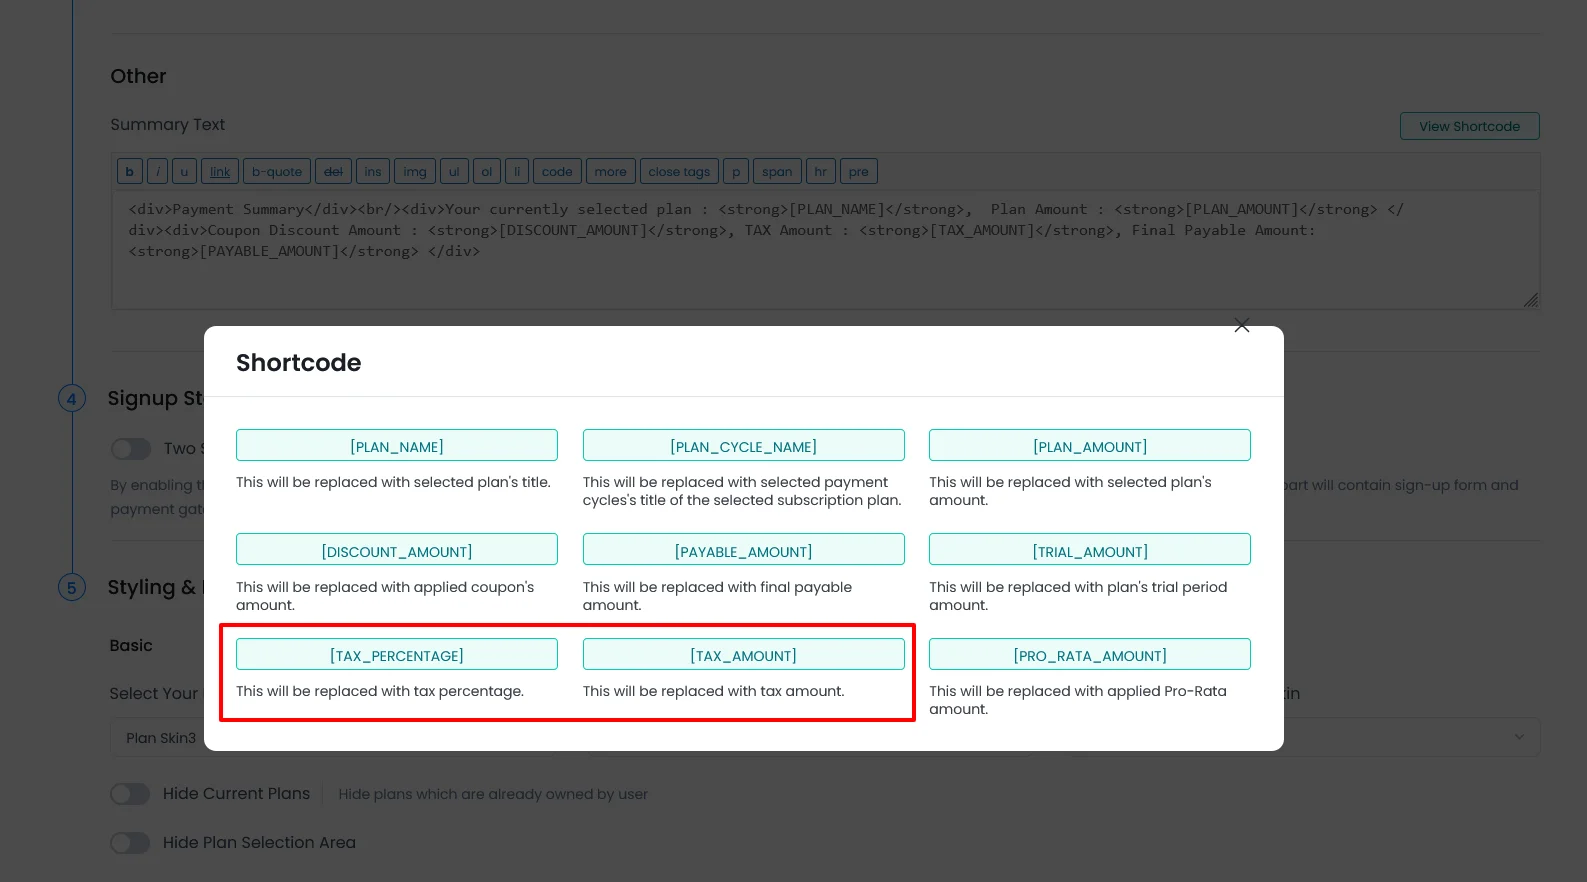
You can add tax in email notifications and in invoices too. Template shortcodes are available for both.
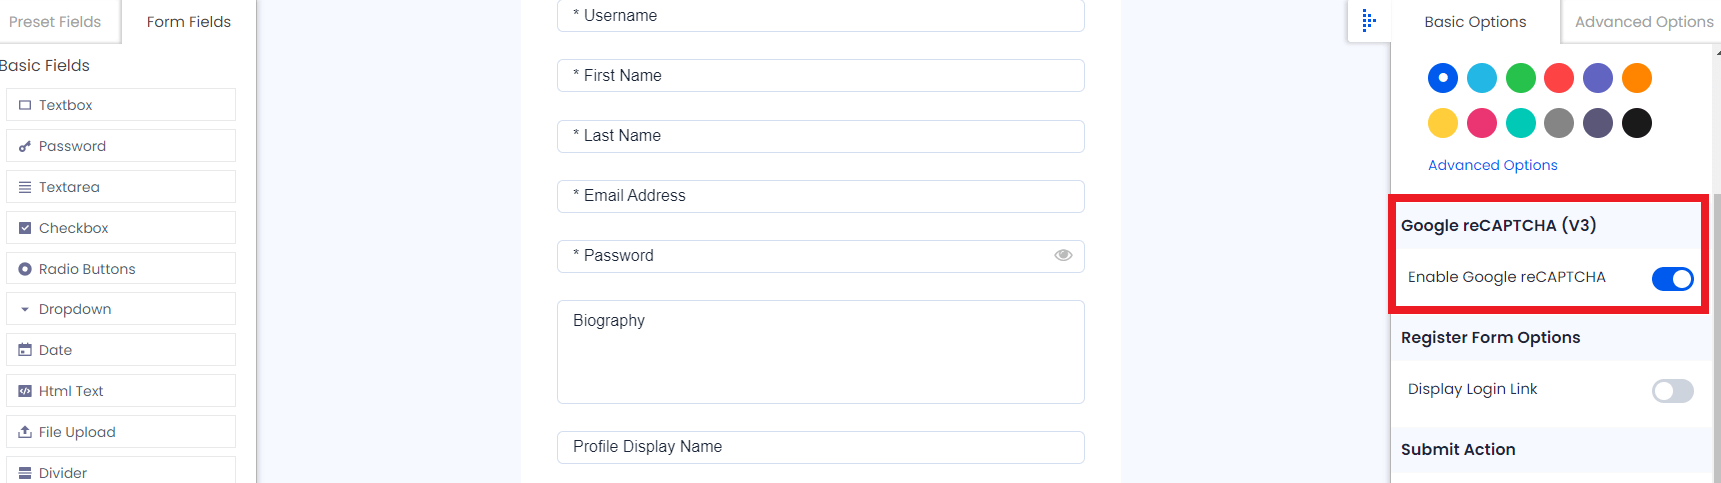
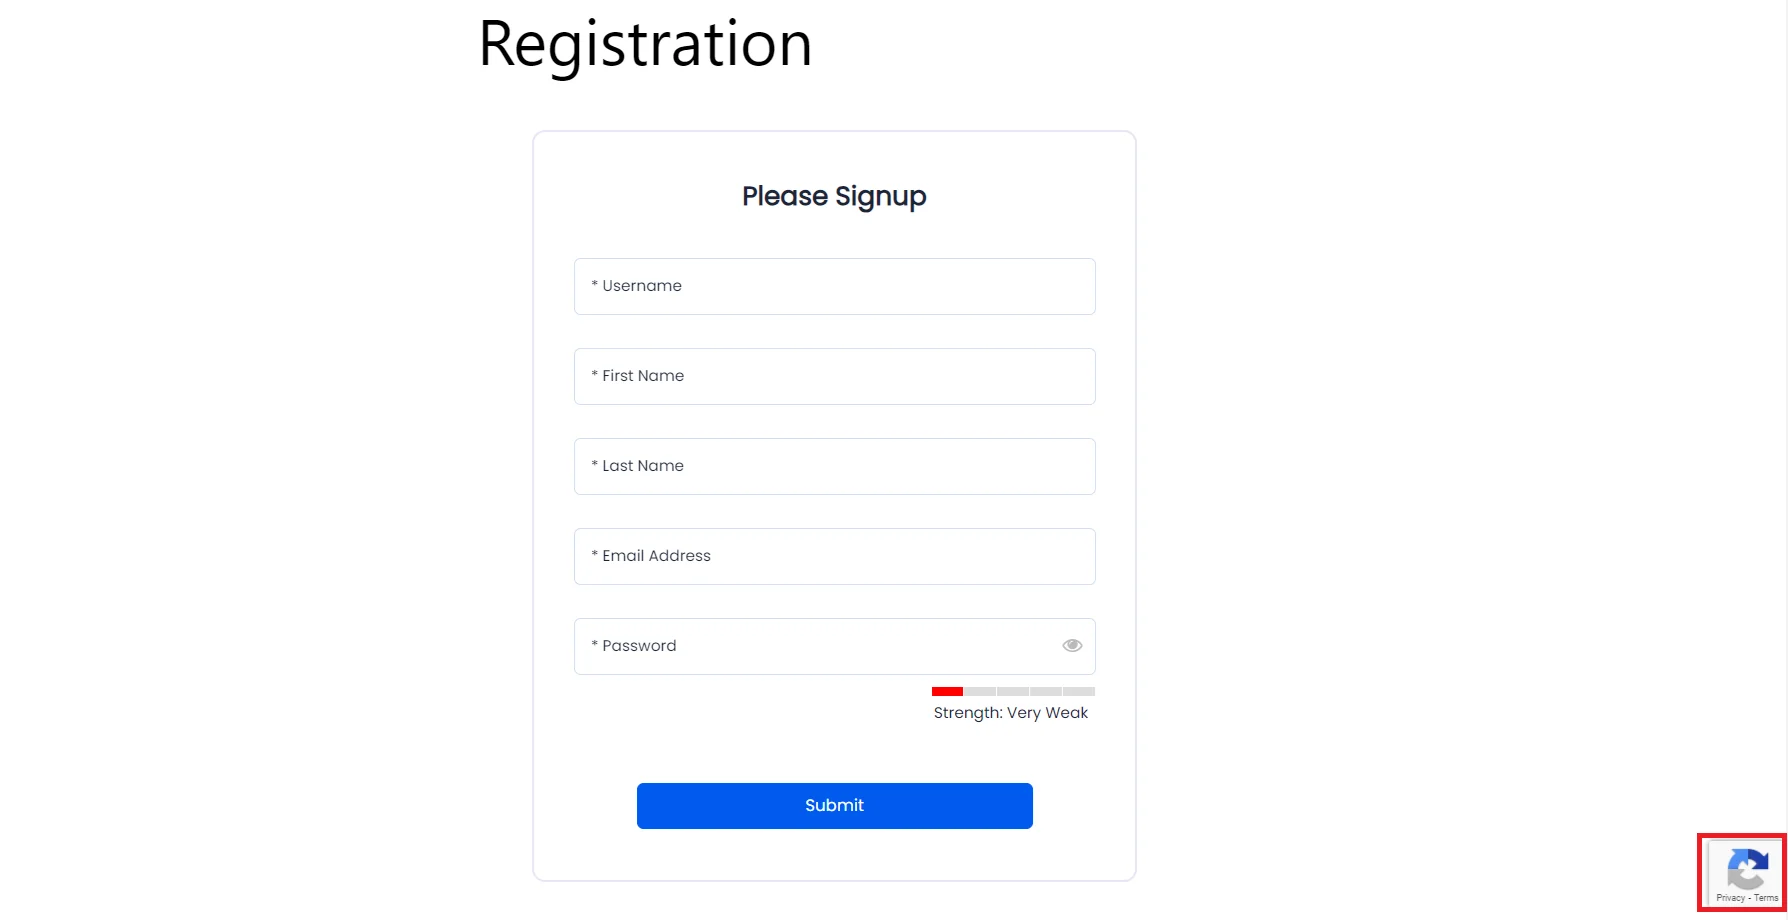
Google reCAPTCHA(V3) Configuration
ARMembers provides Google ReCaptcha(V3) to protect your site from spam and abuse with the ARMembers form.
You can add Google reCAPTCHA V3 Site Key, Private Key, reCAPTCHA theme, and reCAPTCHA language save.

How Google reCAPTCHA Works?
In the Google reCAPTCHA configuration section you can enter the site key and private key to make your reCAPTCHA field work in the form. you can create free reCAPTCHA API key.
Now your users can use Google reCAPTCHA.
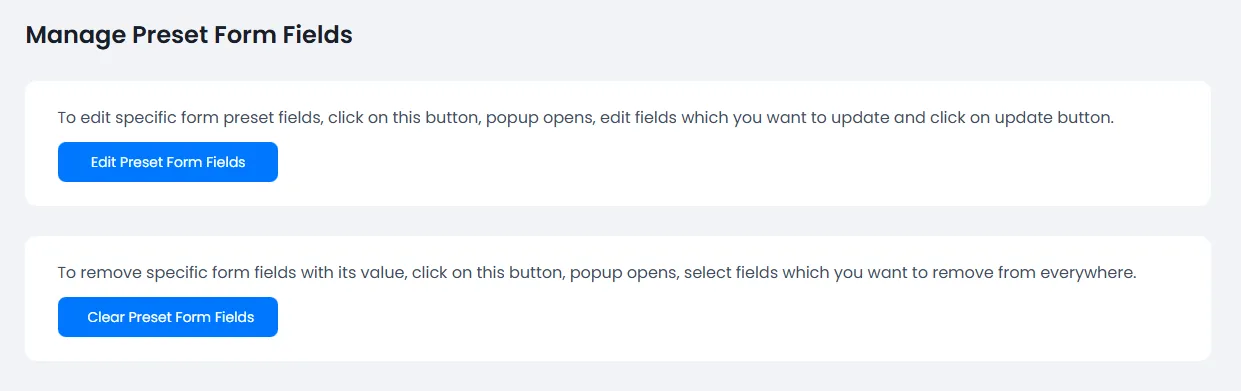
Manage Preset Form Fields
Once you add a new field in the signup form and save the form, then those new fields having new ‘meta_keys’ will be added to the list of ‘Preset Fields’. So you can use these fields directly in other forms too.
But once the field is added to the Preset Field list, any change in that field will not affect that preset field. These preset fields are displayed on Add/Edit Member page.
- Edit Preset Form Fields Button
Suppose you have added a dropdown labelled “Gender” in the signup form and the “Gender” field has two values ‘Male and ‘Female’. Now you have saved the form. So “Gender” field will be added to the Preset field list. Now suppose you want to add a third option in this dropdown. let’s say ‘Transgender’. So you will edit the form and add a new option for this dropdown and save the form. But this option is not added in the Preset field “Gender”. So on Add Member page, you will see only two options ‘Male’ and ‘Female’.
So if you want to update preset fields, then you need to click on
Edit Preset Form Fieldsbutton. A popup will open containing all Preset Fields where you can change label and values of all preset fields. - Clear Preset Form Fields
To remove specific form fields with its value, click on
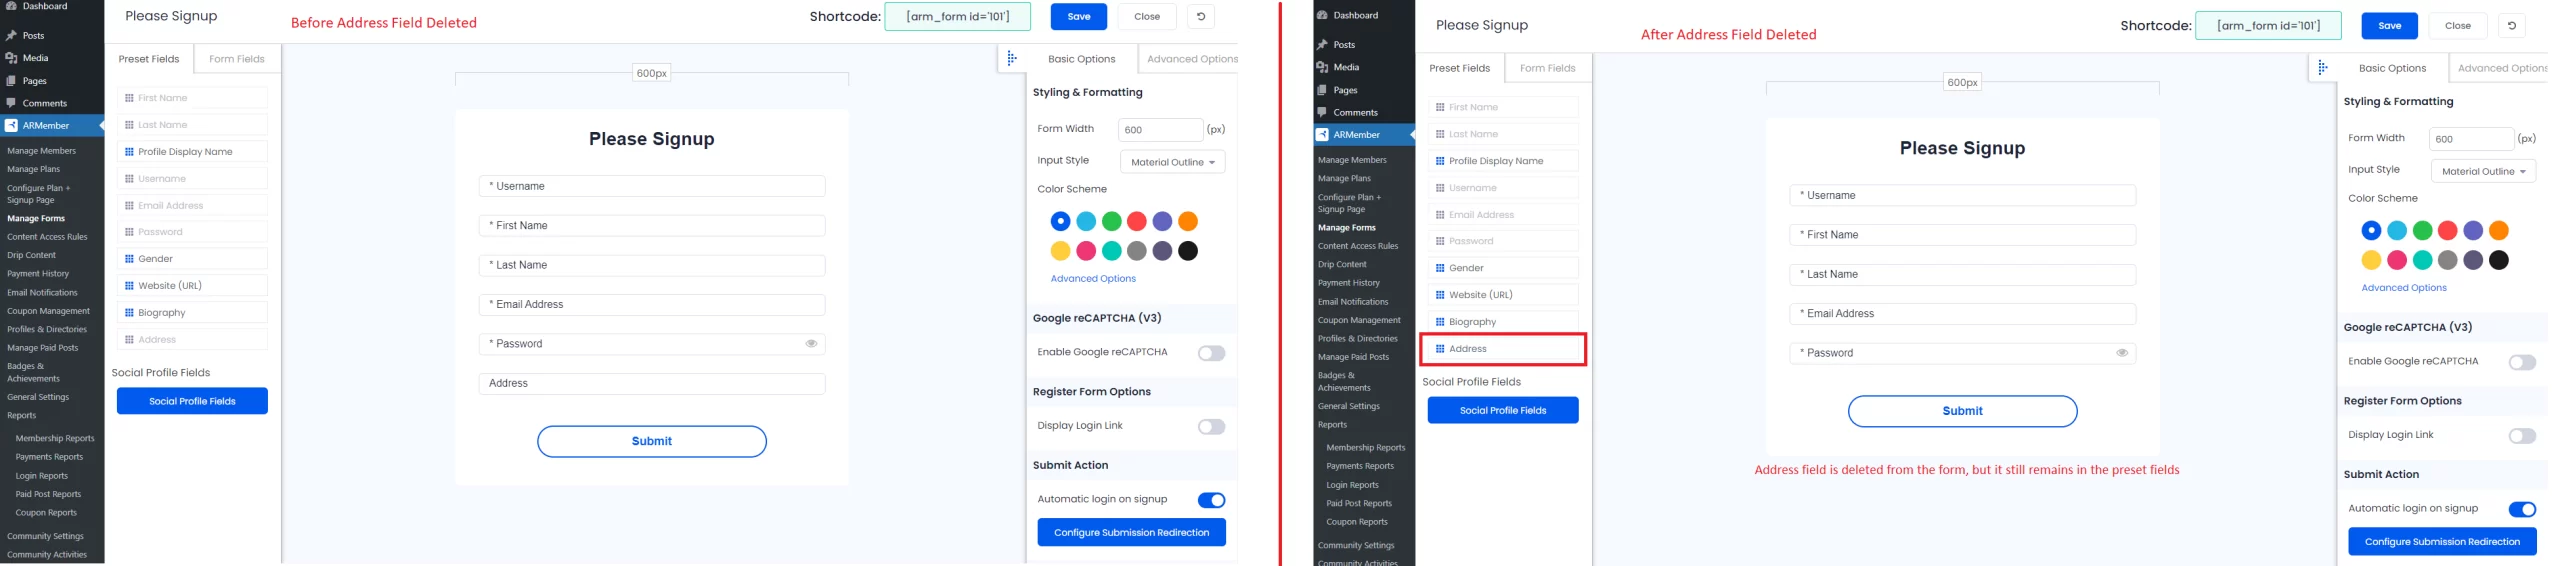
Clear Preset Form Fieldsbutton, a popup opens, select fields which you want to remove from everywhere.All the fields you will add in any of sign up forms will be automatically added in the list of “Preset Fields” section of form builder. Sometimes it happens that some fields becomes unnecessary so you will remove that fields from sign up form, but those fields will still remain as it is in “Preset Fields” section even if they were deleted, so you can add them in the form from Preset Field, if again needed in future.
But sometimes you have added fields for testing purpose and then deleted those fields from forms. If those fields will not be deleted from Preset Fields, then Preset Field list will be longer and longer. Also, those deleted fields will be displayed in “Edit Member” page of administrator area. So you must need some way to clear these unused fields from everywhere.
For these, ARMember Provides
Clear From Fieldsetting inGeneral Settings.
Suppose you have added a text box of “Address” in sign up form. So it will be also added in Preset Fields section. Now if you have deleted address field for any reason. But it still appears in “Preset Fields” section.

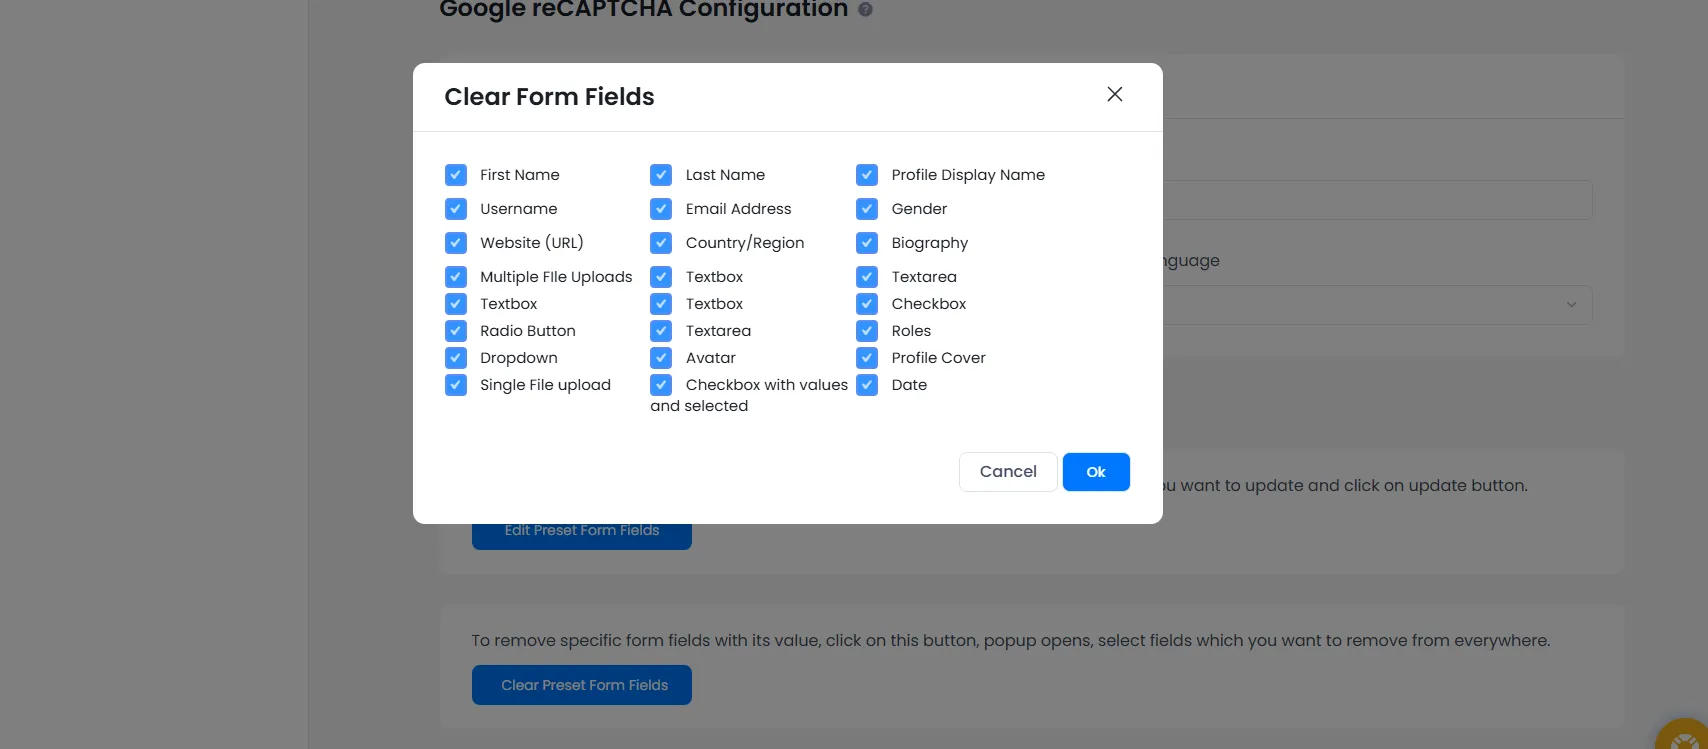
Now to remove “Address” field from “Preset Field” section, use “Clear Form Field” button. Click on it, then popup will open as shown below.

From popup, you can select all the fields that you want to delete from everywhere. You will see some checkboxes remain disabled as they are default fields and cannot be deleted from the sign-up form. Checkboxes for other fields will be enabled only if that fields were deleted from sign up form first.
If data entry exists for any of those fields, then you will see “(Entry Exist)” in red letter beside that field checkbox. Now Select all the fields, that you want to delete from everywhere and click OK button. That’s it. All selected unused fields will be removed from everywhere.

Email notification scheduler settings

You can add the hours as per your site requirements for example if you have selected 1 Hour then on every hour the cron will run and check that whether the member’s membership plan is in renewable or if the member’s plan is expired then the system will suspend the member accordingly.
Also ARMember does provide a facility to check the cron logs, you can enable the logs received at ARMember ⇾ Debug Log Settings ⇾ Cron Debug Log Settings. For more information on the debug log click here.
Pro-Rata Configuration
Here you can setup the configuration for the pro-ration method and also you can enable the reset billing period option. Also note that this option will be available only when you have the activated the addon Pro-rata Addon. For more informaion on this you can click here.
Supported Date Format
ARMember does support date format change as set on the WordPress admin panel settings page.
Below given date format supported by date picker. If the format is not supported then the m/d/Y format will be considered by default.
- m/d/Y (Default Date Format)
- Y-m-d
- Y m d
- F j, Y