Important Note: Conversion Tracking add-on will only work if ARMember plugin is installed with version 6.8 or higher.
You can find this plugin from ARMember -> Add-ons. When this addon get activated to your site, you will get an additional option in ARMember -> General Settings -> General Options -> Conversion Tracking Configuration.
Do settings by filling required details to enable this Addon for users.
Installation & Activation
You can install plugin in following two ways. and ARMember – ARMember – Conversion Tracking Addon plugin requires ARMember Plugin (6.8 or higher) installed and active.
New install via FTP
- Download the plugin and extract it. You will find a directory armemberconversiontracking.
- In your WordPress installation directory, upload armemberconversiontracking to
wp-content/plugins/ - Activate the
ARMember - Conversion Tracking Addonplugin through thePluginsmenu from WordPress admin panel.
New install via the WordPress Uploader
- Download the plugin.
- Log in to your WordPress admin panel
- Go to
Plugins->Add New->Upload - Click on “choose file” and browse the download package. When the plugin uploads successfully, click on
Activate Plugin.
Steps to Setup Conversion Tracking For Your Website
Let’s setup ARMember – Conversion Tracking for your website :
-
When plugin activated then Conversion Tracking Configuration section will be display in
ARMember->General Settings->General Options.Please see below screen.
-
After activating Conversion Tracking , First of all need to enter Google Analytics ID and API Secret and save settings.
If you do not have Google Analytics Google Analytics ID and API Secret then create it.
For obtain Google Analytics ID and API Secret click here and follow below step-by-step guide.
Events That You Can Track Through ARMember – Conversion Tracking Addon
-
New Member register – Event track On New member register with ARMember.
-
Purchase Form Load – Event track On ARMember membership Purchase Form load
-
View item – Event track On ARMember Membership Purchase plan form when selecting membership plan.
-
Begin Checkout – Event track On ARMember membership Purchase Form Submission.
-
Purchase – Event track On ARMember membership Plan purchase successfully.
This will also track the Paid Posts, Membership Gifts, and Online Courses purchases.
-
Cancel Subscription – Event track On ARMember membership subscription cancel successfully.
-
Refund – Event track On ARMember membership refund successfully.
-
Member Delete – Event track On member delete with ARMember.
-
Expire Membership – Event track On ARMember membership subscription plan expired.
-
How to Create GA-4 Account & Obtain Google Analytics ID and API Secret?
-
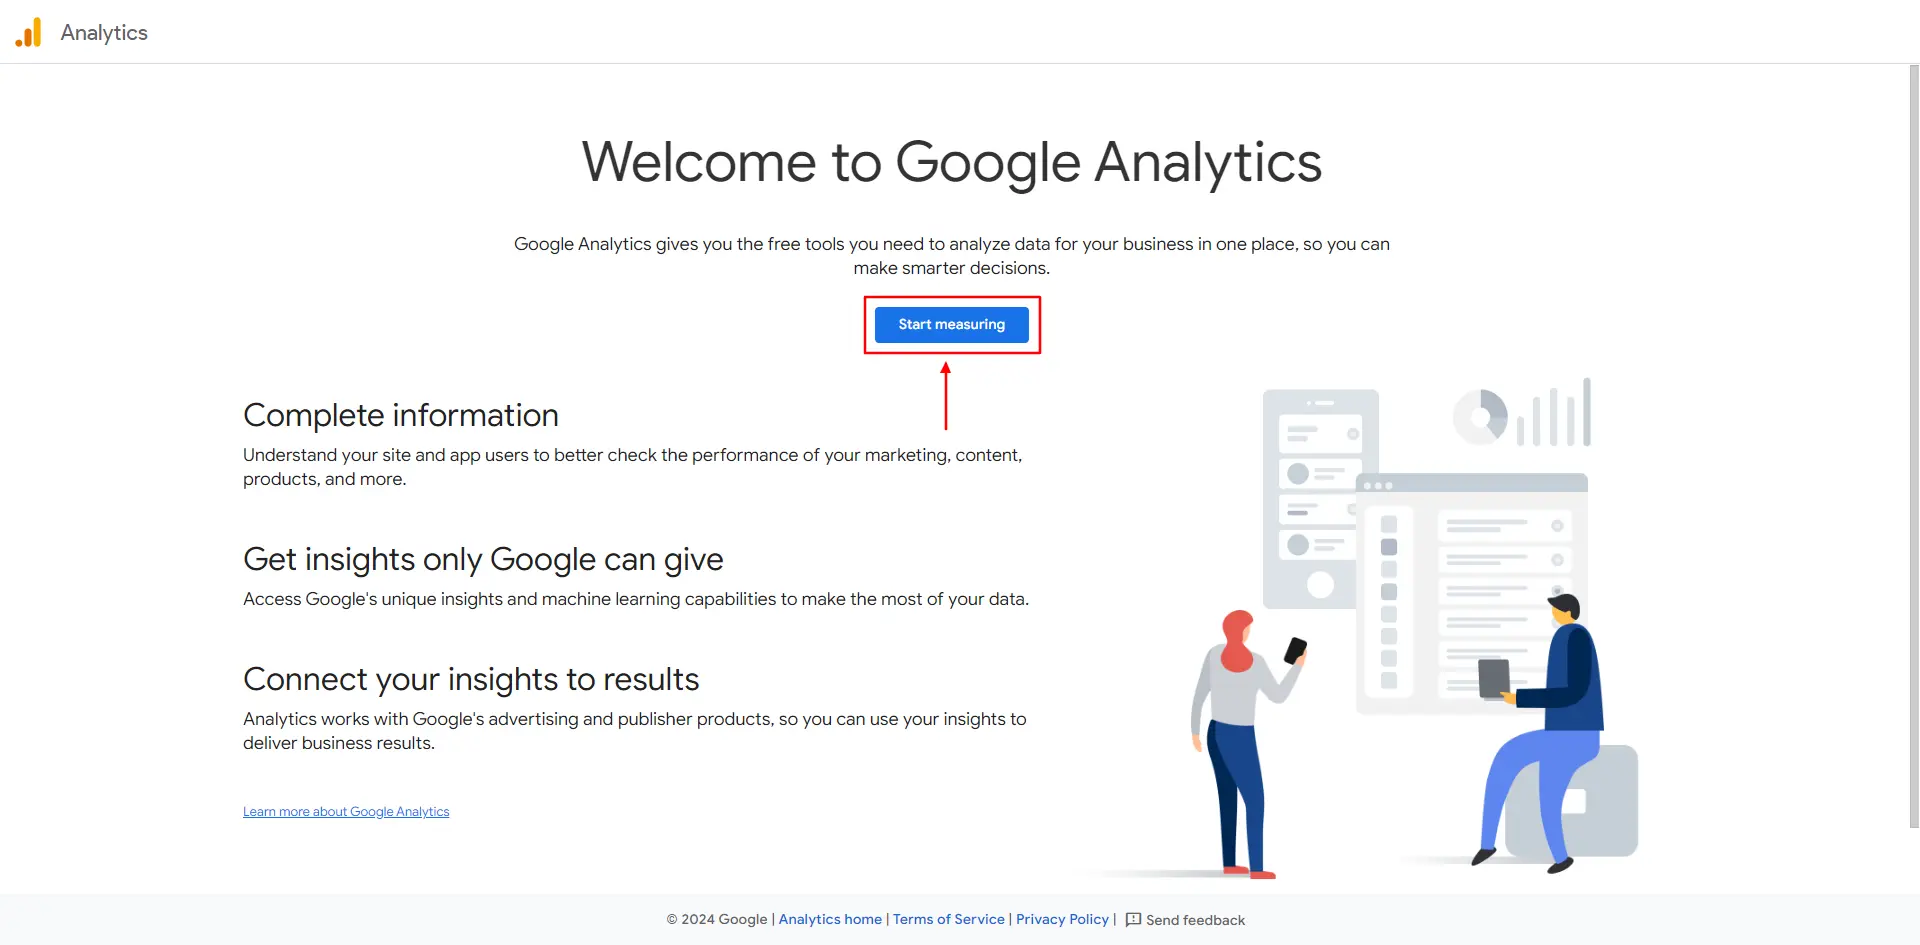
After navigate to Google Analytics website First, click on the “Start Measuring” button.
-
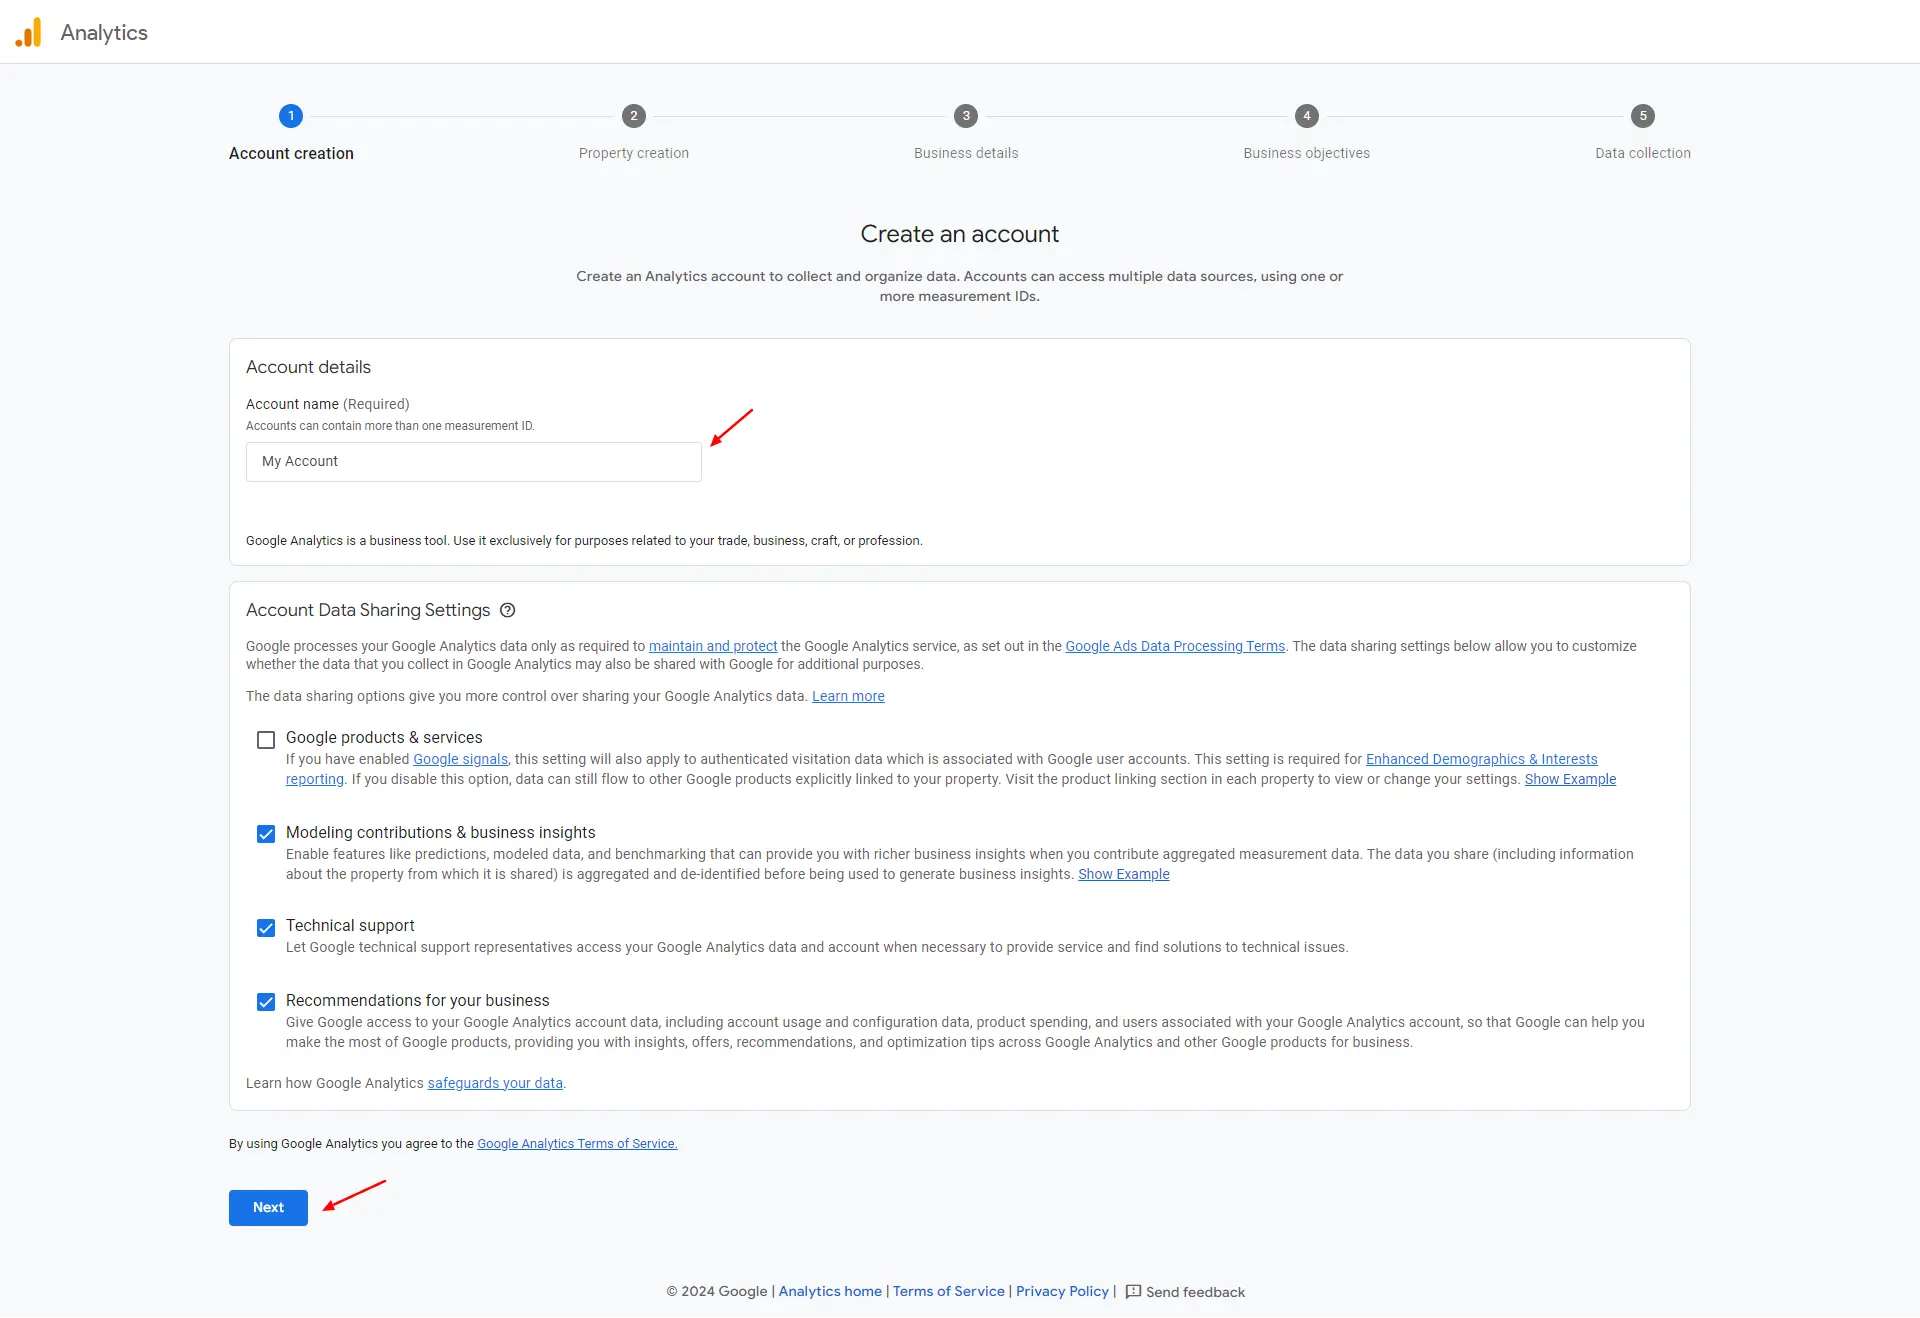
Now provide the account name in the given text field and click on the “Next” button.
-
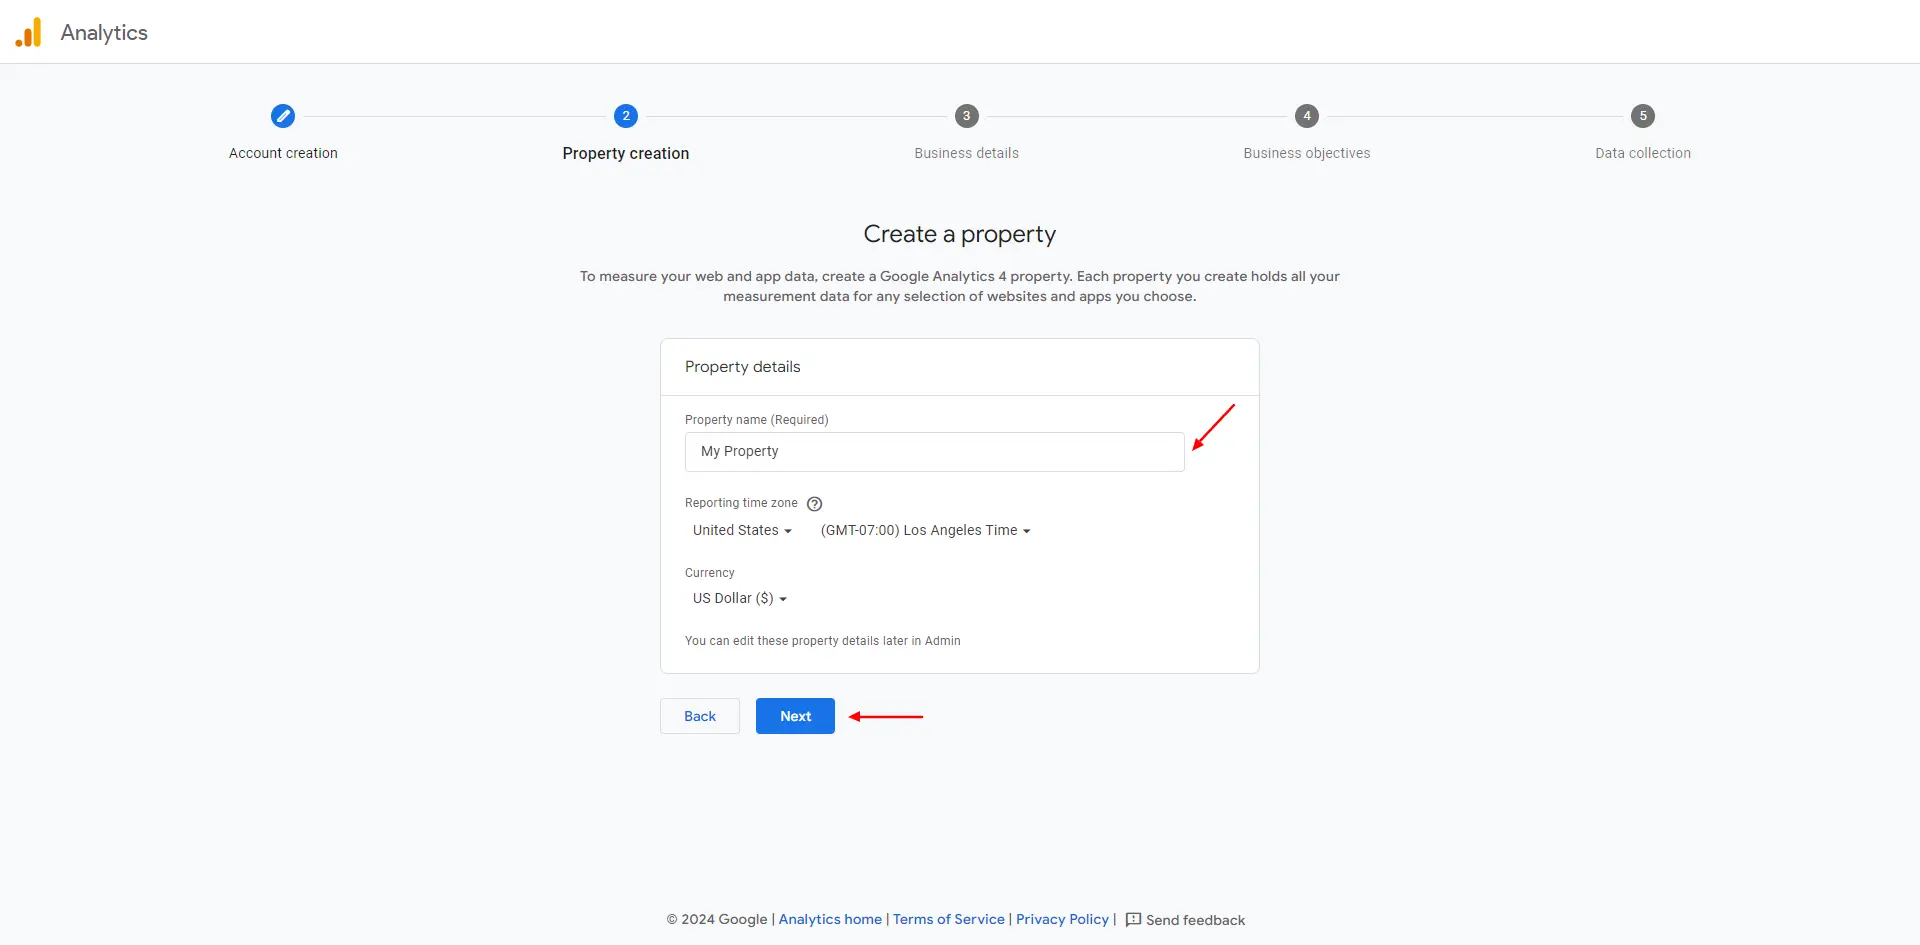
Now, provide the relevant property name, select your timezone, currency, etc.
-
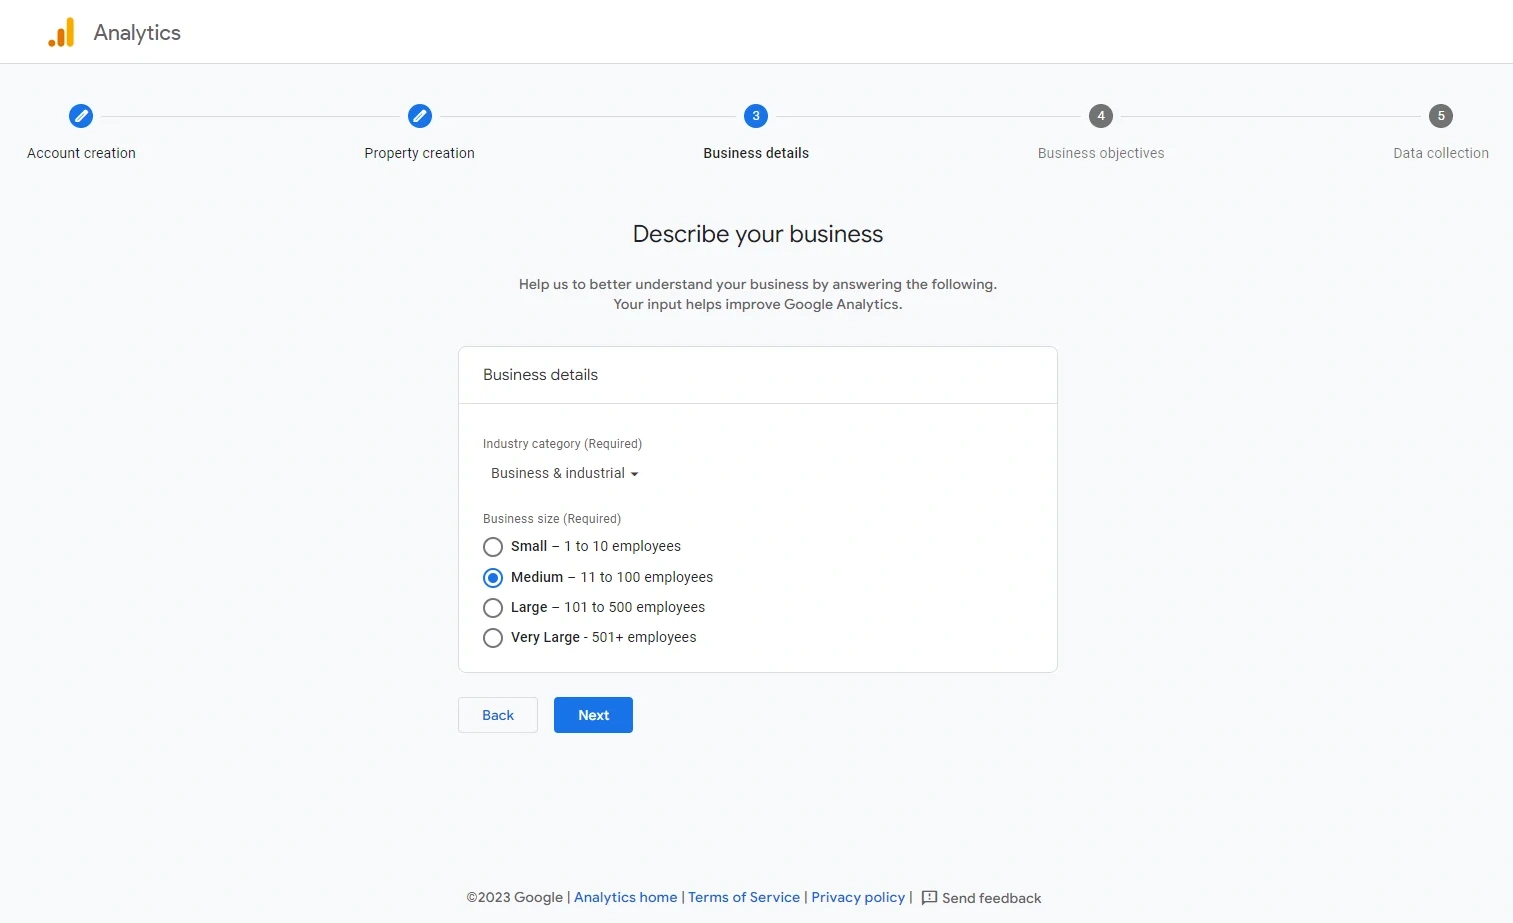
At this step, you need to feed your business details like industry category and business size. Then click on the “Next” button.
-
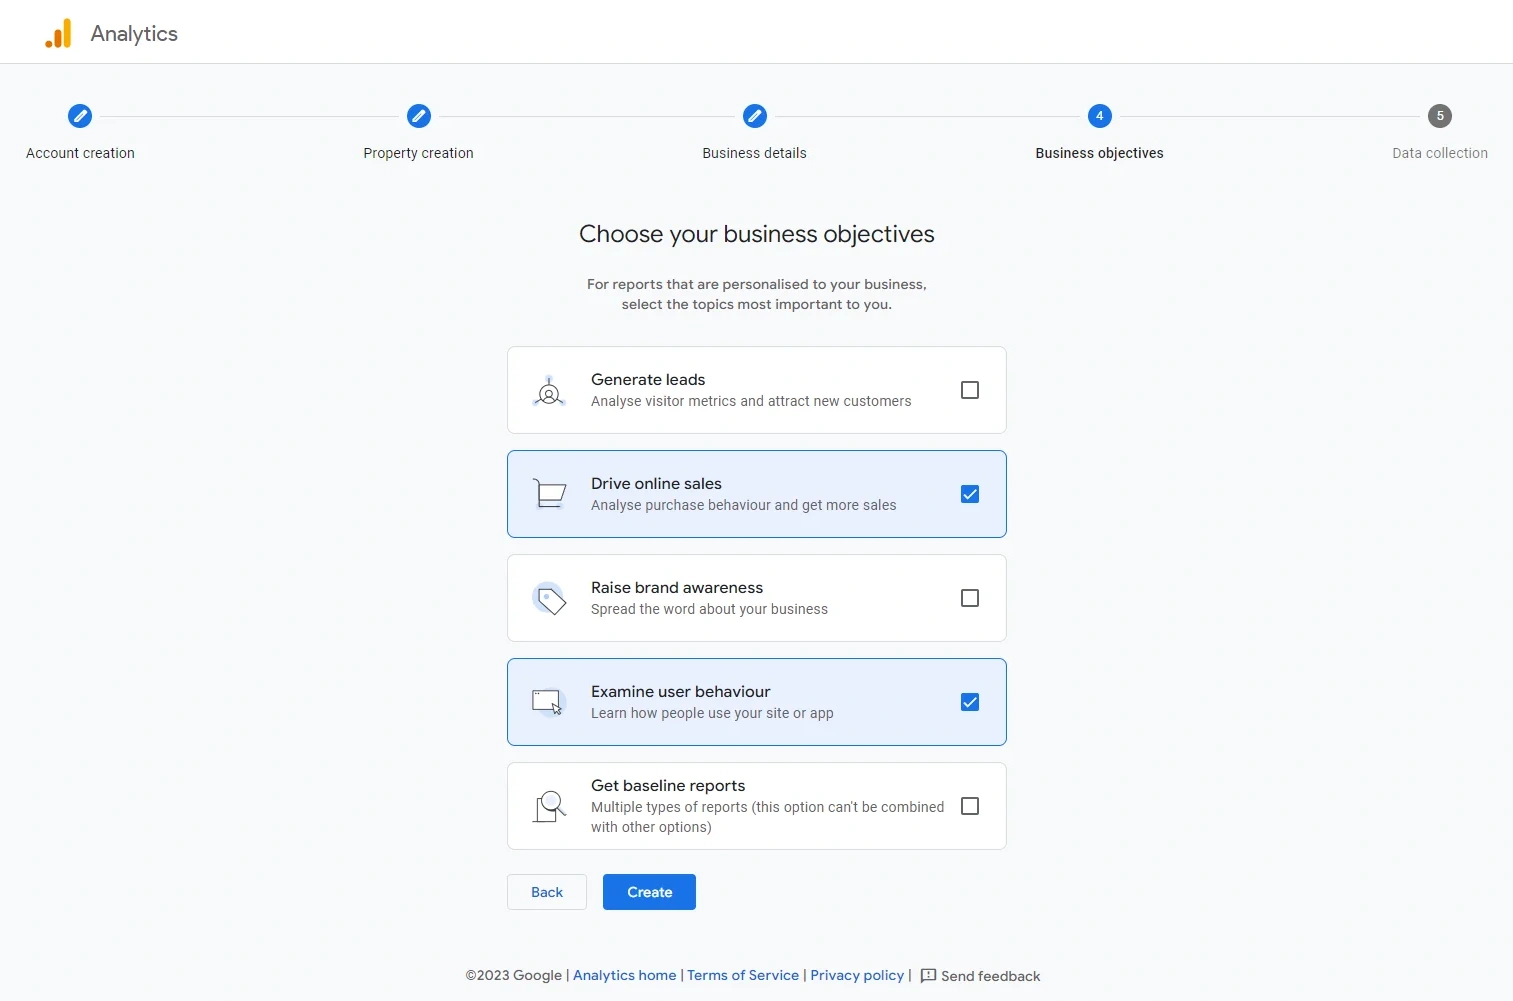
Now choose the necessary business objectives for what you need to create Google Analytics and then click on the Create button.
-
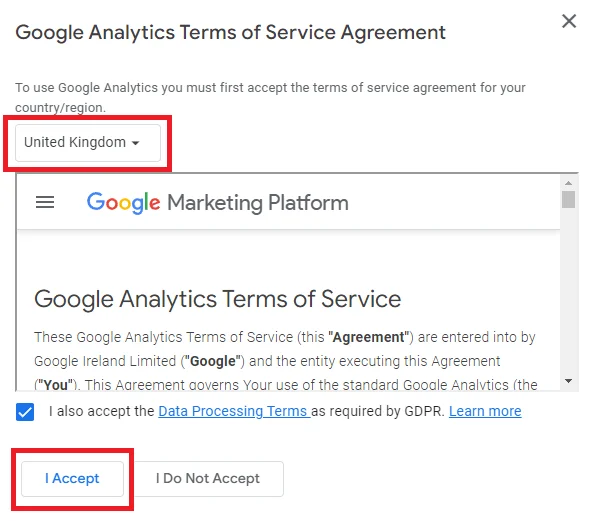
Now you will show a popup window showing Google Analytics Terms of Service Agreement. Choose your country from the drop-down list and click on the “I Accept” button.
-
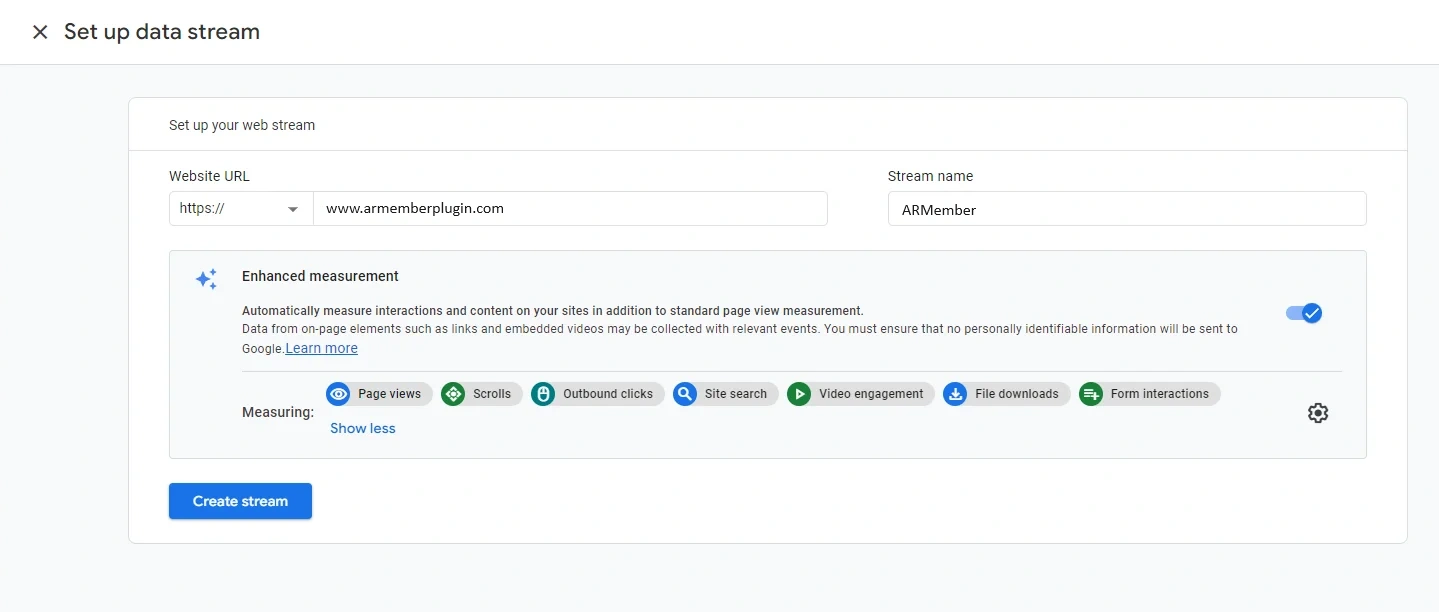
As you have just set up your Google Analytics account, it will ask you to create a data stream. For that, you need to provide your website URL and Stream Name and click on the “Create Stream” button.
Immediately, it will show you the comprehensive details about your data stream including its measurement ID, Stream ID, Stream Name, Stream URL, etc.
How to Create an API Secret in Google Analytics?
-
Go to the Google Analytics.
-
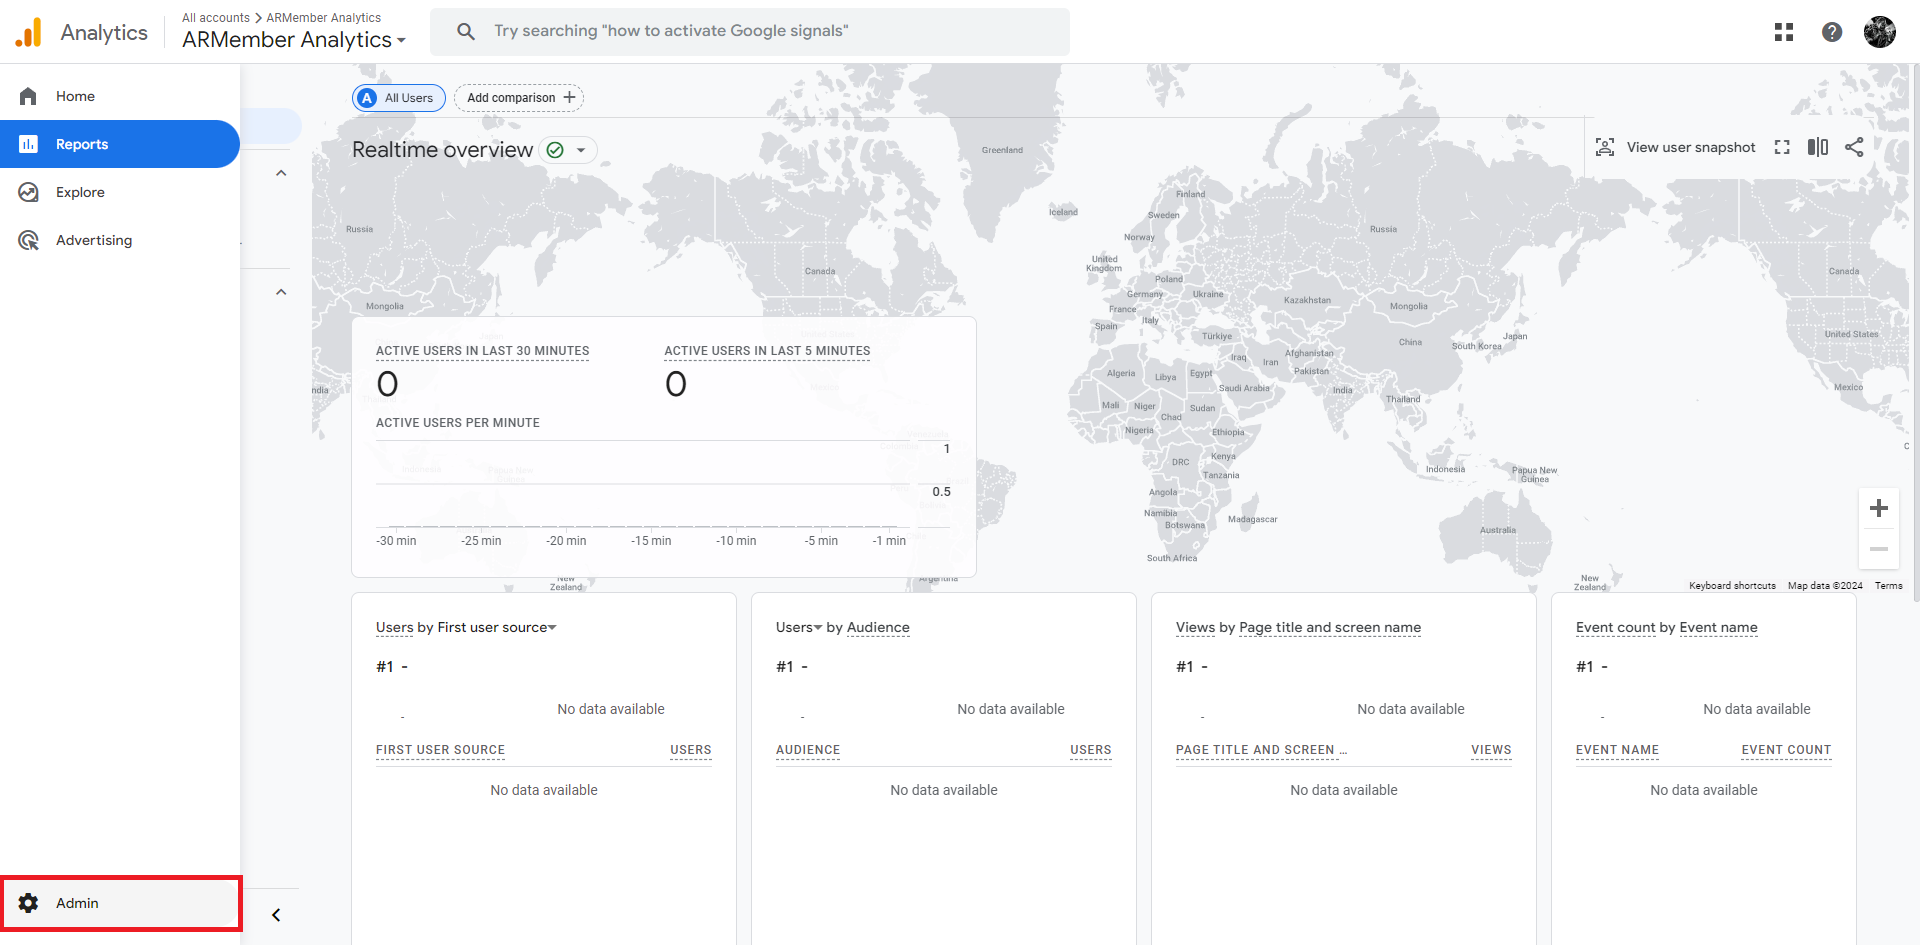
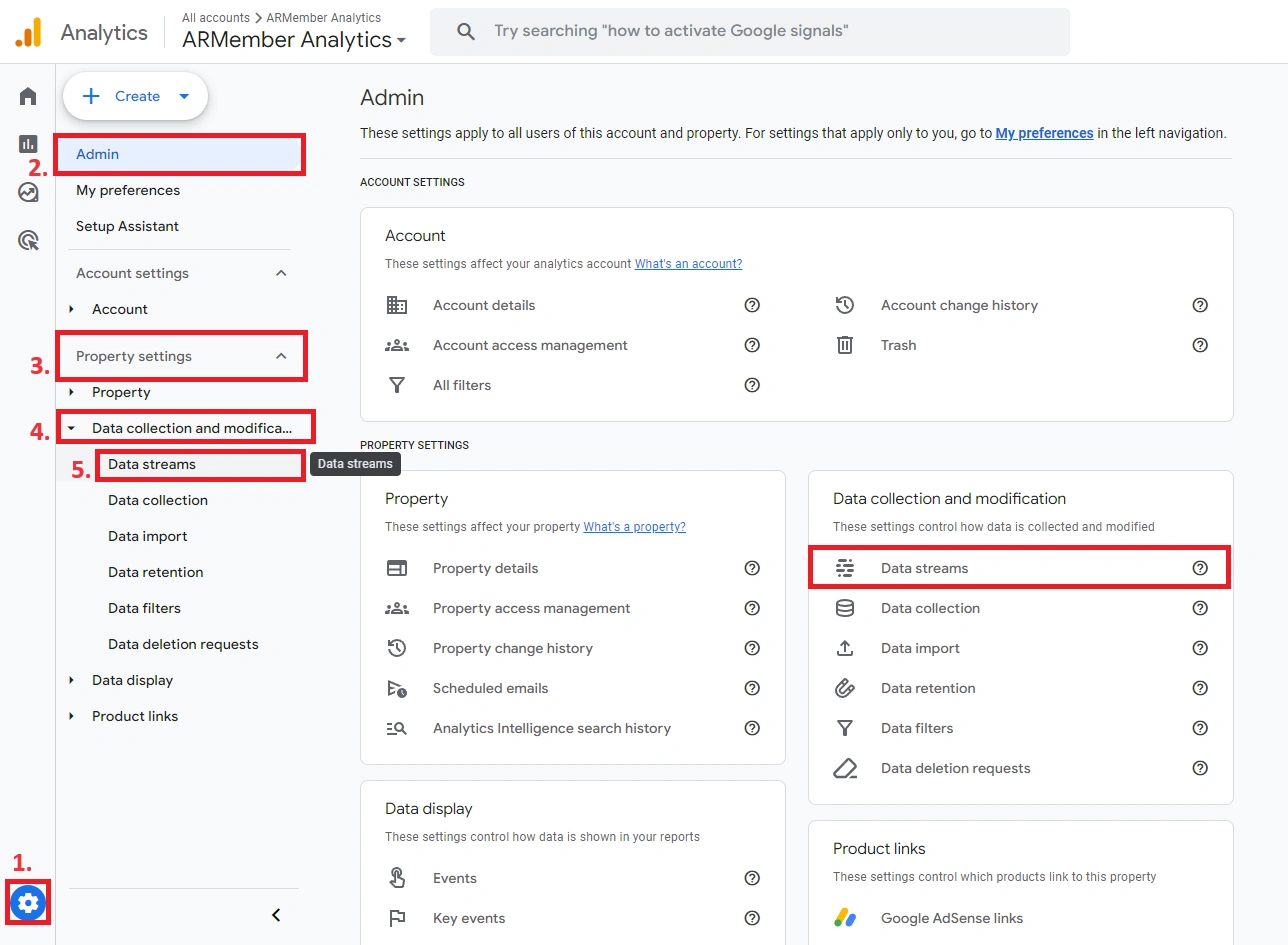
Click on the “Admin” button
-
Select “Data Strea under
Property settings->Data collection and modification -
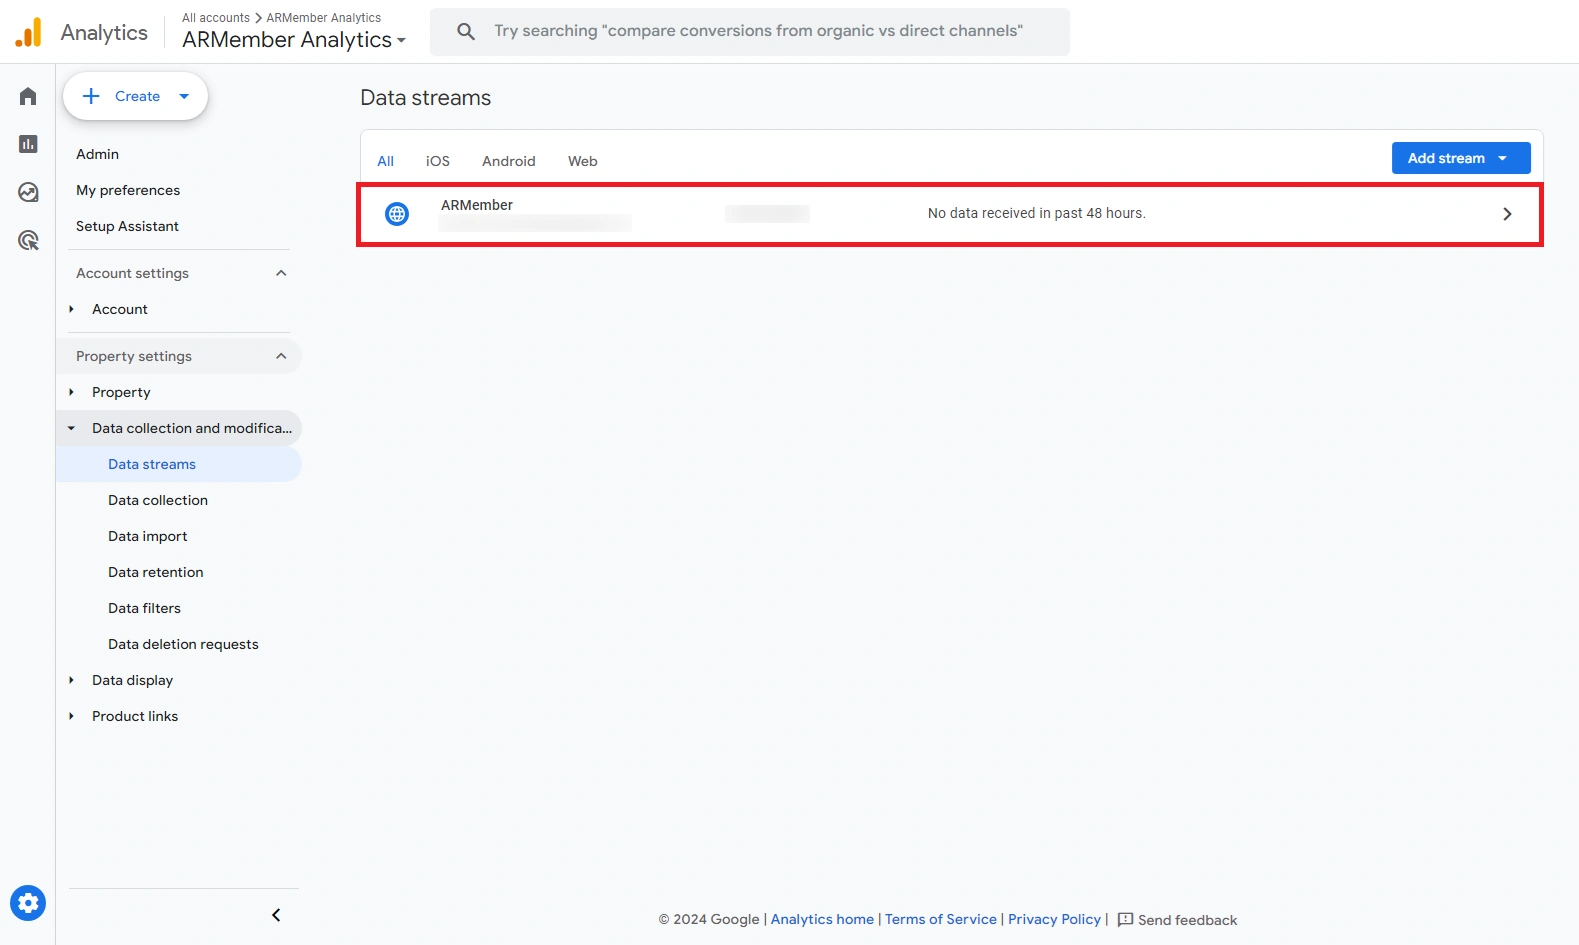
Select your relevant data stream
-
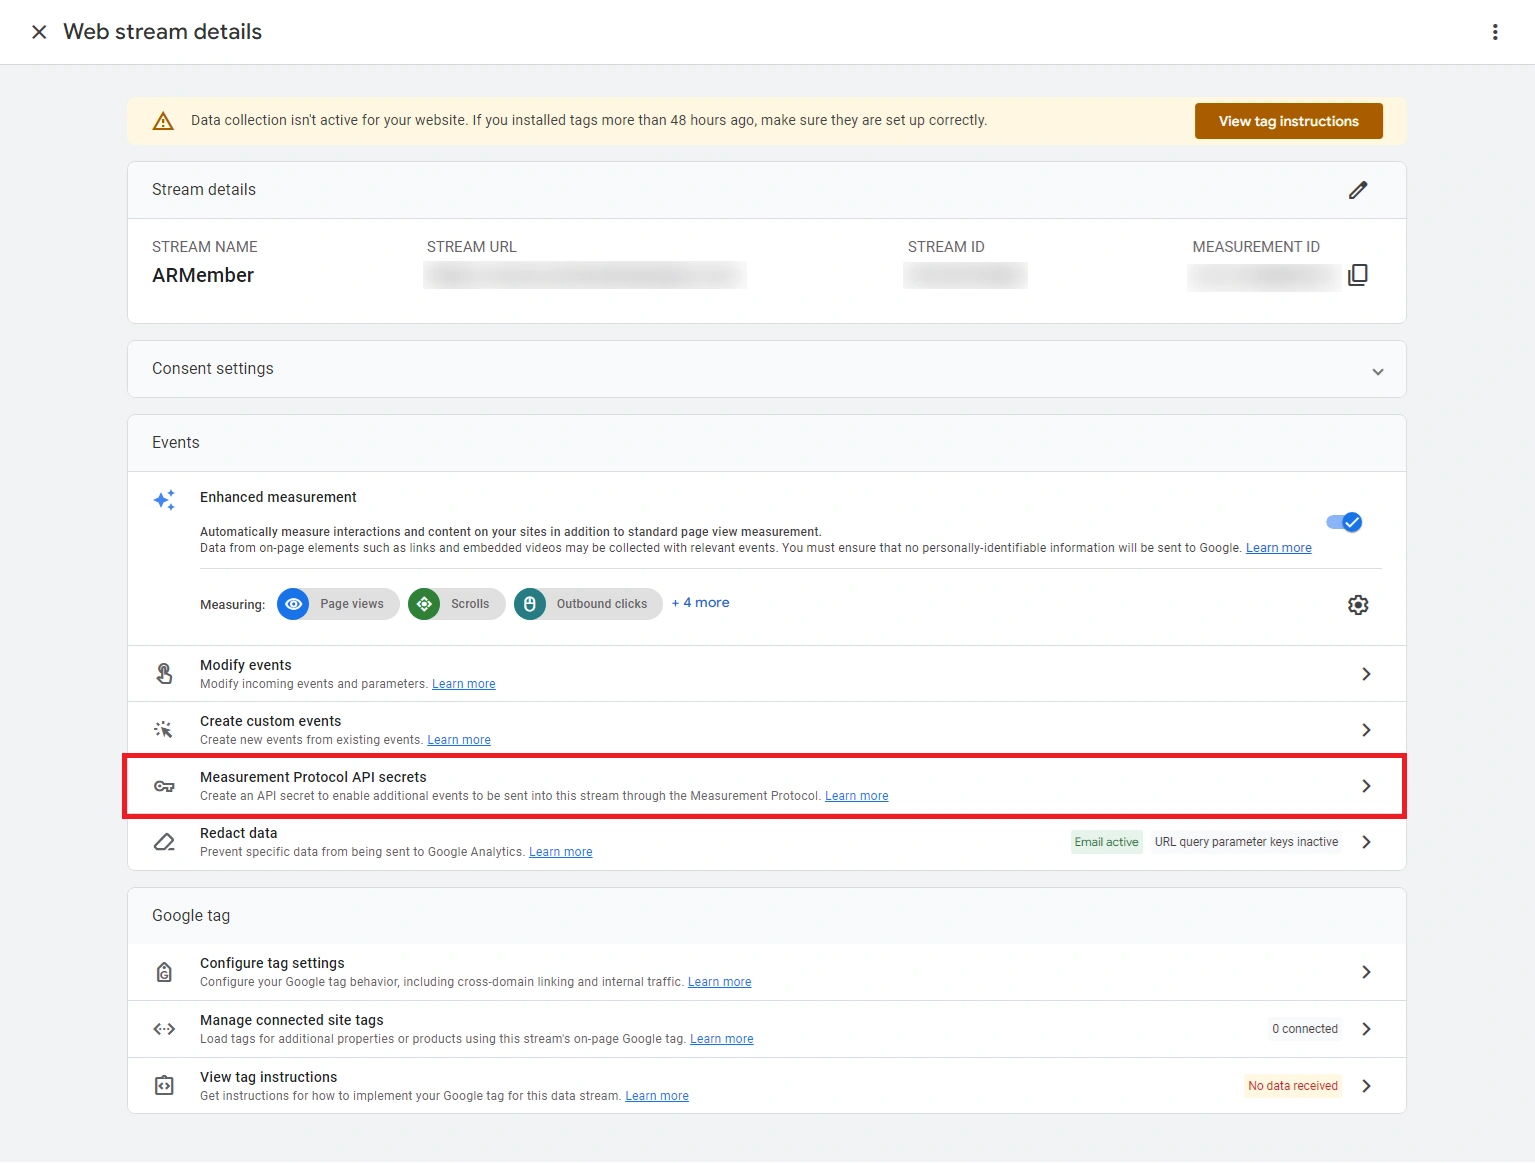
Click on “Measurement Protocol API secrets” option
-
Click on the Create button
-
After click on Create button enter stream name and Create button on next window.
-
Copy the API secret generated by Google Analytics and paste that under
ARMember->General Settings->General Options->Conversion Tracking Configuration->API Secret.
Where can you check your tracked events data?
-
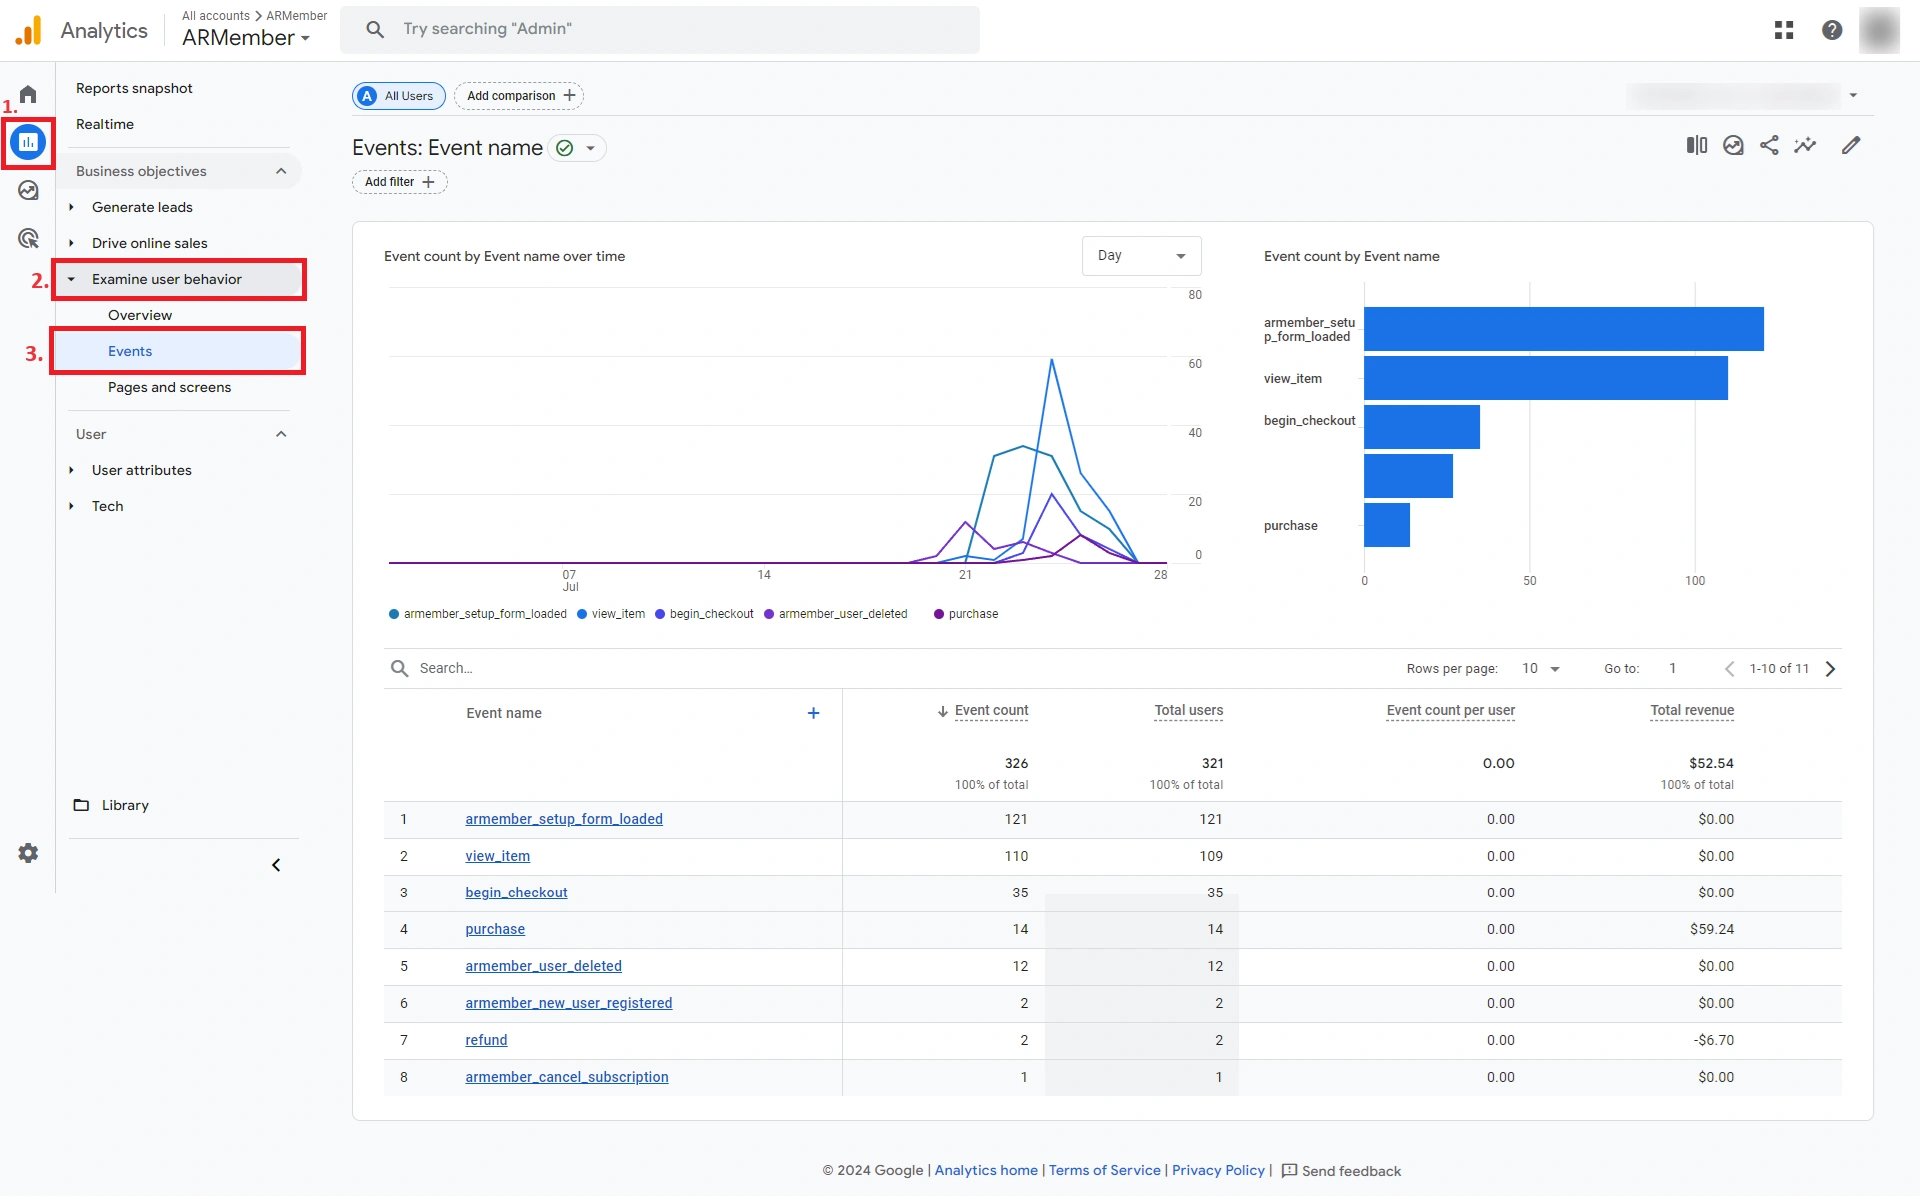
Frist Open Google Analytics then go to
Google Analytics dashboard->Reports menu->Examine user behavior->Events -
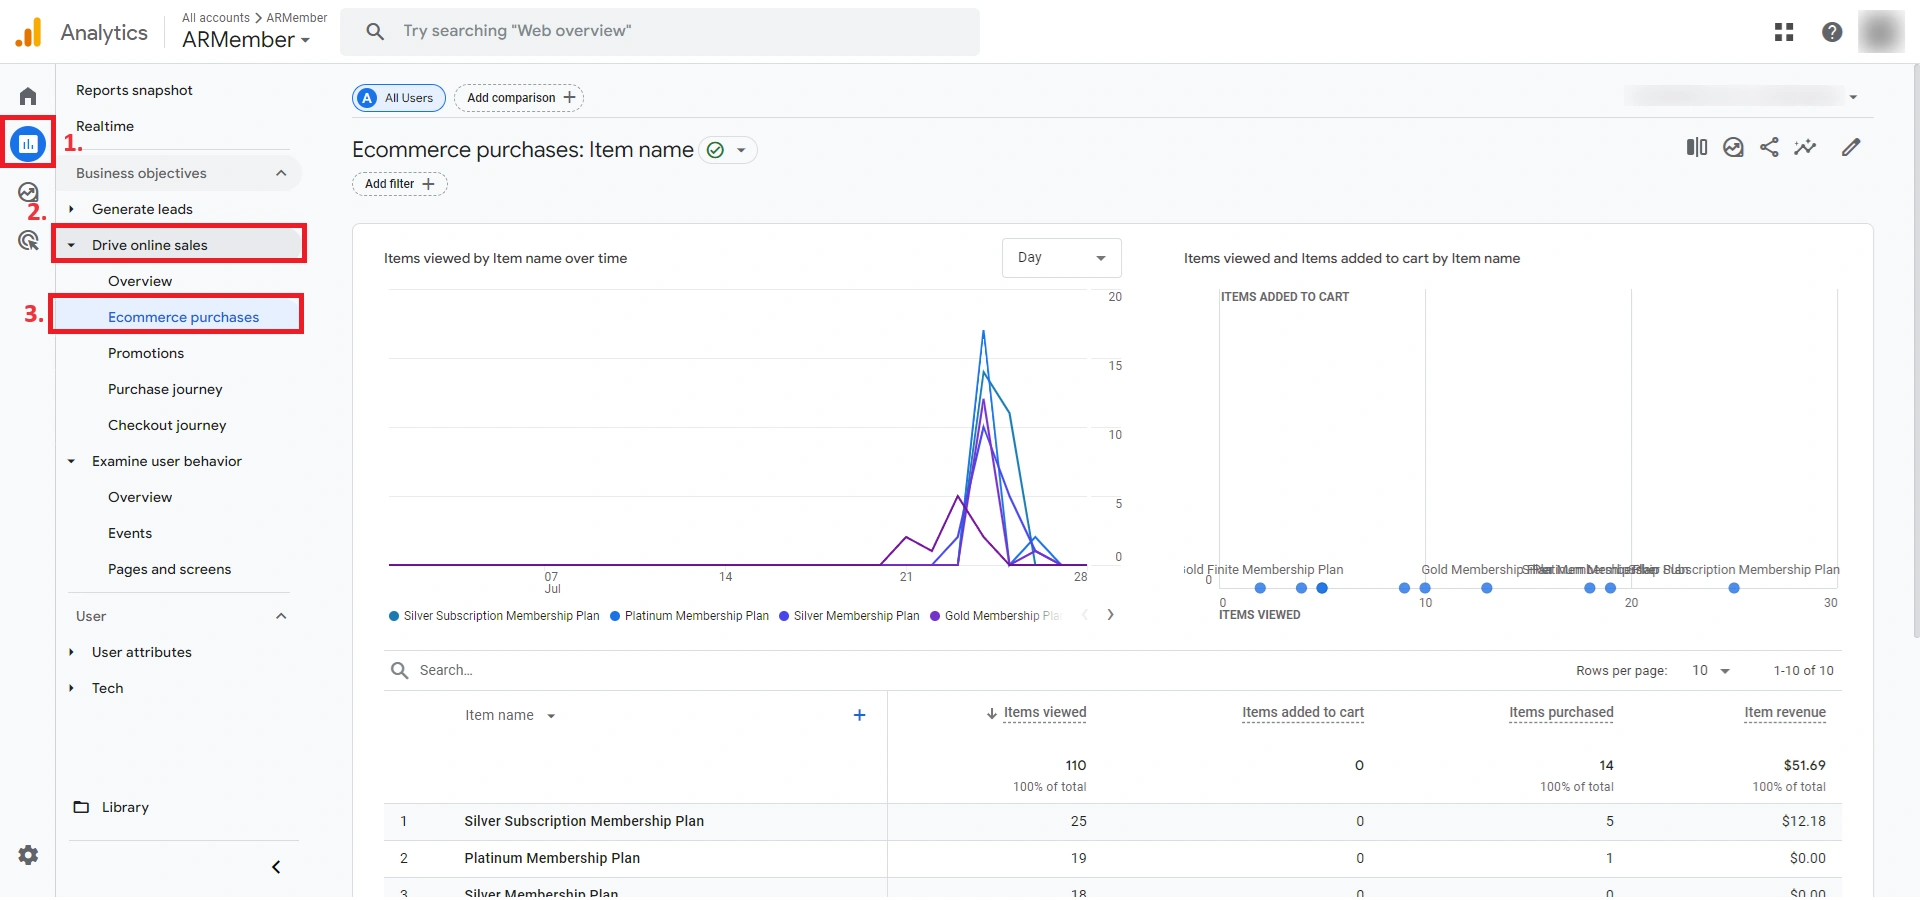
For more information about ARMember Purchase Event you can also check in
Google analytics->Reports menu->Drive online sales->Ecommerce purchases
Important Note: As per Google Analytics, event data will be reflected on the Google Analytics Charts after 24 hours.
Debug Log Setting For ARMember – Conversion Tracking addon
-
ARMember – Conversion Tracking addon offers the functionality to access, download, and delete log files that are generated by the ARMember – Conversion Tracking addon.
-
These logs provide valuable information regarding the requests made, responses received utilized within this Addon. To access the debug log settings, navigate from
ARMember->General Settings->Debug Log Settings.please see below Screenshot
-
You can check requests and responce data of events which is perform by ARMember – Conversion Tracking addon.


