

How to Integrate HubSpot with ARMember
How to Use HubSpot Addon for Email Marketing (opt-in) with ARMember
ARMember HubSpot Integration allows you to connect your WordPress membership site with HubSpot, a powerful marketing automation platform. This enables businesses to engage with their users through personalized email campaigns and targeted communication directly from HubSpot.
Important Note: This Addon will only work if ARMember plugin is installed with version 6.9 or higher.
With the ARMember HubSpot Add-on, you can add users who register through different sign-up forms into HubSpot lists..
ARMember HubSpot Integration Key Features:
- Automated Contact Creation: Automatically creates and syncs a new contact in HubSpot whenever a user registers through an ARMember registration form.
- Flexible List Segmentation: Allows you to assign users to specific HubSpot lists based on the different “sign-up forms” used for registration, helping you segment your audience by purpose.
- Membership Plan Mapping: Enables you to map specific ARMember membership plans to designated HubSpot lists, ensuring members are grouped according to their subscription level.
- Custom Field Synchronization: Supports bi-directional data flow by allowing you to map ARMember form fields directly to custom HubSpot contact properties, ensuring all relevant member data is stored in your CRM.
- Bulk Data Sync: Provides a “Sync Contacts” functionality that allows administrators to manually push existing ARMember member data into HubSpot in bulk.
- Comprehensive Event Triggers: Automatically updates opt-in data in HubSpot based on various lifecycle actions, including:
- New registrations and membership purchases.
- Membership cancellations, suspensions, and plan changes.
- Subscription lifecycle events such as end-of-term, recurring payment receipts, and failed payment notifications.
- Integrated Debugging: Includes a dedicated debug log facility within the ARMember settings to monitor the synchronization process and troubleshoot any data flow issues.
Steps For Installation And Activation
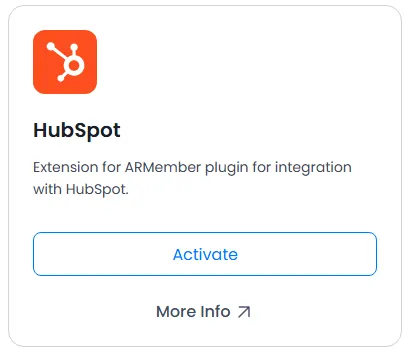
The ARMember HubSpot Integration Addon requires the ARMember plugin to be installed and active. You can install this add-on in the following two ways:
New installation via FTP
- Download the addon and extract it. You will find a directory at armemberhubspot.
- In your WordPress installation directory, upload armemberhubspot to
wp-content/plugins/ - Activate it
ARMember - HubSpot Addonthrough thePluginsmenu from the WordPress admin panel.
New installation via the WordPress Uploader
- First, download the addon.
- Next, log in to your WordPress admin panel.
- Then, go to
Plugins⇾Add New⇾Upload. - After that, click “choose file” and browse the download package. Once the addon uploads successfully, click
Activate Plugin.
Steps to Set up HubSpot For Your Website
-
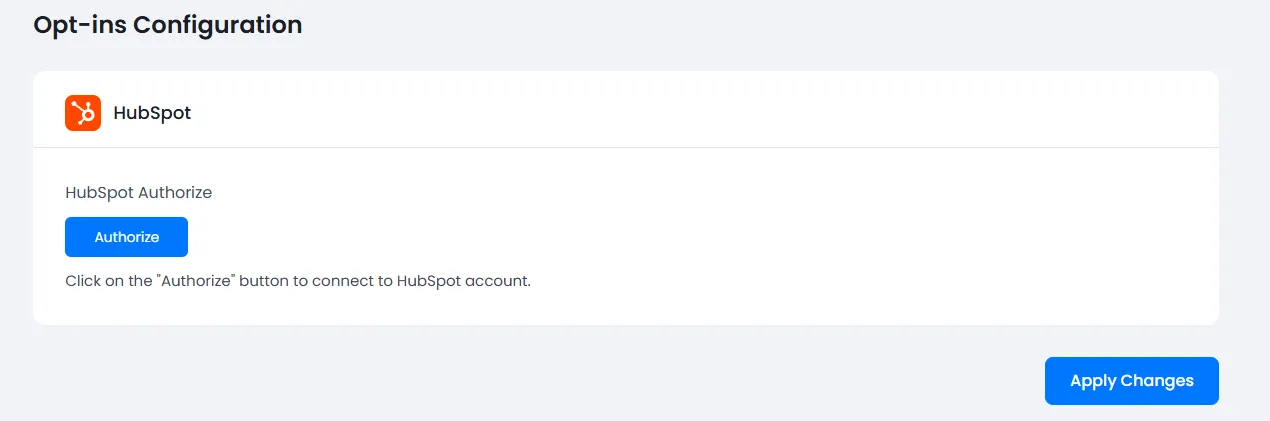
When the add-on is activated, the HubSpot section appears in
ARMember⇾General Settings⇾Opt-ins.
-
If you do not have a HubSpot Developer account, you can create it here.
-
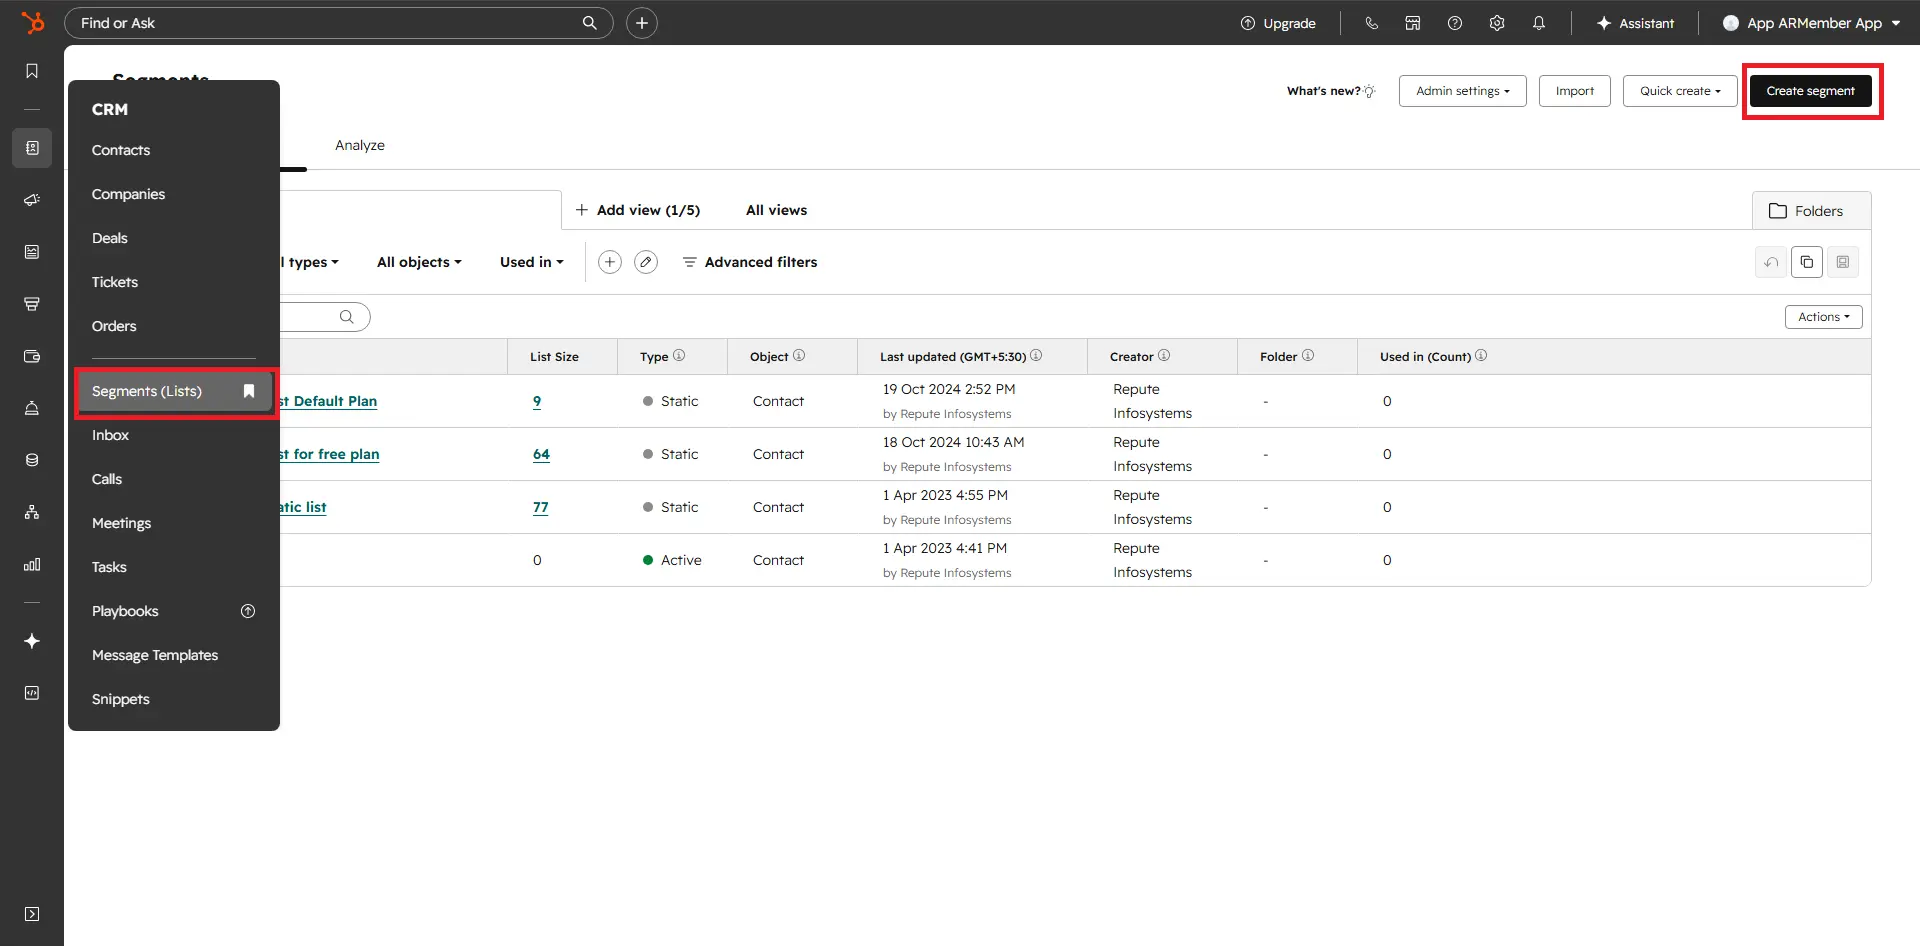
Create a STATIC list in your test account.
Important Note: Please create a STATIC list.

-
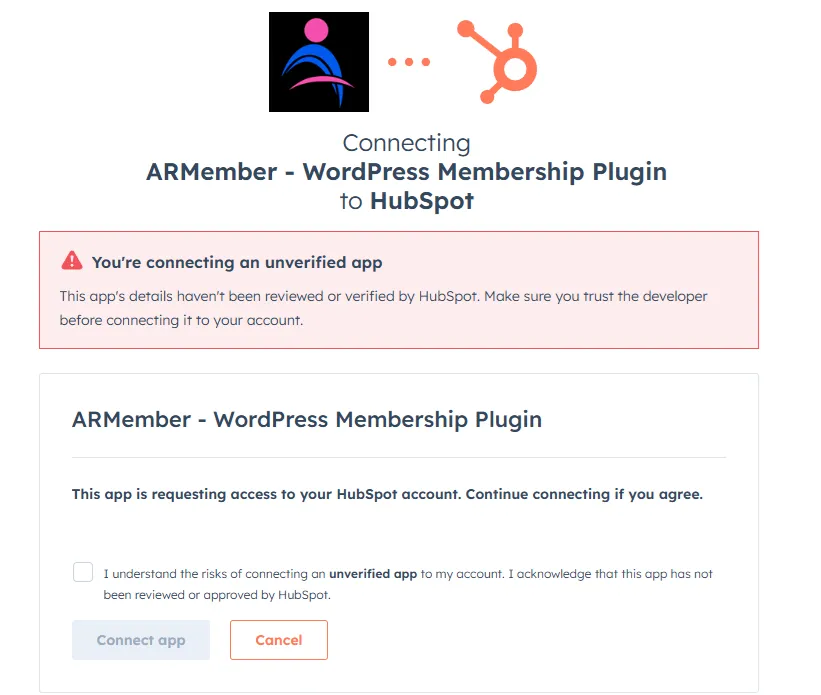
Click on the “Authorize” button at the ARMember General Settings, further select your test account, and Connect App.

-
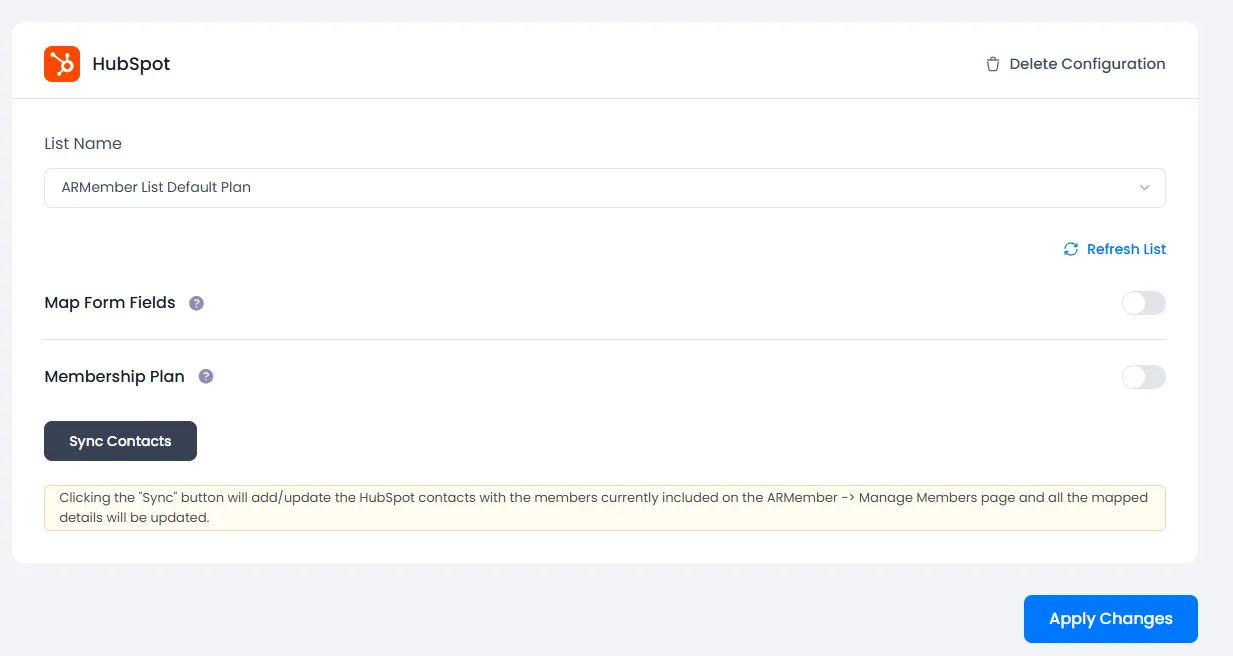
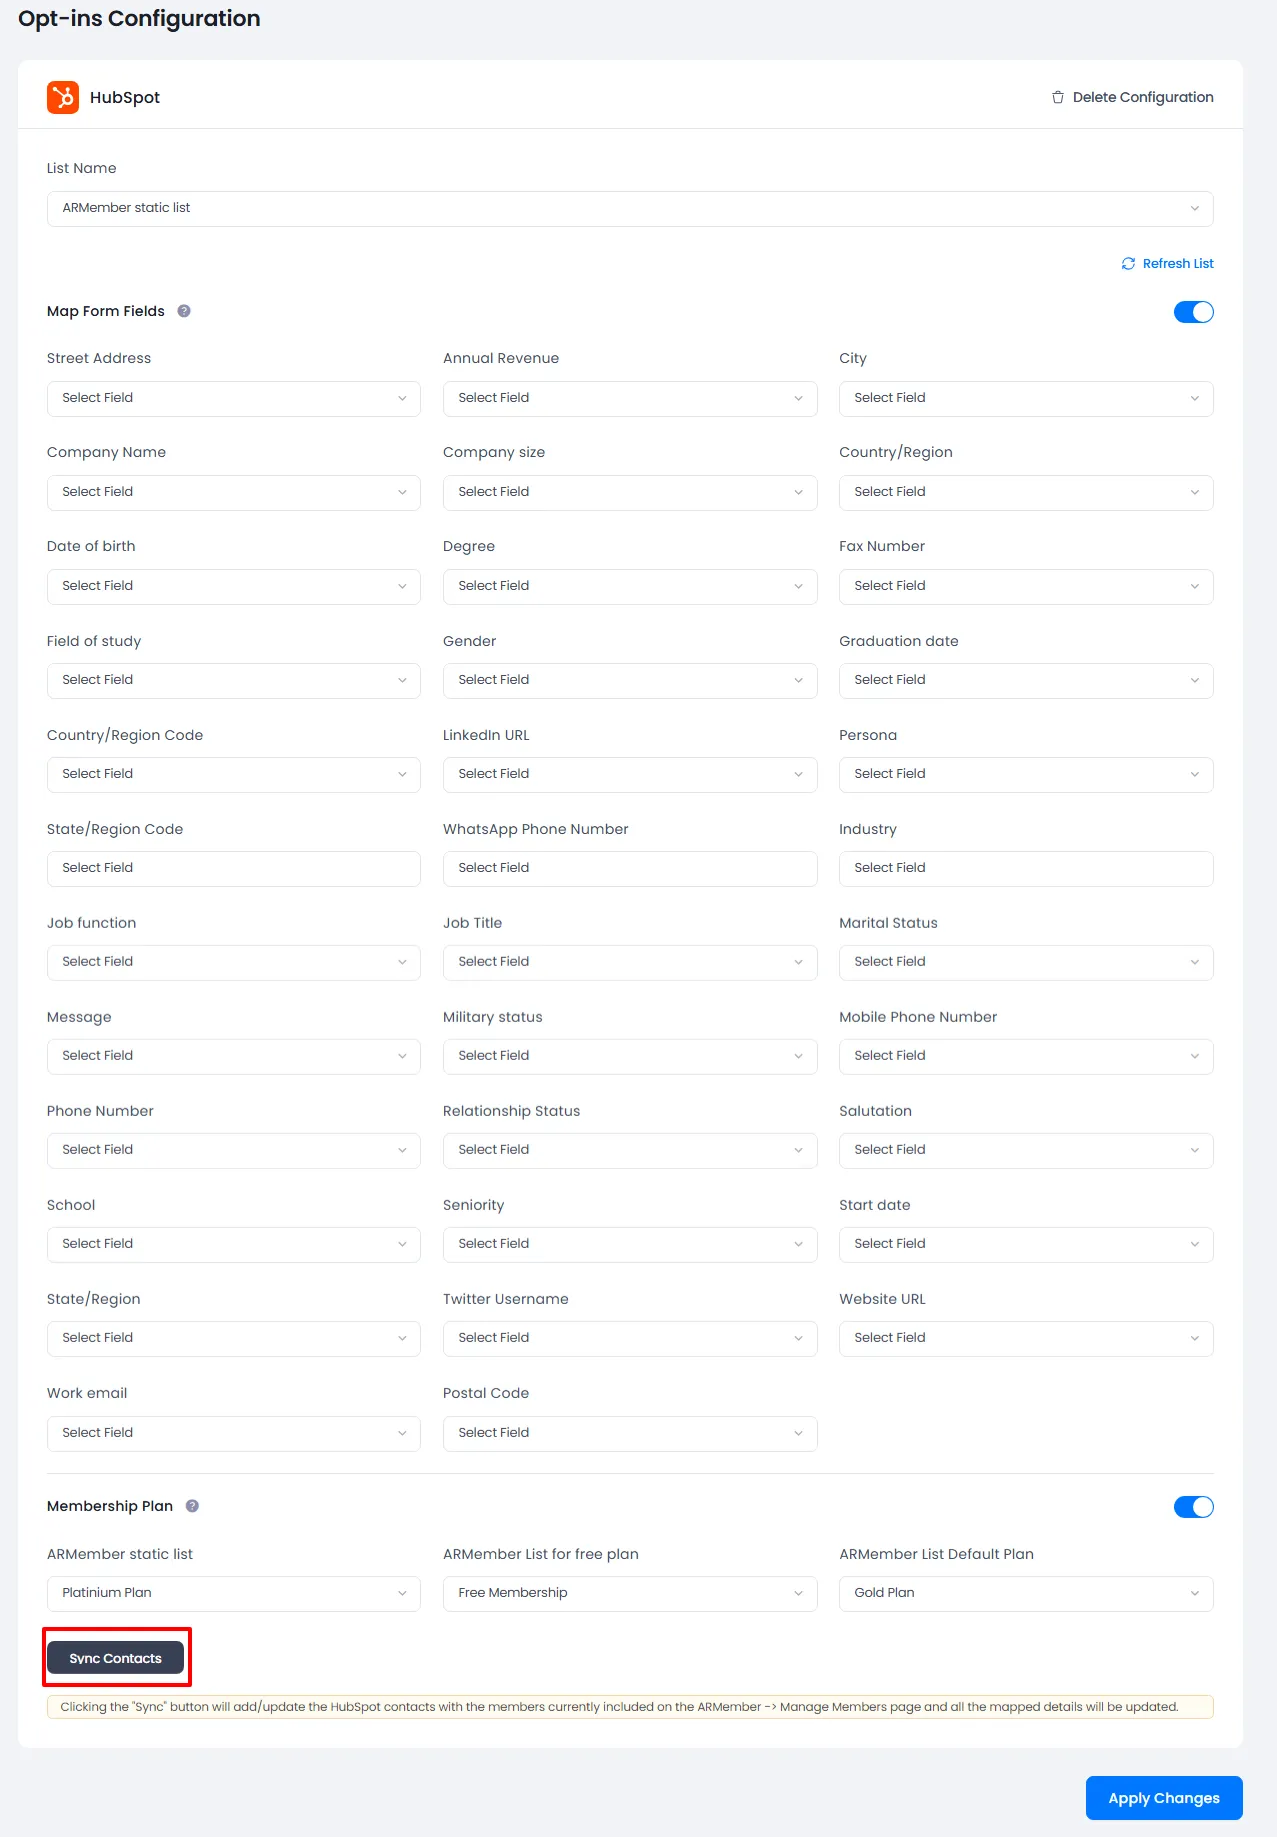
Once you verify the connection, ARMember displays the Map Form Fields switch, Map Membership Plan switch, and Sync Contact button.

-
Click “Delete Configuration” to remove the HubSpot setup, or click “Refresh List” to update the list.
-
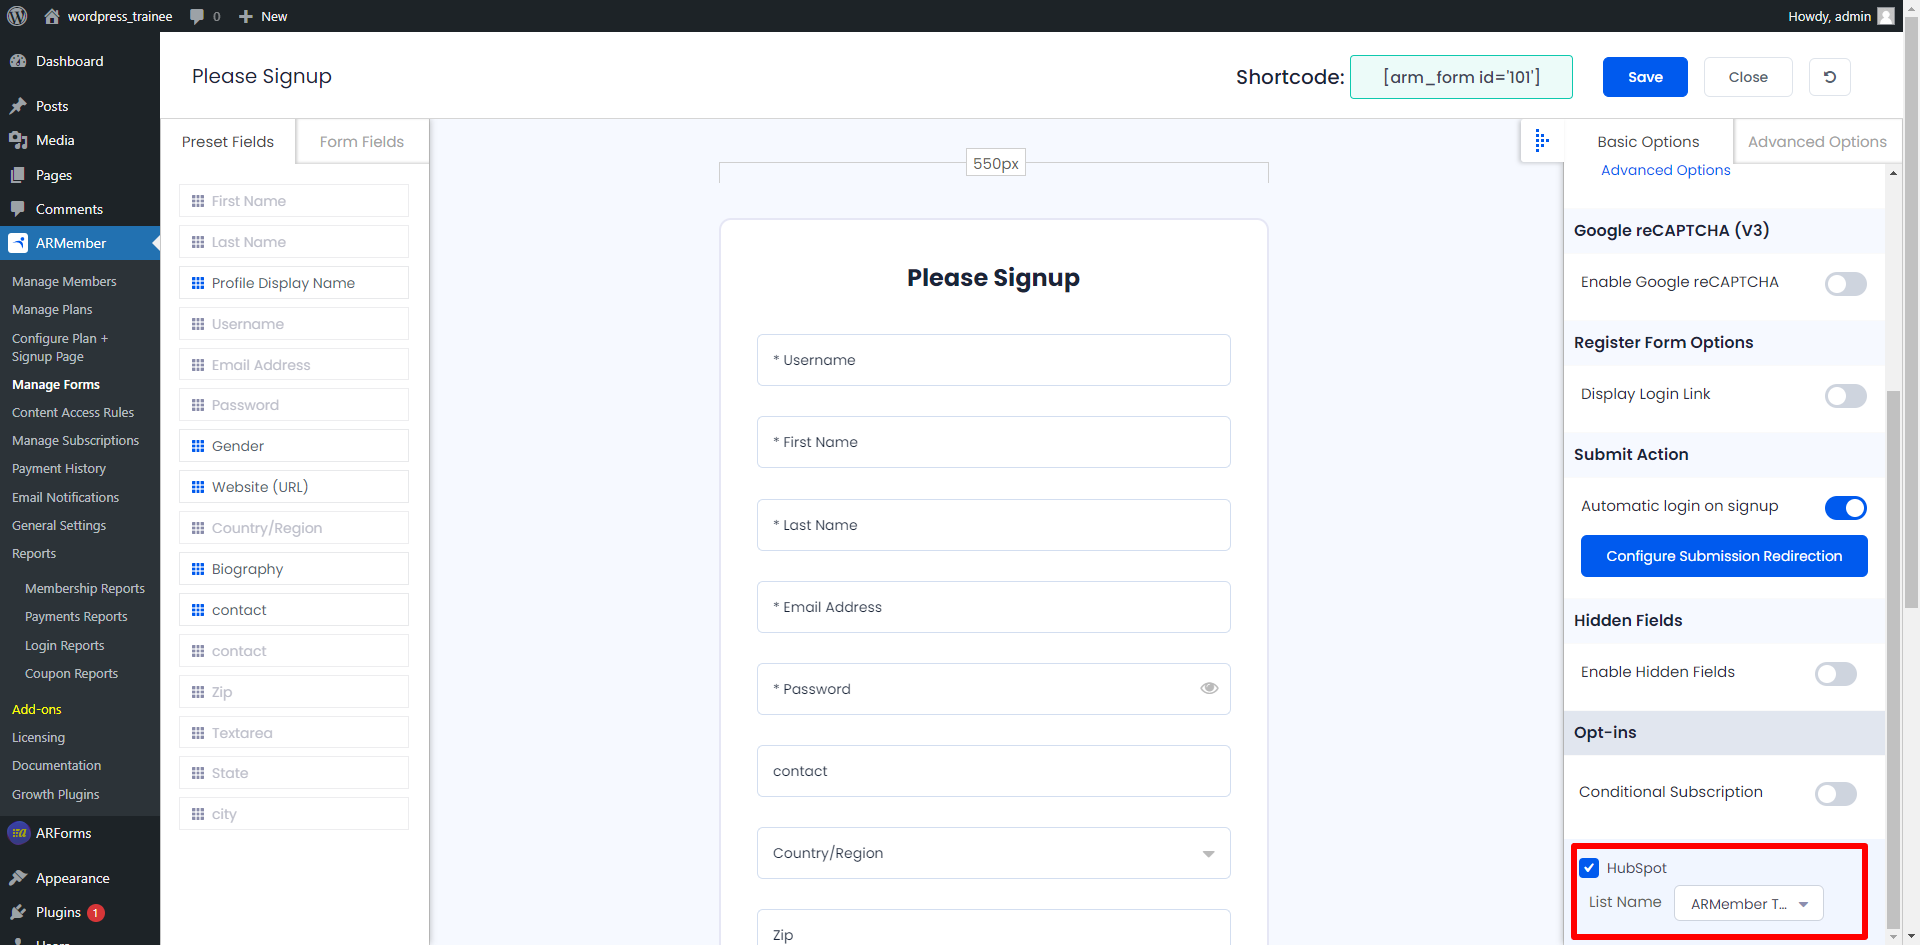
After setup, go to the Manage Forms page, edit your Registration Form, and find the HubSpot checkbox under Opt-ins in the right panel.

-
Save the form. When a new user registers, the contact will be added to HubSpot with their email, first name, and last name.
-
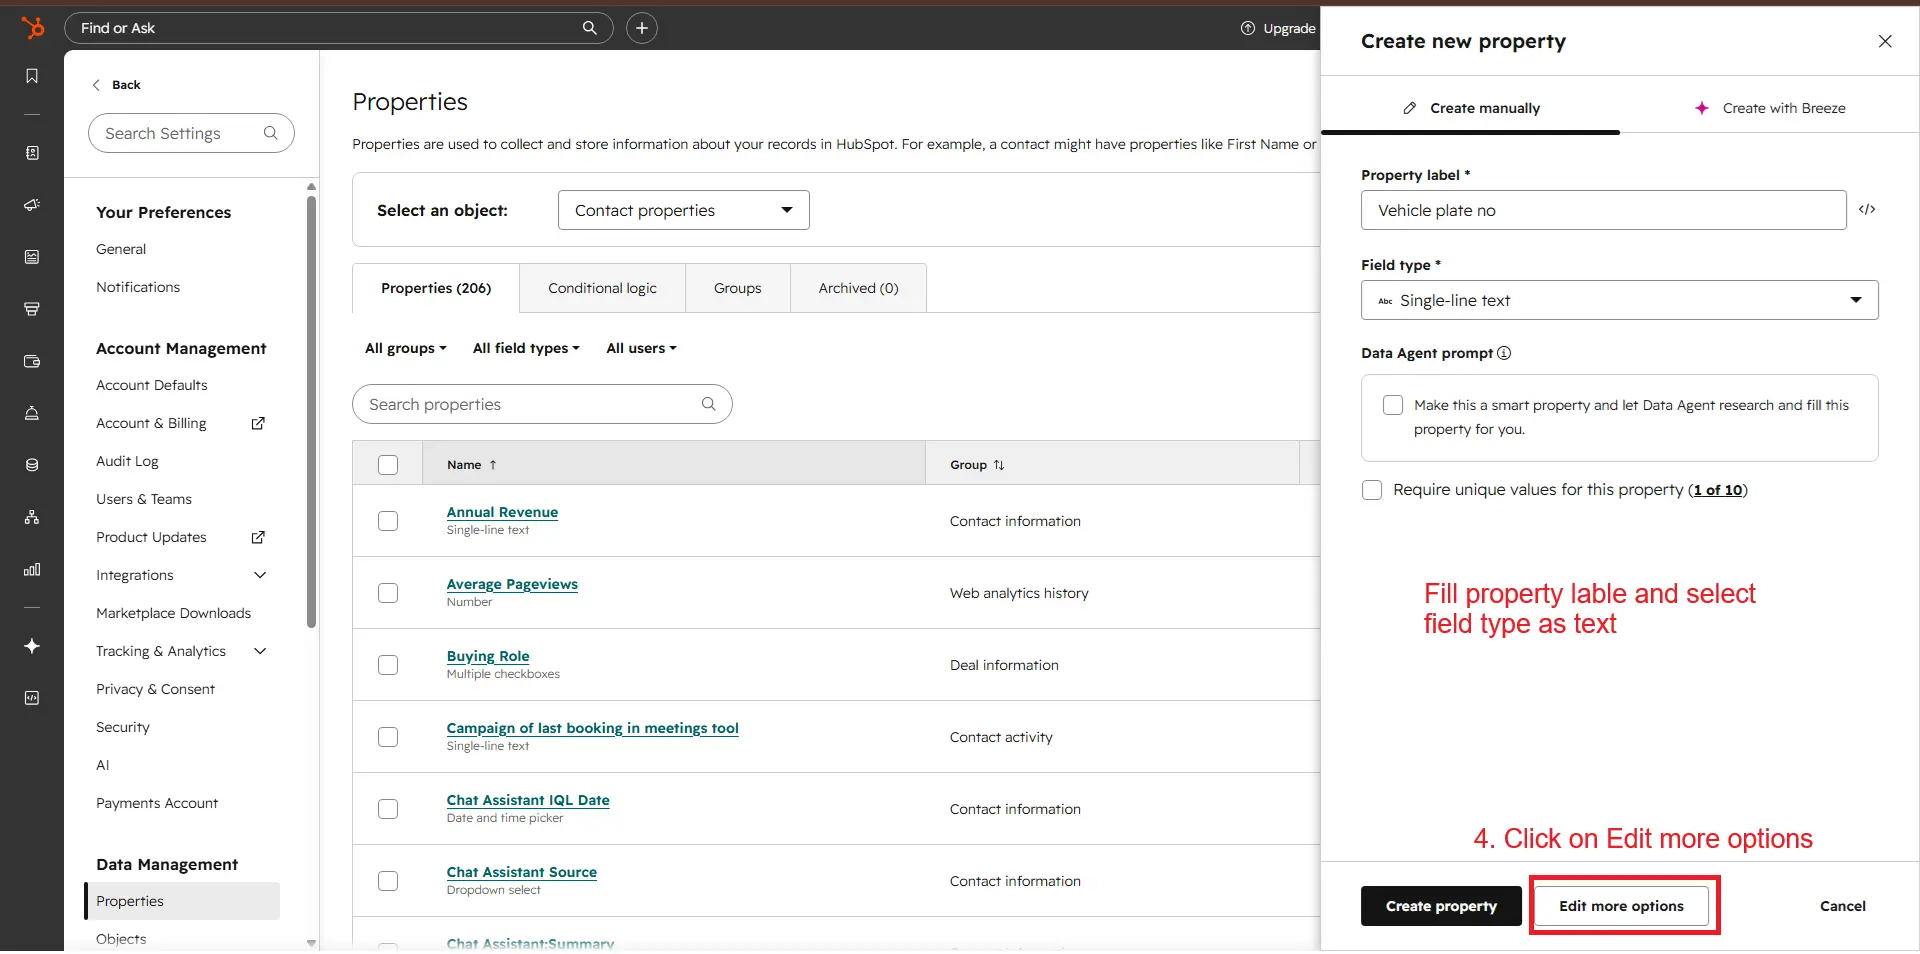
To map custom fields: Enable
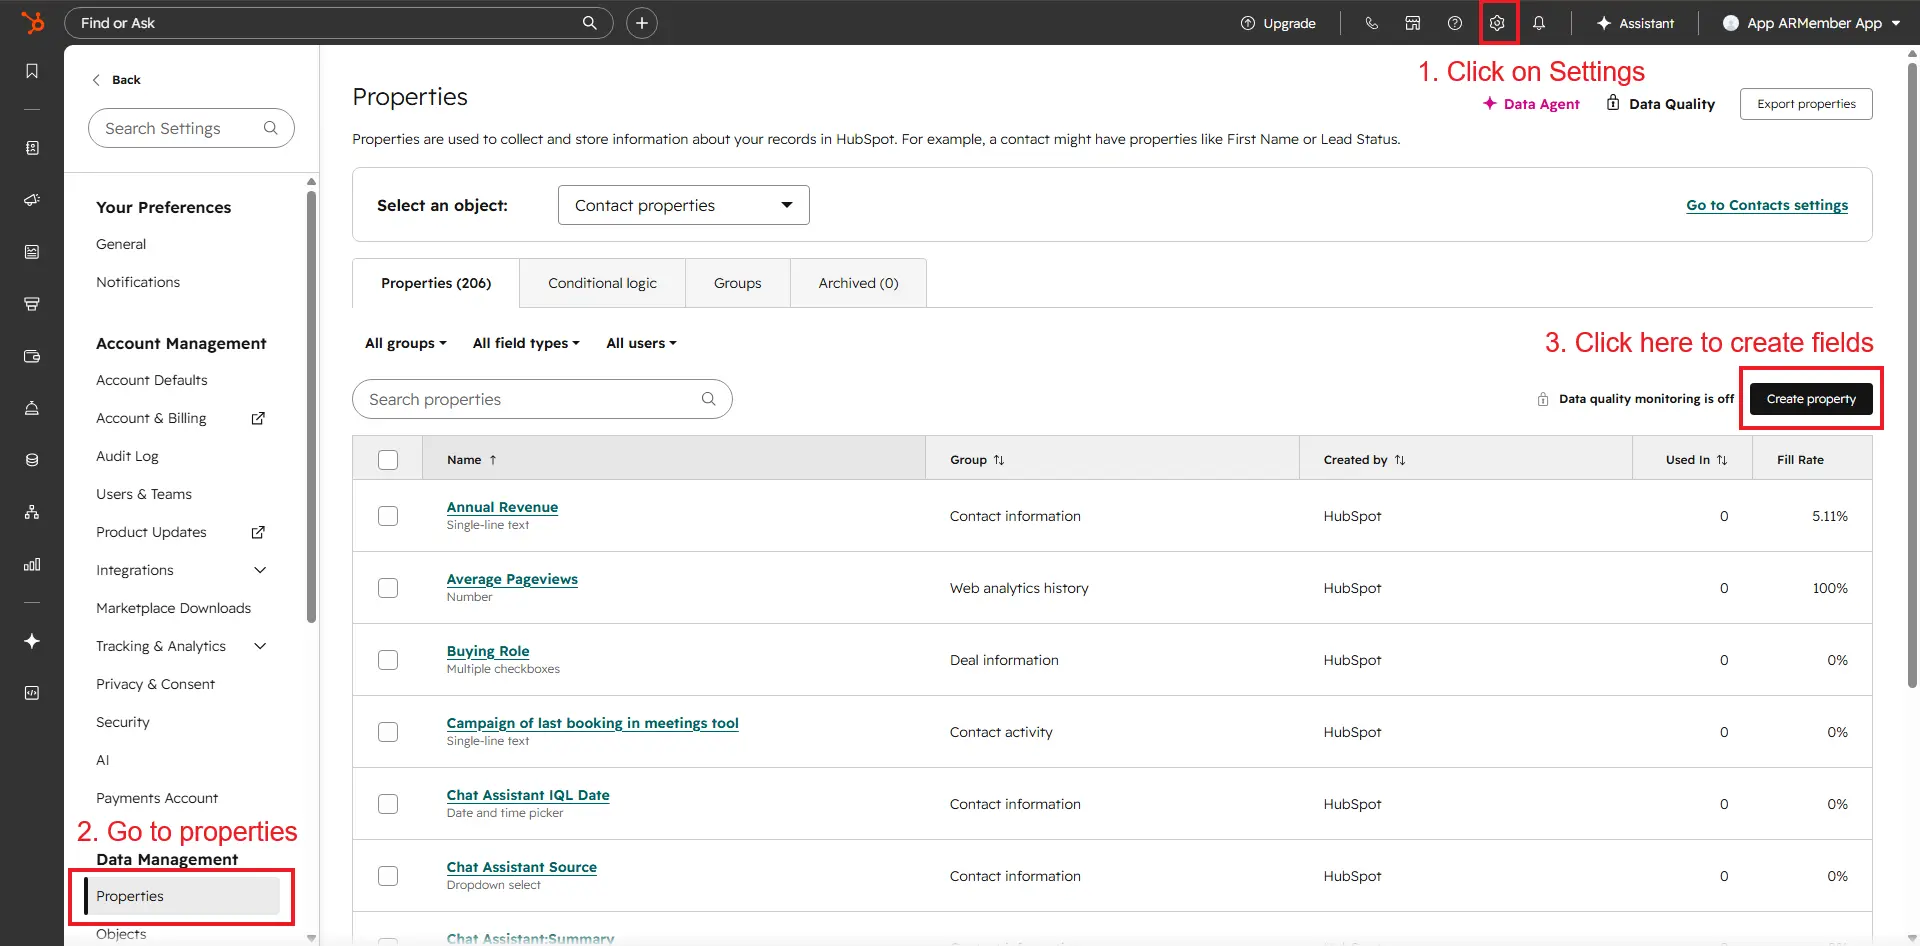
Map Form Fields. To create a custom contact property in HubSpot:- Go to
Settings>Properties>Create Property. - Fill in the info and click
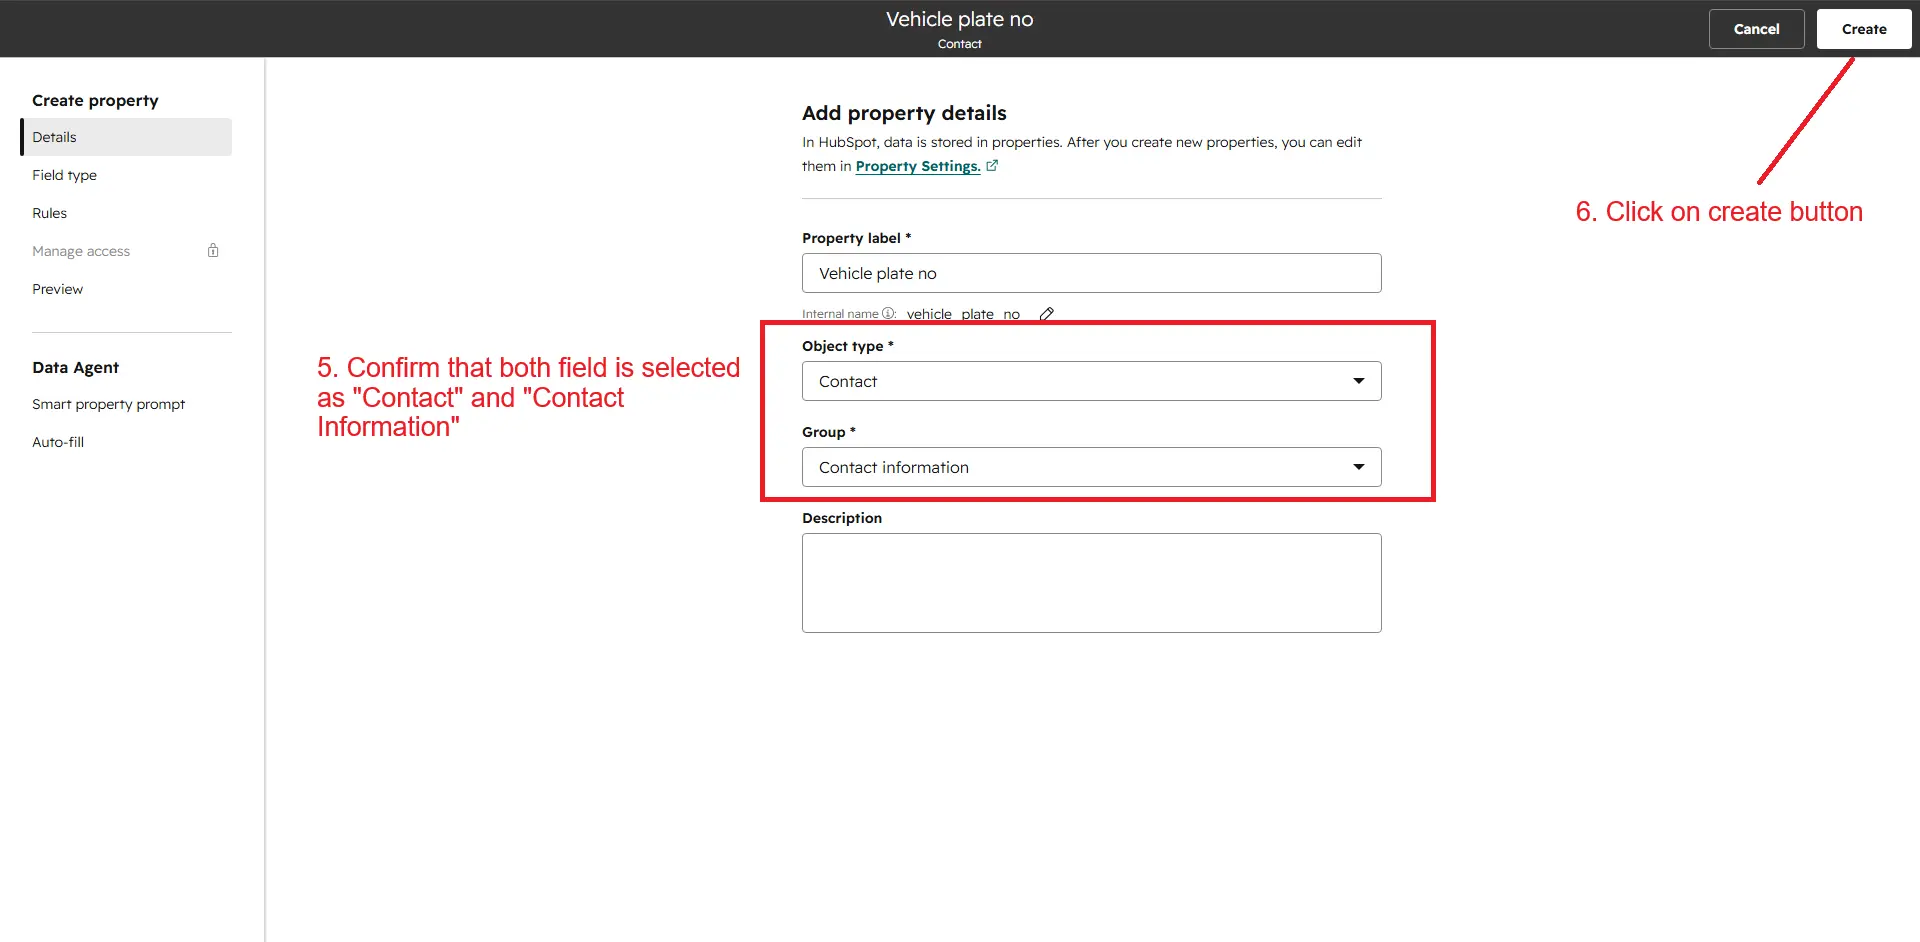
Edit More Options. - Ensure the object type is
Contactand Group isContact Information, then clickCreate.


Click “Refresh List” in the ARMember HubSpot settings after creating the property.
- Go to
-
To map membership plans: Enable
Membership Planin HubSpot opt-ins and select the plans to assign users to specific lists.
-
You can sync all ARMember members into HubSpot using the
Sync Contactsbutton.

Opt-in data will be updated on the following actions:
- On simple register form submission.
- On Purchase Membership Plan.
- On Cancel Membership Plan By Member or Admin.
- On the Membership Plan, End of Term.
- Membership plan suspended.
- On Membership Plan Change.
- On the membership plan subscription, the next payment has failed.
- On a subscription plan, a recurring payment is received.
- Import Users from the ARMember.
- Admin can Sync Existing member data from the admin panel to opt-ins.
Debug Logs
ARMember provides debug logs to monitor data flow. To enable:
Navigate to ARMember ⇾ General Settings ⇾ Debug Log Settings, enable logs for “Opt-ins,” and save.