

How to integrate Braintree Payment Gateway with ARMember Plugin
This Add-on will add a payment option for the ARMember plan with a one-time payment & plan with subscription payment.
Important Note: This add-on will work with ARMember Version 4.4 or grater.
Steps For Installation And Activation
You can install a plugin in the following two ways. And the ARMember-Braintree plugin requires the ARMember plugin to be installed and active.
New installation via FTP
- Download the plugin and extract it. You will find a directory armember-braintree.
- In your WordPress installation directory, upload armember-braintree to
wp-content/plugins/ - Activate the
ARMember - BrainTree Addonplugin through thePluginsmenu from the WordPress admin panel.
New installation via the WordPress Uploader
- Download the plugin.
- Log in to your WordPress admin panel
- Go to
Plugins⇾Add New⇾Upload - Click on “choose file” and browse the download package. When the plugin uploads successfully, click on
Activate Plugin.
Steps to Set up Braintree For Your Website
Let’s set up membership for your website:
-
When plugin activated, then the Braintree section will be displayed in
ARMember⇾General Settings⇾Payment gateways.Please see below screen.

-
Firstly need to activate the Braintree payment gateway so you will be able to insert Merchant ID, Public key, and private key. For activation, click on the active button.
-
If you do not have a Braintree account then create it.
For Live / Sandbox account click here.
-
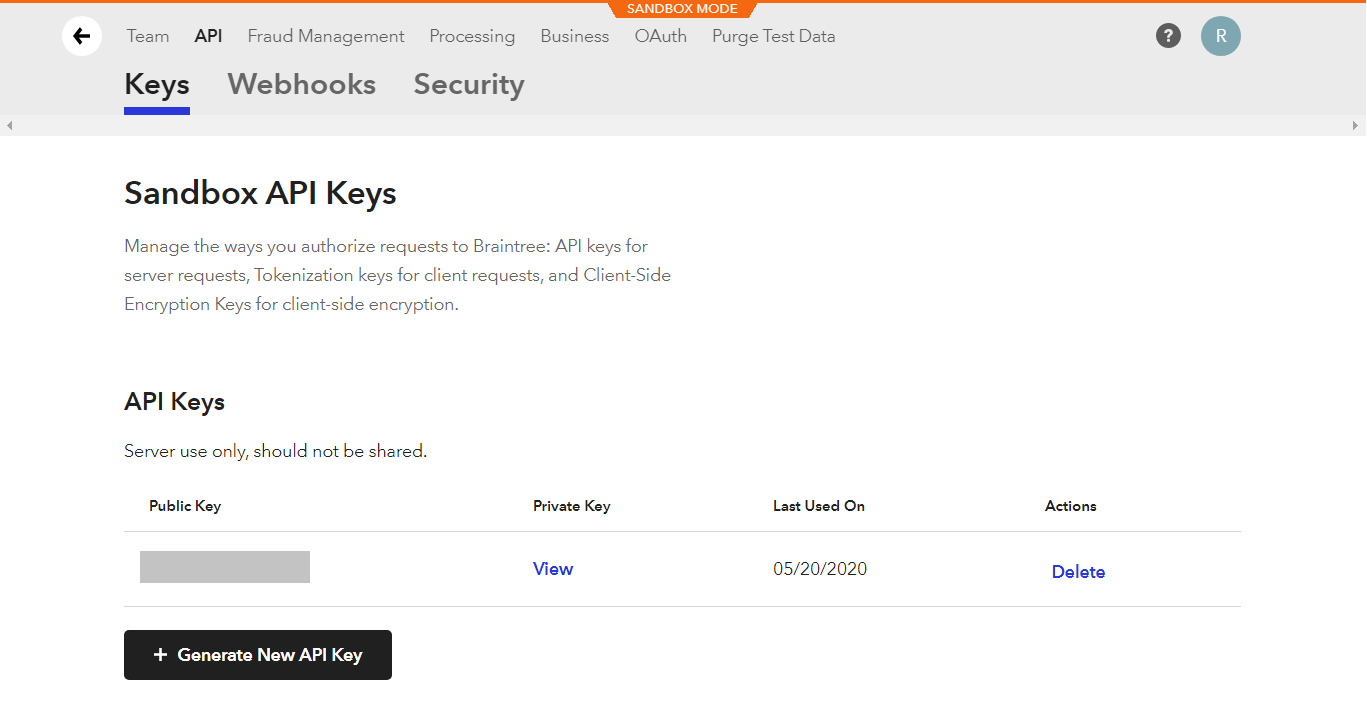
Where do I get
Merchant ID,Public KeyandPrivate Key?To obtain the
keyof Braintree access the site with your login and the password follow the steps:Click
SettingsIcon ⇾ selectKeysmenu.You can see
Public Keyand ForPrivate Keyclick on View to get the private key.
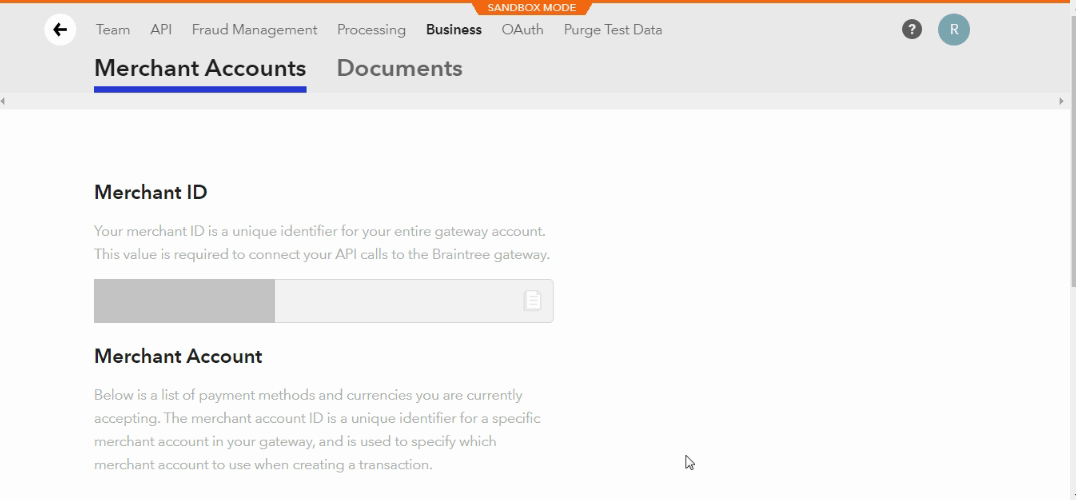
To obtain Merchant ID, click
Settings⇾ selectBusiness⇾ Merchant ID section. You can copy the merchant ID from here.
-
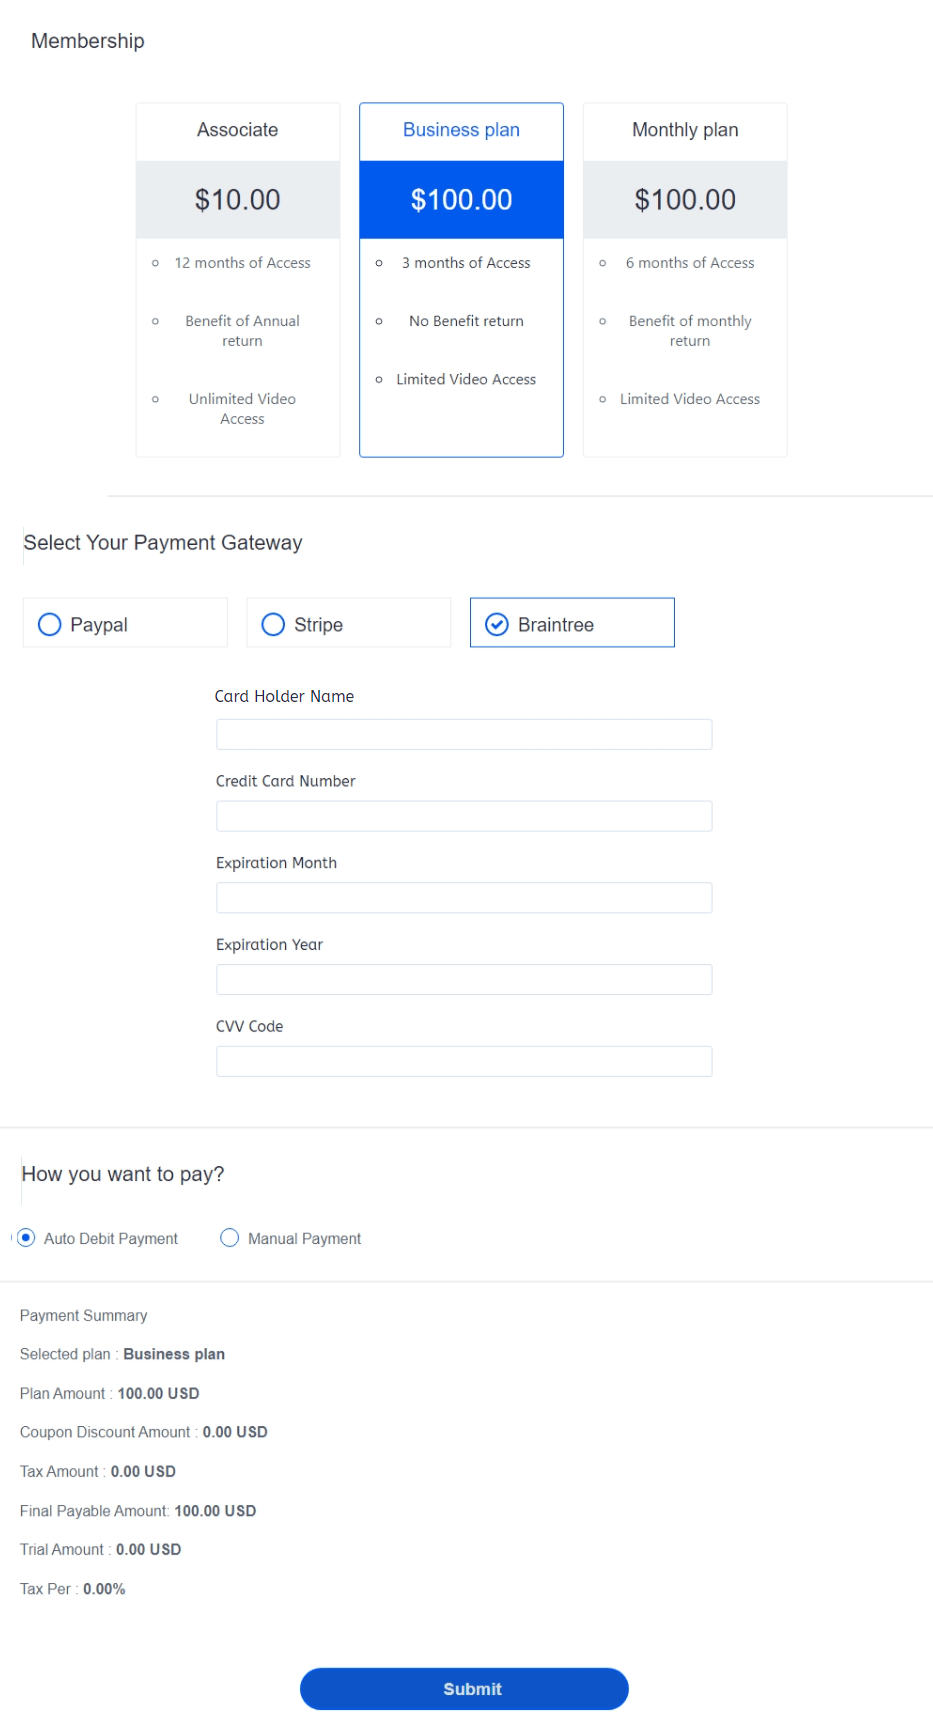
After that you can set labels and descriptions for cardholder name, credit card, expiry month, expiry year, and CVV.
-
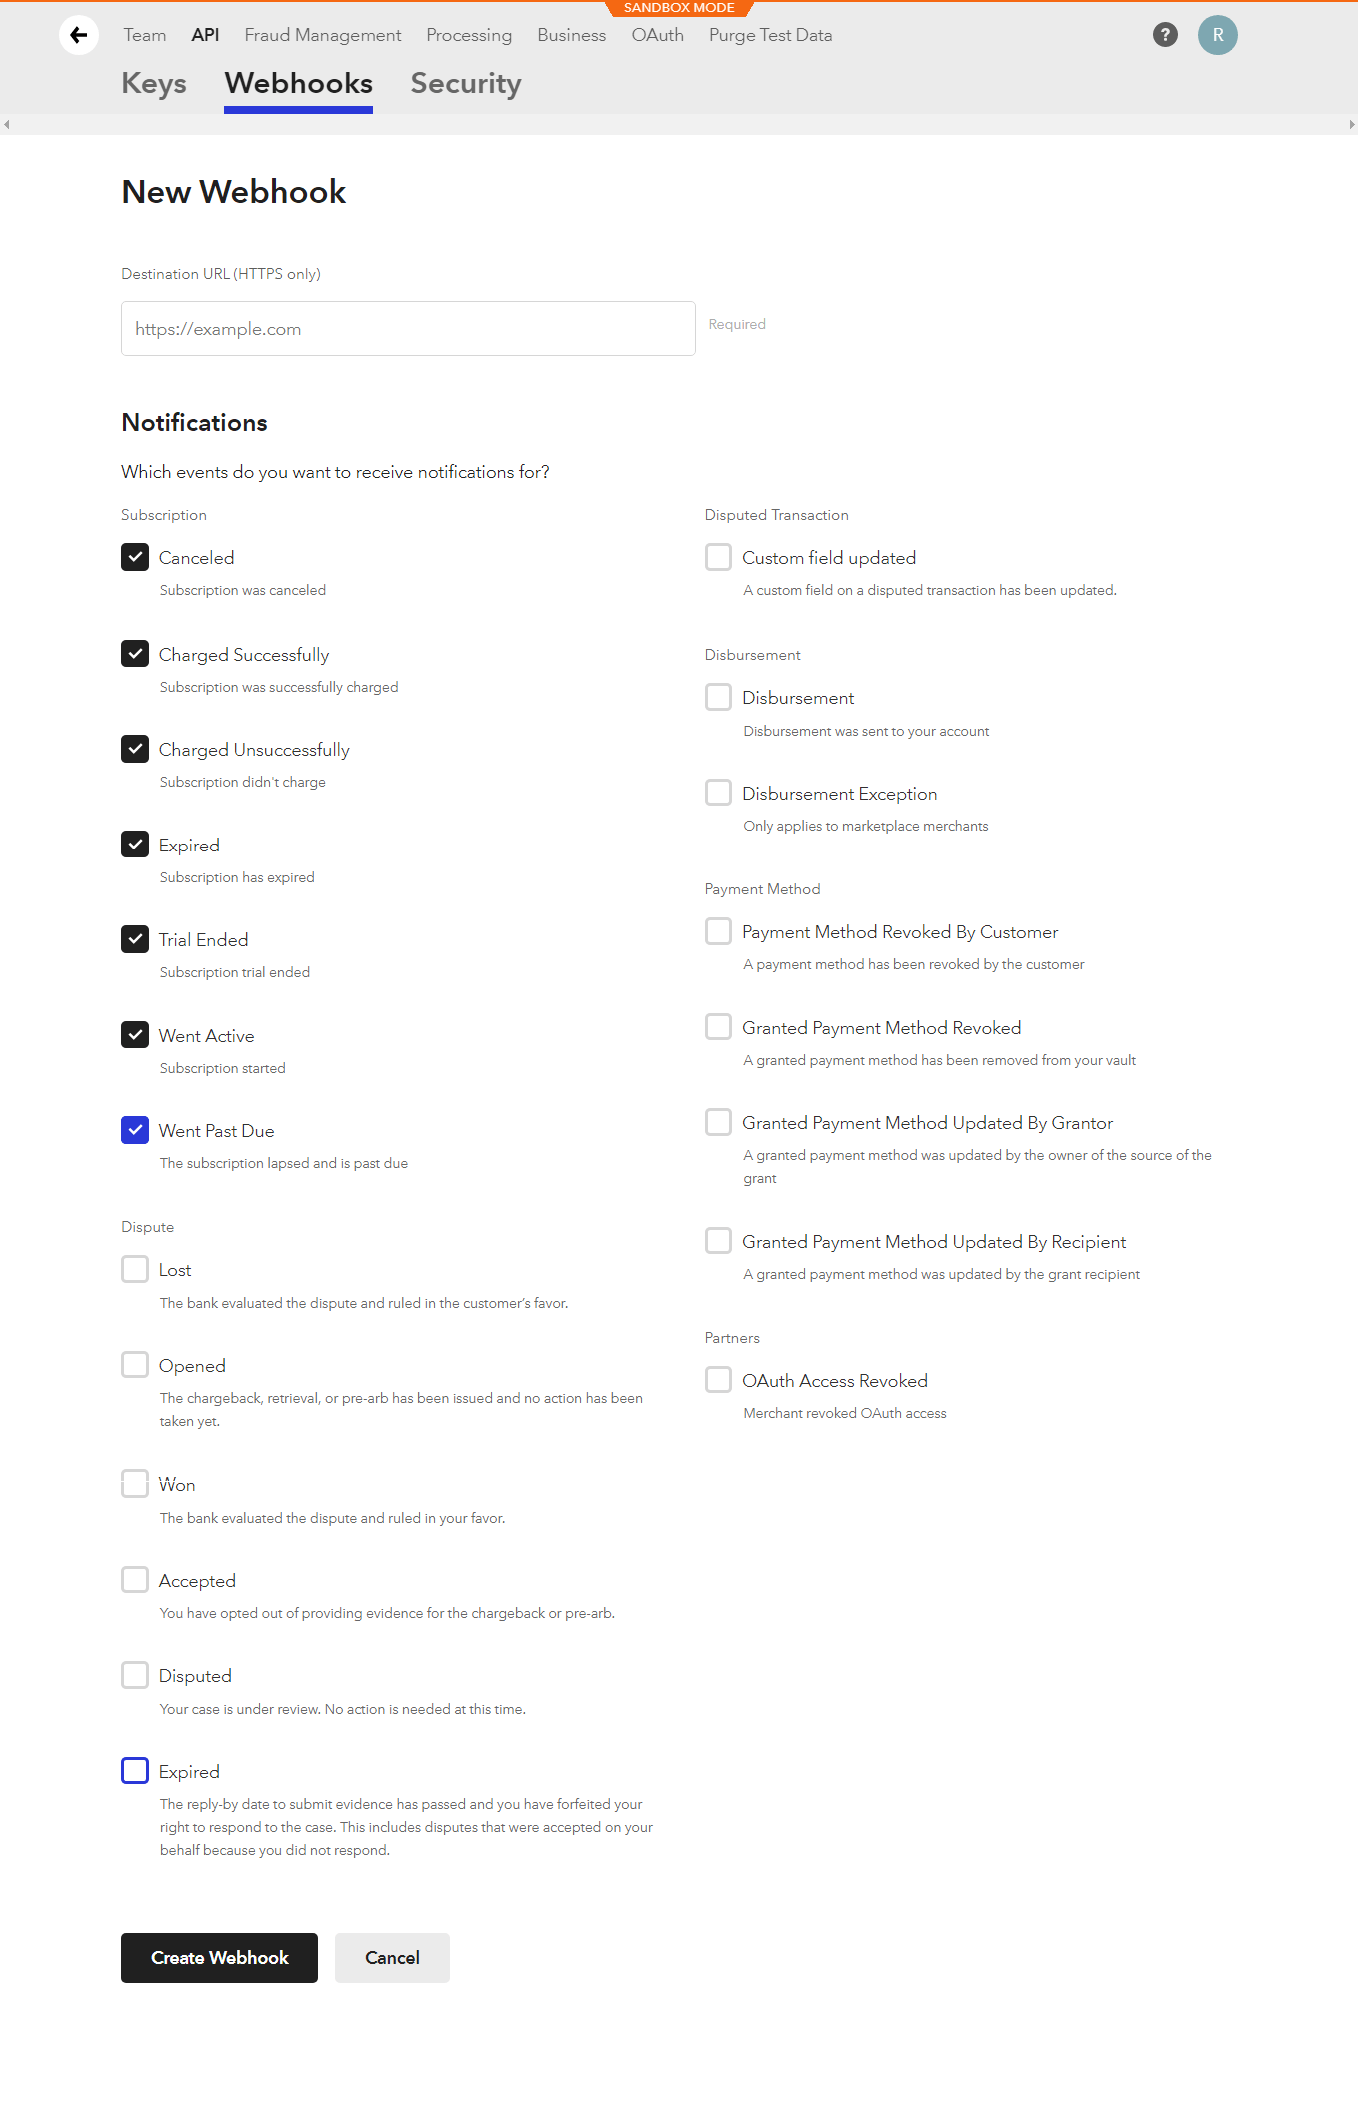
From where can I set
Webhook URL?To set
Webhook URLup a Braintree account, access the site with your login and password and follow the steps:Click on
Settings⇾APINavigate to
+ Create New Webhookthe button to add the destination URL.Now, add https://yoursite.com/?arm-listener=arm_braintree_api into Destination URL (HTTPS only), and then select subscription available events from the list of Notification. In order to receive notification when specific events occurs…
Please see the below screenshot:

Click on the Create Webhook button to create a webhook.
-
For
Auto Debit Paymentof subscription type of membership, You must create Braintree Plan in your Braintree account and set the Braintree plan ID in the membership setup.How to create plan in
Braintree account?After login into Braintree, click on Subscriptions in the navigation bar, then navigate to
Plansthe tab, and then click onNew Planthe button to add a new plan. - Set the plan price and trial period as you have set the data in the ARMember plan.
-
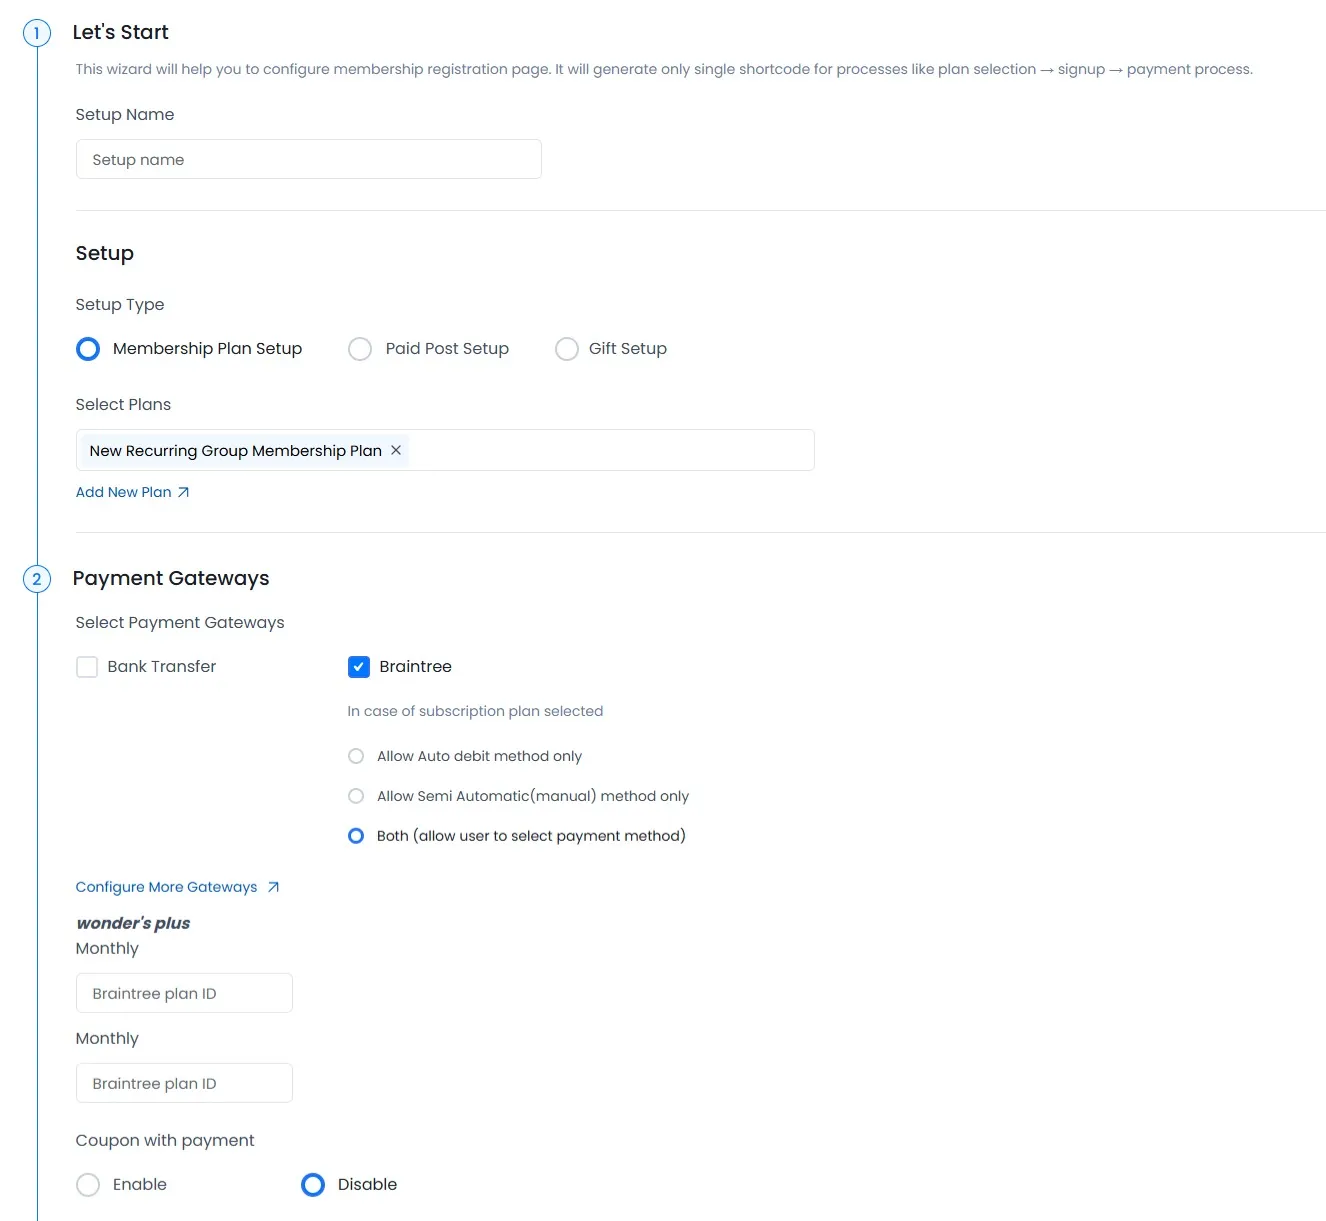
After configured Braintree configuration you can select Braintree payment gateway for the setup form from
ARMember⇾Configure Plan + Signup Form⇾Add/Edit Setup Formpage.Please see below given screenshot.

You must need to add plan ID for the auto debit method recurring payment.
-
Braintree support for one time and plan with subscription payment with ARMember Braintree.
-
ARMember Braintree Addon supports payment with AED, ALL, AMD, ARS, AUD, AWG, BBD, BDT, BGN, BMD, BND, BOB, BSD, BWP, BZD, CAD, CHF, CNY, COP, CRC, CUP, CZK, DKK, DOP, DZD, EGP, ETB, EUR, FJD, GBP, GIP, GMD, GTQ, GYD, HKD, HNL, HRK, HTG, HUF, IDR, ILS, INR, JMD, KES, KGS, KHR, KYD, KZT, LAK, LBP, LKR, LRD, LSL, MAD, MDL, MKD, MMK, MNT, MOP, MUR, MVR, MWK, MXN, MYR, NAD, NGN, NIO, NOK, NPR, NZD, PEN, PGK, PHP, PKR, QAR, RUB, SAR, SCR, SEK, SGD, SLL, SOS, SSP, SVC, SZL, THB, TTD, USD, UYU, UZS, YER, ZAR Currencies.
-
To confirm the transaction on the Braintree account, you can login with your Braintree credentials.
- Using the ARMember Braintree Payment Gateway add-on, you can allow a member to purchase a membership plan from your website. Please see refer below screenshot:


Please fill out required fields like Plan ID, Plan Name, Description, Price, Currency, Trial Period, and Billing Details and then click on create button to create the plan.
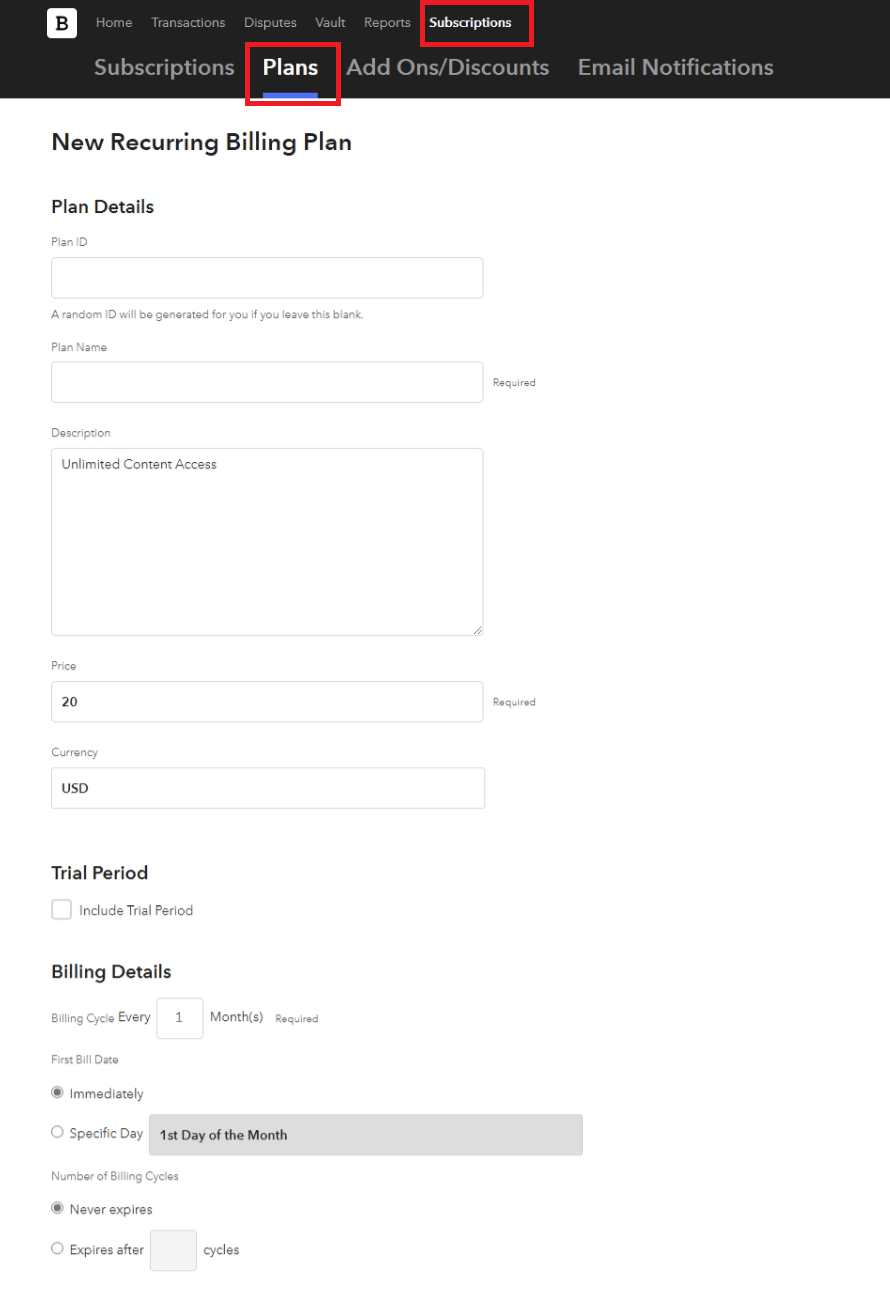
After creating plan you can get plan ID from Subscription ⇾ Plans tab.
Important Note: Braintree Payment Gateway Limitations:
- Braintree does not support “Day” and “Year” in the billing cycle.
- To apply a coupon discount with an automatic payment method (subscription), Braintree Payment Gateway does not support applying the discount to the first payment only, so to allow members to apply coupons successfully, enable the “For Recurring Plan Apply to Entire Duration” option from
ARMember⇾Coupon Management⇾ Add/Edit coupon page. - Braintree does not support
Paid Trialmembership plans with automatic payment methods.