

You can find this plugin from ARMember ⇾ Add-ons. When this plugin get activated to your site, you will get an additional option in ARMember ⇾ General Settings ⇾ Payment Gateways.
Do settings by filling required details to enable this payment gateway for users.
Important Notes:
- Subscription with Trial period will not be applied in Pagseguro.
- Pagseguro does not support billing cycle in Days. Also you can set billing cycle only for 1 Month, 2 Month, 3 Month and 1 Year.
- Pagseguro does not support infinite recurring time.
- Coupon Code will be applied with automatic subscription if the “For Recurring Plan Apply to Entire Duration” option enabled from admin panel -> Add/Edit coupon page.
- Pegseguro Payment gateway will not be activated if payment currency is not BRL.
Steps For Installation And Activation
You can install plugin in the following two ways. And ARMember – Pagseguro payment gateway plugin requires ARMember Plugin installed and active.
New installation via FTP
- Download the plugin and extract it. You will find a directory armemberpagseguro.
- In your WordPress installation directory, upload armemberpagseguro to
wp-content/plugins/ - Activate the
ARMember - Pagseguro payment gatewayplugin through thePluginsmenu from WordPress admin panel.
New installation via the WordPress Uploader
- Download the plugin.
- Log in to your WordPress admin panel
- Go to
Plugins⇾Add New⇾Upload - Click on “choose file” and browse the download package. When the plugin uploads successfully, click on
Activate Plugin.
Steps to Set up Pagseguro For Your Website
Let’s setup ARMember – Pagseguro payment gateway for your website :
-
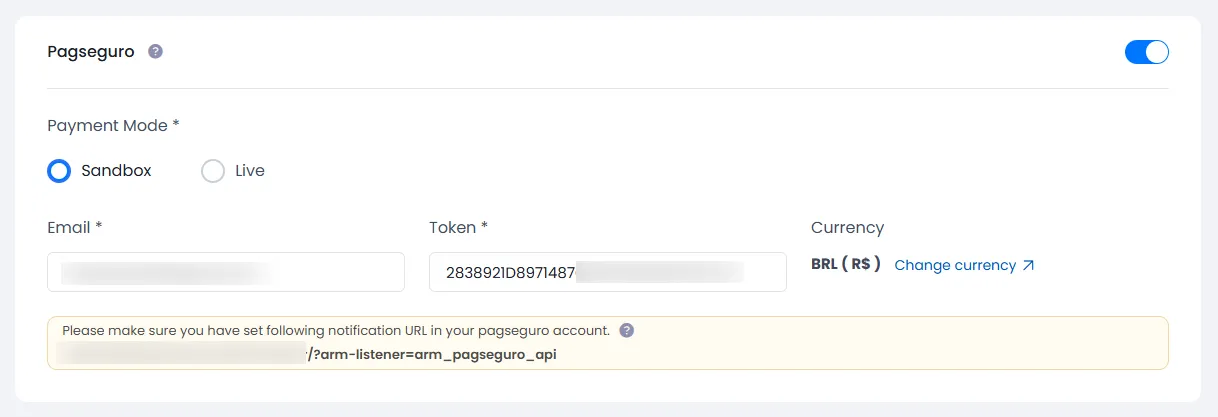
If plugin is activated, then Pagseguro section will be displayed in
ARMember⇾General Settings⇾Payment gateways.Please see below screen.

-
To activate Pagseguro payment gateway, make ‘Active’ switch ON, so you will be able to insert Email and Token.
-
If you do not have Pagseguro account then create it.
For Production account click here.
For Sandbox account click here.
For more information about how to create account click here.
-
Where do I get the token?
To obtain the security token of PagSeguro, follow below steps:
Login to your account
Click Vendedor under PERFIS DE INTEGRAÇÃO section in left panel.
Here you can generate token.
-
Now use generated token and email into ARMember Pegseguro payment gateway.
If you are using gateway for testing purpose, then select ‘Sandbox’ in ‘Payment Mode’, For making Payment Gateway live select ‘Production’. Then click on ‘Save’ button.
-
Follow the below steps to set the Notification URL in your Pageseguro account.
Login to your Pagseguro account
Click Vendedor under PERFIS DE INTEGRAÇÃO section in left panel.
Set Notification URL in Definir URL para receber as notificações: textbox under Notificação de transações section.
Click on Salvar button.
Also you need to set Notification URL in Aplicação tab. Click Aplicação under PERFIS DE INTEGRAÇÃO section in left panel.
Set Notification URL in Definir URL para receber as notificações: textbox under Notificação de transações section.
Click on Salvar button.
-
You need to set BRL currency as Default currency from
ARMember⇾General Settings⇾Generalpage. Pagseguro payment gateway support only Brazilian rupee(BRL) currency. -
For setting up payment related messages, go to
ARMember⇾General Settings⇾Common MessagesIn this page, you will find ‘Payment Fail (Pagseguro)’ under ‘Payment Related Messages’ section. If you do not set the message here, then the default message will be displayed.
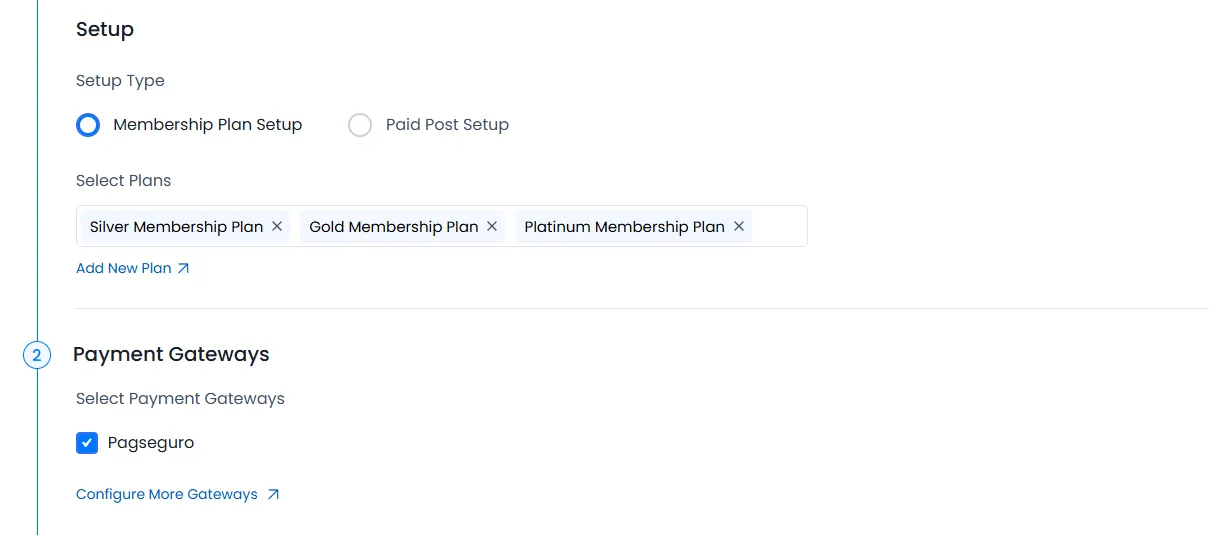
-
After setting up Pagseguro payment gateway you will be able to see Pagseguro payment in
ARMember⇾Configure Plan+SignUp PagePlease see below screen.

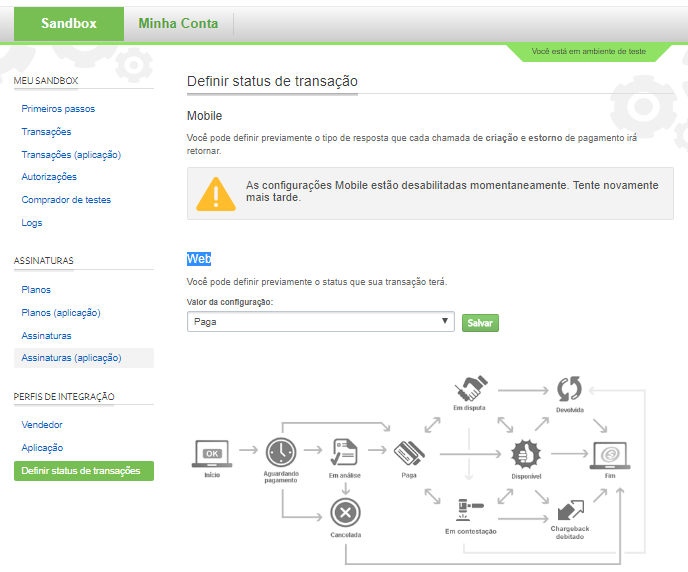
-
Important Note:User will not be created in the system automatically after payment. If you want user to be created automatically after payment of ‘ONETIME’ plan OR ‘MANUAL SUBSCRIPTION’, then please do the following settings in your Pagseguro account.
Click Definir status de transação under PERFIS DE INTEGRAÇÃO section in left panel.
Set Paga in Valor da configuração: under Web section. Click on Salvar button.

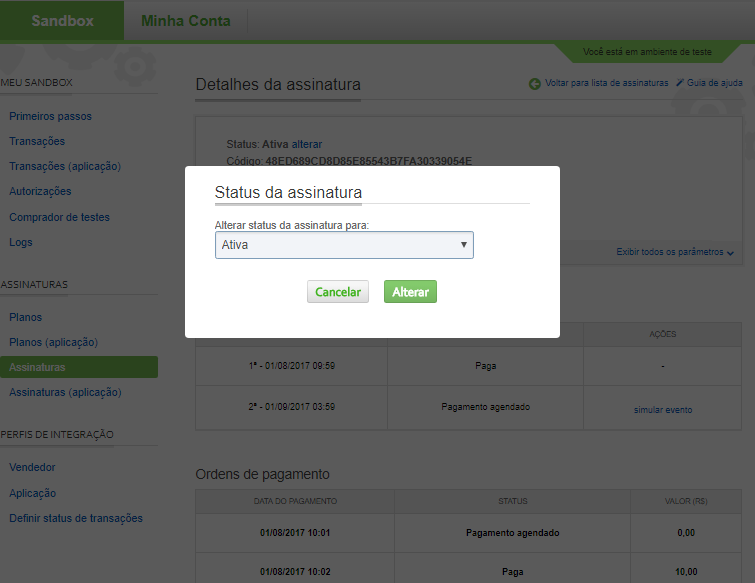
-
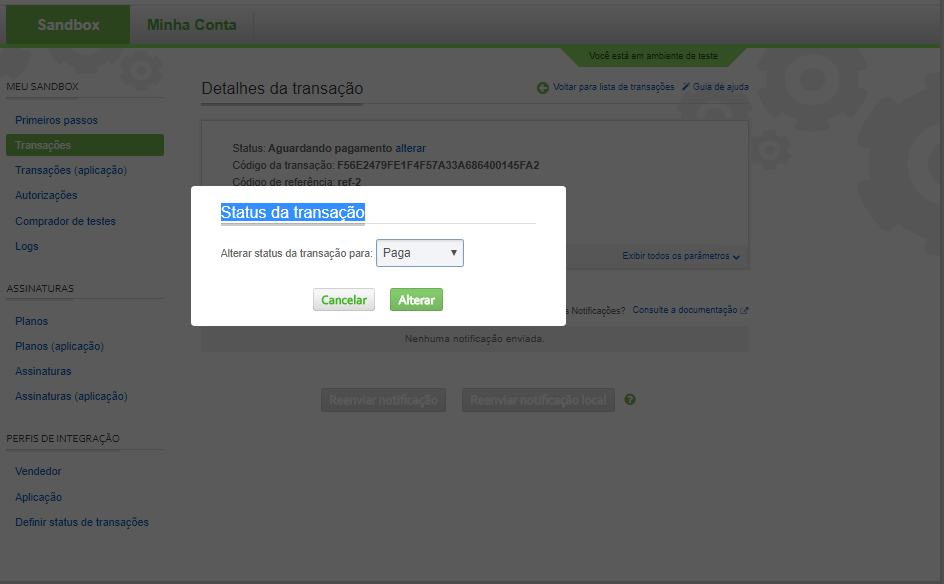
Important Note:User will not be created in the system automatically after payment of ‘AUTOMATIC SUBSCRIPTION’. You need to follow below steps to add member in system.
You need to change Status da assinatura to Ativa from your Pegseguro account.

You need to change Status da transação to Pega from your Pegseguro account.

Please do not forget to change status for each payment, otherwise the system will not work properly.
Boleto Payments
ARMember Pagseguro Payment Gateway support Boleto Payment method.
Boleto Payment method does not support Auto Debit Payments so this method will be allowed for Semi Automatic (Manual) Payment Method Subscription and Finite membership Plan.