

How to Configure & Use the User Private Content inbuilt Addon with the ARMember Pro Plugin
In this guide, we’ll walk you through the process of adding and managing private content for your users with the ARMember plugin. If you’re looking to provide custom content for specific members, ARMember user content makes it simple to configure and display user-specific content. Follow our step-by-step instructions to understand how to add private content, control visibility, and display it to the right users based on their login status.
How to Add Private Content
To add user private content, navigate to Admin Panel ⇾ ARMember ⇾ User Private Content. On this page, you will find a button labelled + Add Private Content.
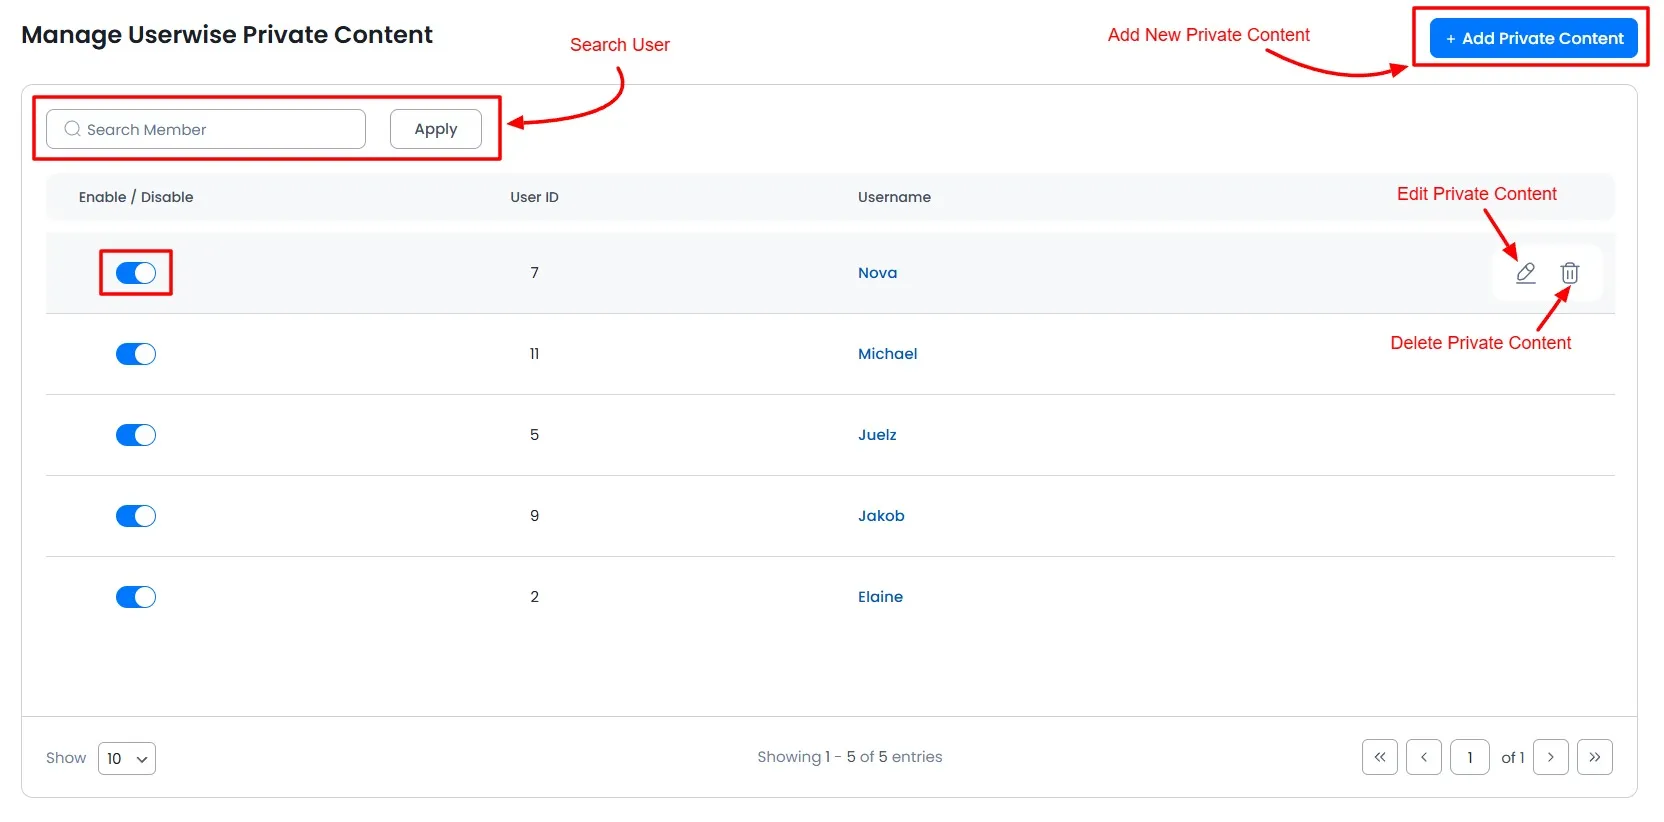
Additionally, ARMember user content lets you manage members from the grid.
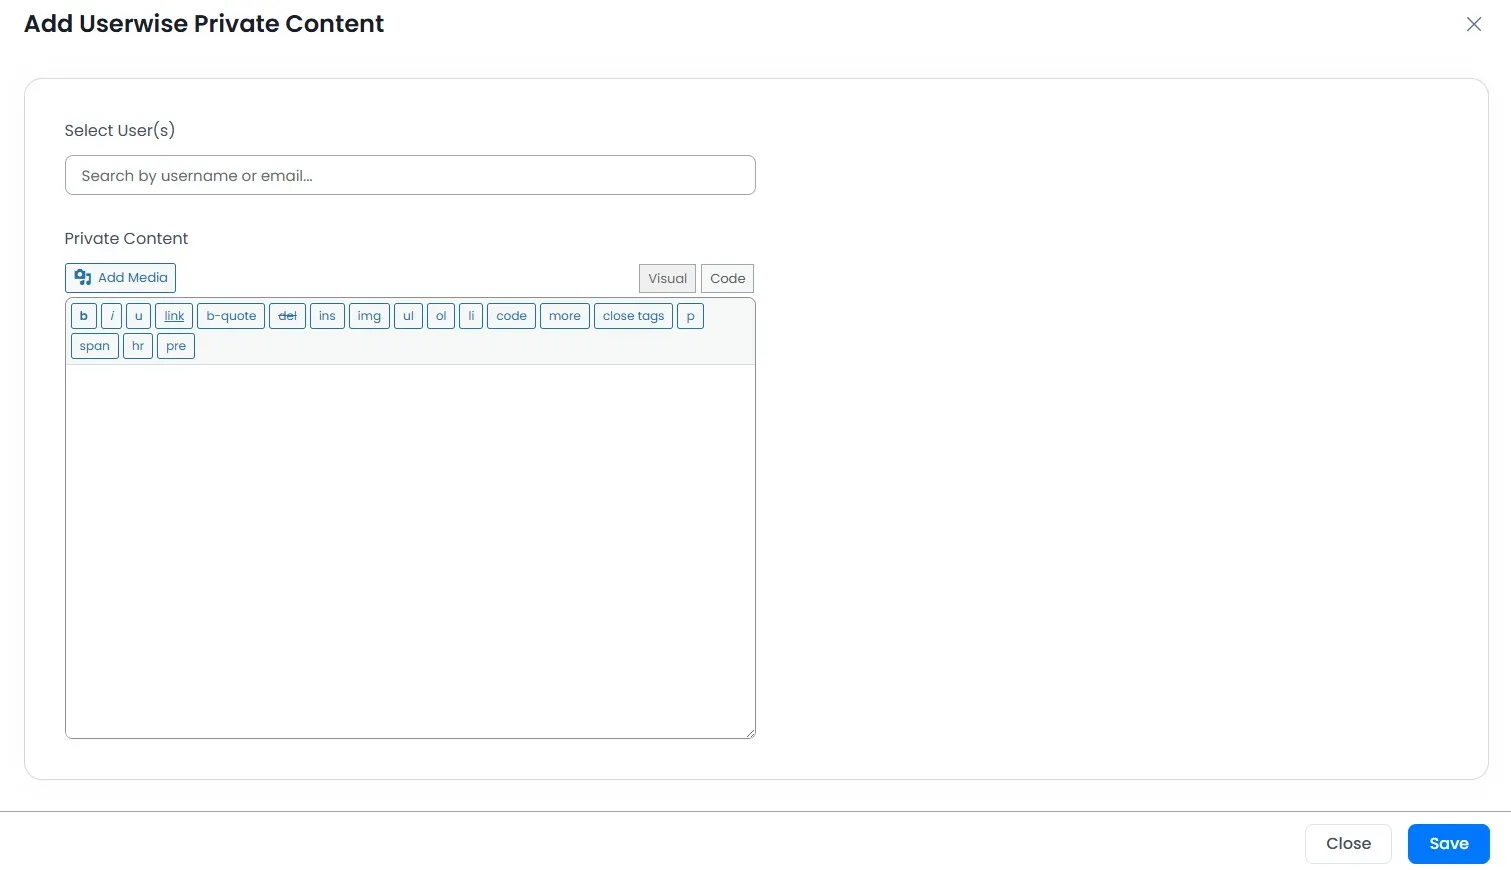
This button appears in the top right corner of the page. Clicking it will reveal a text editor and a user-searchable field, as shown below.
- When you add custom content for a user, ARMember automatically enables private content for the user. However, as an admin, you can enable or disable this content for specific users.
- You can select and add multiple users at once while adding custom content.
- In the content field, you can insert custom HTML content that will display to the user once they log in.
How to Display Private Content to the User
ARMember provides a shortcode to display private content for members. You can place this shortcode on any page or post according to your needs.
[arm_user_private_content]This shortcode will display content based on the logged-in user. Simply place it, and ARMember will show the content to users only if you have added custom content for them.
If you haven’t added private content for the user, ARMember will display the default content for that user.
If you disable the private content for a user, neither the default content nor custom content will display for that user.