Member Panel – Overview
The Member Panel is a feature in ARMember that allows administrators to customize and manage the member’s front-end dashboard experience. It provides a centralized interface where logged-in users can view their membership details, manage their account, and access important information.
How to Access Member Panel Settings
- Log in to your WordPress admin dashboard.
- Navigate to the
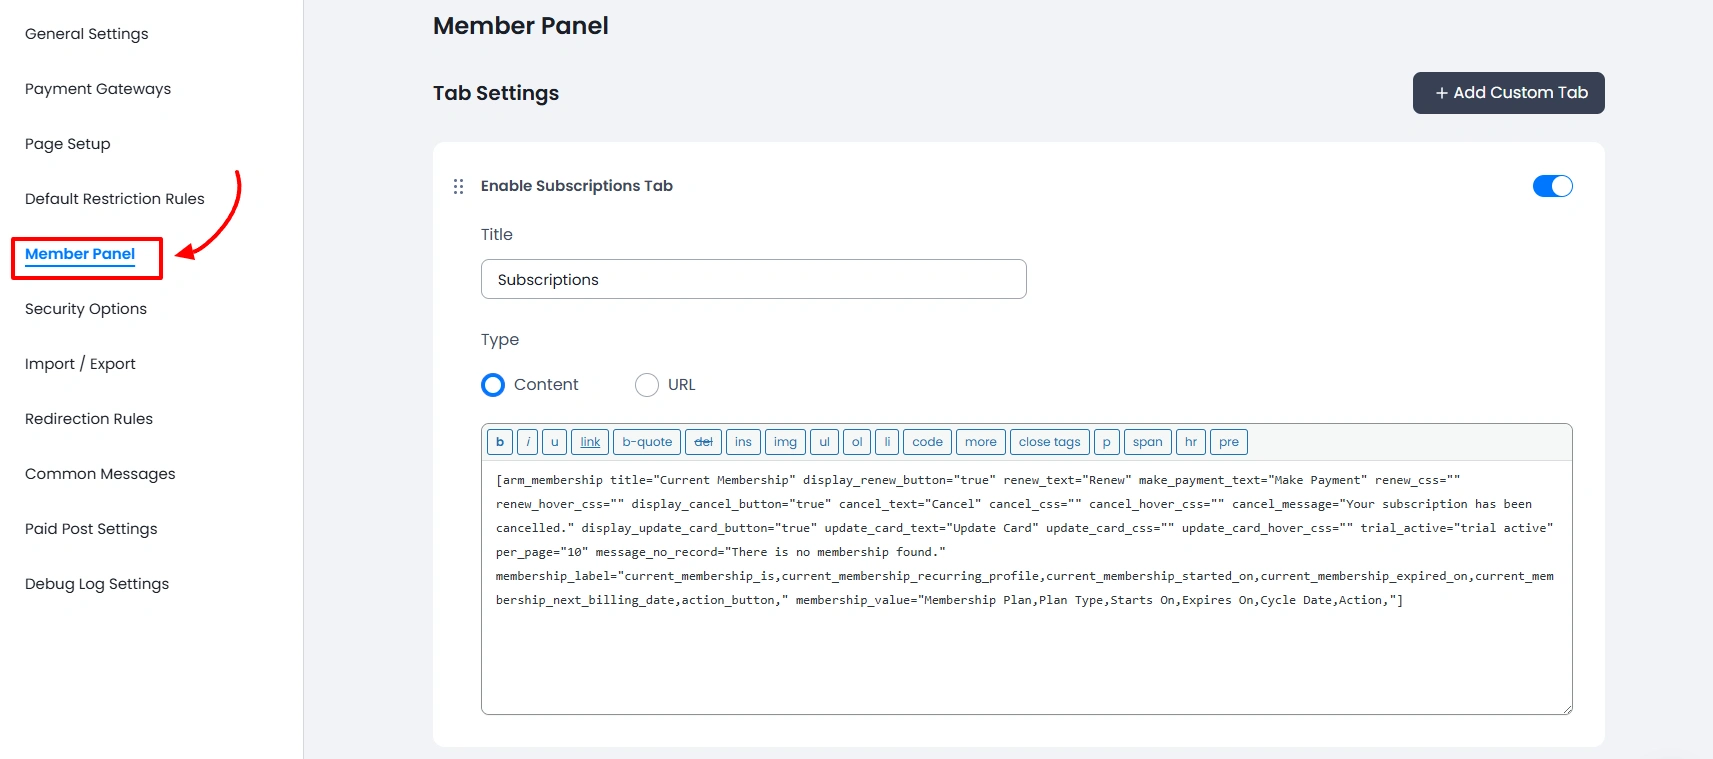
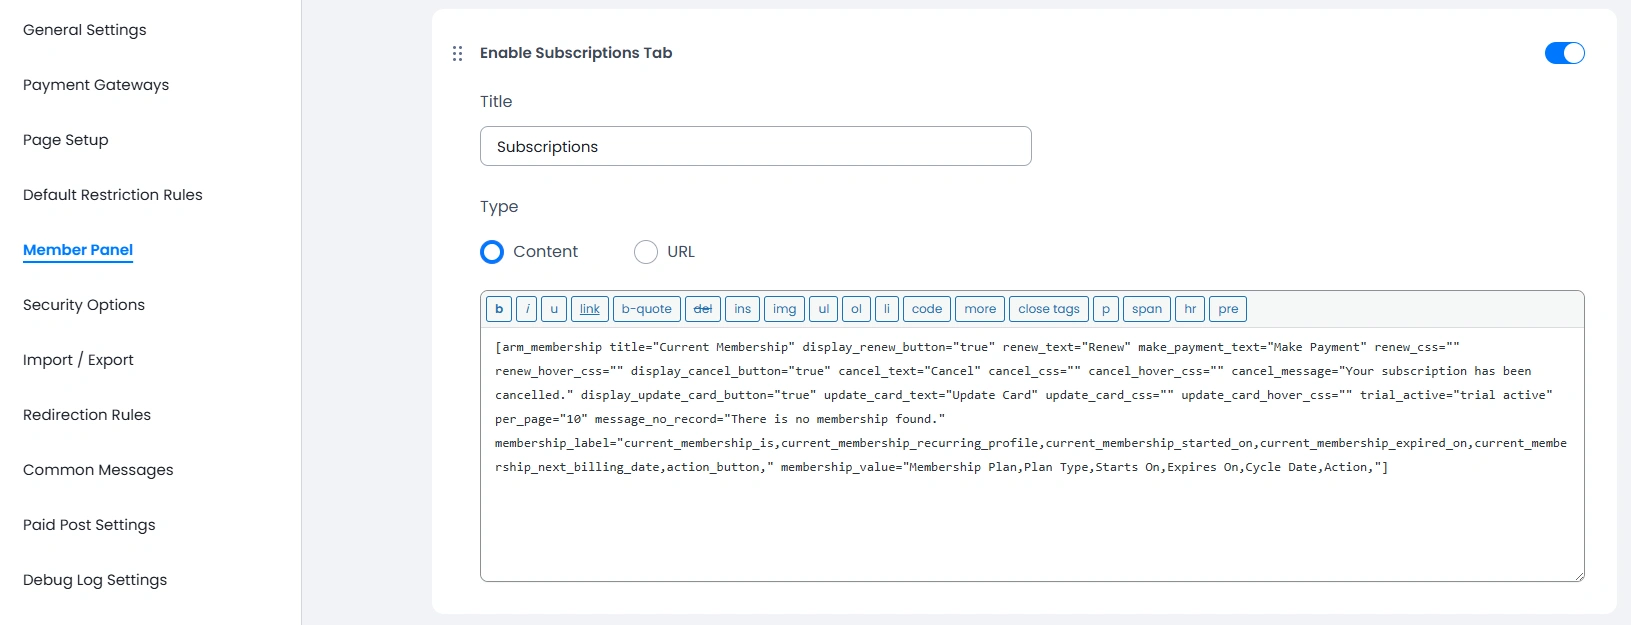
ARMember→General Settings→Member Paneltab. - Once you click on Member Panel, you will be redirected to the Member Panel configuration page.
Key Features
- Customizable Dashboard: The Member Panel allows you to design a user-friendly dashboard for your members. You can control what information is displayed and how it appears.
- Member Information Display: Show essential user details such as profile information, membership plan details, subscription status, renewal dates, etc.
- Navigation Control: You can enable or disable different sections of the panel based on your requirements.
- Styling Options: Customize the appearance of the Member Panel to match your website theme.
- Shortcode Support: The Member Panel can be displayed on any page using a shortcode. This allows flexibility in placing the panel anywhere on your website.
Pre-Active Tabs
ARMember does provide a facility to show the basic few tabs directly when you want to navigate to the ARMember → General Settings → Member Panel tab.
Important Note: Other tabs will be added as per the add-ons activated, like Pay Per Post, Online Courses, Gift Membership Add-on, etc.
The pre-active tabs are as below:
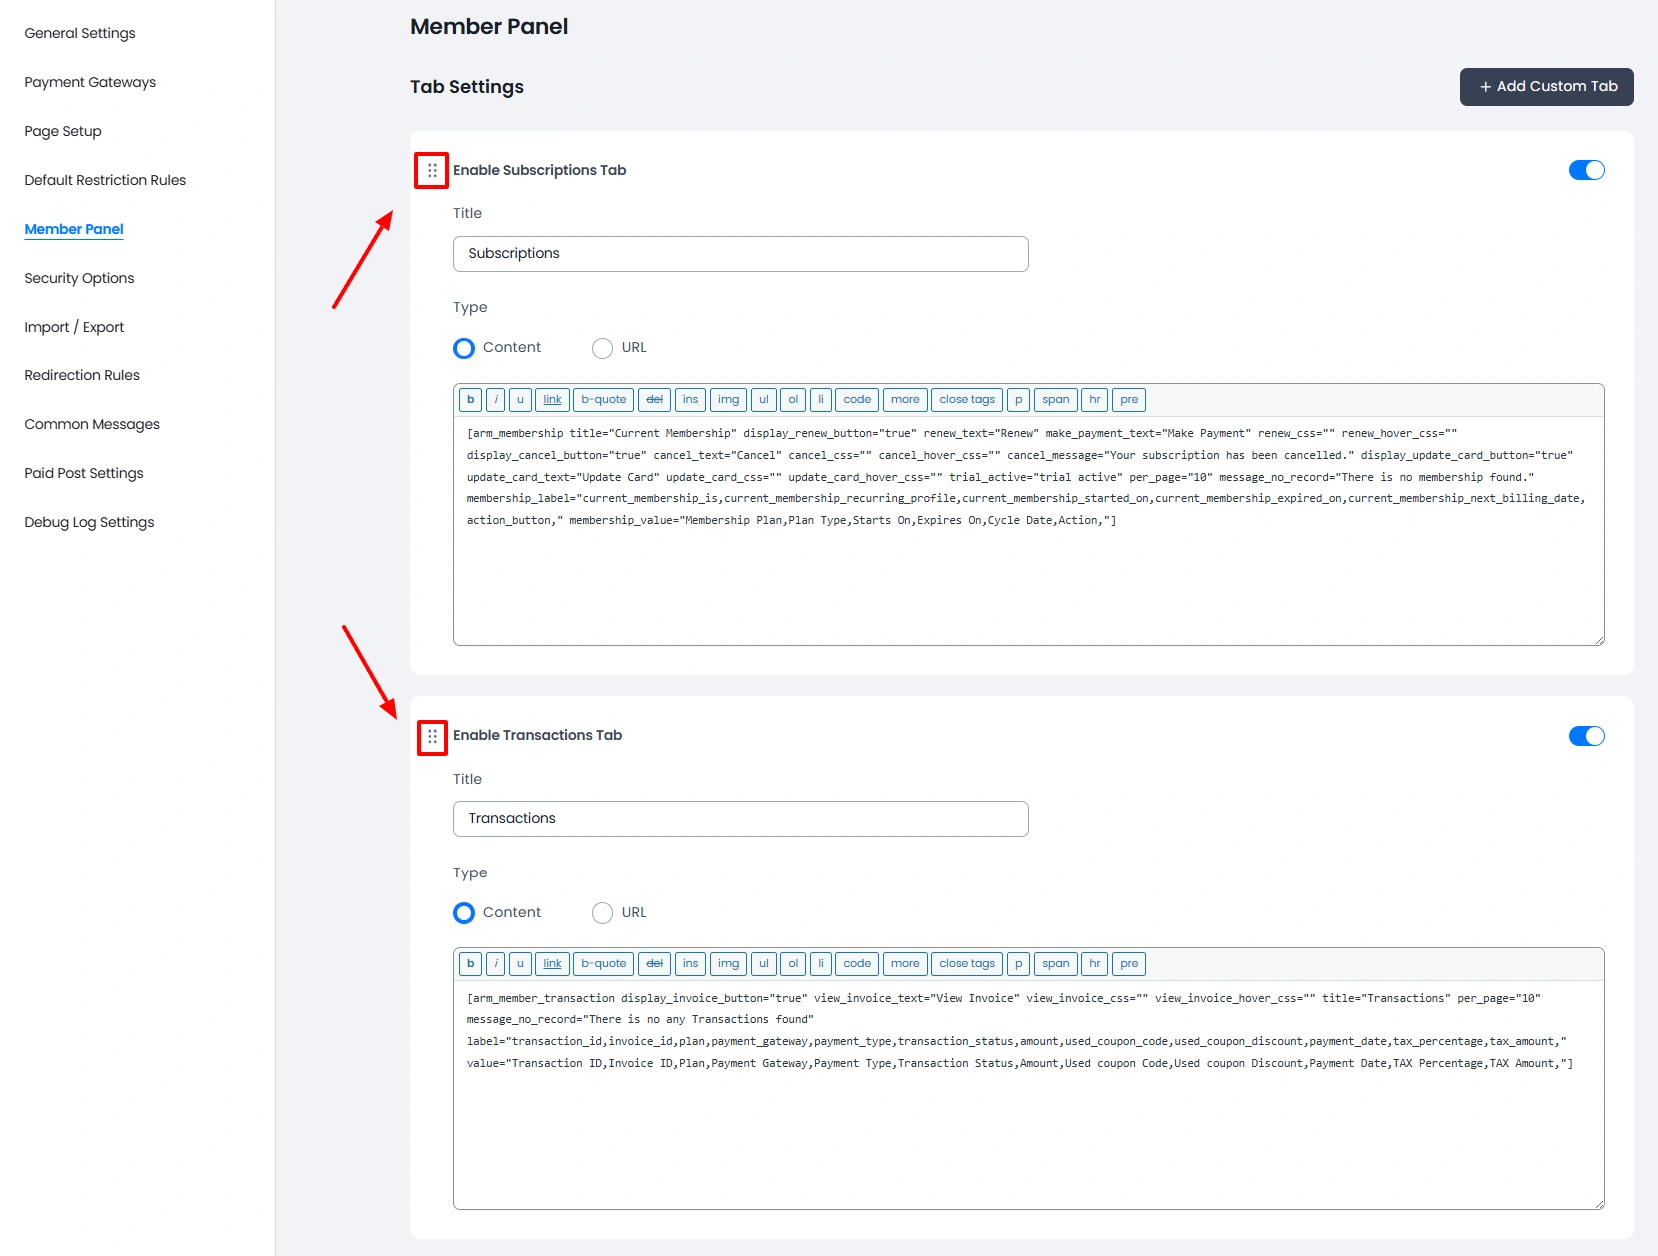
- Subscriptions
- Transactions
- Edit Profile
- Close Account
- Change Password
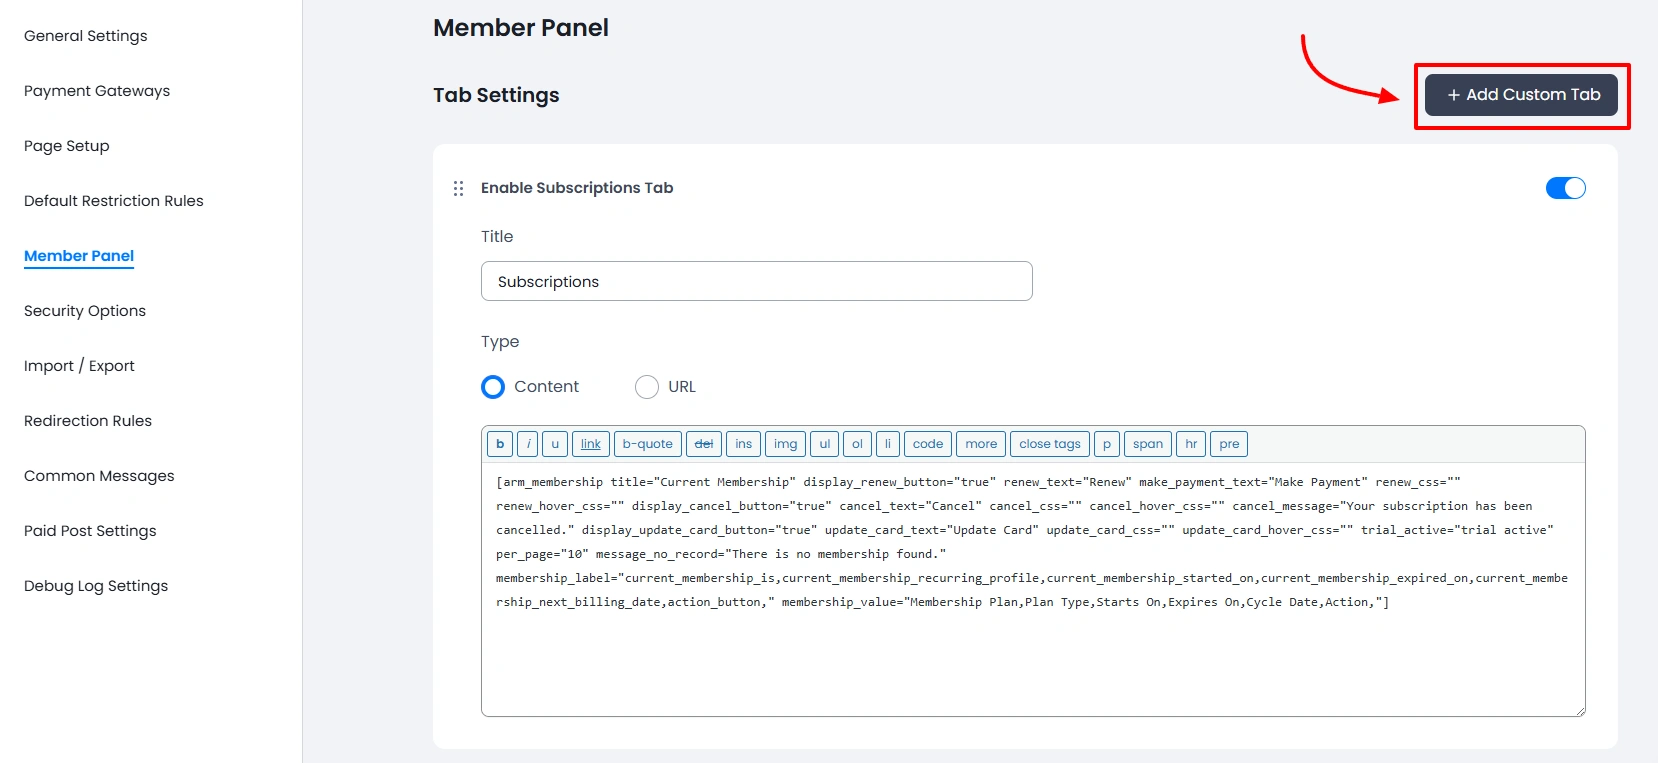
This tab contains the shortcode for Current Membership Shortcode. The parameters added to the shortcode can be modified as per personal preference.
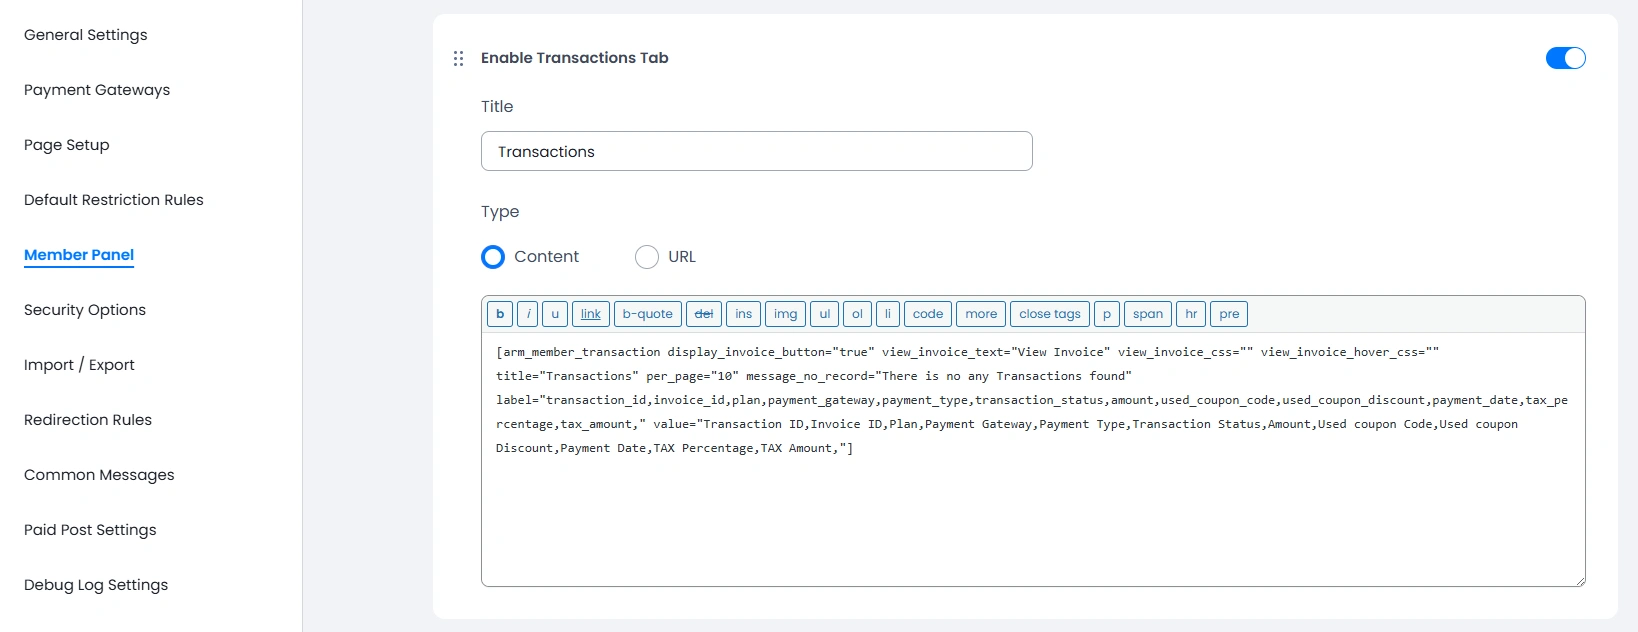
This tab is very useful for any dashboard, as this tab allows the members to check their payment transactions and the status of transactions.
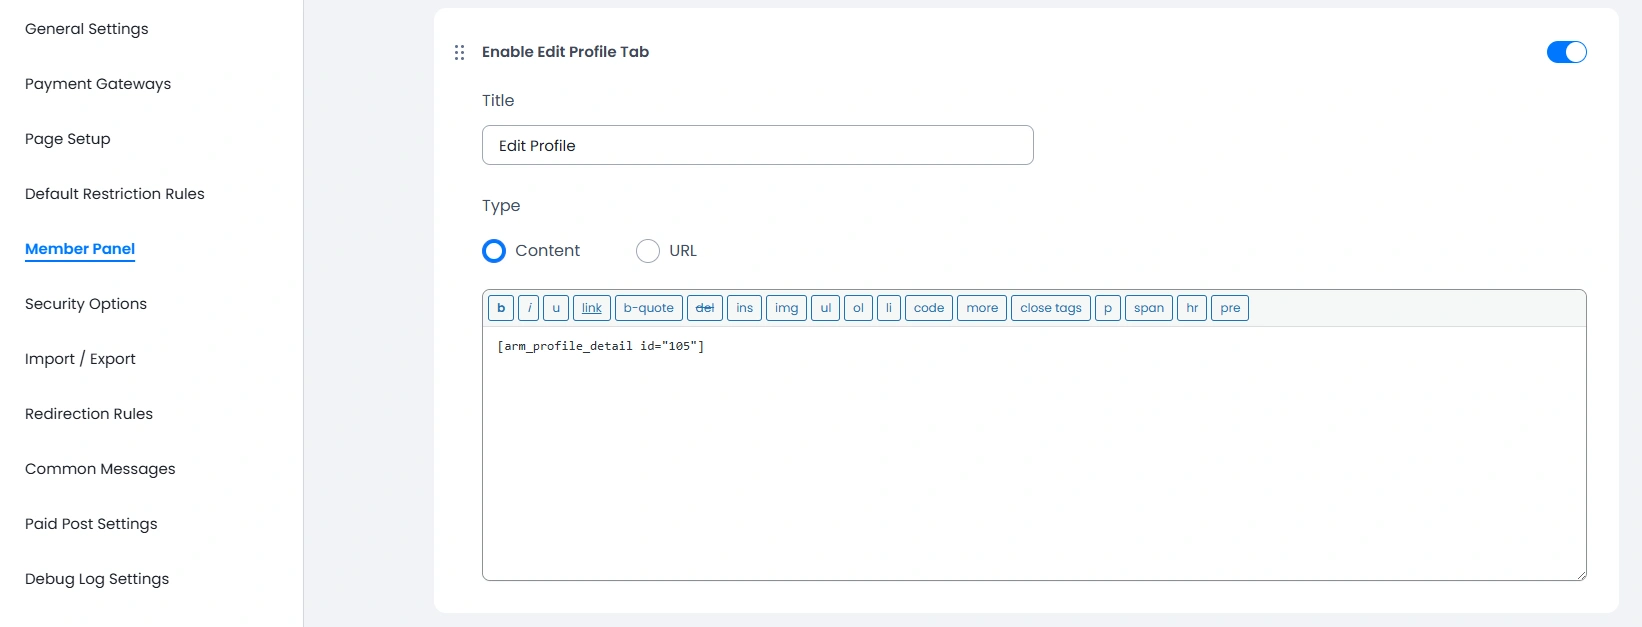
The Edit Profile tab offers flexibility to the member to land on this tab and modify their profiles. By default the shortcode of the default form is added to the panel; however, if you have created any other edit profile form, then you can navigate to the ARMember → Manage Forms page, copy the shortcode of your custom edit profile form, and paste it here.
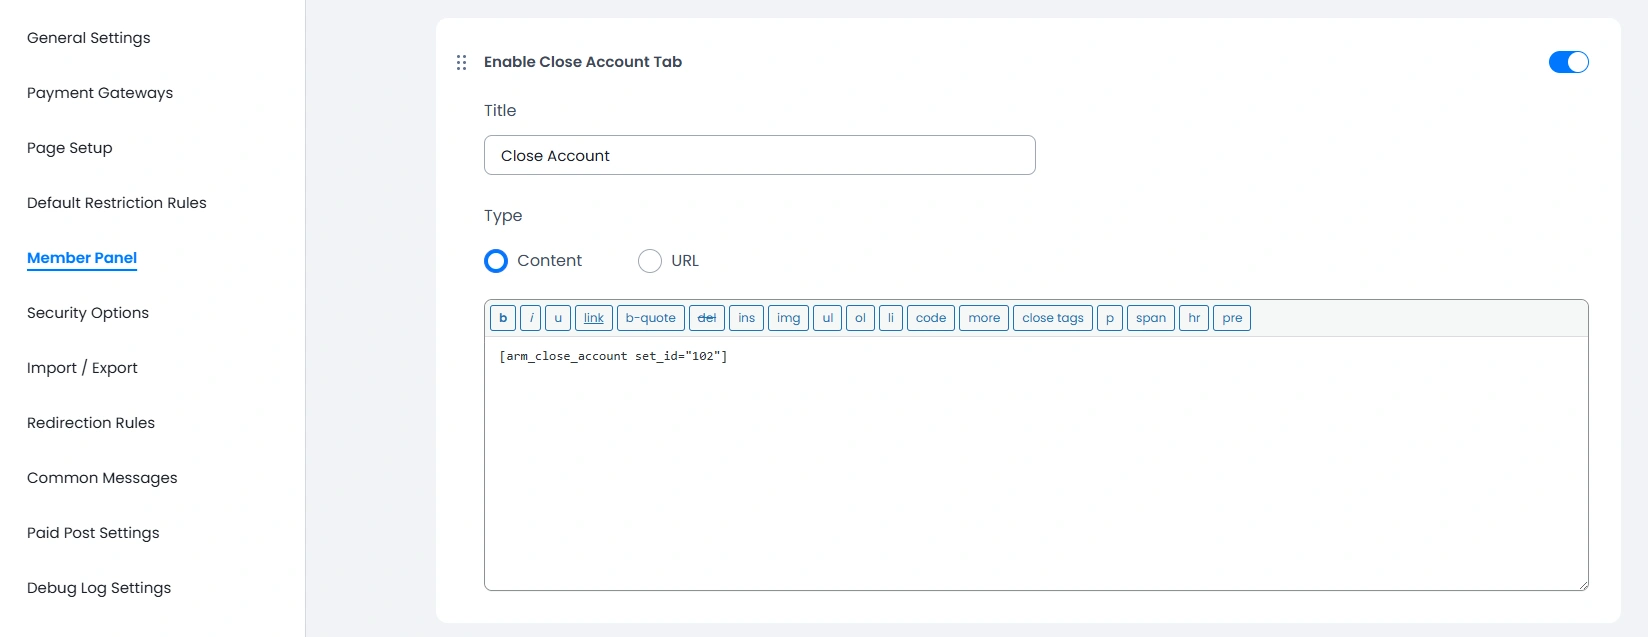
The next up is the Close Account tab; this allows the members to close their accounts permanently. If the administrator does not wish to show this tab, then they can turn off the switch of this tab from the admin panel.
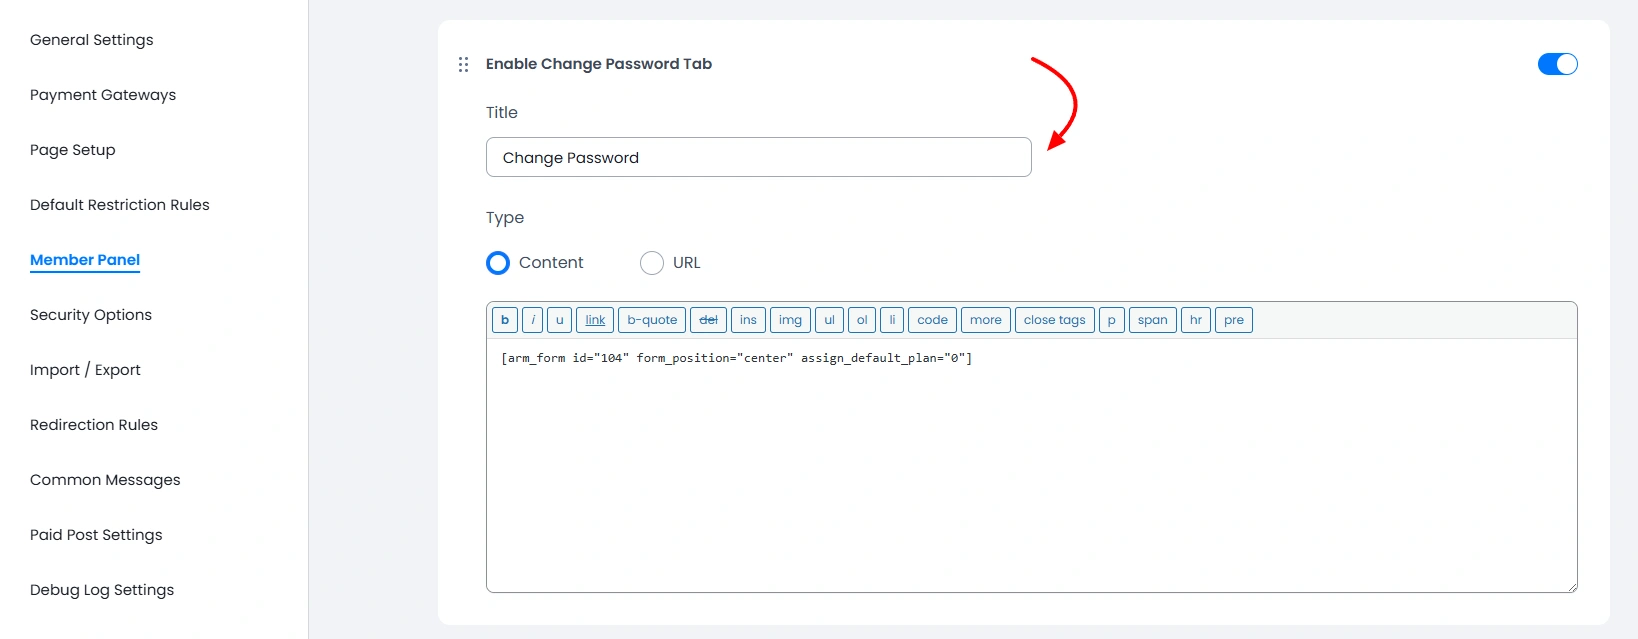
The Change Password tab contains the shortcode of the change password form; it will contain the shortcode of the default change password form. However, if you have created any other form, then copy its shortcode and add it here.
How to add a shortcode of the member panel?
For all the new installations ARMember creates this page by default, so verify once at your site if this page is already created.
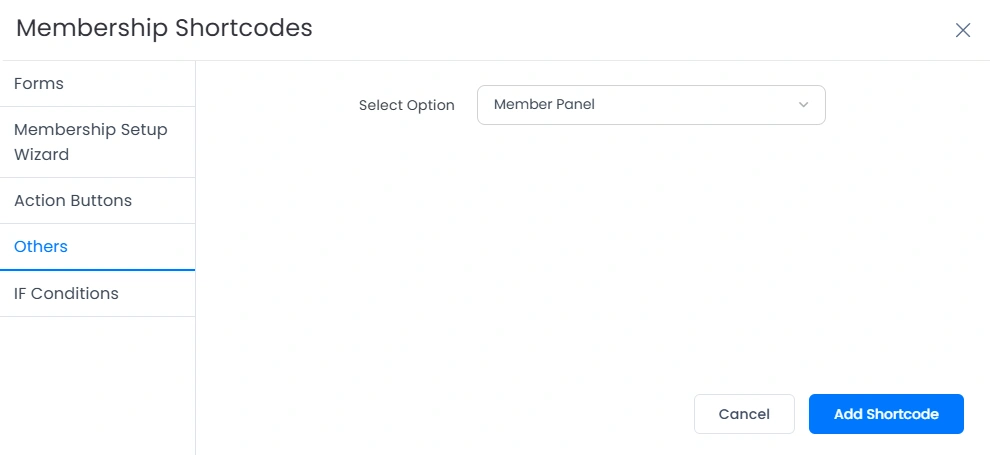
However, if you already have ARMember and have updated the plugin or mistakenly deleted the Member Panel page, then don’t worry; you can create this page again and can map the page. In order to add the shortcode, navigate to the Pages → Add/Edit Pages here and search for the Membership Shortcodes block.
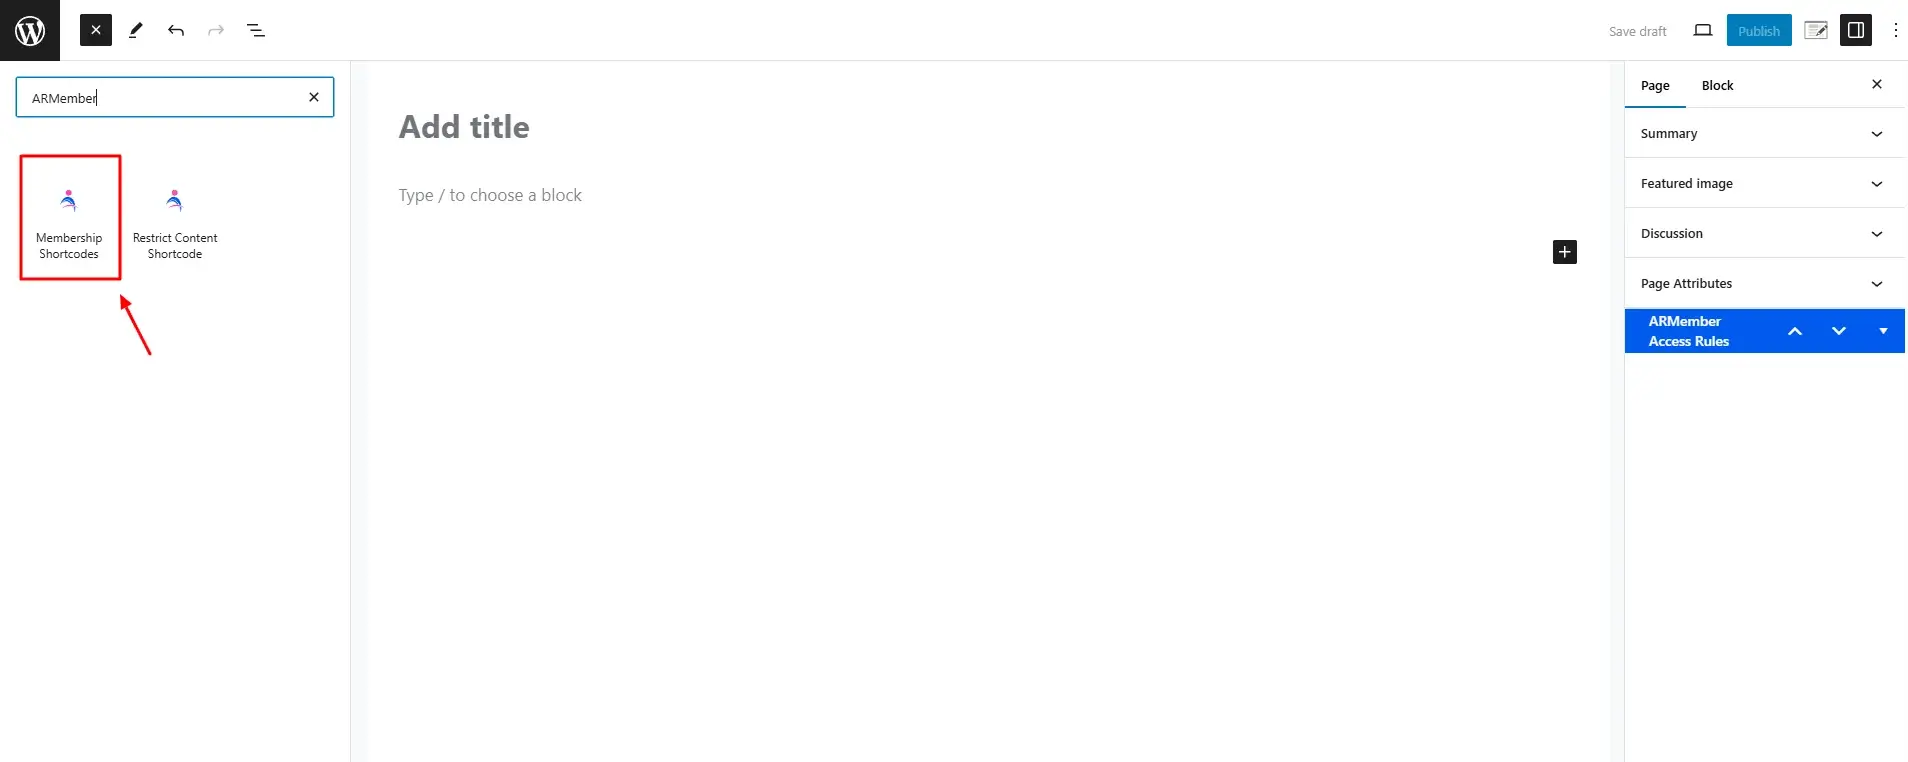
Once clicked on the Membership Shortcode Block, you can click on the Others tab and here in the dropdown, select the option “member panel” and add the shortcode to the page.
Member Panel Shortcode
[arm_member_panel]You can copy the above-provided shortcode and paste it to the page or block as per your requirements directly.
Add/Sort Custom Tabs
All sites work differently and have different requirements. Keeping this in mind, ARMember does provide flexibility to add a custom tab and to sort the tabs.
Let’s first check how to add a custom tab from the admin panel.
Add Custom Tab
In order to add a custom tab, navigate to the ARMember → General Settings → Member Panel tab. Here in the top right corner, you will be able to check a button with the label + Add Custom Tab click on this.
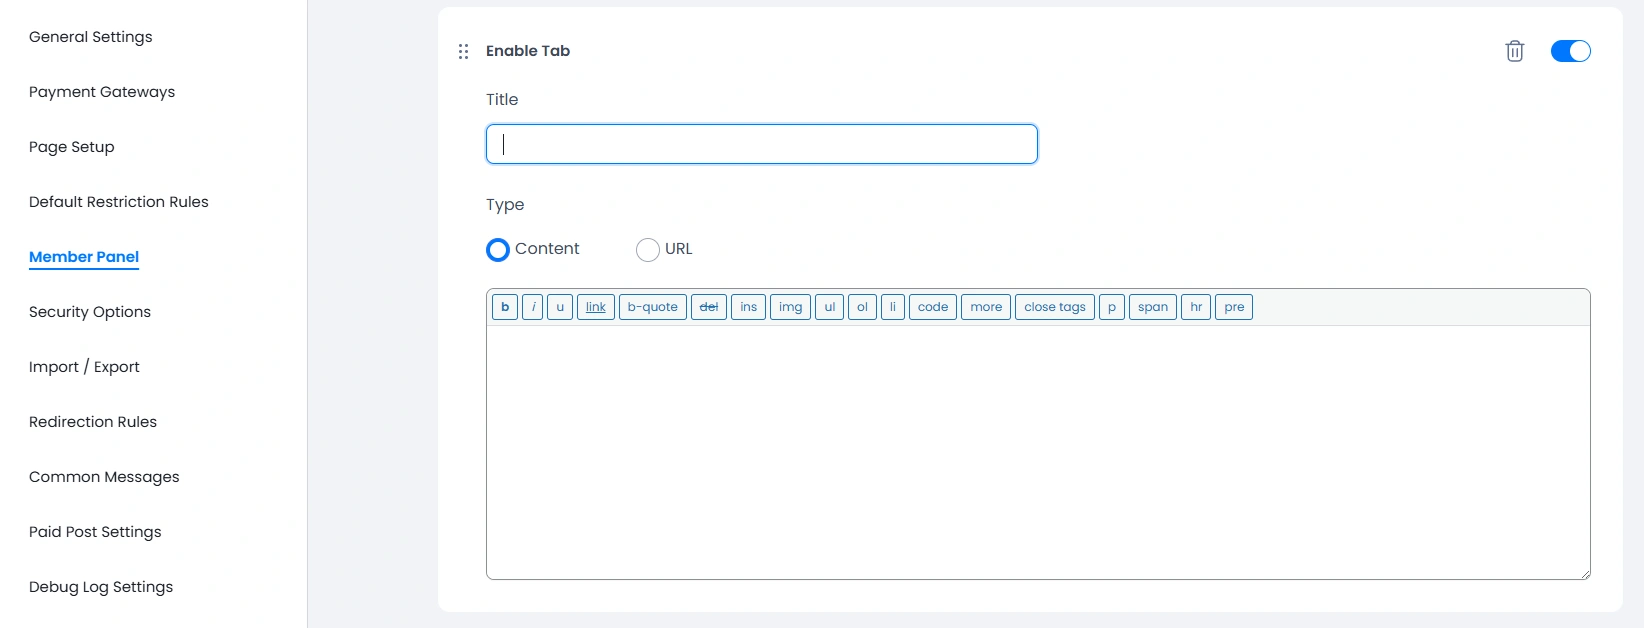
Once the button is clicked, a new tab will be added to the interface, and you can add the title of the tab and set the type to either content or URL .
If you select the type as Content then you can add the content/shortcode to the editor.
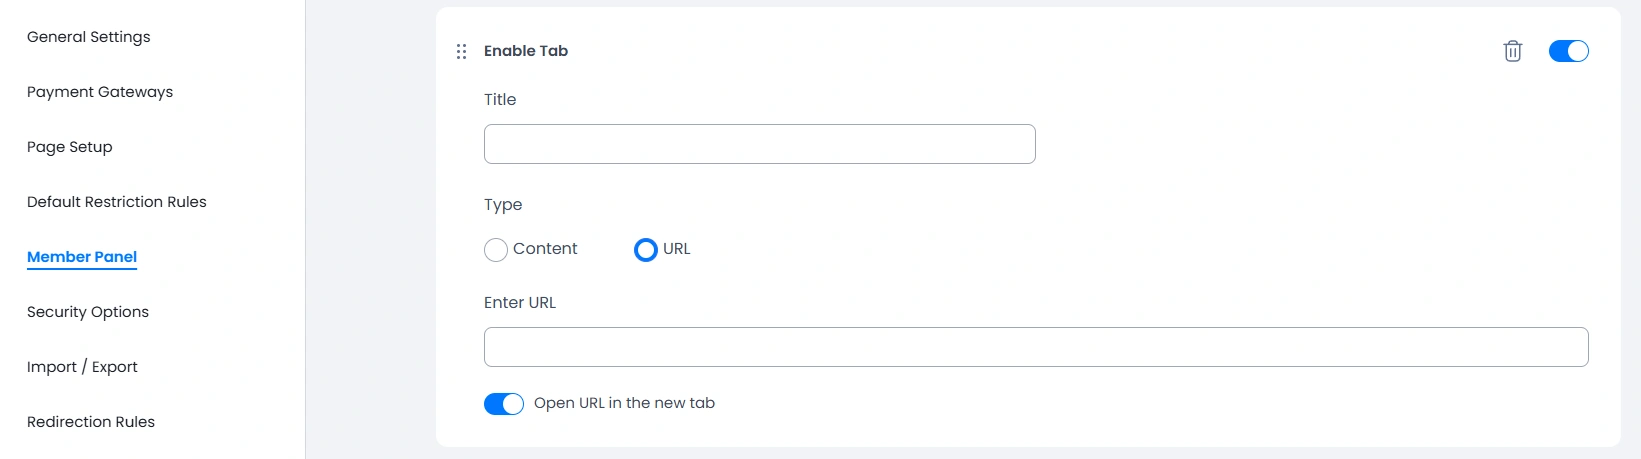
However, if you have selected the type as URL, then you can add the URL to any other page, and if you wish to open it to a new tab, then you can enable the switch for it too.
Sort Tabs
The tabs can be easily set in order as per the requirements, in order to sort these you can click on the sort icon and can drag and drop the tab.
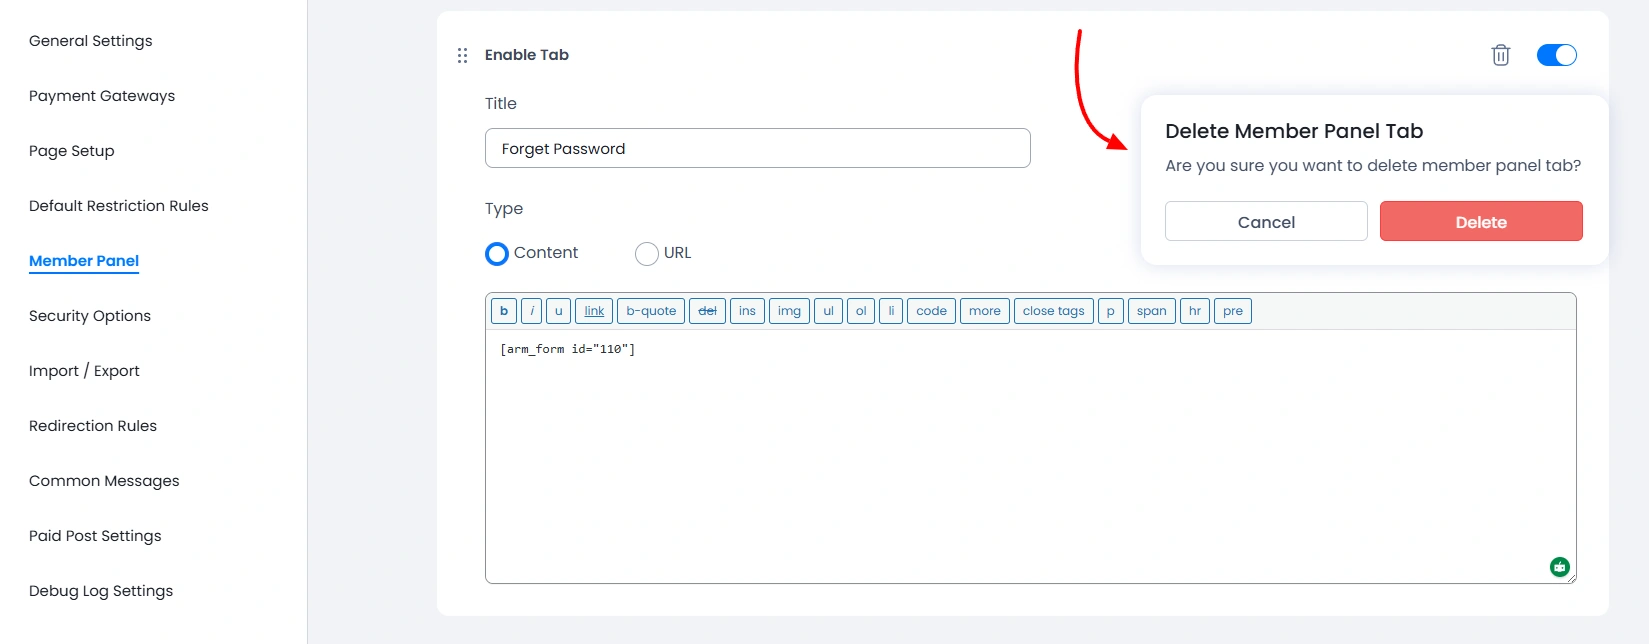
Delete Custom Tabs
If you have accidentally added a custom tab or no longer need the custom tab that you previously created, then you can delete the tab. You will see a Delete Icon at the tab itself; click on it and you will see a confirmation box. Once you confirm, then the tab will be deleted.
Important Note: The delete tab option will not be available for all the pre-active tabs.
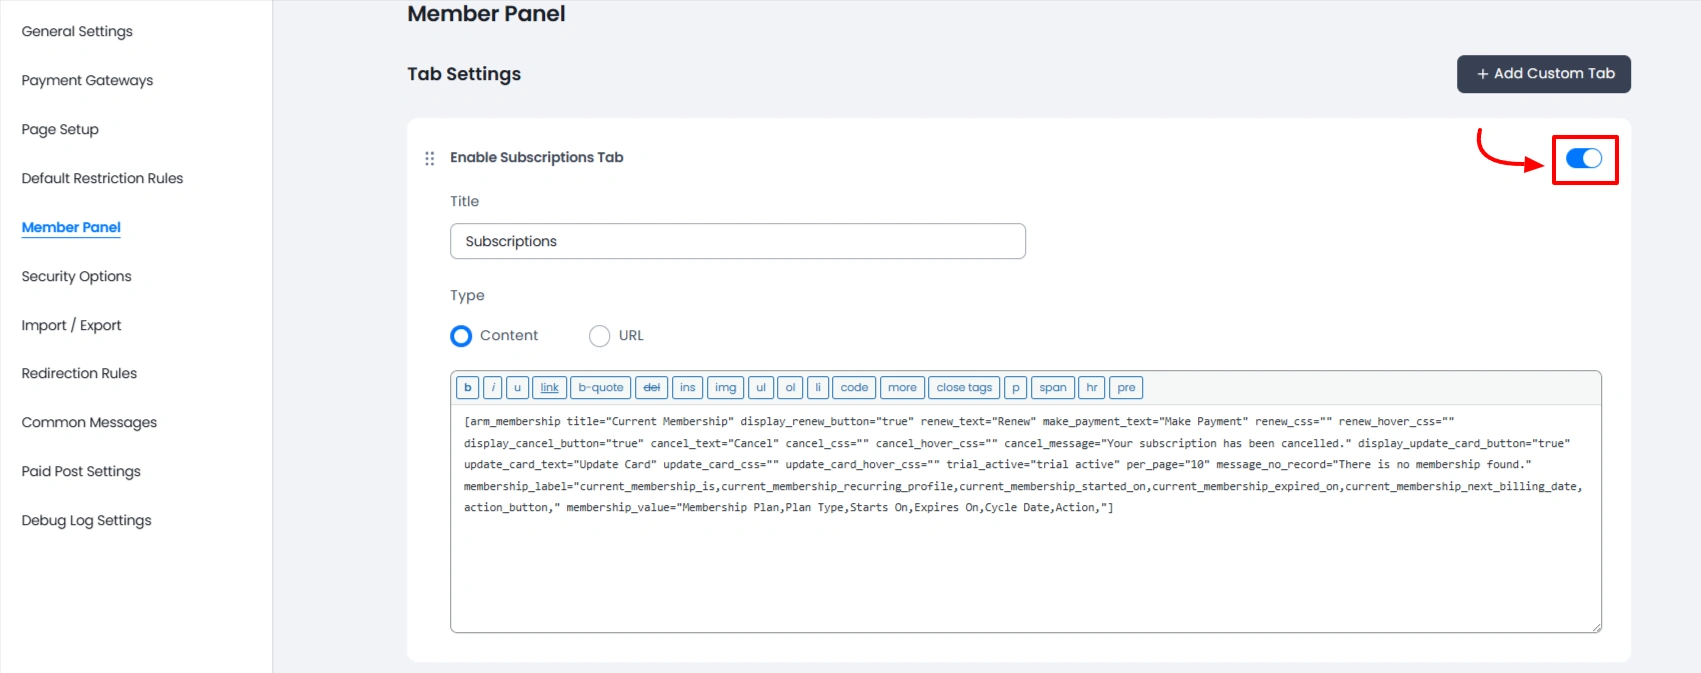
Active/Inactive Tabs
If you are testing the data at your site and for some purpose you need to check by disabling a few tabs and do not wish to completely delete these tabs, then you can turn on/off the switch as per your requirements.
Customize Member Panel Appearance
Every site has different color theme and in order to match to the site theme requirements you can set the panel color, panel sidebar color, panel background and can also set the fort of the panel as per the site requirements.
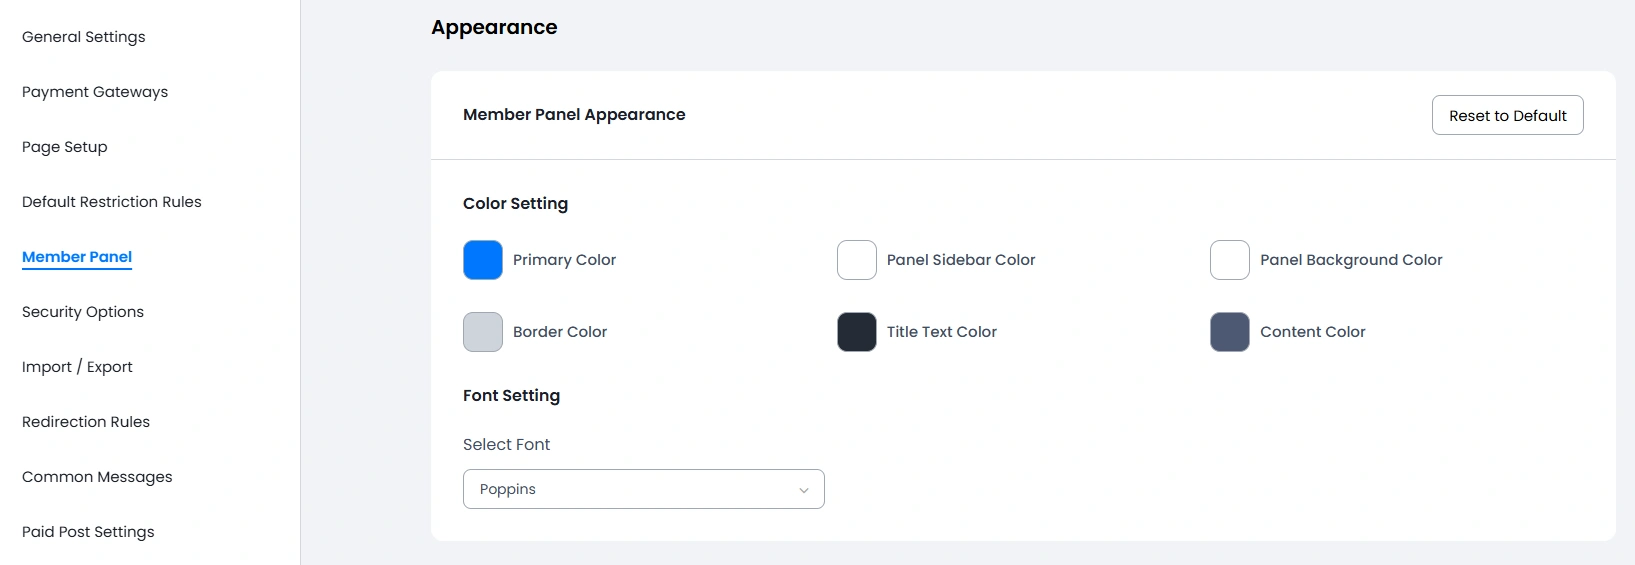
The Rest to Default option allows you to set the original colors set at the plugin by default
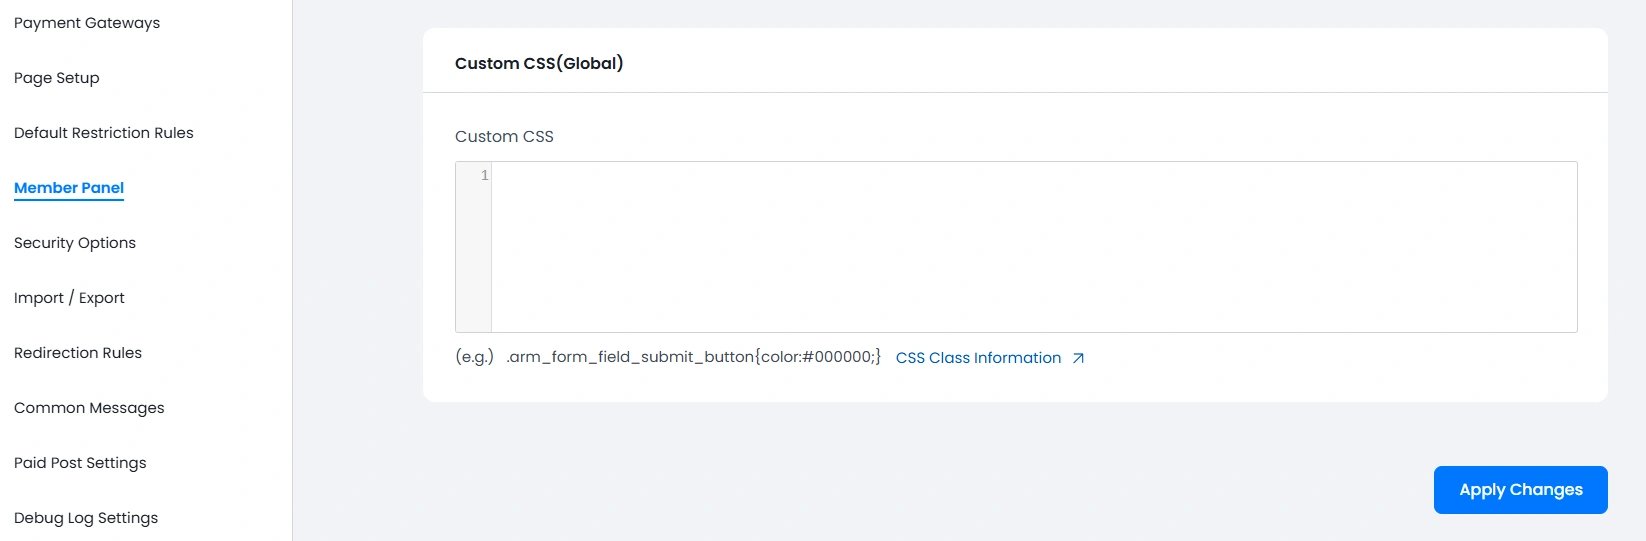
Global CSS
Here you will be able to add a global CSS class according to your requirements, which will be applied to all your templates globally.
You can find a full list of class information by clicking on the CSS Class Information link.
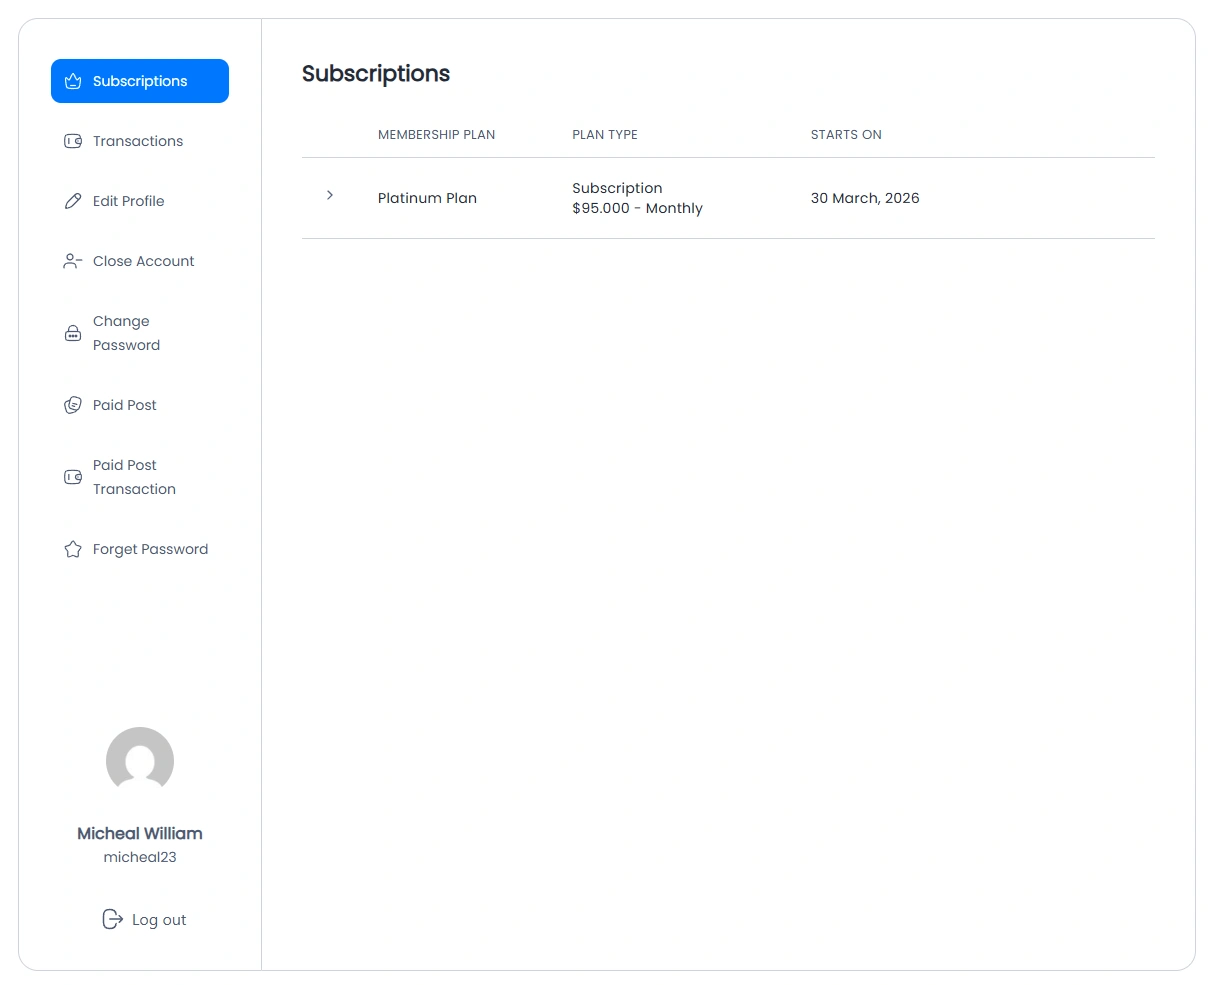
Front-end Panel View
With all the primary colors and pre-active tabs the front-end view of the panel will be as below: