How to Set Up Drip Content using ARMember Pro Plugin (and Why You Should!)
This setting becomes very useful when you don’t want to drip a whole post or page of content. So, if you want to drip some specific block of content or, let’s say, any exclusive section of custom content, then ARMember provides an option to drip the custom content through a shortcode. This becomes very handy and easy to drip the custom content.
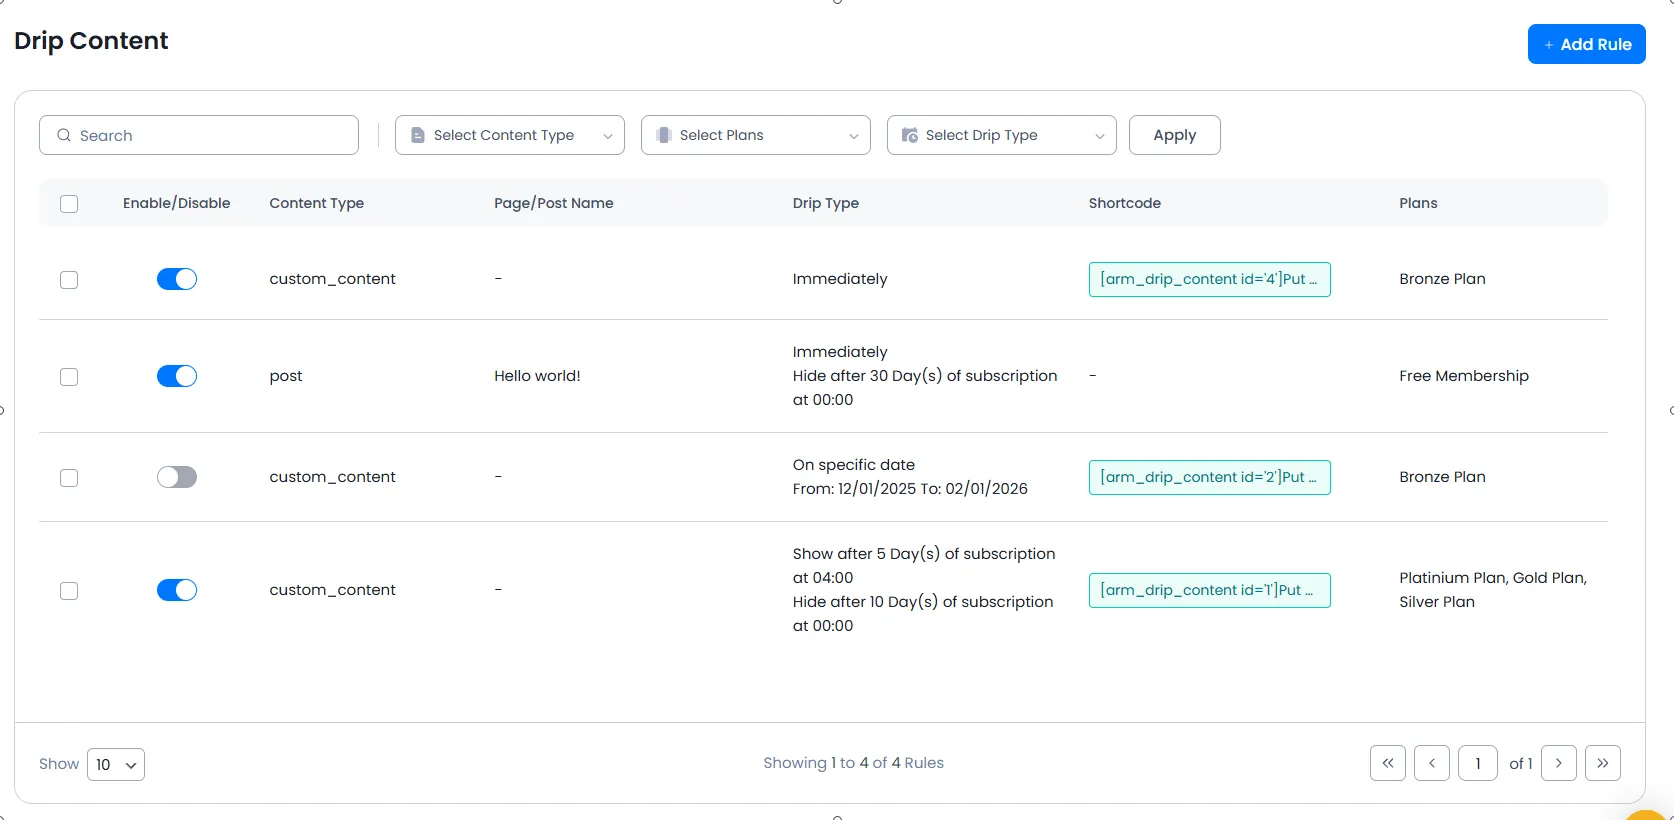
In order to add the custom content and the condition to set the drip timings, navigate to the WordPress ⇾ ARMember ⇾ Drip Content. Here in the top right corner there is a button + Add Rule, hit this button.
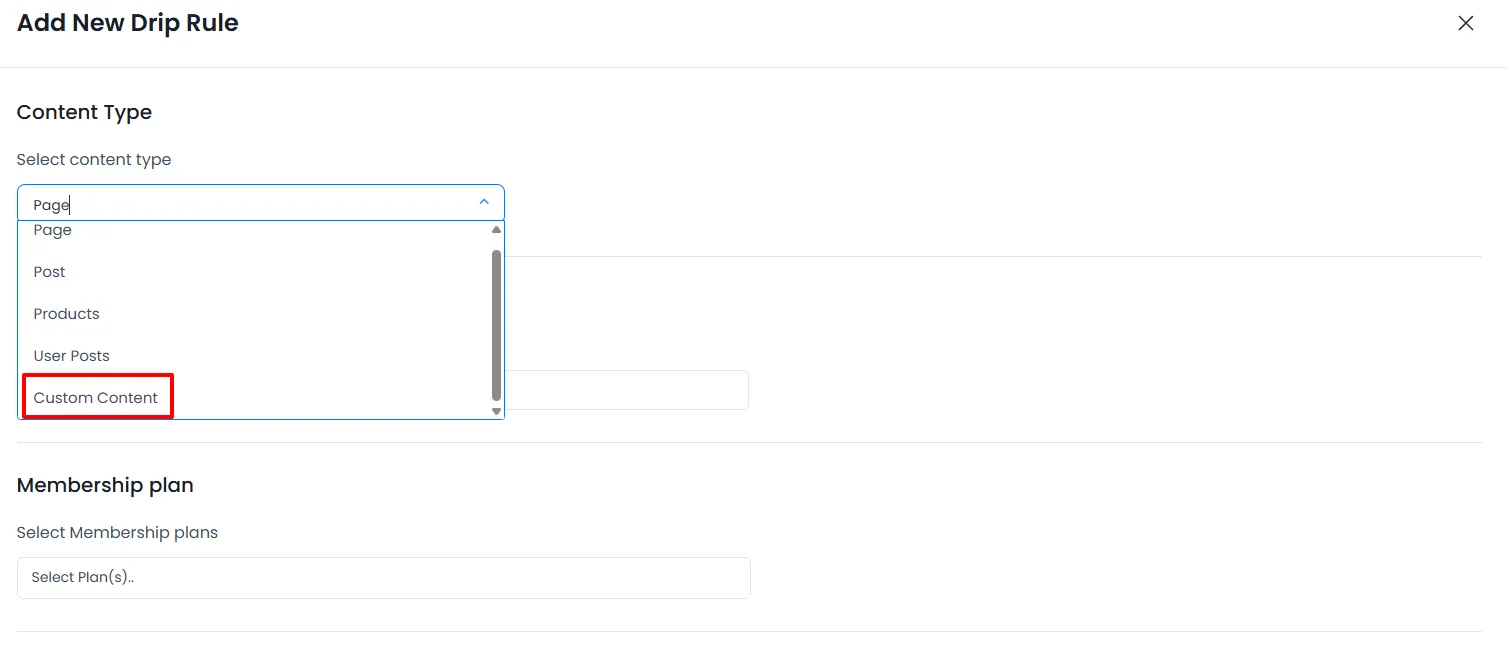
A popup will be displayed, and at the popup under the title Content Type, you can select the Custom Content . Check the below-provided screen.
By using that shortcode in any page/post/custom post, you can drip your specific content—the content only added within the shortcode. Other than that, all the content will be displayed the same as it was being displayed before.
The shortcode for the added custom content with a rule for the timings of dripping can be found on the Drip Content page itself, under the column of the Shortcode.
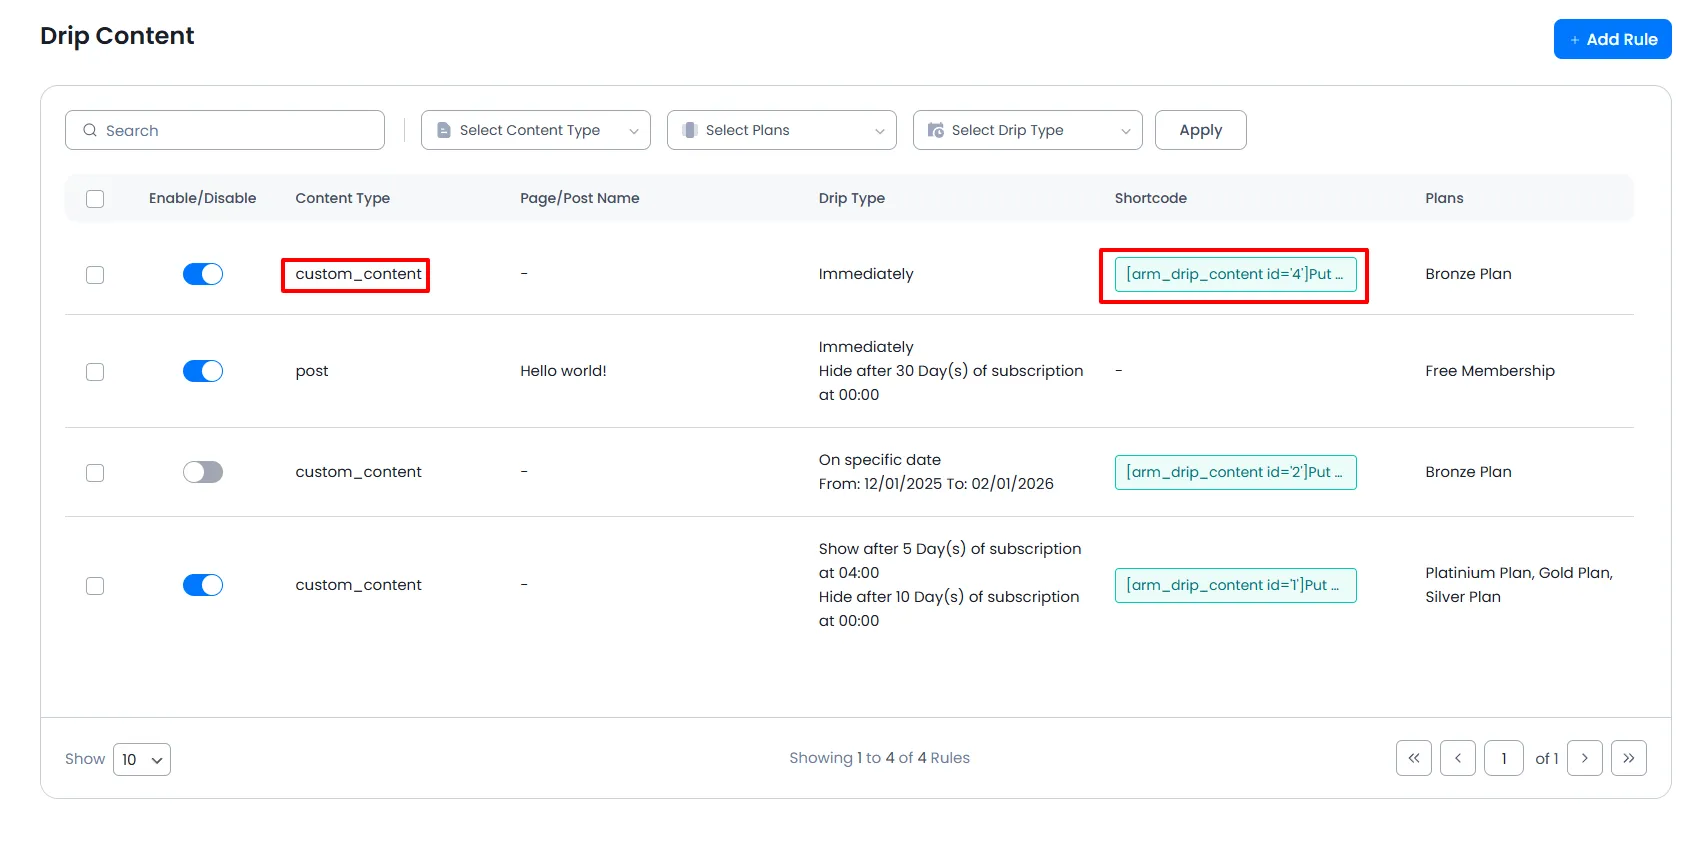
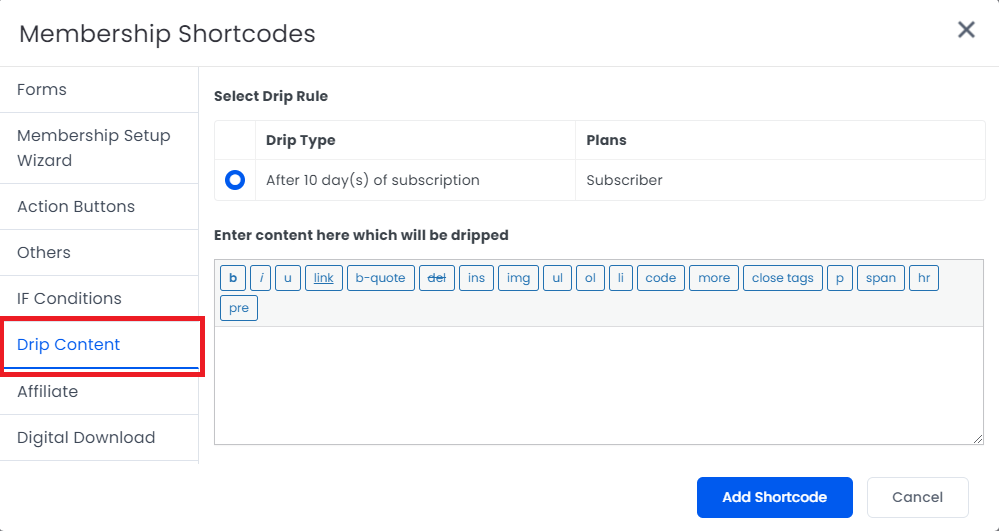
If you have created any drip rule for “custom content,” then it will be directly added to the list of shortcodes supported by the WordPress editor.
(WordPress Editor – more information)
Below provided is the example of the drip content shortcode. You can replace the ID {DRIP_ID} with the one that you have for your custom content.
[arm_drip_content id='{DRIP_ID}']
Put Your Drip Content Here.
[arm_drip_else]
Put Your Restricted Content Message Here.
[/arm_drip_content]