Important Note: AirWallex Payment Gateway add-on will only work if ARMember plugin is installed with version 6.9 or higher.
You can find this plugin from ARMember ⇾ Add-ons. When this plugin get activated to your site, you will get an additional option in ARMember ⇾ General Settings ⇾ Payment Gateways.
To settings by filling required details to enable this payment gateway for users.
Installation & Activation
You can install plugin in the following two ways. And ARMember – ARMember – AirWallex plugin requires ARMember Plugin (6.9 or higher) installed and active.
Installation via FTP
- Download the plugin and extract it. You will find a directory armemberairwallex.
- In your WordPress installation directory, upload armemberairwallex to
wp-content/plugins/ - Activate the
ARMember - AirWallex Addonplugin through thePluginsmenu from WordPress admin panel.
Installation via the WordPress Uploader
- Download the plugin.
- Log in to your WordPress admin panel
- Go to
Plugins⇾Add New⇾Upload - Click on “choose file” and browse the download package. When the plugin uploads successfully, click on
Activate Plugin.
Steps to Set up AirWallex For Your Website
Lets setup ARMember – AirWallex payment gateway for your website :
-
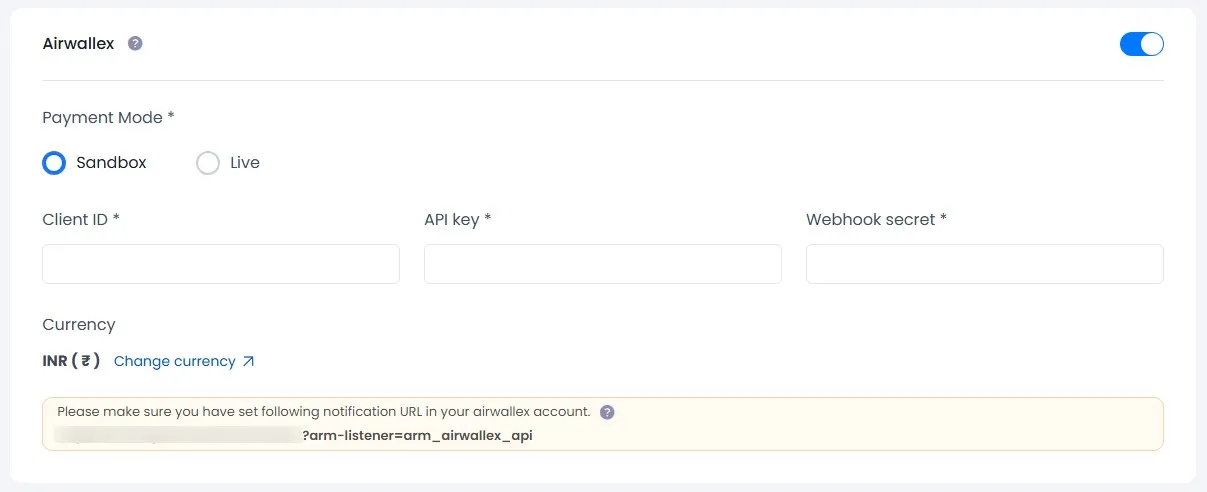
When plugin activated then airwallex section will be display in
ARMember⇾General Settings⇾Payment gateways.Please see below screen.

-
Firstly need to activate the Airwallex payment gateway so you will be able to insert Client ID and API Key. For activation click on active button.
-
If you do not have Airwallex account then create it.
For Production / Sandbox account click here.
-
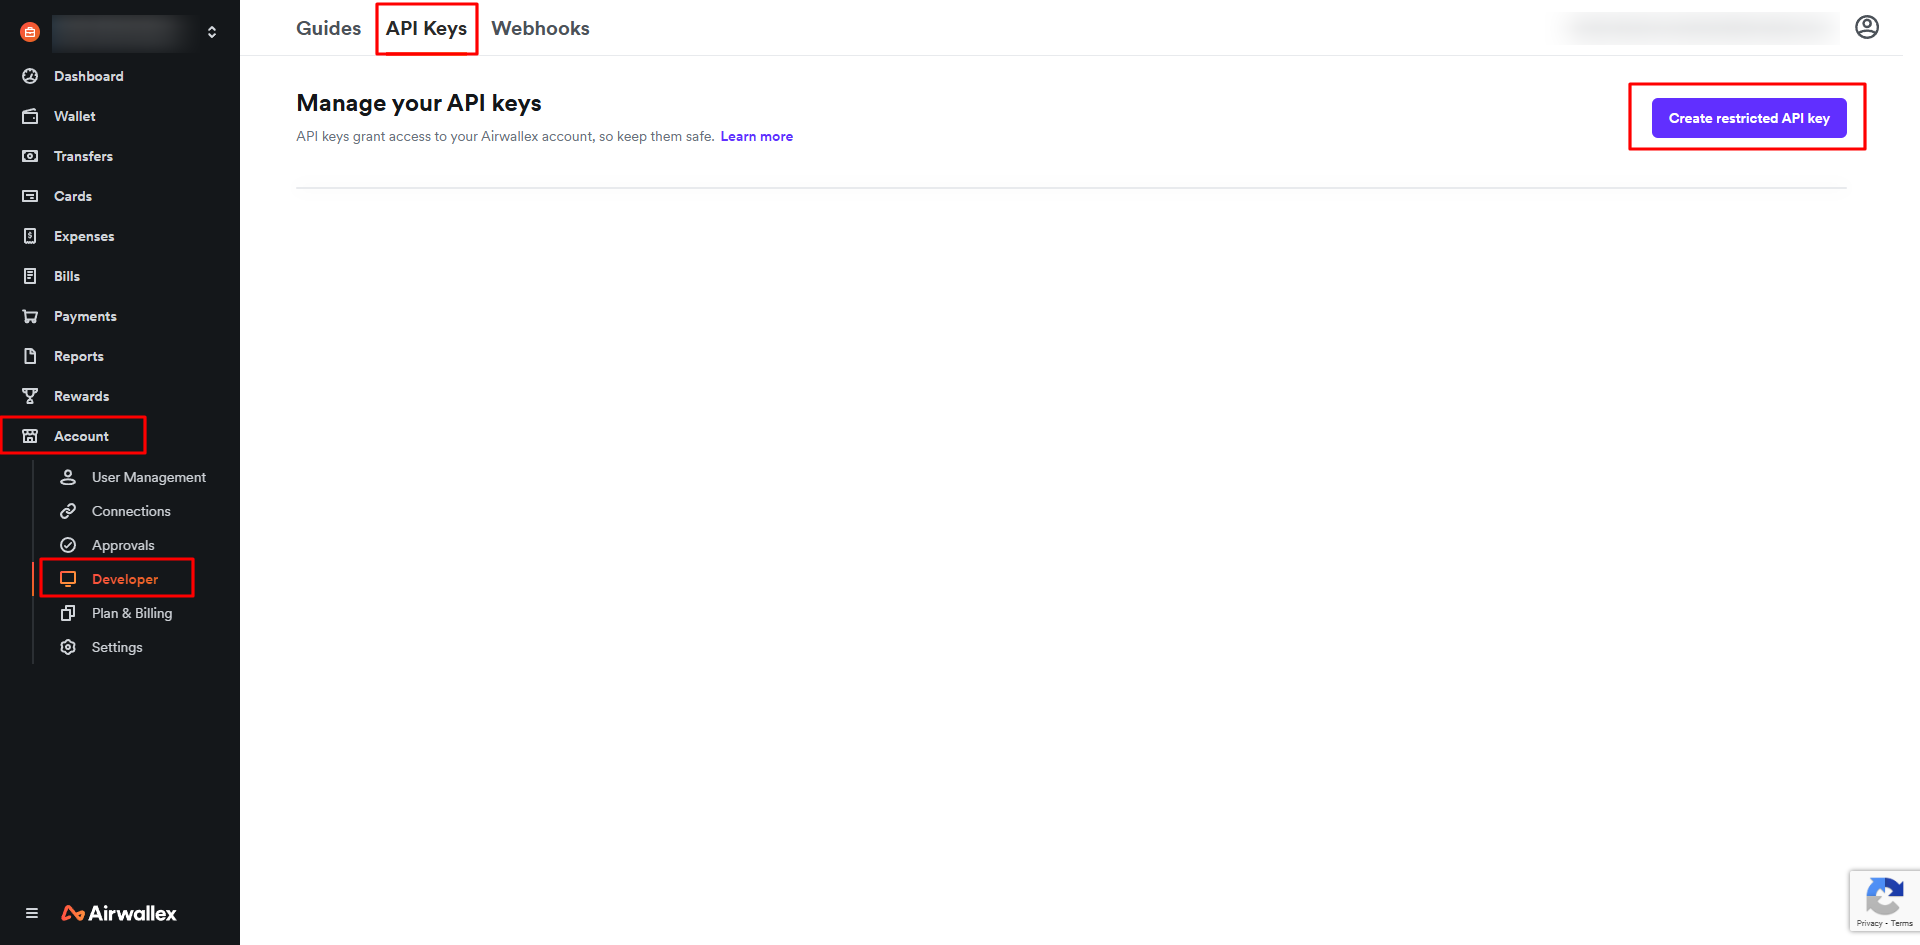
Where do I get the Client ID and API Key?
First navigate to account ⇾ Developer ⇾ API Keys, and Click on Create Restricted API key for creating new API key and secret.

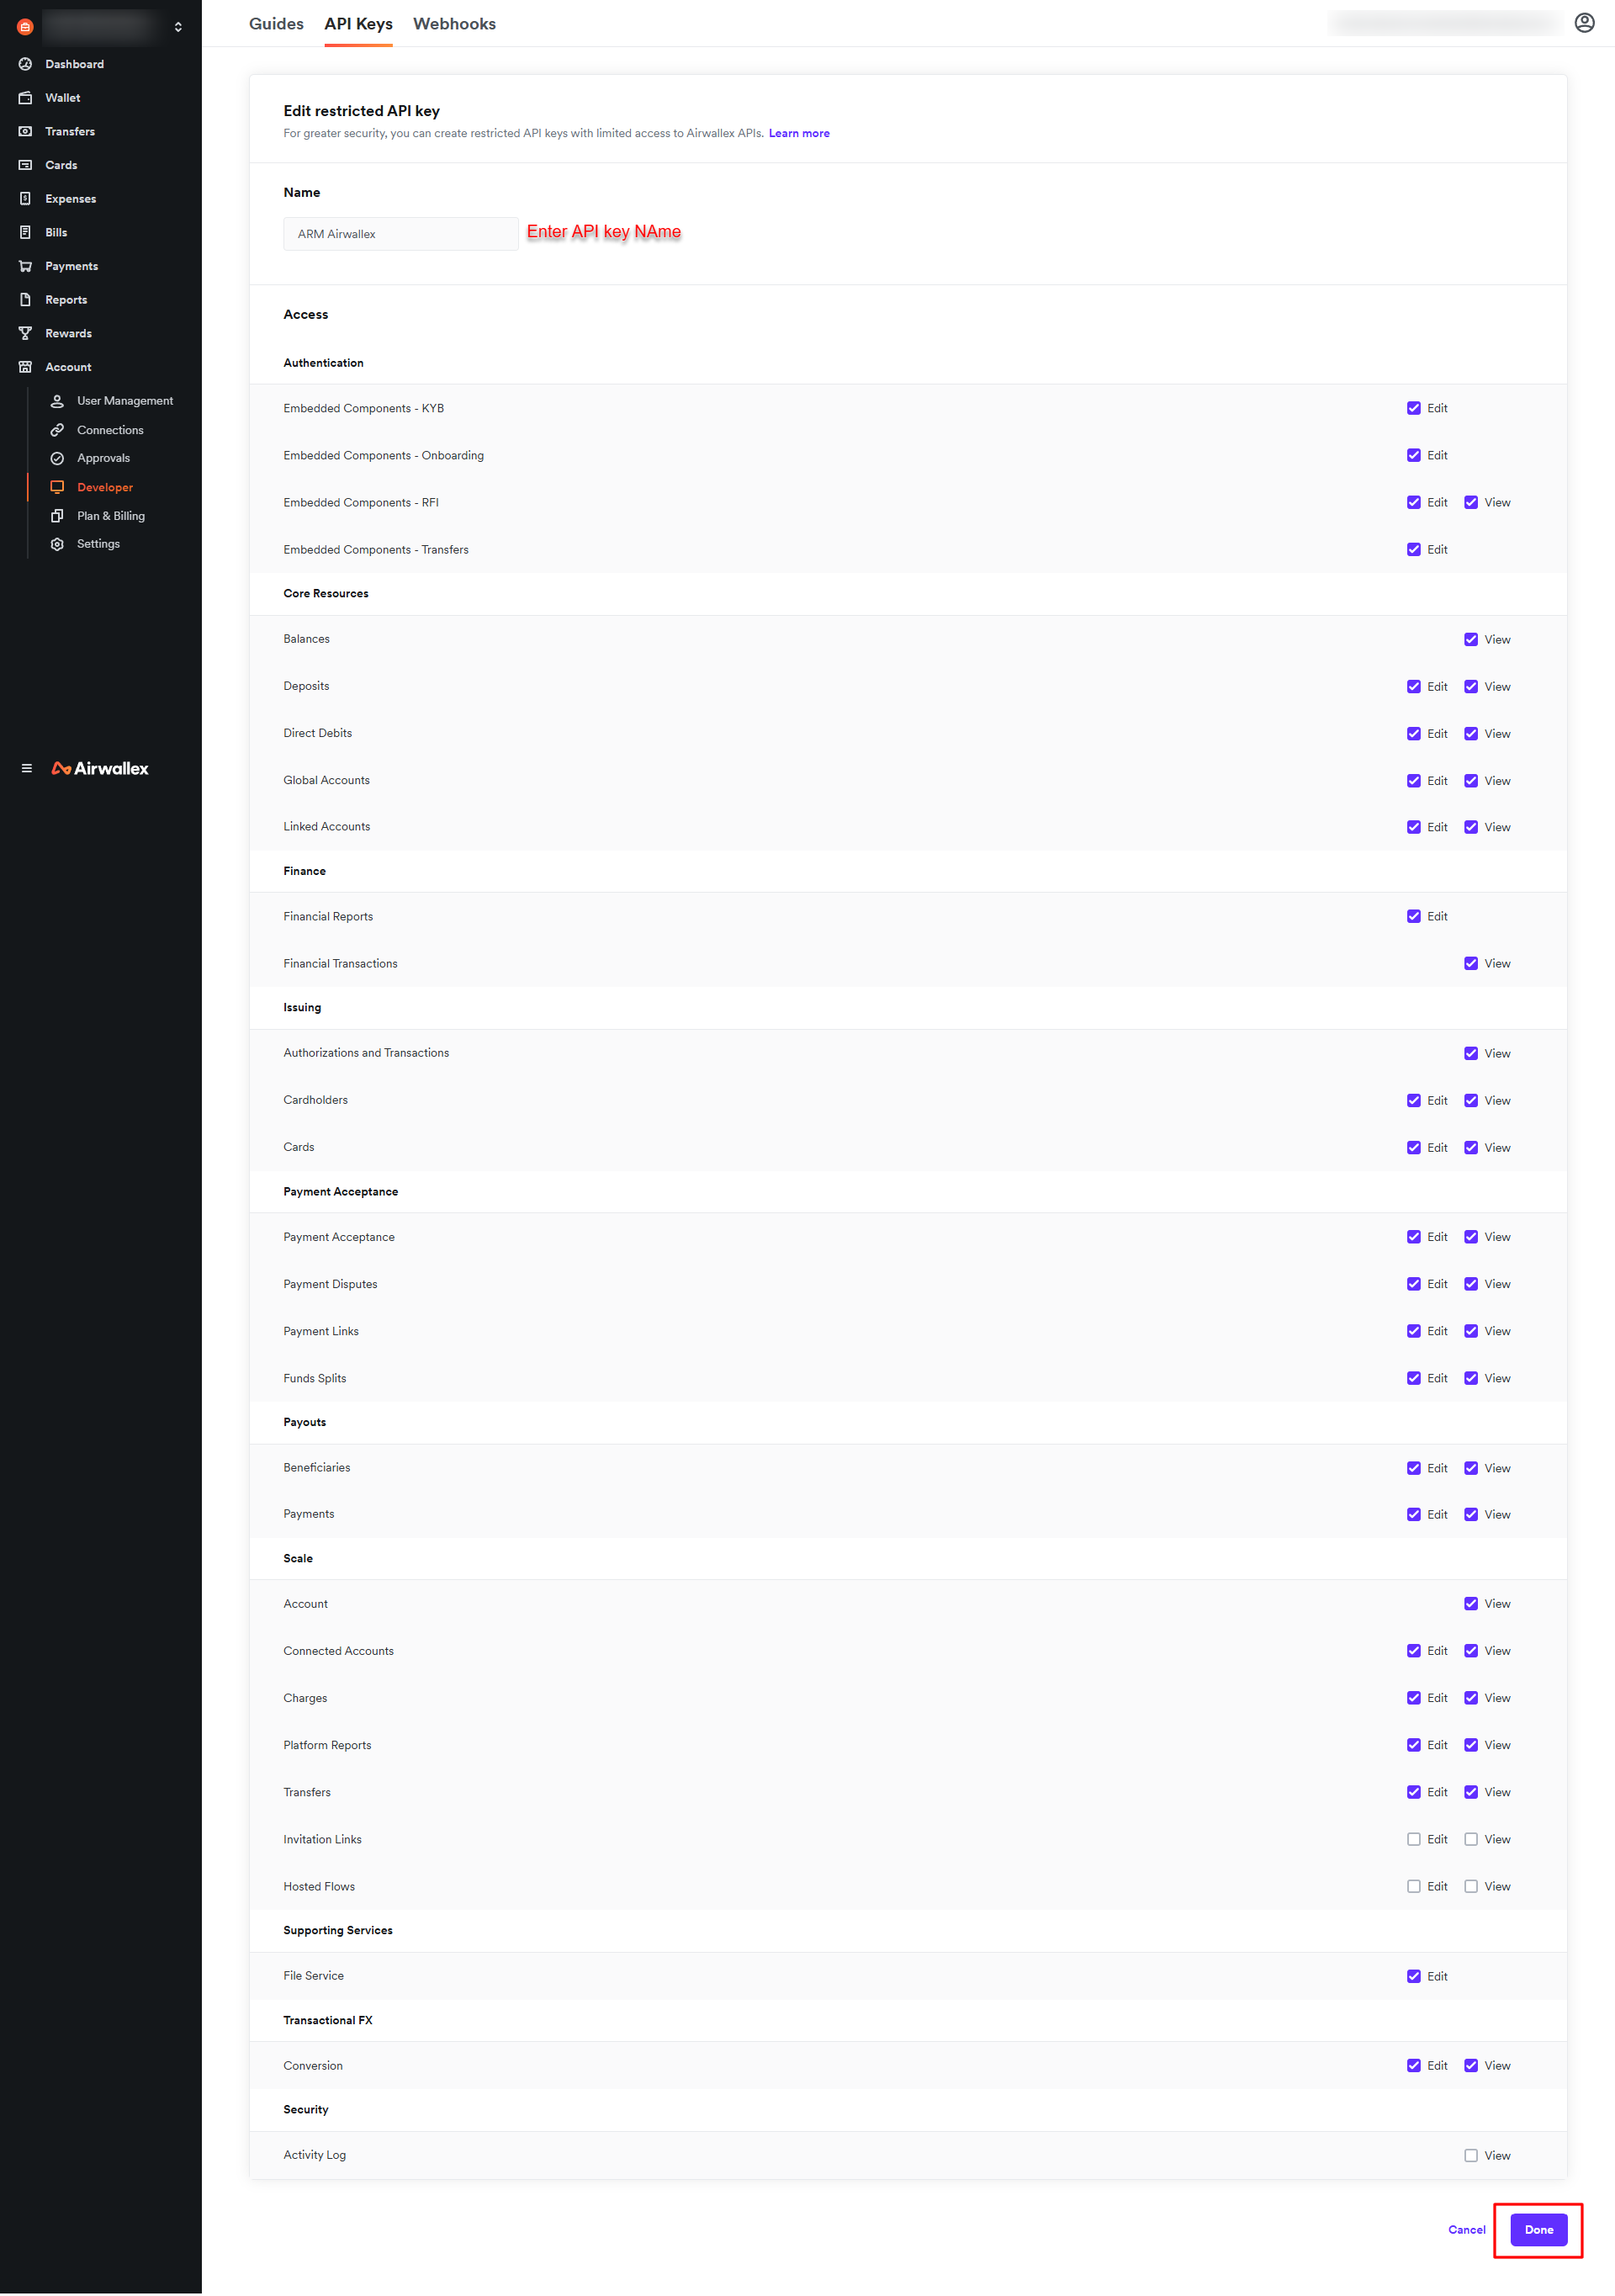
Enter the API key name and allow permission as per the requirement and click on save.

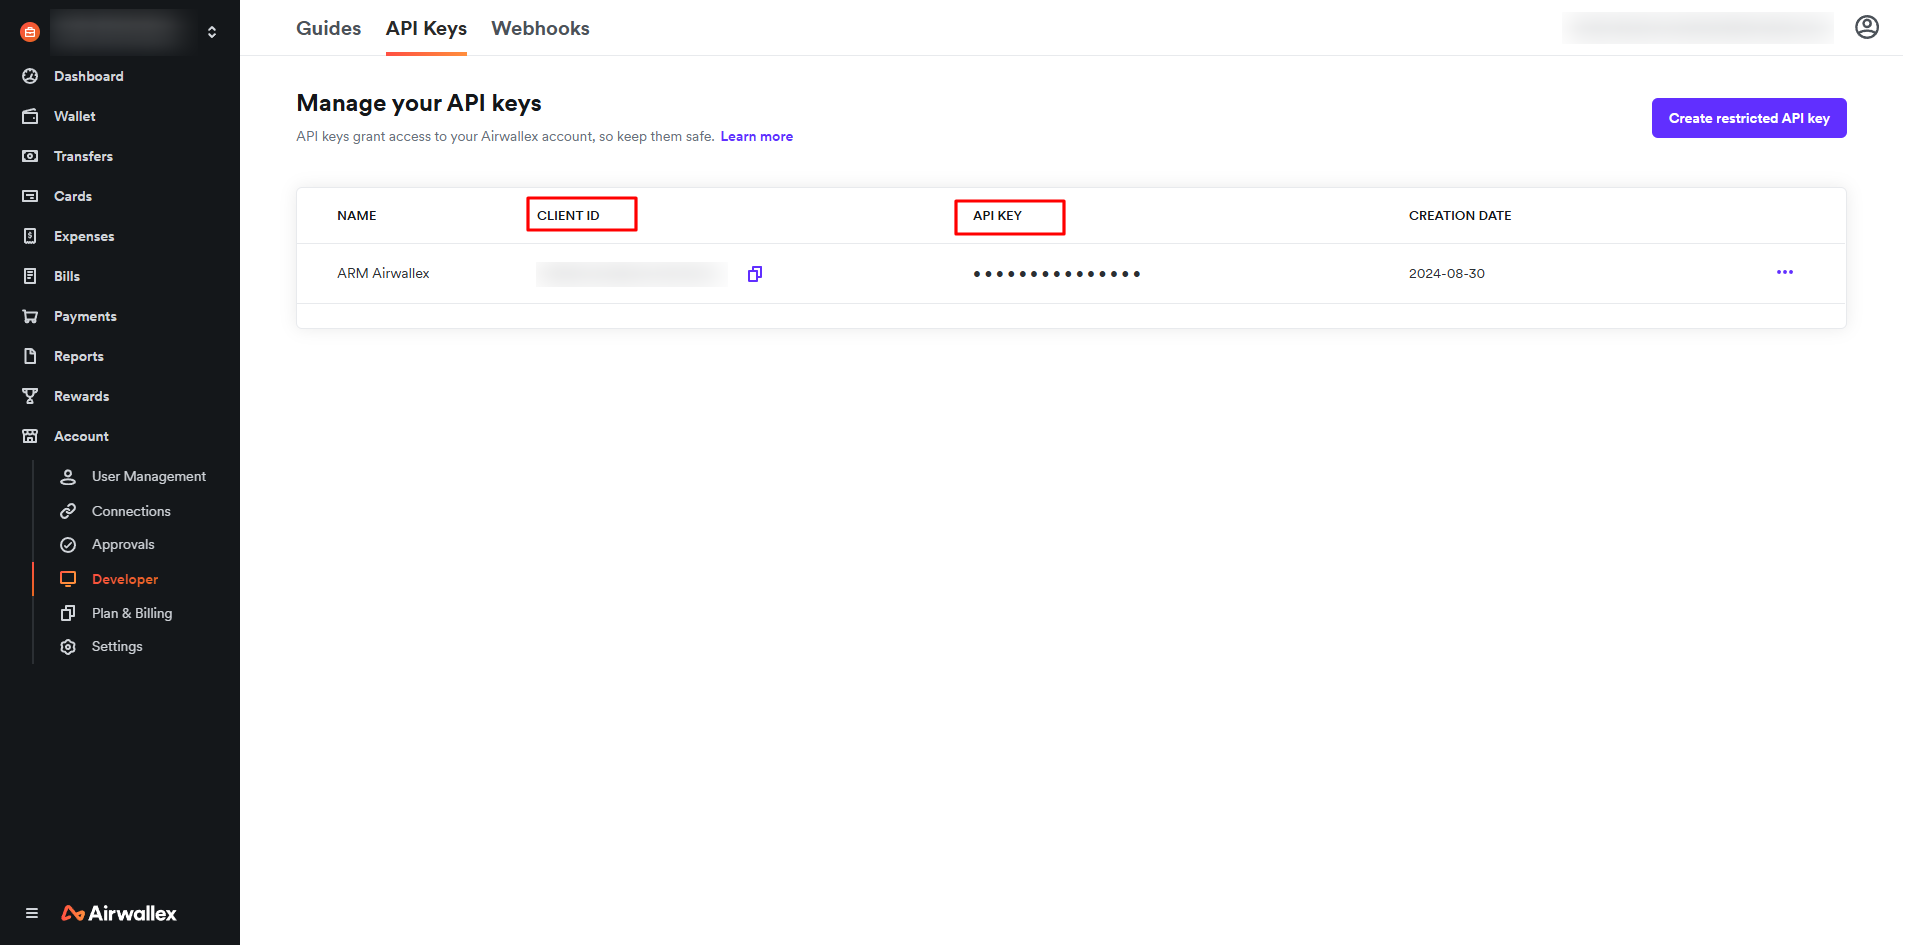
After Creating API key, can get the Client ID and API key and configure.
-
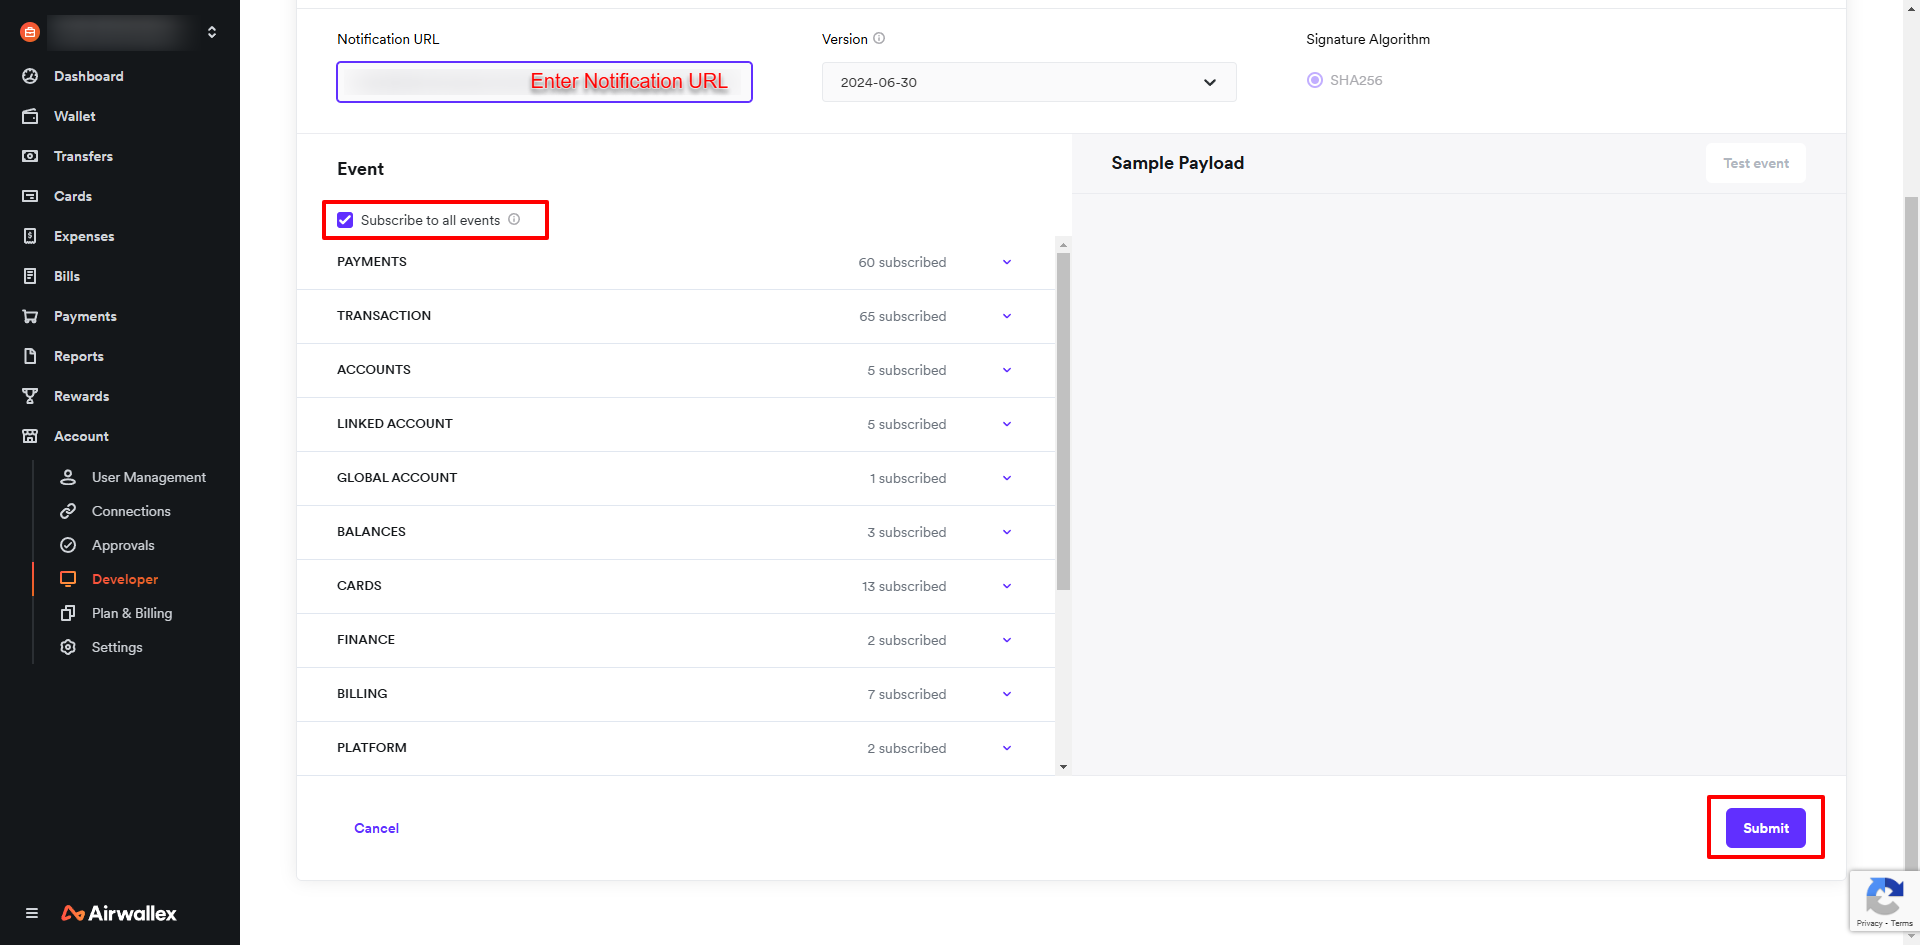
Where do I get the Webhook secret?
you can flow step to below screen:
Create a new webhook.
Here, Enter your notification URL.
After that submit and get Webhook secret. Enter Webhook secret in general settings payment gateway.
-
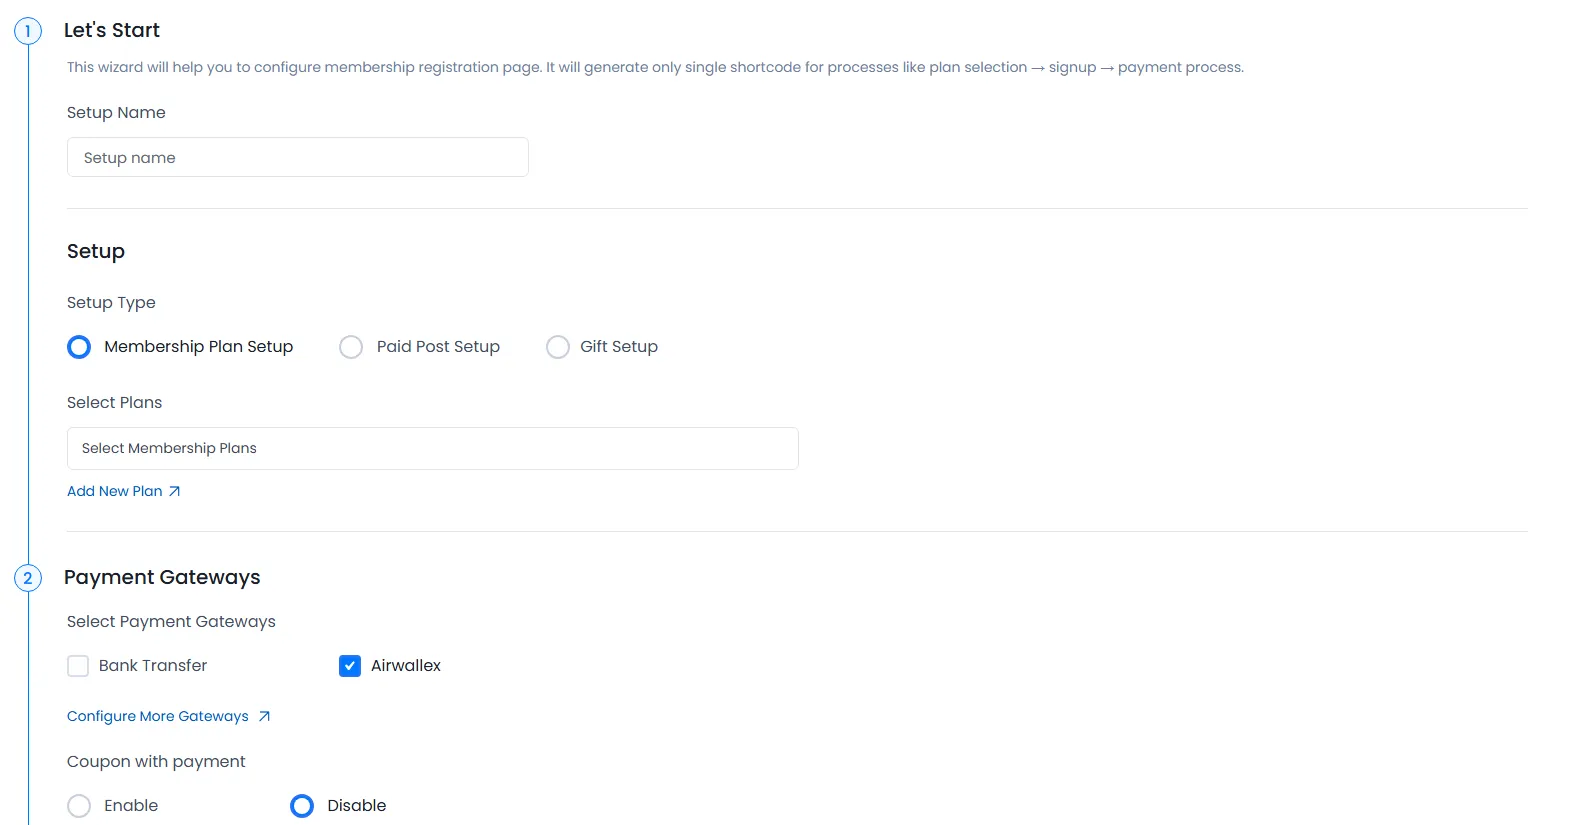
After setup Airwallex payment gateway you will be able to see Airwallex payment in your Plan + Signup Page in ARMember and set it for the plan.
Please see below screen.

In above screen display all active payment gateway with Airwallex.
-
ARMember Airwallex Addon supports payment with AED, AOA, ARS, AUD, BDT, BGN, BHD, BOB, BRL, BWP, CAD, CHF, CLP, CNY, COP, CZK, DKK, EGP, EUR, GBP, GMD, HKD, HUF, IDR, ILS, INR, JPY, KES, KRW, LKR, LSL, MAD, MGA, MWK, MXN, MYR, NAD, NGN, NOK, NPR, NZD, PEN, PHP, PKR, PLN, PYG, RON, RWF, SAR, SEK, SGD, THB, TRY, USD, UYU, VND, XAF, XOF, ZAR, ZMW.
-
ARMember Airwallex addon does NOT support for Auto Debit payment method for Subscription Plan.