


In this ARMember tutorial, we’re covering what it takes to build a WordPress membership platform without needing tons of plugins. Because the ARMember plugin is the only membership and subscription solution you need when you’re looking to have models like:
- Digital subscriptions and recurring payments
- Paywalled content
- Email marketing, billing, and community forums at one site
- Client onboarding and access control
- One-time sales of memberships
To be more precise, you will be able to create structured membership levels, restrict access to resources, accept online payment, automate client communication and onboarding, integrate social features, customize content deliverability, and more – fully hosted on your own WordPress website.
Now, let’s understand what you need for that and look at the chronology of the steps you need to follow.
TL;DR: ARMember lets you create a complete WordPress membership platform. It handles memberships, content protection, payments, email automation, and member management, all in one place. Simply create membership plans, restrict content, connect payment gateways, customize member experiences and launch your subscription, course, or community website with ease.
What Are The Most Important Features Of The WordPress Membership Platform?
First of all, there are different types of membership platforms, based on what you want to achieve. You can easily restrict access to premium content, digital products, courses, or forums.
Member-To-Member Interaction, Group Discussions, And Events
One of the options with ARMember is creating organized spaces for member interactions, including threads, events, media libraries, automated member workflows, social media communities, leaderboards, and badges. You’ll be needed options like:
– Secure and protected paywalls (built-in with ARMember, including 20+ gateways)
– Member directories and forum features (partially built-in)
– Digital downloads for libraries (Professional and Enterprise plans in ARMember)
– Per-post sales to sell individual templates of stream recordings (the Pay Per Post add-on is free in any plan)
– Badges and achievements (free in any plan with ARMember)
– Create a community with the Social Community add-on (Enterprise plan)
Content And Course-Driven Membership Platforms
If you want to monetize structured educational content for training or marketing, membership platforms also serve you well. Top tools you’ll need along the way:
– Powerful media support (video, image, etc.) to deliver your content, which is easy to have in the default WordPress
– Content dripping for releasing content piece by piece at scheduled times (free add-on in ARMember)
– Flexible access tiers for students (default in ARMember)
– Quizzes, assessments, certificates, and homework (the Course builder add-on in the Enterprise plan of ARMember)
ARMember supports all these types more or less, being a more powerful and focused solution for content-focused sites, where you curate and deliver premium content to your community, optionally through the dripping options.
Based on the type of platform you want to build, you’ll be choosing features and tools, thus, the needed payment plan.
Building A WordPress Membership Platform With ARMember
Make sure that you have an up-and-running WordPress site, also ensuring that your site has an active SSL Certificate (HTTPS) installed (payment gateways like Stripe will refuse to process live charges on an unencrypted HTTP site).
1. Install and Activate Your Membership Plugin
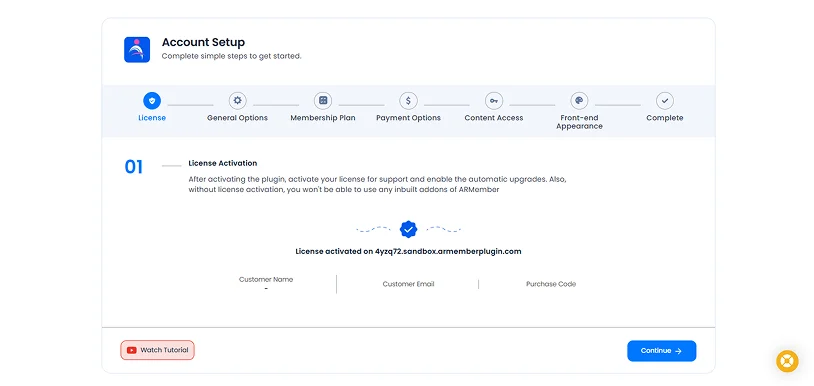
Upload and activate the ARMember plugin you’ve purchased. This is your core engine for all membership platform operations.
Then, optionally, run through the plugin’s initial setup wizard to automatically generate core essential pages (registration, account, login, etc. – you’ll find them all through the Pages menu on WordPress) and choose fundamental settings like a member approval mode (payment or manual), email confirmation, currency, etc.
With or without a wizard used, also visit the General Settings in ARMember to customize more nuanced settings. For example, you can set up a clear redirect or customized message for non-logged-in visitors, explaining how they can register to unlock a specific plan page (you can even set up conditional redirection).
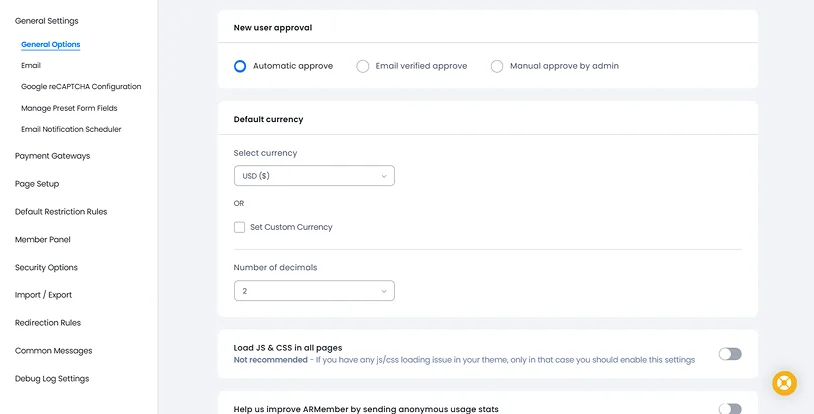
Also, you can go through other multiple options important to you:
– Security options to protect your login and registration forms from spam and attacks
– Various customer-facing messages (success, failed login, payments, etc.)
– Member profile management options
2. Add Your Plans / Tiers for WordPress Membership Platform
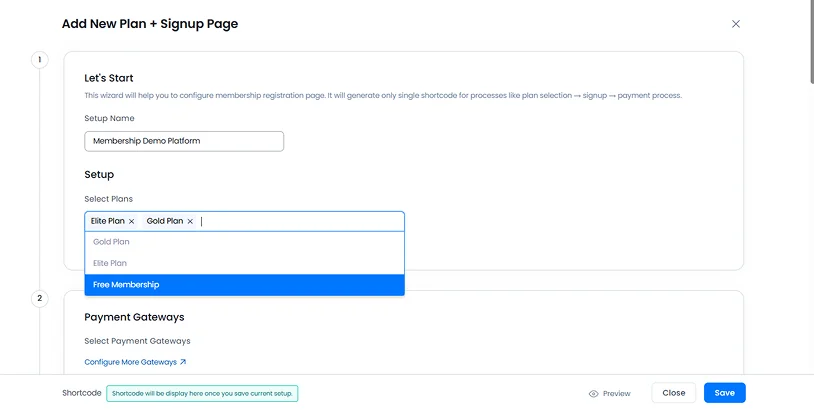
Most likely your platform will have plans and subscription tiers, no matter whether it’s a course/content platform or a member interaction area. Membership plans allow you to structure access and diversify events or content.
You have a lot of options – you can create monthly memberships, annual subscriptions, or even lifetime plans.
In ARMember, you will need to go to ARMember → Manage Plans → Add New Plan and specify your configuration for all free or premium plans.
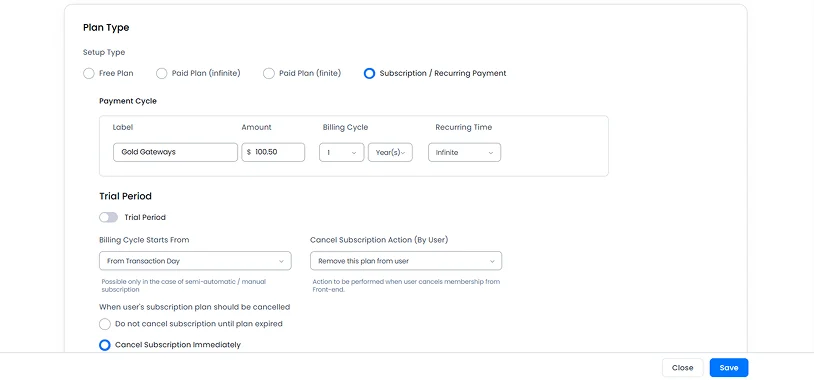
They have deeper features like free trials, grace periods, one-time payments, subscription renewals, etc.
3. Customize Content Restriction
Next come the content protection rules (ARMember → Content Access Rules) that are easy to build with ARMember using basic checkboxes – either via the dedicated menu or inside the WordPress post. Of course, you should already have all your pages with content and other details added.
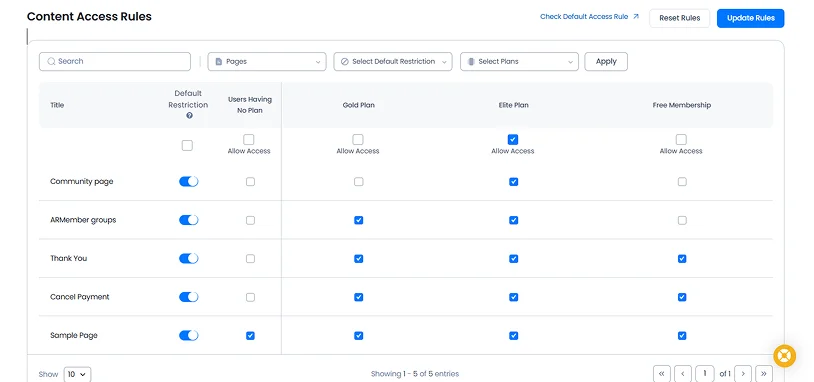
These are the rules that connect your content to your access levels. For example, create a rule like “Any page categorized as ‘Premium’ or is restricted to users with an active ‘Silver’ or ‘VIP’ membership”.
How can you configure content protection rules with ARMember? Here the options you’ll have:
- Entire site protection
- Restrict pages by category or tag
- Individual pages or posts
- Custom URLs
- Partial content using specific shortcodes.
4. Build and Organize Content in WordPress
Using default WordPress settings and optionally extra plugins for content management, create your content, courses, or premium pages. For example, you may use the course add-on provided by ARMember to organize your video lessons and modules.
Moreover, ARMember supports all your favorite builders, which means you can add WordPress membership platform-related content via the interface of your builder (Elementor, Gutenberg, Bricks, Oxygen, SiteOrigin, and more).
5. Set up Your Billing & Payment Gateways
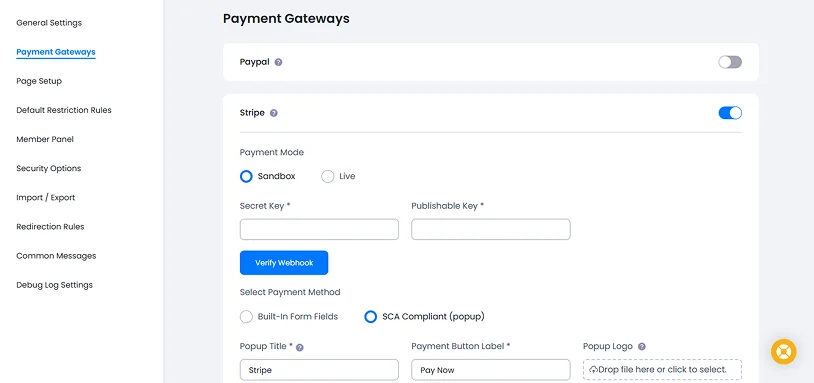
ARMember provides you with the best selection of ready-to-go payment gateways: with the 22+ payment gateways included with premium plans, your members can easily pay online.
You can connect payment account credentials through ARMember → General Settings → Payment Gateways.
The connection method will depend on the chosen gateway. Some popular ones include PayPal, Stripe, Square, Klarna, Braintree, Paddle, Skrill, Mollie, etc. You will need to enter your API credentials (some methods require extra or fewer settings) and then save the settings.
Recurring payment might need extra configuration in the payment account settings. For example, when a recurring monthly payment succeeds or fails, Stripe can tell WordPress to instantly renew or revoke that user’s access.
The entire billing process can be further enriched with essentials like invoices (Payment History > Invoices), taxes / VAT (Sales Tax & Taxation add-on), discount coupons (default), gift memberships as a payment method (add-on), affiliate programs (with the AffiliatePress add-on), and more.
Test payments
We also recommend running sandbox tests before going live with payment-based registration. Normally, all payment processors allow that.
In ARMember, you can also put your payment gateway into a test mode with a sandbox. To test it, you may register a fake user account from an incognito browser window and complete a test checkout using test credit card numbers. To ensure everything works smoothly, also verify that the user receives their welcome email (use a valid email address for a test), can access the protected content dashboard, and that their account status changes accurately inside your WordPress dashboard. Then switch the gateway to live.
6. Customize Email Notifications
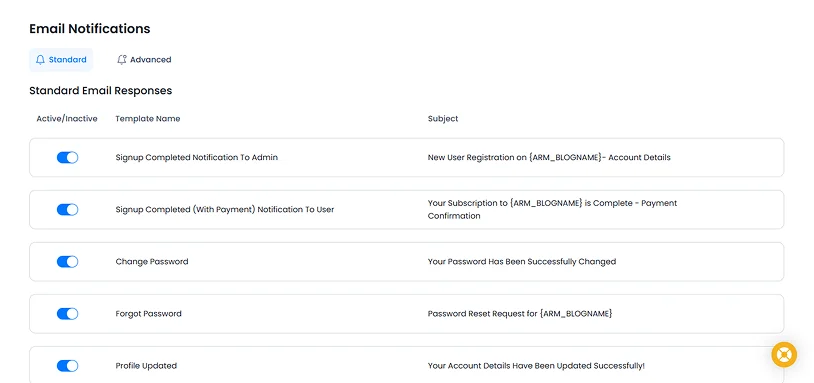
To automate all custom notifications related to account registration, payments, new content, etc. – you can alter the default ARMember emails via the Email Notifications menu in the plugin.
To set up email marketing for your membership site, you can also connect your favorite services directly to ARMember using supported integrations:
- Omnisend
- Mailchimp
- Brevo
- Brevo
- MailChimp
- MailPoet, and more
7. Complete Your Membership Platform Setup
The final steps include the addition of the platform registration pages, accounts, member panel, plan purchase, etc. to your WordPress website.
In other words, all the pages are already there if you use the setup wizard. Otherwise, you can also use your preferred page builder to add the required pages to your website using ARMember shortcodes or blocks.
Moreover, you can make your member panel match the style of your WordPress theme from ARMember → General Settings → Member Panel.
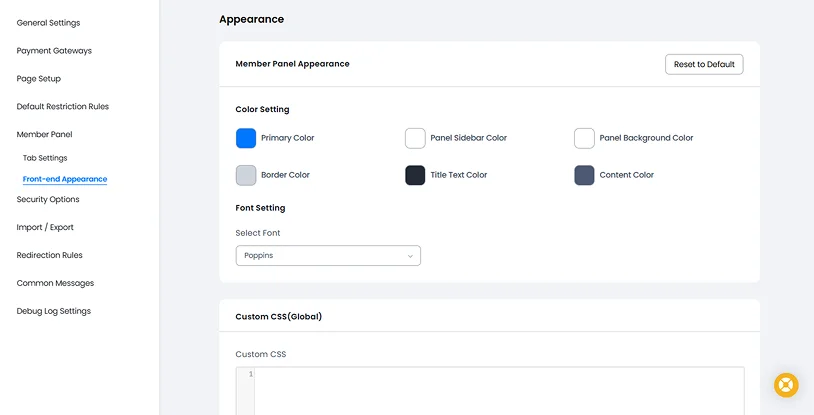
From here you can customize labels, Color, border, title text color, font and more for your member panel.
Concluding on Building a WordPress Membership Platform
If you are looking to curate and deliver exclusive content via the WordPress membership platform, ARMember is the only plugin you need; it offers a set of 62+ add-ons within premium plans to create a platform model you’ve chosen.
Following a simple installation wizard and a few other steps, you can easily build a WordPress membership platform, a training membership site, or even deliver a course with all the engagement tools.
Related articles:

Share this post