Do you want to create a social networking site with WordPress, specifically for your members? While building a membership site, you must keep member engagement in the center. This eventually helps build member retention!
Do you know what would be the perfect combo for you? A dedicated WordPress membership plugin with the power to build a loyal and active community online. Yes, you read that right. ARMember, the robust membership site builder comes with a powerful Social Community extension. Using this combo, you can strengthen your brand, create monetization options, build engagement, and create your own community rules. You will be up and running in just a few hours. Here is how.
What Can You Achieve with the Social Community Add-on?
The Social Community addon from ARMember is perfectly suited to your business if you are looking to build a private or public social community around your brand, membership, or user base. Think of sites like private alumni networks, member-only social clubs, or even creator communities like Patreon Communities.
If you are already on WordPress, this add-on from ARMember alone can replace extra tools like BuddyBoss or PeepSo, giving you more affordable yet truly powerful tools.
So, this ARMember’s add-on for a social networking site delivers all the specific features for different types of websites, for example:
- Membership sites (e.g., online courses, private learning platforms).
- Fitness clubs / Coaching communities.
- Networking for industry experts.
- Fan communities like musicians, gamers, sports teams.
- Event-based businesses (e.g., conferences, workshops with private networking).
If we translate the features of the add-on into the exact opportunities, you can build a login-protected community and:
- Create member profiles.
- Allow users to befriend, follow, and message each other.
- Build group discussions and activity walls.
- Facilitate private messaging, reviews, and posts.
- Build loyalty and retention on your community site.
What Are Top Benefits of the ARMember Community Addon?
What makes a social community by ARMember unique? How does it simplify your workflow as an admin and community manager? Following are the few major benefits of the same.
- You have control over the community, with your own community and data (unlike when relying on third-party sites like Facebook or LinkedIn).
- It’s highly customizable, allowing you to brand it your way with your own labels, messages, and visibility easily.
- Modular setup enables you to activate only the features you need (friends, messaging, groups, etc.)
- If you are already on ARMember, the add-on smoothly works alongside ARMember profiles, with no separate system needed.
- Build engagement capabilities of big social networks using posts, reviews, and news feeds.
Let’s Build a Social Networking Site on WordPress with ARMember’s Community Add-on
Let’s first explain what is required to get started with the add-on – and how to get started. So, here is how it works.
Important: ARMember Enterprise Plan is required to use the add-on, or you can purchase the add-on separately with any plan. The ARMember plugin must be installed and activated to use the add-on.
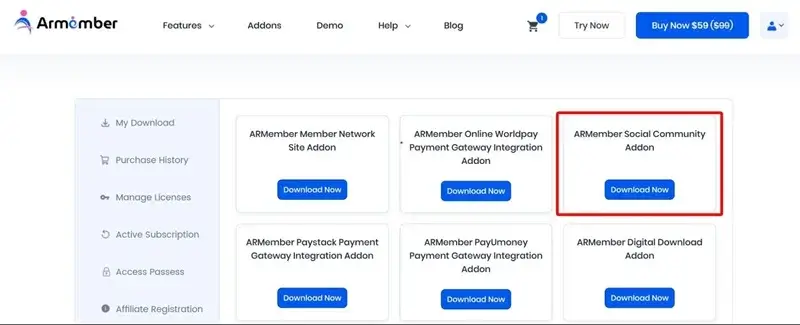
1. Download the ARMember Social Community add-on from your ARMember account.
2. Install and activate the addon through your WordPress dashboard as a regular plugin.
3. Configure key Social Community settings [we’ll elaborate on them later in this post].
- Friendships
- Private Messaging
- Follow/Unfollow
- Reviews
- User Posts
- User Groups
- Activities and Notifications
4. Customize available labels and messages.
5. If you use groups, create necessary system pages for them.
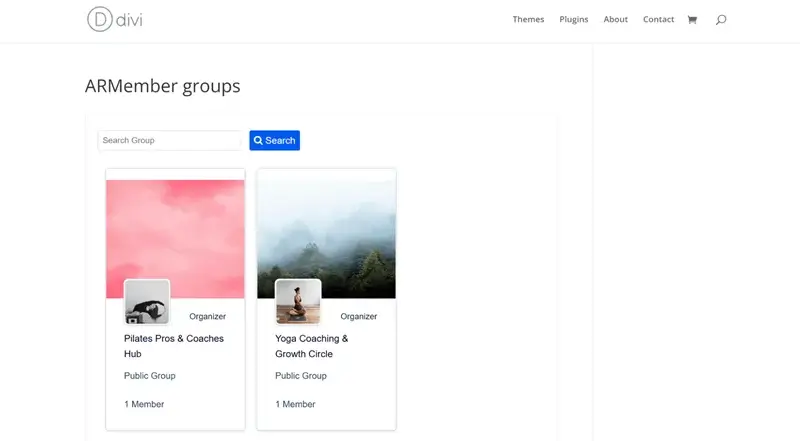
- Create a WordPress page
- Paste this shortcode: [arm_com_group] – you can use any page builder.
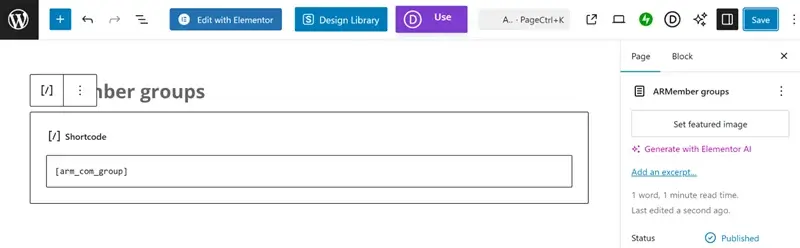
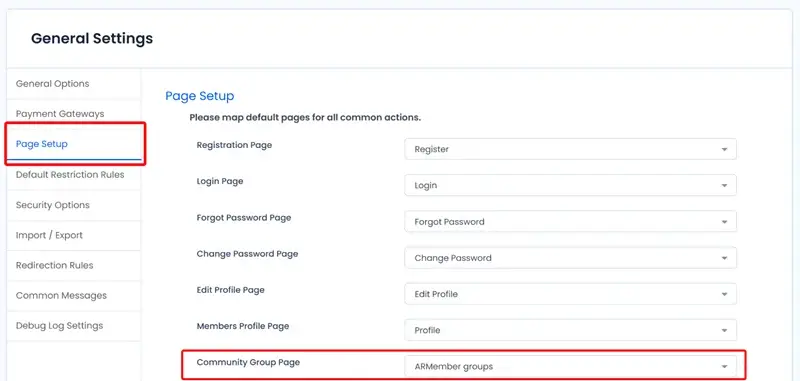
- Assign this page under ARMember → General Settings → Page Setup → Community Group Page.
Once you create community groups, they will be displayed on this page.
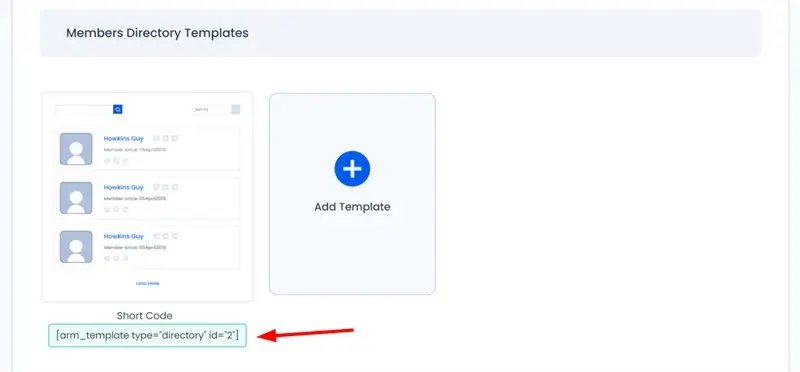
6. To show members, activities, or other interactions, create the respective pages with shortcodes for your online community site [find all shortcodes in the docs]. For example:
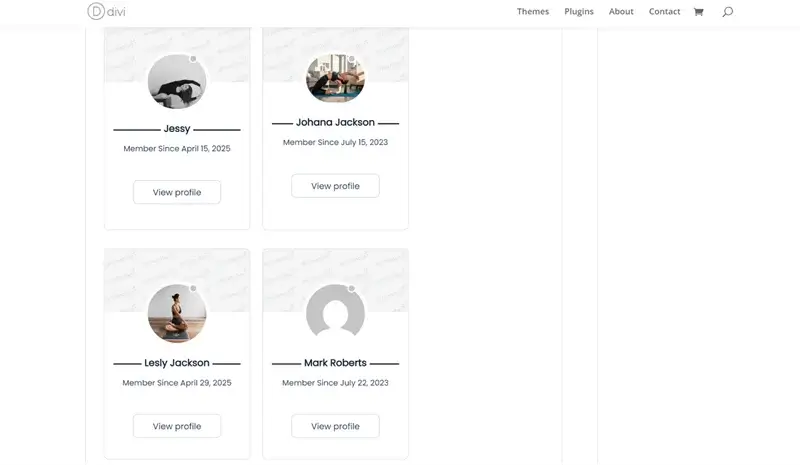
- Display all the members of the community: use shortcodes from the Members directory templates in the Profiles & Directories templates.
Use the theme settings to adjust the design:
Or, if you want to customize how the online community site profiles look in terms of social community features, edit the member profile settings: ARMember → Profile & Directories → Add/Edit Member Profile Template.
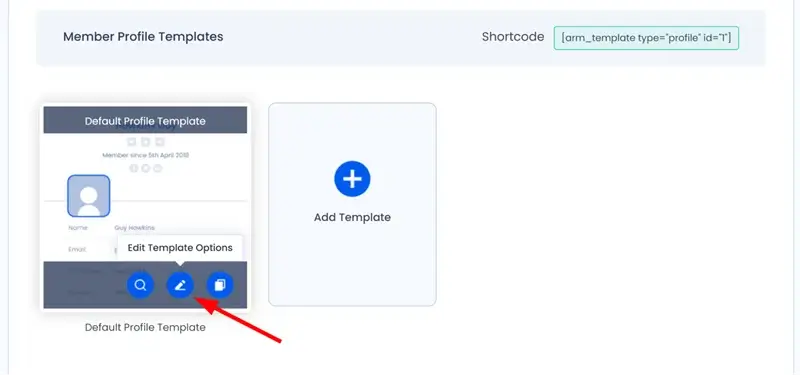
Here you can turn on the needed sections for profiles (Posts, Friends, Groups, etc.).
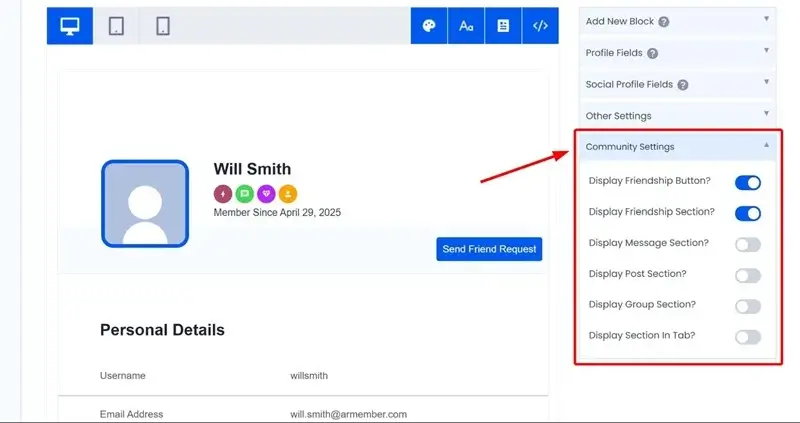
There are also layout and color settings that you can change.
7. Manage Community content via these ARMember menus:
- Community Activities (user posts, reviews, and activities).
- Community Groups (group posts and comments).
A more hands-on social networking site tutorial through the features follows! We’re going through the key settings and options in the next part to show you how deeply you can customize it.
A Closer Look At Specific Social Community Settings & Features
What flexibility do you get when jumping to the settings of the Social Community WordPress extension? Let’s guide you through the top options below.
Friendships / Friend Request Feature
Traditionally, members want to build a personal friends list inside their profile. That’s exactly what the ‘Allow Friendship’ option in the add-on does: enable it to let members connect by the means of sending, accepting, canceling, or removing friend requests.
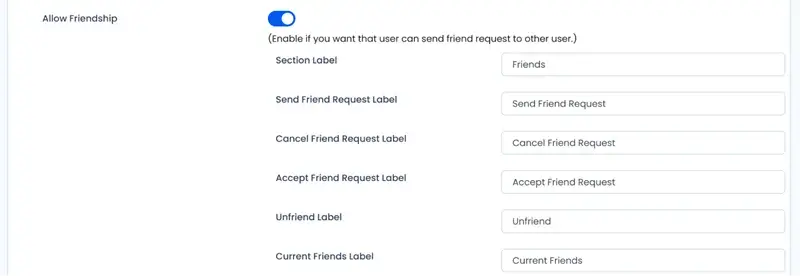
If needed, there are options to quickly personalize the text and messages shown to users, including button texts (Send, Accept, Cancel, Unfriend), tab labels (Current Friends, Friend Requests), or social community system messages.
Optionally, you may turn on the ‘Display Friends to Other Users’ if you want friends lists to be visible to others on your social networking site on WP.
Allow Private Messaging
With this feature enabled, you give users an option to send direct, private messages to each other using their profiles inside your membership community.
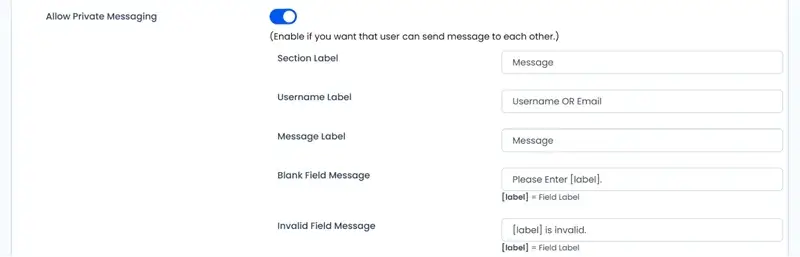
To sum up, your settings include:
- Enable private messaging.
- Customize labels and user messages if needed.
- Optionally restrict messaging to friends only.
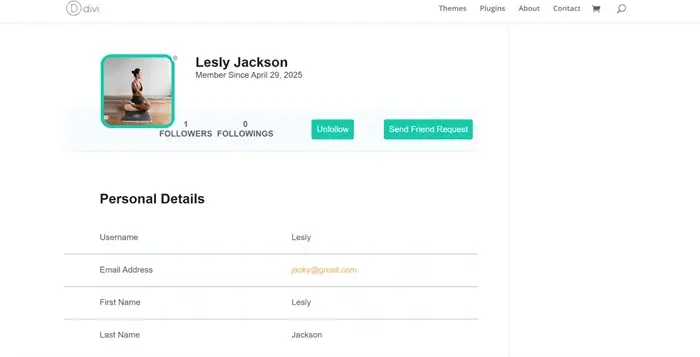
Following and Unfollowing Others
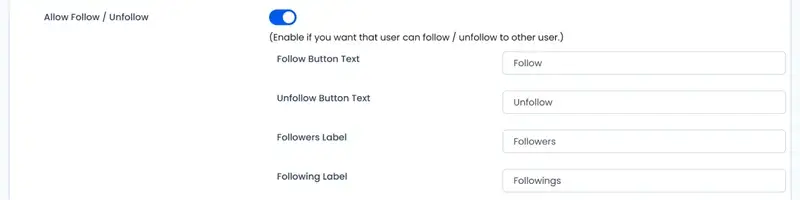
Just like in any known social community, you can allow people to follow other users without needing approval. This makes following updates of connections easier. Here you can also customize button text and tab labels as needed.
Allow Reviews
Enable this feature in your social community if you want to use public reviews, allowing people to leave such across the community.

Your key options include:
- Keep reviews public: Enable to make all reviews visible to everyone.
- Review approved by admin: Require admin approval before a review appears.
- Allow Users To Change Their Submitted Review: Let users edit their own reviews after submission.
Allow Posts
The Allow Post feature lets users add and share posts on their profile. That’s perfect for more engagement and public activities inside your community.
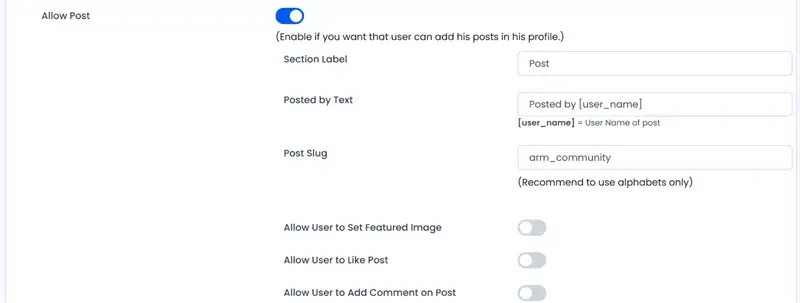
Once enabled in Community Settings, you can customize how posts work using this setting – set a custom post slug, allow users to upload a featured image, enable likes and comments on posts, and even create a News Feed that displays updates from the user, their friends, and users they follow.
You can also personalize section labels for both the Posts and News Feed tabs to match your site’s style.
Groups
This is probably one of the biggest features of this Social Community extension. Its main goal is to allow users to create, join, and manage groups from their profiles.
Smaller communities within your membership website is the foundation of your community engagement!
Key Setup Steps for Social Networking Site with WordPress
- Enable Allow Group from Community Settings.
- Create a WordPress page with the shortcode [arm_com_group] and link it under ARMember → General Settings → Page Setup → Community Group Page.
Users can create groups by setting:
- Name & Description.
- Type (Public, Private, Hidden).
- Avatar and Cover Images (with optional cropping).
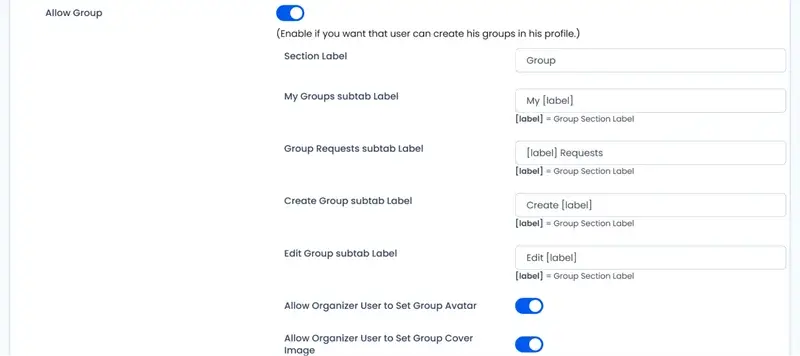
There are many customization options to help you build a stronger community. Some of the most important features are:
- Customize tab labels for My Groups, Group Requests, Create Group, Edit Group.
- Let organizers set avatars and covers for groups.
- Allow users to set featured images for group posts.
- Enable likes and comments on group posts.
- Invite users by username or email (only for group members).
When you are ready to create a groups list page, use the [arm_scom_group] shortcode on that page.
Activities in Social Networking Site

When you enable ‘Activities’, this allows all logged-in members to view each other’s activities in the community on your social networking site with WordPress.
Enable the feature > Set activity tab label > Choose if activities are public > Users’ profile pages now show their latest actions!
Social Networking Profiles

Let users manage their own profile preferences like visibility, email notifications, online status, and group invite settings directly from their profile page. Here are some of the user controls you can customize:
- Enable/disable different email notifications.
- Control their profile visibility in directories and who can see their online status.
- Restrict group invites only to friends.
Adjust Notifications For Your Social Community
The ARMember WordPress membership plugin lets you send automatic email alerts to users for different community activities, such as friend requests or private messages (actually, everything we’ve described above in the settings overview).
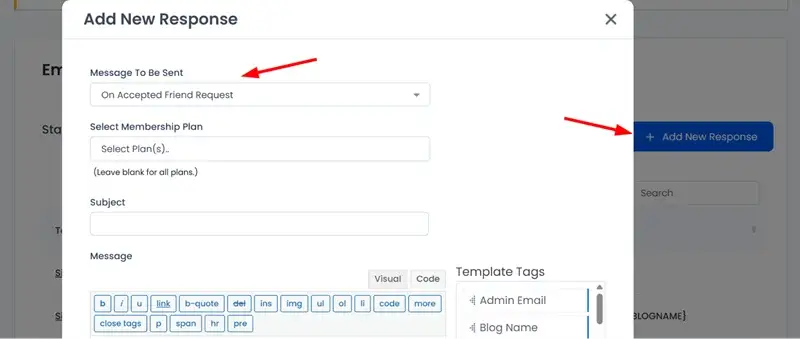
It takes just a few steps to configure these automated messages:
1. Configure Email Templates
Go to ARMember → Email Notification and set up custom email messages for different activities.
2. Enable Email Notifications:
Activate specific email triggers (‘Friend Request Received’ or ‘Group Invite’) in Community Settings.
As a site manager, you can edit labels, messages, button texts, and error alerts across all group, profile, and email-related sections for a fully branded experience.
Here are a few types of notifications you can automate for users:
- New friend request or friend request accepted.
- New private message received.
- Someone followed you.
- Someone liked or commented on your post.
- Group invites and group request approvals/denials.
- Likes and comments on group posts.
Moreover, members can manage which notifications they want to receive from their Profile Settings (Email Preferences tab).
Let’s Conclude: Building a Social Networking Site with WordPress
Build a powerful social networking site on WordPress with ARMember and its purpose-created extension. With the Social Community add-on, you will easily configure all the interactions needed for the active and loyal social community within your network or membership site. Get started now with the Enterprise plan or an individual add-on!
FAQs
1. Can members chat with each other using ARMember’s Social Community Addon?
Yes! You can easily set up private messaging using the social community addon. You can also allow members to create separate groups with other members for chatting.
2. Can I use the Social Community Addon with the standard plan?
Yes, instead of buying the enterprise plan, you can just purchase the Social Community Addon separately alongside your Standard Plan. This would help you create your own plan with only the features you require.
3. How does a Social Networking Feature support Membership Sites?
A social networking or a social community feature gives the following benefits to membership sites;
- Boost member Engagement
- Builds Member Retention
- Sense of Belonging and Loyalty
- Increased Membership Experience
- Gather Member Generated Content via Posts/Feed
- Understand What Member’s Value
Related Articles:

Share this post