

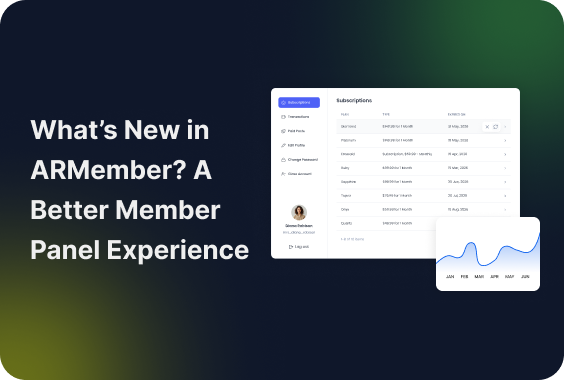
One of the most significant updates of the ARMember plugin version 7.3 is definitely the all-in-one member account for profile and billing settings. This is the type of log-in area on your membership site, where your members can easily view and update various things, such as:
- Profile and account settings (personal info).
- Billing and subscription details.
- Renewal controls.
To help your members easily find their way around in the profile, you can fully customize the latter. You can now structure and customize the member’s account interface the way that matters to your exact business.
Curious to know the details and how to ship your members the best experiences? Let’s review the member panel in ARMember in greater detail.
TL;DR: ARMember 7.3 introduces a redesigned Member Panel that gives your members an easier way to manage profiles, subscriptions, billing and transactions from one place.
A Quick Look At What The ARMember Member Panel Offers
The member account you create provides a dedicated dashboard, separate from the gated content on your site.
And with the ARMember settings, you’re in full control of it. Here are just a few membership panel features you get.
Smart Design
Designing this membership panel interface, we tried to avoid complex tables or tiny controls so that it’s truly mobile-first. The navigation works even on smaller screens when members log in to your site on the go.
Profile And Account Settings
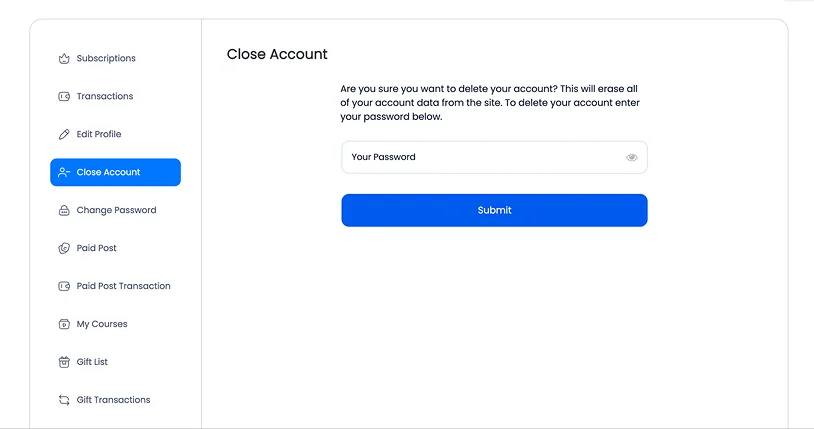
For the basic membership panel control, your members will be able to manage:
- Personal info (name, email, avatar)
- Password settings
- Closing account settings
Full Billing And Subscription Management
This is also a very functional dashboard!
- Current plan details
- Upgrade/downgrade options
- Payment methods
- Transactions
- Renewal/cancellation controls
Adapts To The Extra Services Your Members Use
Based on which extra ARMember add-ons you use, your members can see that info in dedicated tabs as well. Paid posts, Online courses, and more. But you can also turn them off in profiles.

Customizable Colors And Fonts
We all have different sites! We want to make sure a member account reflects your public site brand identity.
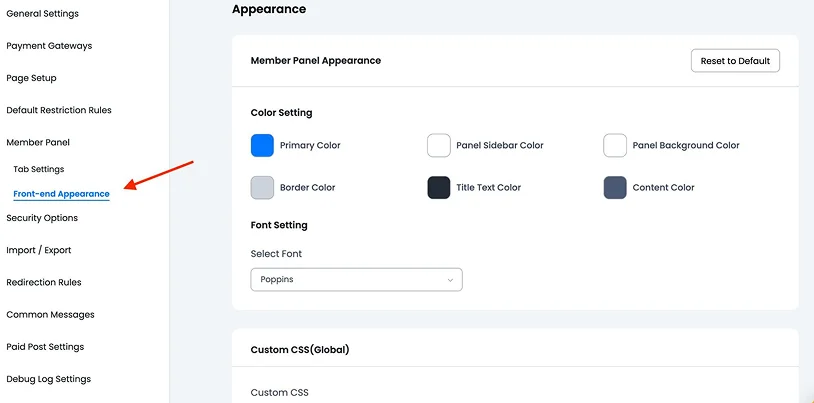
For this, you have a special panel to customize colors, sidebar colors, backgrounds, and fonts for member accounts.
Easy To Build For Website Owners
In the first place, an account creation is an easy thing to do for you! You can add the tabs your members need, customize each section to match your site, and easily improve the layout by dragging and dropping items into the right order.
With full control over how the account area is structured, customizing a polished member experience feels intuitive and fully under your control.
How To Build The Member Account UI?
Now, it’s time to take a closer look at how you can build the member profile: go to ARMember > General Settings > Member Panel.
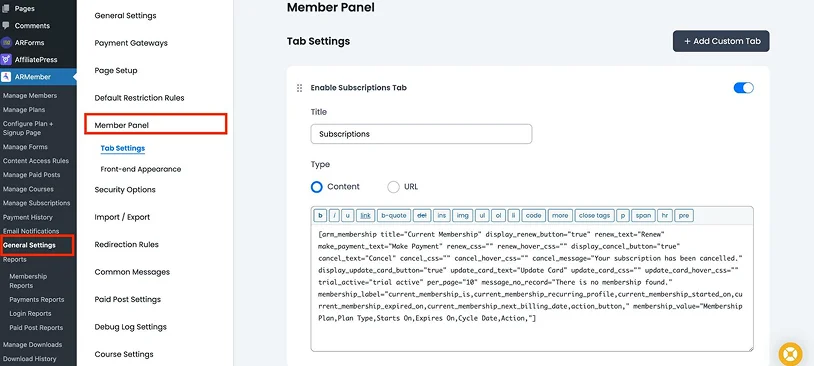
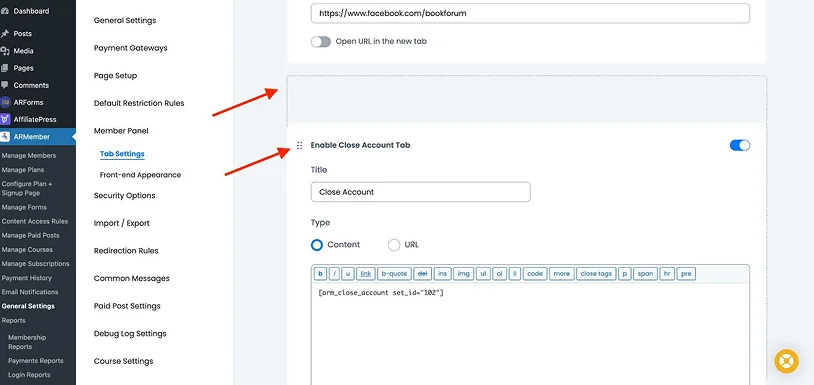
You can either customize what you have (change, enable/disable tabs) or add custom tabs to the member profile to shape how the account looks and behaves.
There’s no hard limit here, so you’re free to create as many tabs as your experience requires.
When adding a new tab, you can define its title and choose its type: display simple content like text/shortcode, or use a URL to redirect members to another page on your site, a community space, or even an external platform like a social network.
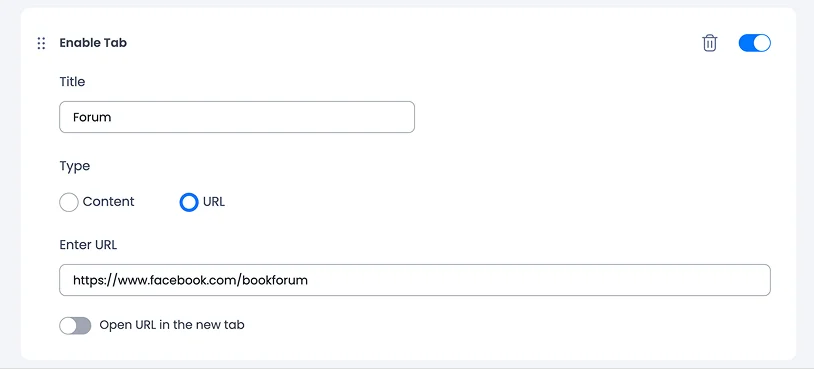
Moreover, you can control the structure and visibility of the member profile. Tabs can be reordered with drag-and-drop to create the perfect flow, and simple enable/disable toggles let you decide exactly which tabs appear in the final member account.
As we’ve already mentioned, you can jump to Appearance to adjust sidebar and background colors, refine font styles, or apply your own CSS classes.
Transactions And Subscriptions
As for the standard tabs with personal billing data, how do they generate content?
They use normal text or shortcodes. For example, such tabs as Transactions and Subscriptions require creating dedicated shortcodes with the info you want to include.
By the way, by default, you don’t need to do anything – the shortcodes are already generated and placed into the relevant tabs!
But you might want to customize them, right? How to do so?
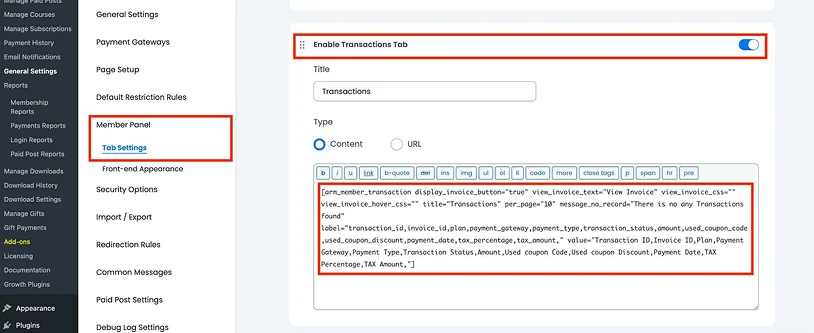
Let’s talk about transaction info displayed in the member account. If you want to change it, first, you need to generate a shortcode with your preferences (which billing info to include) for the transactions and then simply paste it into the relevant tab inside the Member panel. To generate a shortcode, use the typical ARMember shortcode block > Other > Payment Transactions > and the prompted settings.
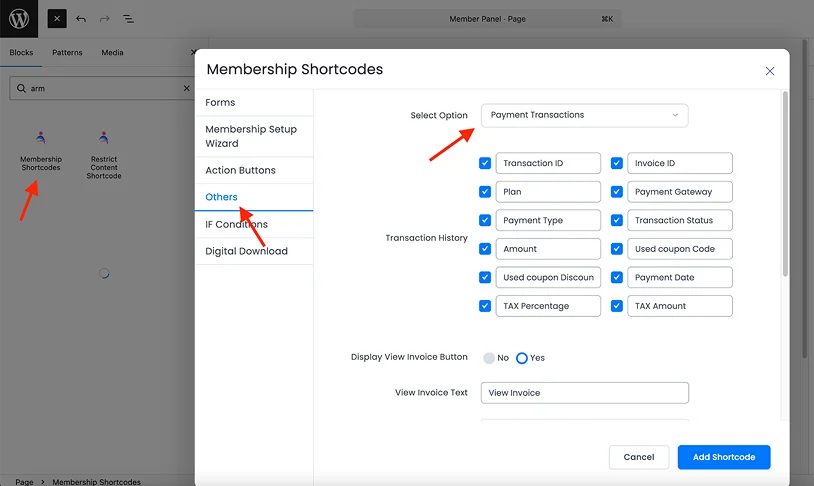
For example, start by choosing Payment Transactions, then pick which columns you want to show (like plan, amount, date) and rename them if needed.
If you want to include invoices, just enable the “View Invoice” option. Once you are done with your settings, click Add Shortcode, copy it, then paste the shortcode into the Transaction’s text section in the Member Panel and save the changes.
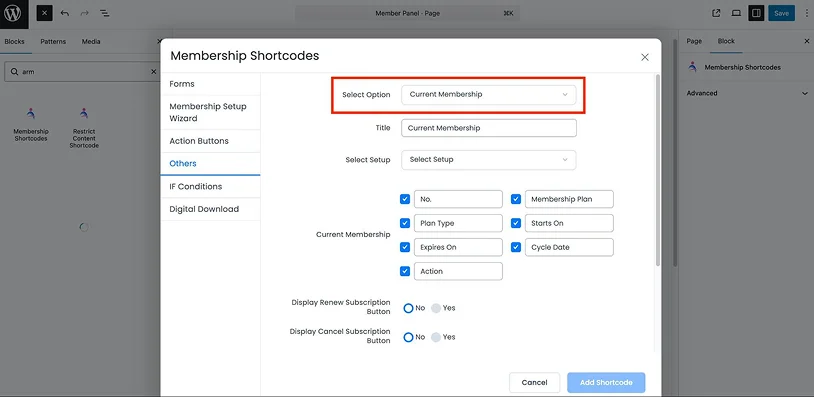
The same works for Subscriptions – but you need to use the ‘Current membership’ shortcode (if you are not satisfied with the defaults).
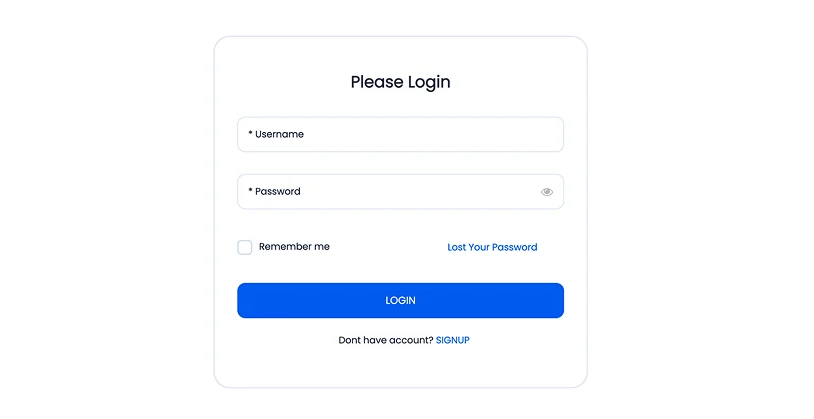
Adding The Member Account Log-In Area To Your Site
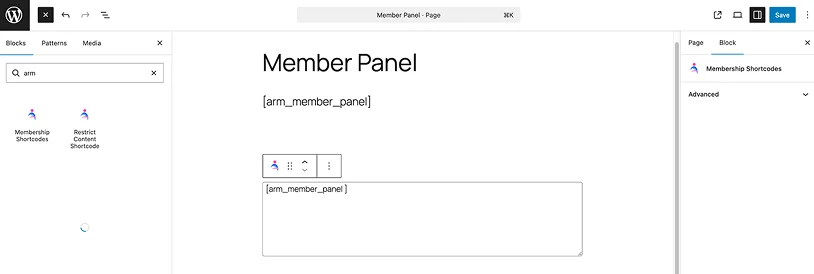
You can either manually copy and paste the [arm_member_panel] shortcode to the needed page or let the ARMember plugin create it for you via:
- Pages > Add New
- Add the Membership Shortcode block
- Go to ‘Others’
- Select “Member Panel” from the dropdown.
But before that, ensure that the page is not there yet – because ARMember creates a lot for you automatically.
Concluding: Provide Your Members With Functional Accounts
The latest version of ARMember delivers a powerful control panel for your members, and the total customization freedom of this panel for you!
– Use account tabs to build the needed member account UI.
– Build an account fast and easy with pre-defined tabs, shortcodes, and pages.
– You can easily let members view their payment history using a simple shortcode.
– Fully brand member accounts with the color and font settings.
Ready to introduce your members to better account management experiences?
Related article:

Share this post