

If you run a membership site on WordPress, one of the most important parts of your user experience is the member panel, also known as the member dashboard. Under no circumstances should it feel confusing, limited, or poorly designed, as this can directly impact retention.
However, the truth is, most members won’t visit a dashboard just because it exists. They use it when it solves a specific need quickly. If it becomes a control center (manage subscriptions, view whether the payment went through on the website side), it gets used regularly. And your task as a site owner is to make it truly usable and handy.
ARMember, the WordPress membership plugin, provides you with a super flexible dashboard customization experience for your members. Let’s break it down in simple terms and then walk through how you can fully customize your membership account page using ARMember.
TL;DR: Customize your membership account page in ARMember to turn it into a powerful member dashboard so that your members can handle their own subscription plans, payments and profiles.
What is a Member Panel Page in ARMember?
What is a member panel and when is it commonly used? A member panel is essentially a private dashboard that a user / member sees after logging into your website.
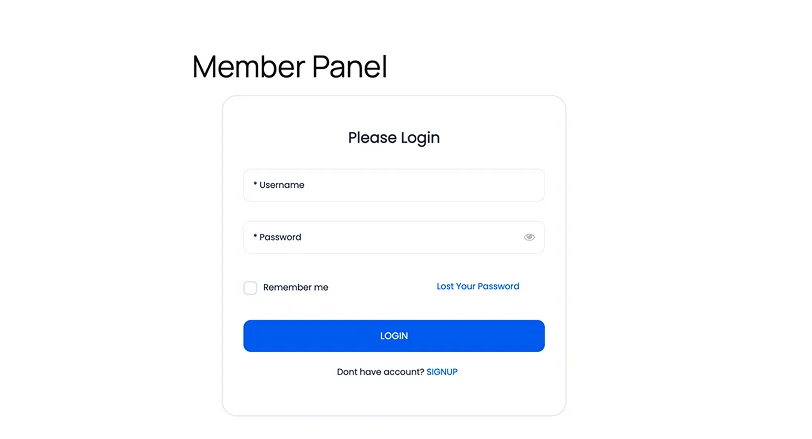
This is their personal control center, not visible to other fellow members.
Inside this dashboard, members can:
- View and update their personal information
- Check their active membership plan
- See subscription and renewal details
- Access payment and transaction history
- View extra purchases (if available – e.g. paid posts or online course)
- Change their password
- Edit their profile
- Close their membership account if needed.
In short, this is where members manage their membership account, transactions and subscriptions, not where they consume content you post on your WordPress memberships website with ARMember
The actual content (courses, posts, downloads, etc.) is accessed through other protected pages or menus powered by ARMember.
For the member dashboard, you can also customize the look and custom tabs with your preferences.
Key Features of the ARMember Membership Account Page
ARMember gives you a ready-to-use member dashboard, which you can manage and customize to reach the look and feel you want your members to have.
Here’s what you can do with it:
1. Customizable Which Sections To Include
Decide which member panel section should appear and where:
- What information is displayed
- How it is structured
- Which sections are visible
2. Member Information Display
Which portion of user information details should be here? You can include profile information, membership plan details, subscription status, and renewal dates. This is the info members really want to access often. You can enable or disable specific sections to simplify the interface of a member dashboard.
3. Customize The Visual Part
There is an individual section in the ARMember settings that allows you to match the dashboard to your brand by customizing:
- Panel colors
- Sidebar colors
- Background
- Fonts
A very helpful thing to build a visual part that actually reflects your main site design.
What’s more, you can place the member panel anywhere using a simple shortcode: [arm_member_panel]
In WordPress, you can add shortcodes in literally any website builder experience – even the classic Editor.
How to Access Member Panel Settings & Customize It
Let’s get our hands dirty and help you build the member panel experience that you will be satisfied with.
To configure the dashboard, follow these steps:
- Log in to your WordPress admin
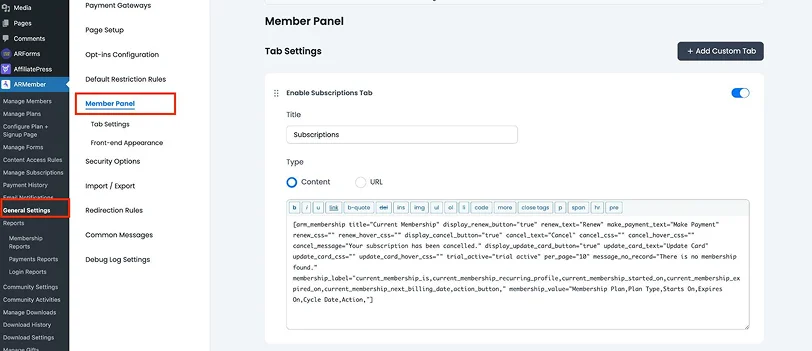
- Go to ARMember → General Settings
- Open the Member Panel tab
You’ll see an intuitive and flexible panel, where you control everything related to the dashboard.
Default (Pre-Active) Tabs in the Member Panel
ARMember includes several ready-to-use tabs that cover the core functionality of a membership dashboard. However, if you use extra add-ons (e.g. Pay Per Post, gift lists), additional tabs may appear, allowing you to add them to the member dashboard as well so that your members can see everything they purchased.
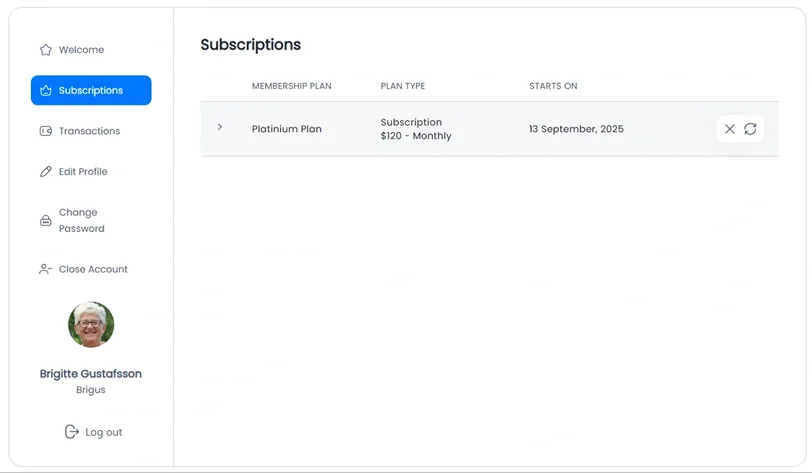
1. Subscriptions
Displays the user’s current membership plan and subscription details.
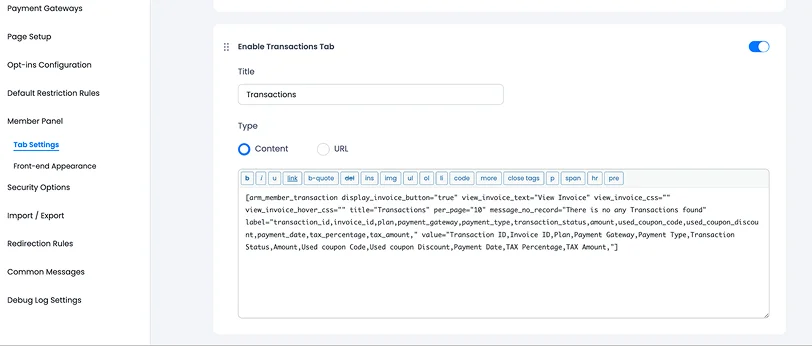
2. Transactions
Shows payment history and transaction status (allowing members to renew them quickly as with a button click).
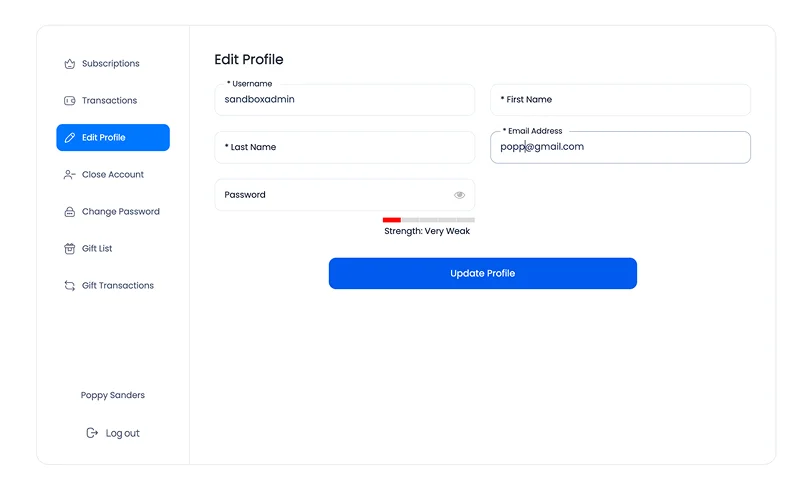
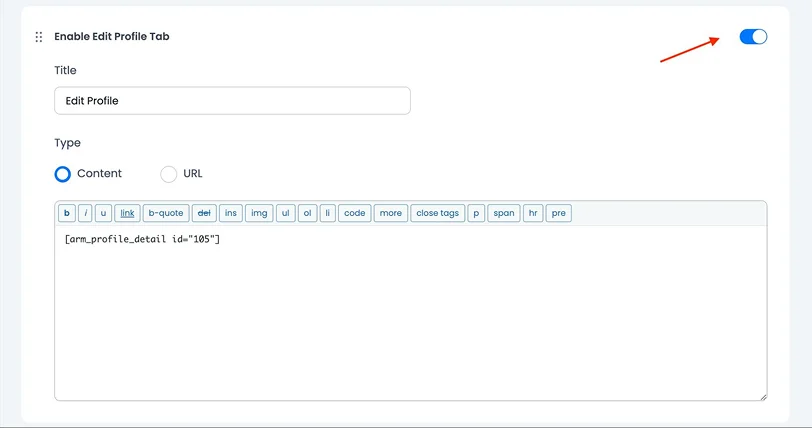
3. Edit Profile
This section allows your members to update their personal information using a form. You can also replace the default form with a custom one.
4. Change Password
This lets users securely update their password using a built-in or custom form.
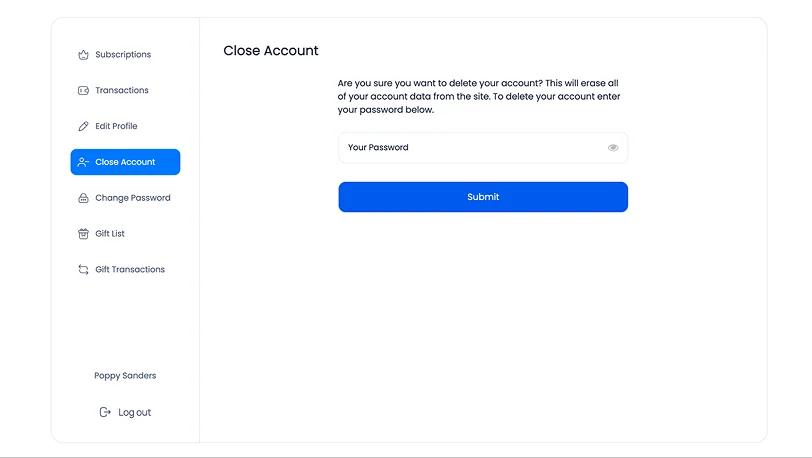
5. Close Account
Optionally, give your members the option to permanently delete their membership account automatically. You can disable this if you don’t want to offer self-service account deletion.
How to Customize the Member Panel
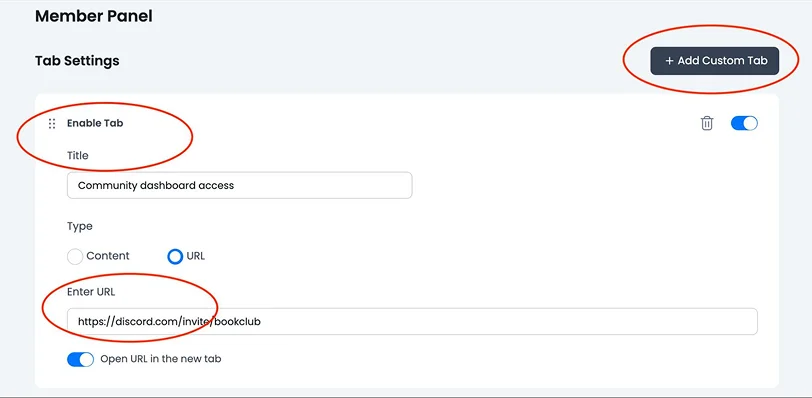
The key feature here is the ‘Add custom tab’ button, which allows you to play with the member dashboard.
You can create your own tabs based on your needs by going to:
- ARMember > General Settings >Member Panel
- Click + Add Custom Tab
You can choose between:
- Content Tab > Add text, HTML, or shortcodes
- URL Tab > Link to another page
For instance, if you have a private community hosted on another platform (like a forum or Discord landing page), you may simply create a tab called “Community” using a URL Tab. It will redirect your member to your external community page (or internal site page if you add a URL to your site).
Besides that, you may:
– Sort tabs (reorder them with drag-and-drop to prioritize what users see first).
– Enable and disable tabs.
– Temporarily hide tabs without deleting them (when you are in a testing mode, for instance).
– Delete custom tabs (remove any custom tab when it’s no longer needed).
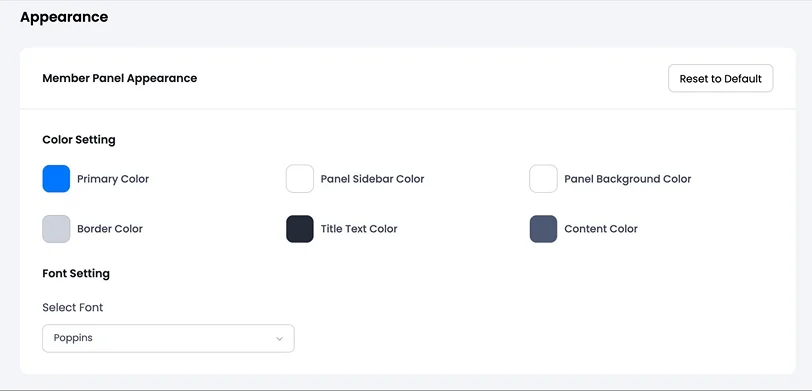
Your settings here also allow you to go through the main design settings and adjust:
- Panel color
- Sidebar color
- Background
- Font styles
You can also reset everything to default with the Reset button and, if you’re familiar with code-based styling, apply custom CSS for advanced styling.
How to Add the Member Panel to Your Website
In most cases, ARMember automatically creates the member panel page when you are setting things up.
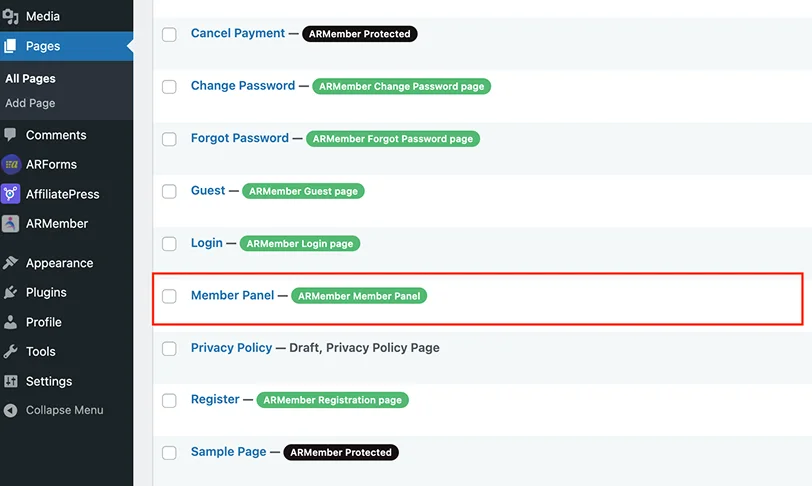
But if it’s missing, you can easily recreate it and place it where you need it.
Method 1: Using the Block Editor
- Go to Pages > Add New
- Add the Membership Shortcode block
- Jump to ‘Others’
- Select “Member Panel” from the dropdown.

Method 2: Using Shortcode (works no matter what)
Simply paste this shortcode into any page and then publish the page (wrap into the shortcode widget if required).
[arm_member_panel]

Of course, you also need to make this page accessible from the navigation menus, footers, widgets, or other website parts, where your members are supposed to log in and view these details.
Tips & Best Practices for an Effective Member Panel
Since you already have all the tools in your hands for making a member dashboard in ARMember truly effective, we’re here to help you make it even more useful with a few simple tips.
- Keep it really simple – Avoid overwhelming users with too many tabs. Show only what they need.
- Prioritize important actions – One of the iconic tips in the UX design – place key sections like Subscriptions, Profile and Transactions at the top.
- Use custom tabs strategically – Add tabs for what you currently want to have their attention for (e.g. quick links to premium content, support or help center, exclusive offer).
- Maintain consistent design – Match your member panel with your website branding for a seamless experience.
- Test the user flow – Log in as a member and check the navigation clarity, load speed, and ease of use.
Concluding
The process of customizing the membership account page for your members takes a few simple steps: configure the dashboard tabs and decide what information they display, adjust the design if needed, add the sign-in button to your WordPress site using a block or shortcode, and test everything to ensure it works as you wish.
The member panel is the heart of your membership experience, and ARMember helps you to:
- Build a fully functional dashboard
- Customize every element
- Add powerful features using shortcodes and custom tabs.
Ready to update the WordPress membership dashboard for your users?
Related articles:

Share this post