
When you create membership site, you can monetize your content and offer special content access to your members. From creating a fitness membership site, to a consulting service, online teaching platform, daily news portal, multiple membership site ideas can be explored.
But how to create and manage a WordPress membership site? What are the special tools required and eventually, how does it work? Well, enter ARMember. ARMember WordPress membership plugin is your one stop solution for all things memberships. From setting up your first membership plan to setting up payment gateways, everything can be done with this one, all rounder WordPress subscription plugin. Therefore, we are here with a definitive guide on creating membership sites and its utility for your business.
Things to Consider Before Your Create Membership Site
Before you set up a specific membership platform, you need a general, basic website. Once you create a WordPress site, you can easily build a subscription based website over it using ARMember.

Proper Niche and Goal Planning
To create a website, you have to come up with a niche that attracts you and excites you. Ensure that your niche is sustainable and you can work dedicatedly over it for the long term. You can explore some of the best membership sites examples for inspiration. Once you decide your niche, create at least a one year plan. Your goal, timeline, types of content you will deal with, and how many members you would achieve. These planning and time management would help you work in an organized way.
Domain Name, Hosting Platform, and Themes
This is the most basic requirement to create a paid membership site. Based on your niche and content subject, buy a website domain name. It must be catchy and reflect the value you want to offer. Further, you need to explore hosting platforms and themes to suit your business. With hosting platforms like Bluehost, Hostinger, A2 Hosting, GoDaddy, you get domain names, hosting platforms, and even basic themes to get you going to create membership site. Explore the best WordPress themes.
Think Thoroughly about your Plans and Pricing
There are multiple types of membership plans and pricing models that you can create. From tiered memberships to one-time payments,and recurring subscriptions, you need to choose what kind of payment plans you want to offer. Thus, you need to think beforehand regarding the various plans to offer and how you will price them. Based on that, what content you would offer to manage plans effectively must be decided.
Once you thoroughly go through this process of thinking, planning, and visualizing your site performance for the future, you are ready to set up your WordPress membership site with ARMember which is the best membership website builder out there.
Moving ahead, let us create a membership website step by step.
Create a Membership Website using ARMember (Step by Step Guide)
You can effortlessly create membership site using ARMember Lite, the free version or enhance your experience with the Pro version of this powerful WordPress subscription plugin to follow this tutorial.
Install ARMember Lite or Get the Pro Version
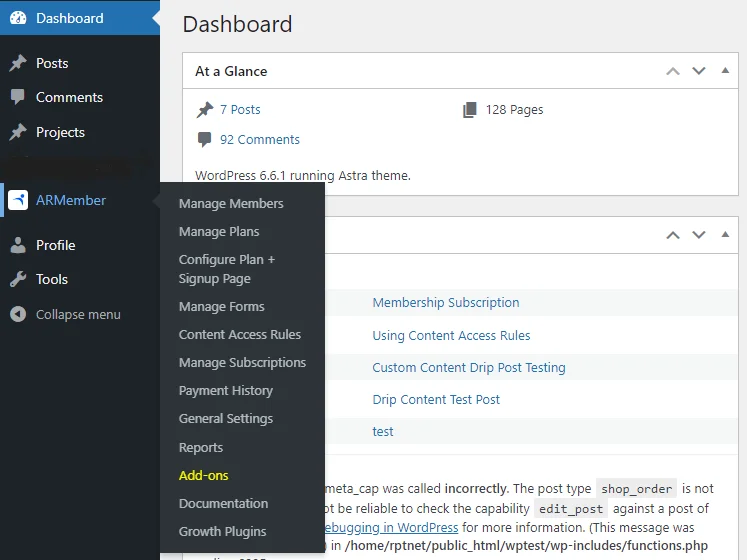
Want to set up a membership site for free? Simply download ARMember Lite version for free. To unlock premium features, purchase the Pro version and activate it on your WordPress site by adding a dedicated license key. Once ARMember is set up on your site, you’ll find a comprehensive list of its functionalities right on your Dashboard. The Lite version offers a seamless experience with all core features, except for the addons option, which is available in the Pro version.
Setup for Membership Plan Management (with 4 different Categories)
To set up various plans, you need to click on the Manage Plans options. This option will let you create a plan, set its duration, pricing, and other details. In ARMember, you can set up four different types of plans.
1. Free Plan
In the free plan, you just need to mention Plan Name, Provide Plan Description, Set Up Member Role (if required), and inherit any access rules previously set.
2. Paid Plan (Infinite)
The paid plan infinite means it is a lifetime membership plan. You receive a one time payment from a member for which they can access your content for lifetime. Here, apart from the details you have to add in a free plan, additionally you specify a price of the plan. You need to be careful while setting a price for this plan as it is going to be a lifetime access to your membership site. Additionally, you can easily define the duration of a lifetime membership for your site.
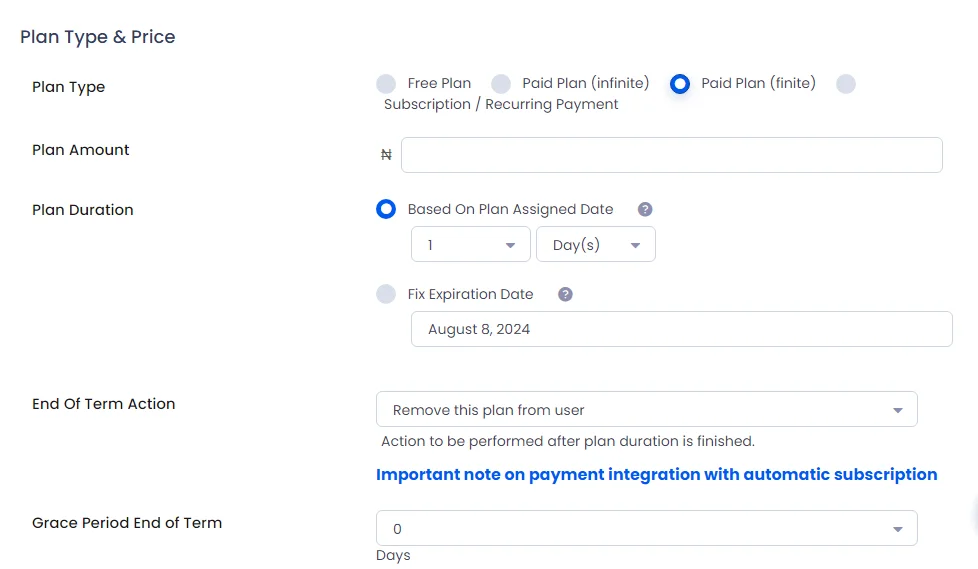
3. Paid Plan (Finite)
For a paid plan of finite duration, apart from the basic plan details, you need to specify certain other details as well.
- Set a specific plan amount.
- As it is a finite plan, you need to specify the duration of the plan. It can be in days, weeks, months, or years. Based on your requirements, select the duration.
- You can even fix the expiration date of your plan. If you are doing a timed online course or taking a gradual fitness session, set an expiry date. Thus, no matter the joining date, everyone will be able to access the content till a specific date.
- Set end-of-term action, choose a grace period, and enable upgrade/downgrade settings after the completion of current plans.
4. Subscription Website or Recurring Payments
Apart from the basic plan details, following details are to be specified to set up subscription plans. This helps create a Netflix type website or subscription sites.
- Set amount, duration of billing cycle, and how many times it should keep recurring.
- With ARMember Pro, you can also set up a Trial Period. It can be a free or a paid trial.
- Decide end-of-term action, grace period, payment failed action, and upgrade/downgrade option.
If you want to provide different plans for different member needs, then create multiple plans in a similar way. Even with ARMember Lite, you can manage multiple plans when you create membership site.
Configure Plan and Sign up Page
Once your plans are set up, you need to configure it for the visitors to see and subscribe. Let us get into it, step by step.
Go to ARMember > Configure Plan + Signup Page > Click on Add New Setup
Here, you have to set up your plan in three parts. The setup process includes three simple steps: Basic Configuration, additional options, and finally, styling and formatting choices.
Basic Configuration of Membership Site Plans
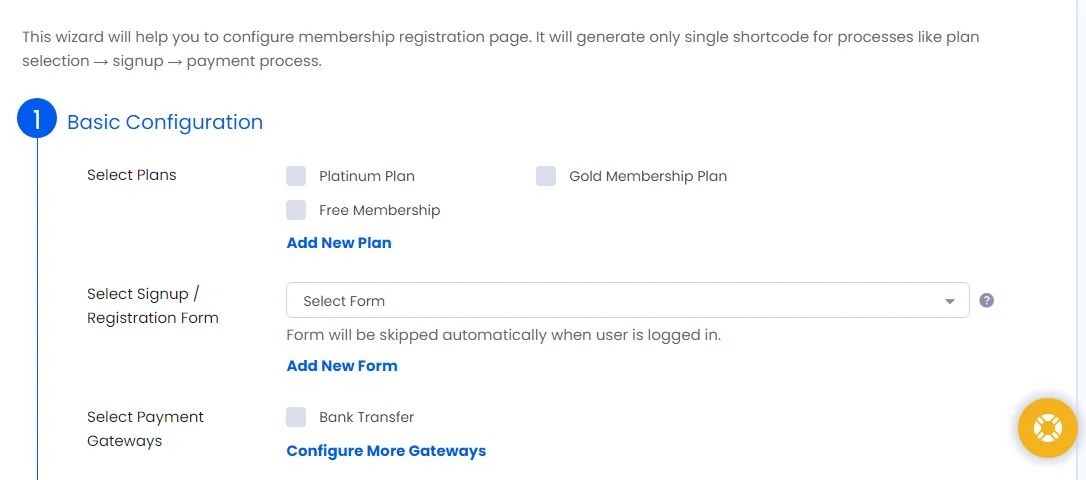
Select Plans: Choose the plans that you want to showcase on the front-end of your membership platform website. Pick the ones for which you want to invite subscriptions after you create a membership site. You can even display all your plans here.
- Select Signup/Registration Form: You need to choose the form that a user would fill for basic information while subscribing. A default sign-up form is available for you to move ahead. If you want to create or edit the form, you can do it from there itself by clicking on Add New Form.
- Select Payment Gateways: With ARMember Lite, you get to choose Bank Transfer. For integrating payment gateways in membership sites that support all countries and currency, opt for ARMember Pro.
Other Options
This section will let you edit the labels of various buttons on the signup page. For instance, edit submit button label, payment cycle section title, subscription labels, and also add custom CSS text if required.
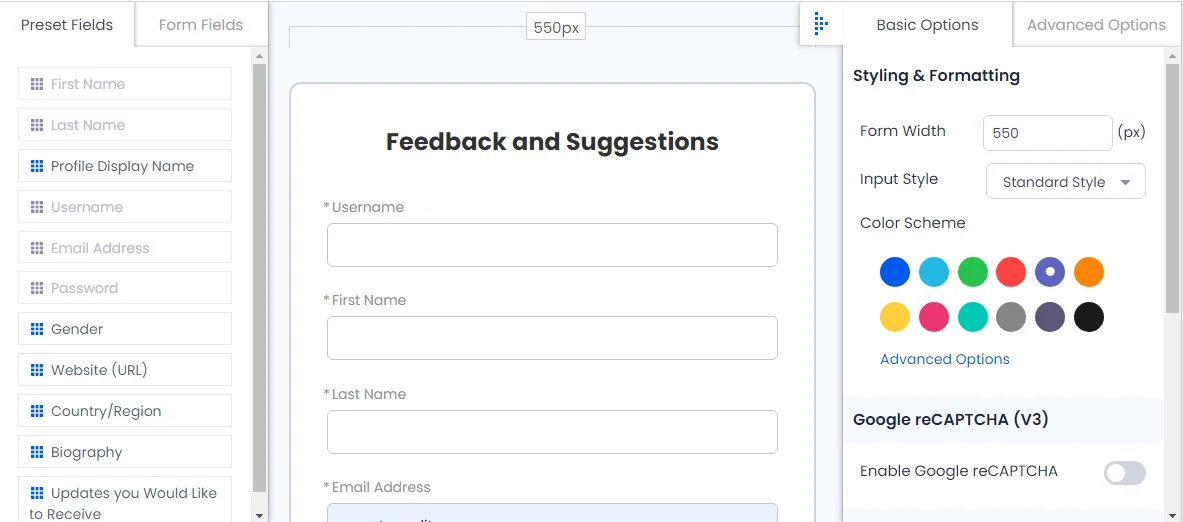
Styling & Formatting
To customize the look of your membership signup page, the styling and formatting options are helpful. Customize your membership experience by selecting a plan skin, enabling two-step signup, adjusting content width, text alignment, fonts, and color options.
Once you are done with all the changes in the setup, click on the save button. Now, as soon as you click on save, you will see a shortcode. On hovering over the shortcode, you can copy it.
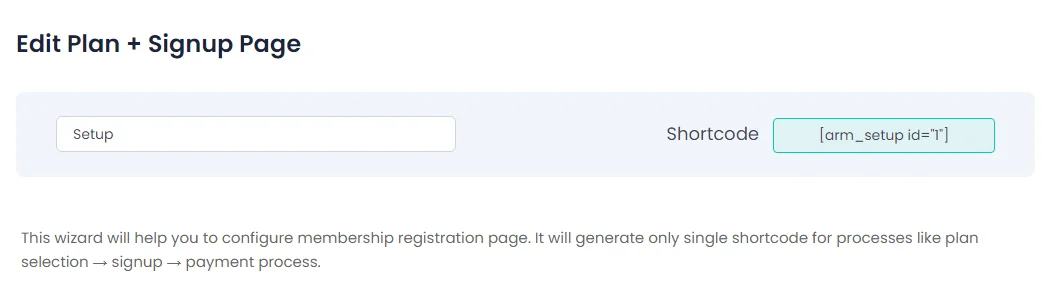
After copying the shortcode, create a New Page. Simply paste the shortcode, publish the page, and then check out how it looks on the front end of your site. This membership website setup would be visible to the visitors for subscribing.

Manage Various Forms for Best Membership Site Platforms
To make any changes to the forms or add a new form, you can use ARMember’s robust form builder tool. You will get default forms of sign up, login, forgot/change password, edit profile, logout, and also close account. With this membership website builder, you can create as many forms as you require for different purposes. Customize it as per your choice, copy the shortcode, and paste it wherever you would like the form while you create membership site.
Create Content for Membership Portals
You create membership site to share exclusive content and that’s what you need to do now. To keep up the membership site for the long term, you need to work on creating awesome and valuable content. Create diversified content, plan bonus content for loyal members, and retain your member’s interest. With a good member impression, you will keep having recurring subscriptions.
Fun fact: Retaining existing customers is five times more cost-effective than acquiring new ones! So, try every trick in the book for good member engagement and retention.
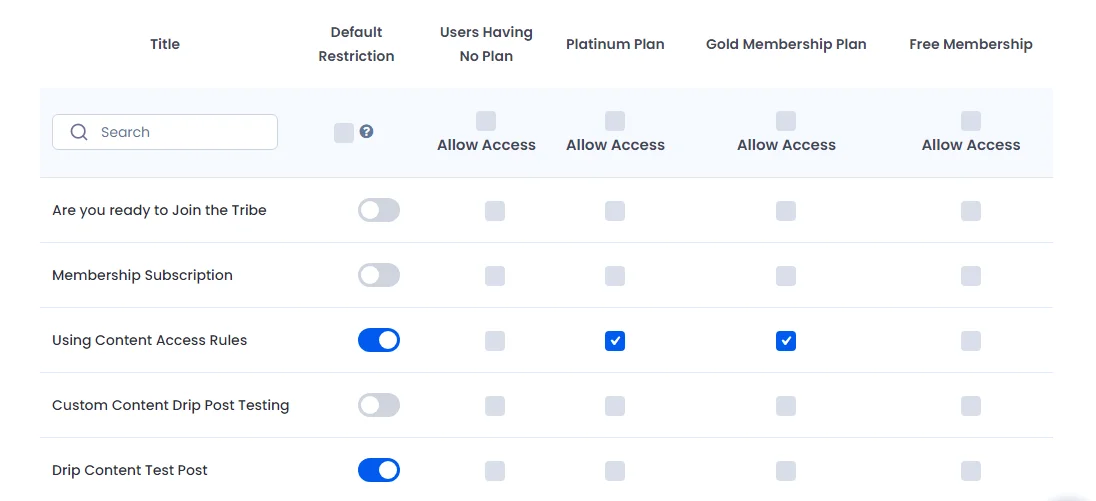
Setup Content Access Rules or Content Dripping
When you put in all the hard work to create exclusive content, you must also protect it. With ARMember, you can lay down various Content Access Rules and decide which plan members can view which post/page/content. You can set full restriction or even partial restriction over your content.
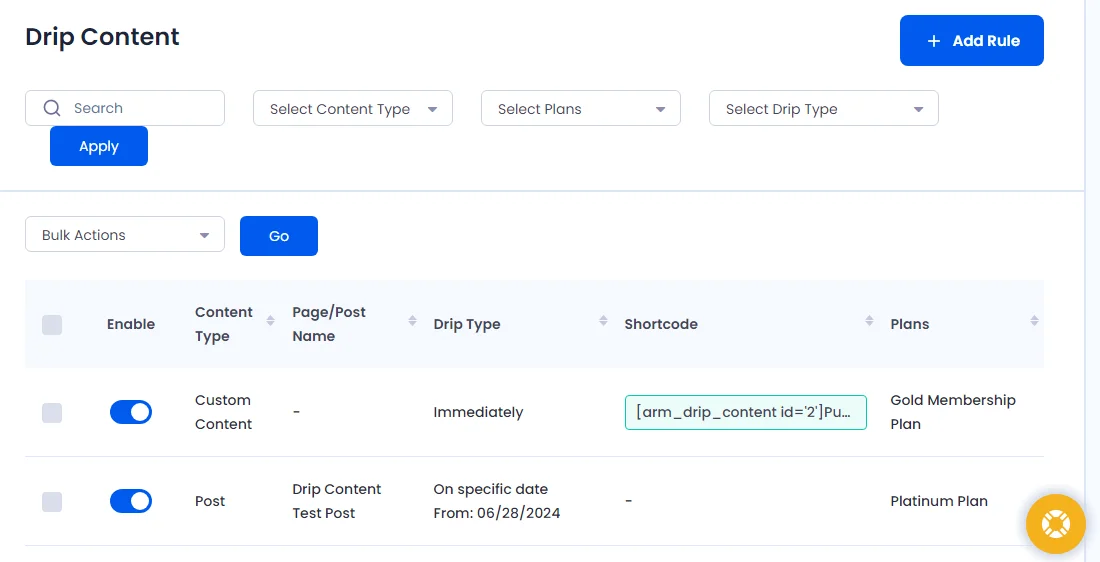
With ARMember Pro, you get the option of Content Dripping as well. Instead of providing complete content access in one go, you can schedule your content to release step by step.
This way, you can retain member’s to wait for the next release. With such a drip schedule, they also keep logging back to your site, thus increasing their on-page time with you.
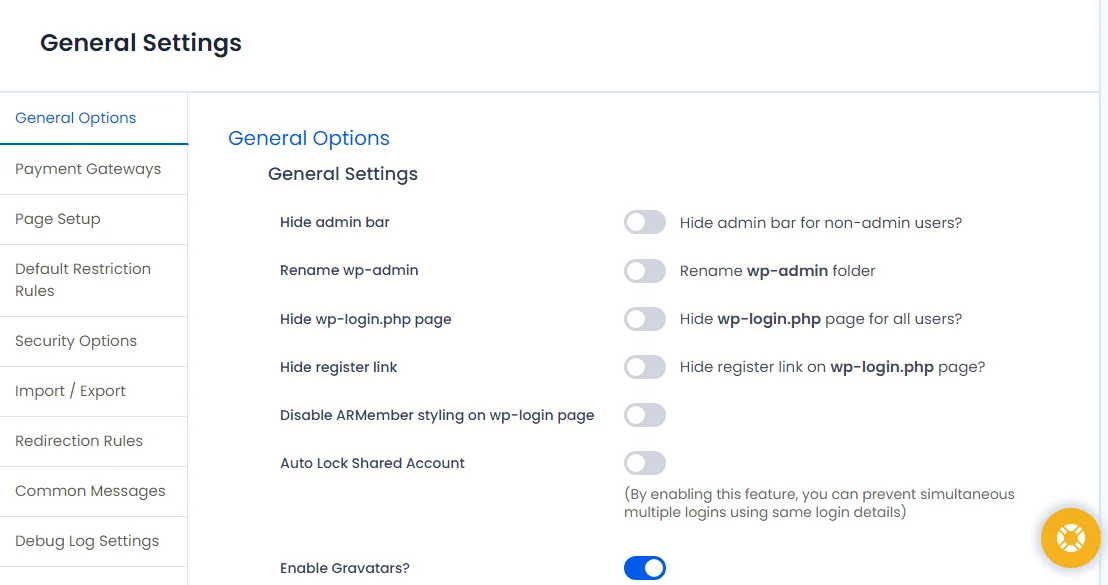
Explore General Settings
Apart from all the major modules of membership website software, ARMember, you can check out General Settings. From here, you can set up multiple things on creating a membership site.
- Enable varied payment gateways, Bank Transfer and PayPal for ARMember Lite.
- Explore default restriction rules to make necessary changes.
- Checkout various security options and set a maximum number for login attempts. Features to block a certain user, email address, or an IP address for membership site safety can be set from here.
- Import or Export your members as well as settings based on your requirements.
- Enable varied custom redirection rules so that a user is led to a proper page.
- Check the common messages and Debug log settings as well to leverage it as per your membership site’s need.
Create Membership Site with ARMember Pro Features to Stand Out
There are some of the pro features that will make your membership site powerful. Let us get a brief summary of it.
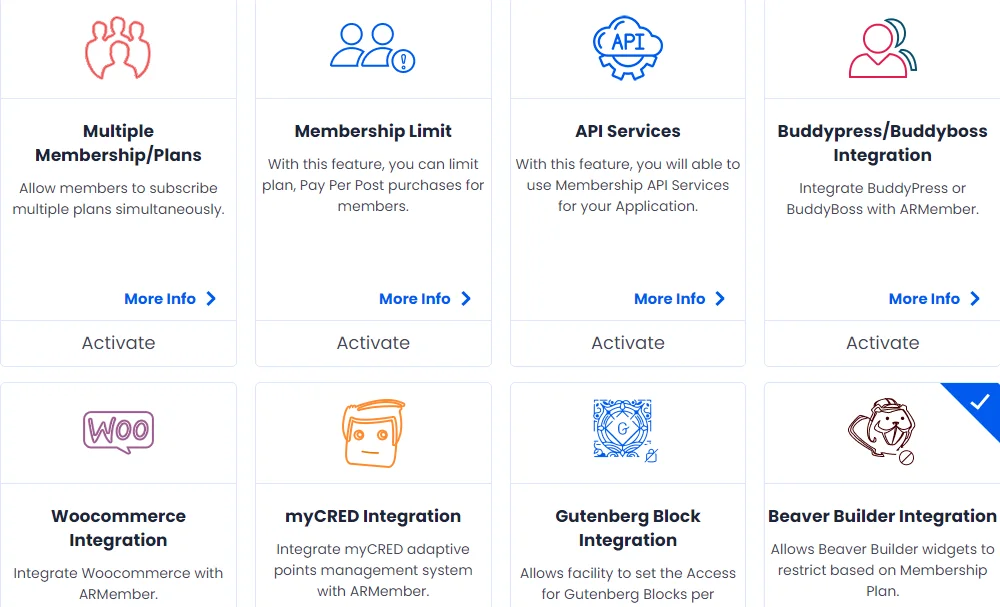
- Enable Social Feature for access to member profiles and member directories. Set a Social Login so that a visitor can log in with their other social credentials. It also allows you to create various badges and achievements.
- Create your email list with the Opt-ins configuration and use powerful email marketing tools like MailChimp, Aweber, Constant Contact.
- Enable the Pay Per Post feature to sell individual digital downloads or products.
- Try out the Coupon Feature and create various discount coupons that can be used during checkout by members.
- Enable the facility to send invoice and also calculate Sales Tax with ARMember Pro.
- Set different Content for different users with User Private Content add-on.
- Use myCRED for an adaptive point management system and add interactive gamification elements to your membership.
- Use multiple site builders that are adaptive and aid you in site creation.
Wrapping up the Creation of Membership Site with ARMember
With ARMember, you can easily create membership site for free using the lite version. It will definitely be a completely functional membership site. However, to extend the functionality of your membership site, the ARMember Pro Plugin starts only at $69/year.
Further if you want features like Online Courses, Affiliate Marketing, Social Community creations, or a Gift Membership, you can get them as add-ons. With ARMember, your membership journey is going to be a cakewalk with robust features, regular updates, and timely adaptation to ever evolving world of tech.
Read this also:

Share this post