

Modern-day Zapier is pretty fast and easy to set up, even AI automated membership workflows are already implemented in a beta version with Copilot. It lets you connect your membership site with email systems, CRMs, calendars, messengers, and more.
If you want to link Zapier to your membership site on WordPress, this ARMember plugin tutorial is for you.
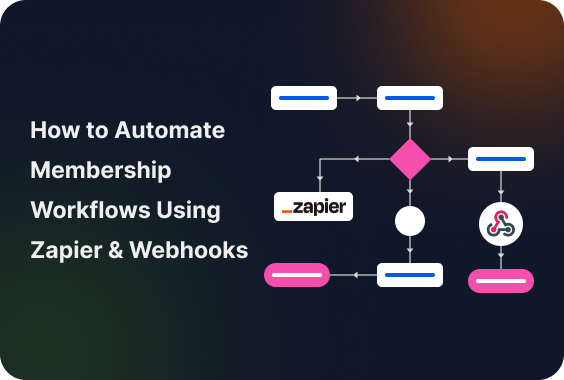
What will you set up? The final result is an automated membership workflow. The user takes an action on your membership site (e.g. cancels a subscription), then Zapier receives it, which then triggers action in another app (like an email software). And vice versa – full automation, no manual work!
For this zapier webhooks tutorial, we’ll be using webhooks, which are basically a way to send data from one system (your ARMember plugin) to another instantly (an app) via a URL. This way, webhooks send real-time data when native integrations don’t exist.
TL;DR: A membership workflow simply automates actions which are triggered by users (Or members). With Zapier and webhooks, your ARMember-powered WordPress site immediately connects to tools for auto-running emails, CRM updates, and more.
Examples of Membership Workflow Automation
Do automated workflows differ between membership sites? Yes, and they vary a lot depending on the business model. Let’s take a look at a few examples.
1. Content-based memberships (courses, premium blogs)
- User joins → send email
- Renewal reminders
2. Community memberships
- Join → invite to community (Slack/Discord)
- Tag user by interests
- Trigger engagement emails
3. Subscription services
- Payment success → invite to online event
- Missed payment → send email
- Cancellation → trigger retention email
Needless to say, you can set any with ARMember and Zapier.
1. Set Up ARMember with Zapier
If your site with the ARMember plugin is already up and running, you just need to activate Zapier inside your dashboard (might need to install an add-on first after downloading from your ARMember account). The Zapier add-on is available from the ARMember Professional plan.
From there, you can connect your website to Zapier and start automating tasks.
Inside the Zapier settings, you’ll find triggers and actions that you need to set up.
1) Triggers (when something happens)
These are events on your membership site that can start an automation, like:
- A user signs up
- A user updates their profile
- A membership is renewed, changed, or cancelled
- A user account is deleted
You can easily turn these on or off depending on what you need.
2) Actions (what happens next)
You can also allow Zapier to send data back to your site, for example:
- Create a new user
- Assign a membership plan
- Add custom user information
To enable this, you simply can turn on the Zapier action option and save your settings.
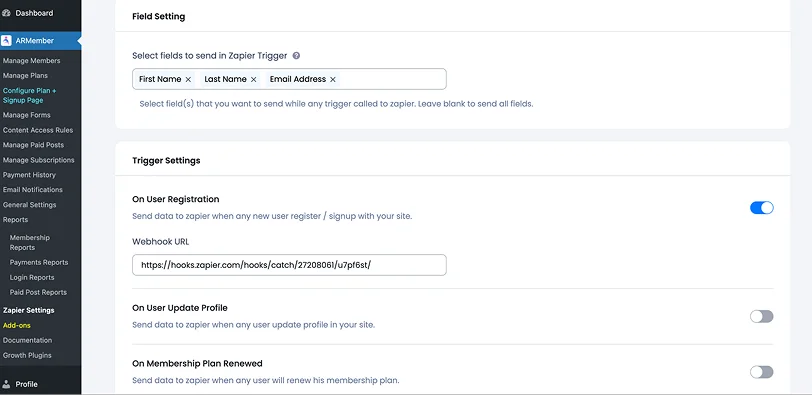
3) Sending data to Zapier
You can choose which user details to send (like email or name). If you don’t select anything, all available data will be sent automatically. And as for security, your site will only accept data from Zapier if everything matches correctly. Thus, when setting up your automated membership workflow, make sure:
- Field names are entered exactly as required.
- Values match exactly. (they are case sensitive)
If you already have membership plans and custom fields, here is your automated WordPress membership workflow:
- You can set a default membership plan for new users.
- If Zapier sends a specific plan, it will override the default.
- You can also pass extra custom fields. (if needed)
2. Create Zapier triggers with Webhooks
1. Log in to Zapier
First of all, head straight to Zapier and log into your account. (or sign up – it only takes a minute)
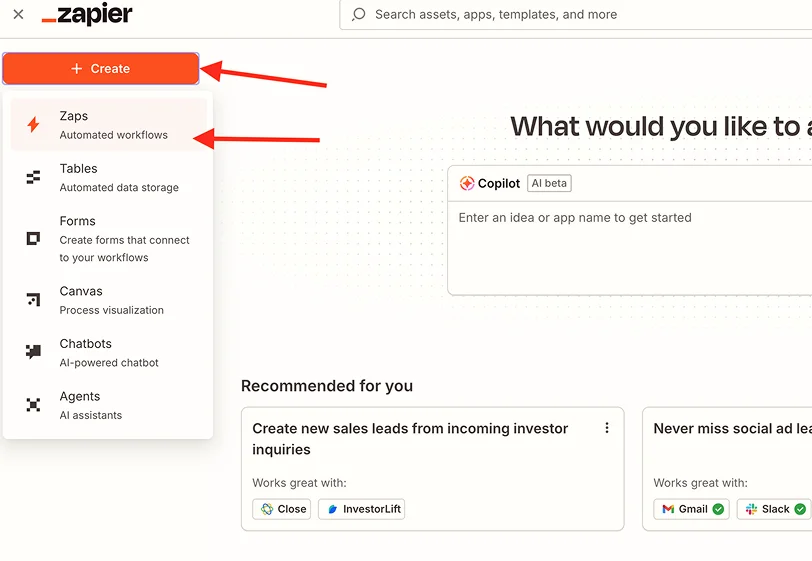
2. Create a new Zap
From your dashboard, click “Create” > “Zaps”.
A “Zap” is just an automation (trigger – action).
3. Set the Trigger (start of membership automation)
- Search for Webhooks by Zapier (requires a Premium plan of Zapier)
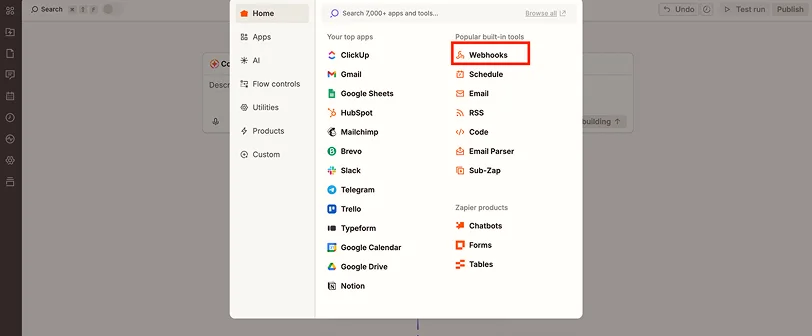
- Select it as your trigger app
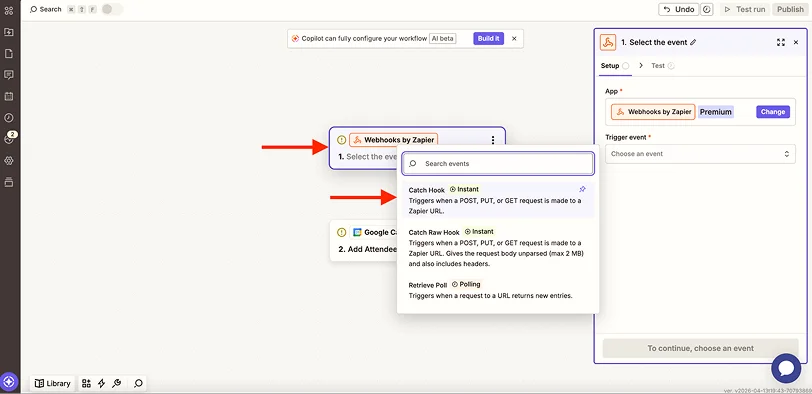
Please note: Choose “Catch Hook” – this tells Zapier to receive data from your website and Click Continue (you don’t need to fill anything here).
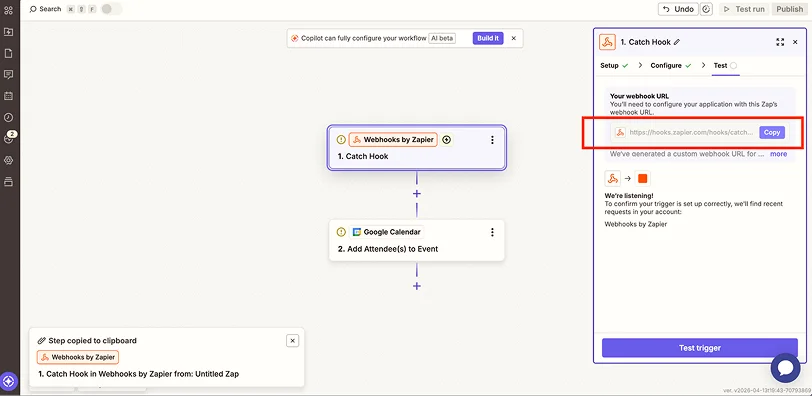
4. Copy the Webhook URL
Zapier will generate a Webhook URL. This is the key connection between your site and Zapier. Copy this URL.
5. Add the Webhook URL in ARMember
Go to your ARMember → Zapier settings → Trigger settings.
Now decide what actions you want to track:
- New user registration.
- Plan renewal.
- Plan change.
- Plan cancellation/expiry.
- User deletion.
What to do:

- Enable the event you want.
- Paste the Webhook URL into that event’s field.
- Save settings.
For example, if you want membership workflow automation when someone signs up, enable User Register and paste the URL there.
6. Set the Action
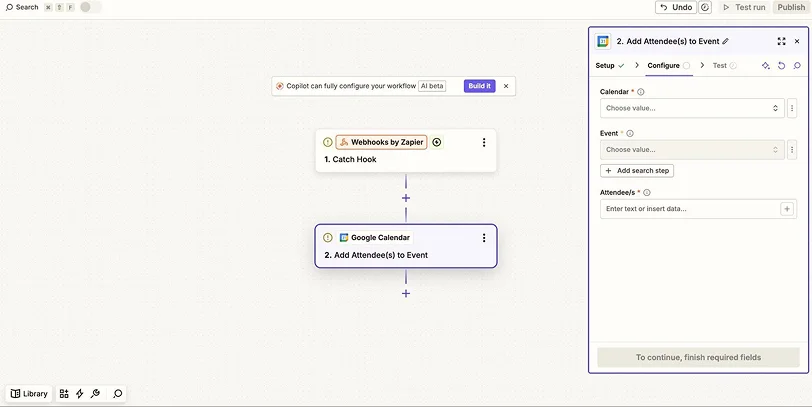
Now choose what Zapier should do with that data:
- Add a user to the email tool.
- Save to CRM.
- Add attendees to the calendar.
- Send notification.
- And more….
Connect your app (any software you want) and map the fields. For example, a user signs up – then this is automatically added to your calendar or email list (based on the app).
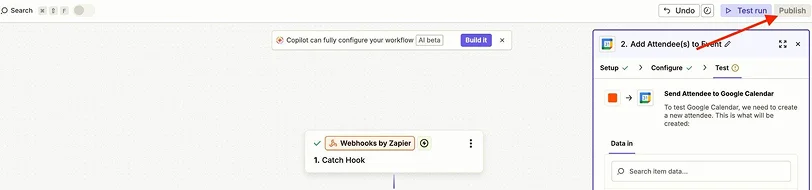
7. Test and turn on your Zap by clicking ‘Test trigger’
- Run a test to confirm everything works.
- Name your Zap.
- Publish your Zap.
3. Set Up Zapier Actions with Webhooks
The process is similar but works in the opposite way.
You need to complete these steps to let another app that you want to use (like a calendar or email marketing software) send data into your ARMember site (e.g. create a user automatically).
1. Create a new Zap
From your dashboard, click “Create” > “Zaps”.
2. Choose a Trigger (where data comes from)
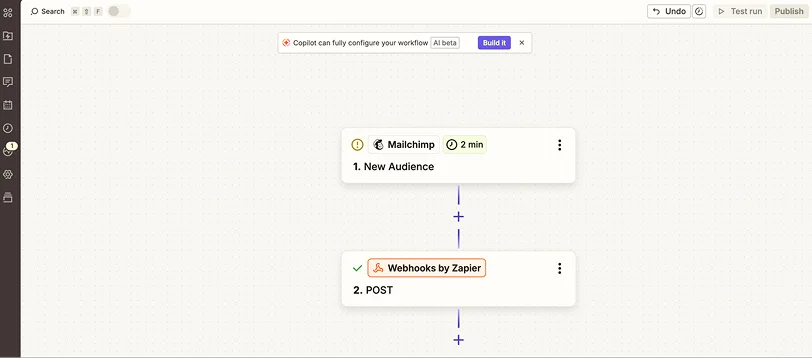
Pick the app you need that will send data to your site. The next steps will differ based on what app you choose and select extra actions.
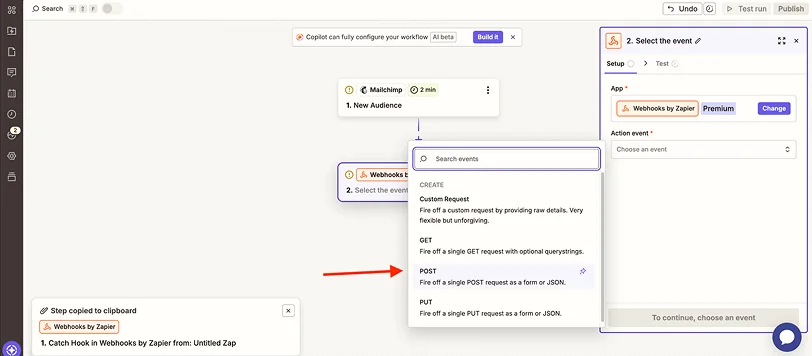
3. Click “Add Action” > Choose Webhooks by Zapier
This allows Zapier to send data to your WordPress website (choose ‘Post’).
4. Configure the Webhook
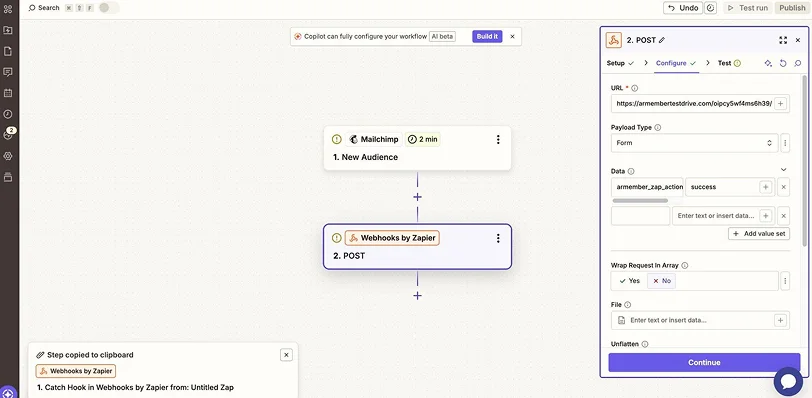
Now you’ll connect Zapier to ARMember by entering:
- Website URL, which is your ARMember webhook URL.
- Key fields based on the app.
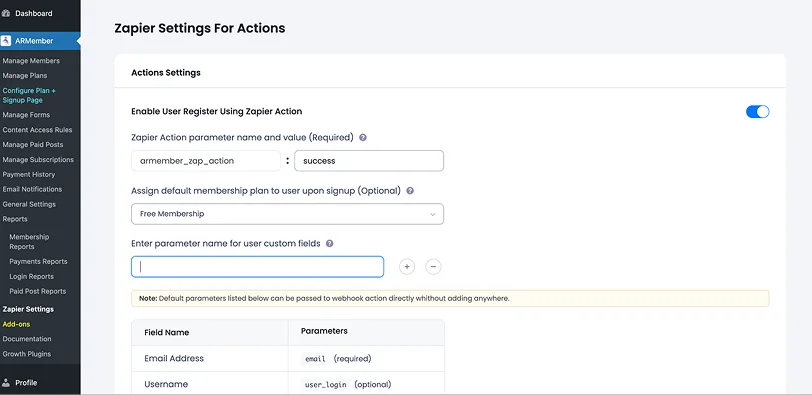
You must include this in data field:
armember_zap_action = success
This acts like a “permission key” so your site accepts the request.
5. Add armember_zap_action
As mandatory field for creating users using Zapier webhook (use value as at ARMember Zapier settings).
6. Test the connection: Click “Test”
This checks if your website correctly receives the data and creates the user. If it works, you’re good to go!
7. Finish and click “Publish”
What you just built: app (e.g. Mailchimp) – Zapier – Your membership site.
Let’s Conclude: Setting up Zapier for Your Membership Site Automation
An automated membership workflow is simply a sequence of automated steps triggered by a user action. It can do many things when, for example, a user signs up on your site created with ARMember:
- create account
- renew a plan
- change a plan
- plan cancellation/expiry
- delete a user.
Zapier acts as a bridge between apps that don’t naturally talk to each other. It uses this logic: Trigger → Action. For example:
- Trigger: New member signs up (your site)
- Action: Add them to email tool (e.g. Mailchimp)
You can easily integrate Zapier with ARMember with a dedicated add-on and set up your automated membership workflows with ease.
Related Articles:

Share this post