

Want your membership site on WordPress to become fully multilingual? Maybe you need to explain crypto strategies to international audiences, showcase tourist highlights to foreigners, or something else – then multilinguality is always a necessity!
But while it’s easy to translate your content thanks to professional services or even machine and automatic translation tools, it’s not always that simple to do the same for the functionality plugin that drives your memberships and subscriptions – like ARMember Membership plugin.
You are surely troubled with questions like whether you can send member emails in customer’s language, or if they can use payment methods in their language on your site, etc. The answer is… yes!
To create a multilingual membership site, follow the steps in our tutorial – and your site will surely provide a smooth and professional experience for all users, no matter their language.
What do you need for a multilingual membership site on WP?

To follow our simple multilingual membership site tutorial, you need:
- The ARMember membership plugin to power content restriction and subscriptions on WordPress.
- The Multi-language add-on by ARMember.
- A WordPress translation plugin that works with ARMember’s add-on: WPML, Weglot, TranslatePress, Polylang, or WPGlobus.
What can you translate in your membership site with ARMember?
Before we go any further, you surely want to understand how deep you can go with the multilingual membership site setup on WordPress with ARMember + its multi language addon.
Well, you can make almost every website front-end element + billing and emails – multilingual. This means members will see content in their chosen language automatically. So, you can translate:
- Membership forms (labels, placeholders, buttons)
- Common messages (e.g., success, error, confirmation)
- Plans and pricing details displayed on your site.
- Paid post titles and descriptions
- Security options messages
- Payment gateway text
- Invoice details
- Email notifications
- Preset form fields
- Plan + Signup pages.
Curious how to create the translation environment on your WordPress multilingual membership site? Let’s walk you through the steps.
How to get started
ARMember makes the integration with many free and paid multilingual plugins easier thanks to the Multilingual addon. Here are the steps to install and configure it.
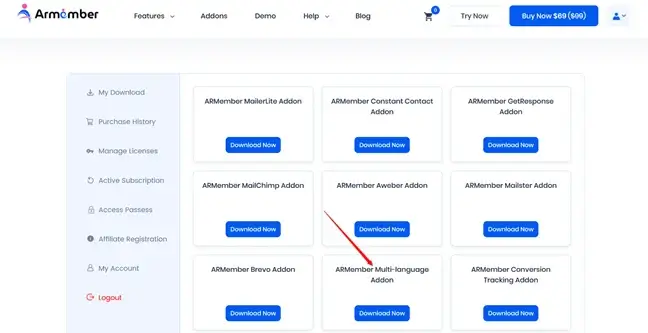
- First, go to ARMember → Add-ons → Find the Multi-Language add-on → click Get it.
- After being redirected to your ARMember account, sign in and go to My Download.
- Find the Multi-Language add-on and click ‘Download’. Note: You must be on the Professional or Enterprise plan with the ARmember plugin.
- Install and activate the add-on on your WordPress site (Plugins → Add Plugin → Upload plugin → choose a zip file with the add-on).
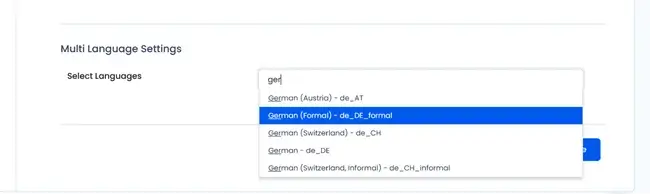
- After activating the add-on, go to ARMember → General Settings → General Options tab → Multi Language Settings, then select the languages you want to add to your site and use for the member registration form. Note that you can select several ones! Just add one after another.
- Make sure that the multi-language plugin of your choice is installed and activated. Once more, ARMember supports these plugins:
For our multilingual membership site on WordPress tutorial, we’ll be using Polylang as an example because it has a free version you can easily install without leaving your site dashboard.
For instructions with other listed WordPress multilingual plugins, visit our docs.
Let’s now get back to the setup with one chosen multilingual plugin!
Example: Building your multilingual membership site on WordPress with ARMember and Polylang
So, here it goes – we’re ready to build a multilingual website with the membership plugin and the multi-language plugin!
Step 1. Install and activate Polylang (or your plugin of choice).
Polylang gives your membership site the ability to detect and display the right language for each visitor.
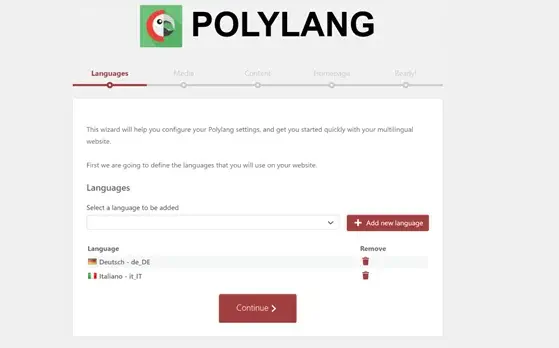
- Go to Plugins → Add New, search for “Polylang”, install, and activate it.
- Complete the setup wizard (or skip it and configure later). You can add several languages.
Step 2. Add your languages
You are free to provide a personalized experience for users based on their language.
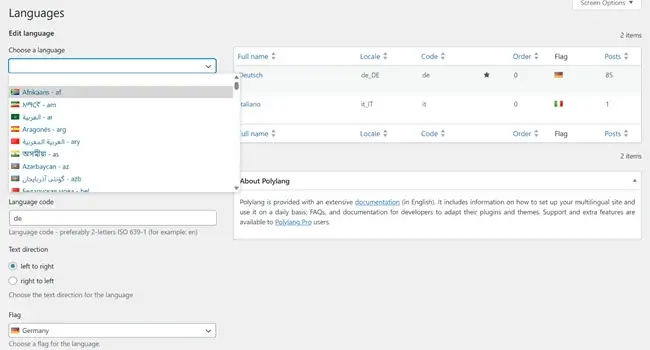
- Go to Languages → Languages in WordPress.
- In this menu, Polylang allows you to add all the languages you want.
- Set your default language to match your current site language.
Step 3. Add languages in ARMember
We’ve already described this step before in the general quick start guide for the WordPress multilingual site. Here it is one more time:
Go to ARMember → General Settings → Multi Language Settings.
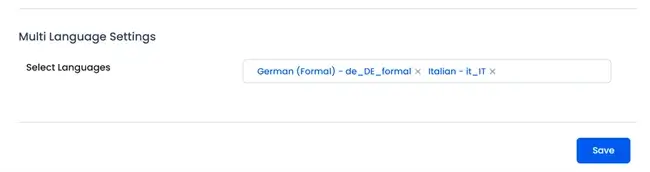
ARMember will be linked to your chosen languages so that all membership forms and related content can be translated and shown in the right language.
Step 4. Translate membership forms
Member registration and sign-up forms are virtually the key place of where the interactions happen.
Display them in the correct language automatically to improve customer experiences with onboarding and login:
- Go to ARMember → Manage Forms → Add/Edit Form.
- Next, Click the Translate button (top-right).
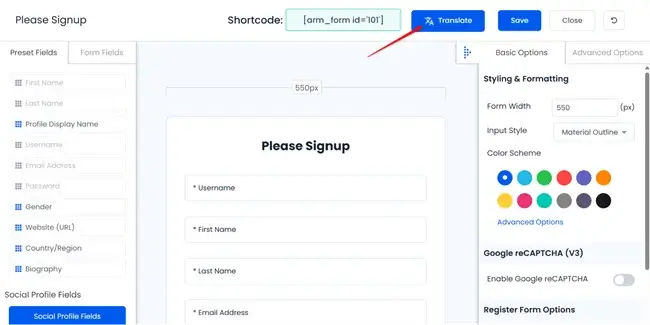
- Last but not the least, just select a language and translate all fields and labels.
Step 5. Translate common messages
ARMember’s add-on also helps you display system messages in the user’s language so that it’s easier for users to understand error or success notifications.
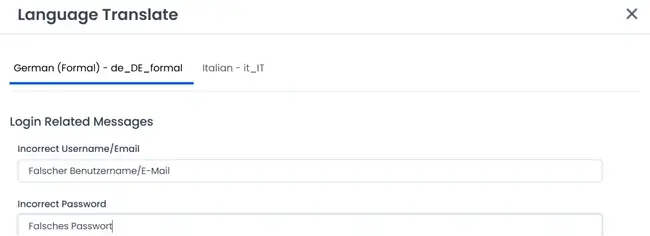
You can translate them too, if needed:
- Firstly, go to ARMember → General Settings → Common Messages.
- Later, click the Translate, select a language, and add translations.
Step 6. Translate membership plans and paid posts
Want the pricing, plan names, and descriptions shown in the correct language?
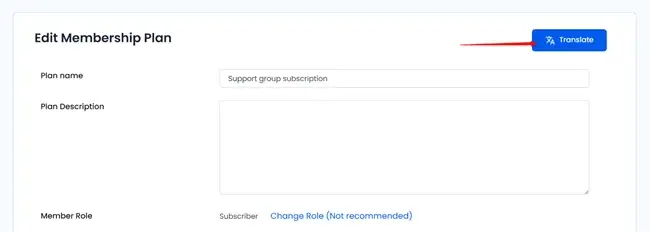
Then go to translate plans and paid posts in ARMember:
- For Plans: Go to ARMember → Manage Plans → Add/Edit Plans → Translate.
- For Paid Posts: Go to ARMember → Manage Paid Post → Add/Edit Paid Post → Translate.
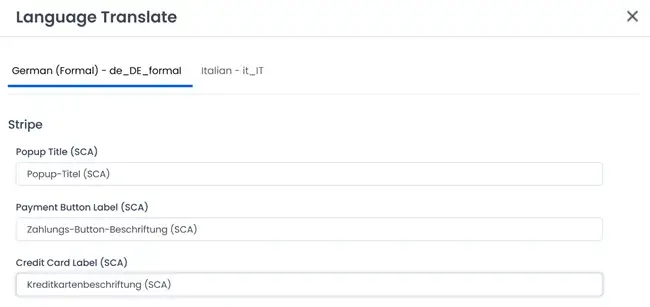
Step 7. Translate billing and invoices

Yes, you can do even this! Make it easy for members to see all payment and security information in their own language. We hope it will help your membership business reduce any payment-related misunderstandings.
- Go to each section in General Settings (Security Options, Payment Gateways, Invoice Settings).
- Click Translate and add the relevant translations to the needed parts of your memberships site.
Step 8. Translate email notifications
Emails from your ARMember plugin can also be sent in the recipient’s chosen language.
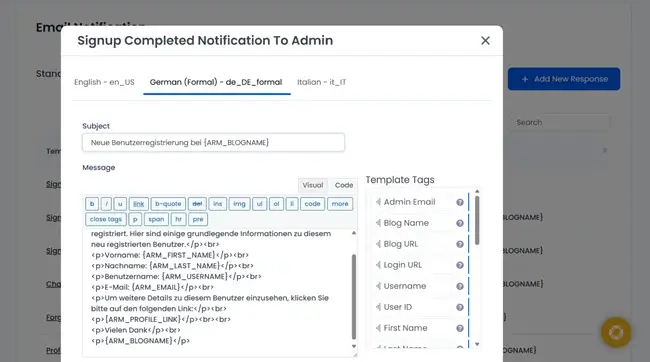
For this, do the following:
- Go to ARMember → Email Notifications → Add/Edit Email Notifications.
- Click Translate, choose a language, and customize the text.
Step 9. Translate form fields
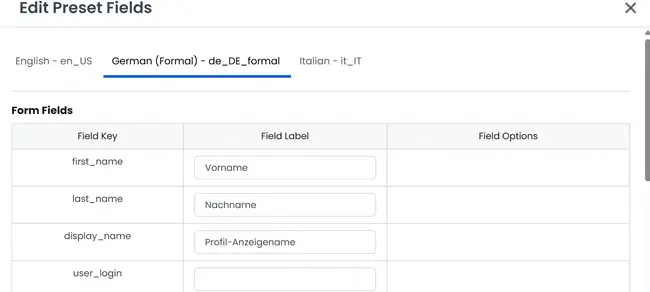
If you want default fields (e.g., Name, Email) to match the site language, you can also customize this with the help of the translation add-on.
- First thing first, go to ARMember → General Settings → General Options → Manage Preset Form Fields.
- And then, edit and translate each preset field for all languages.
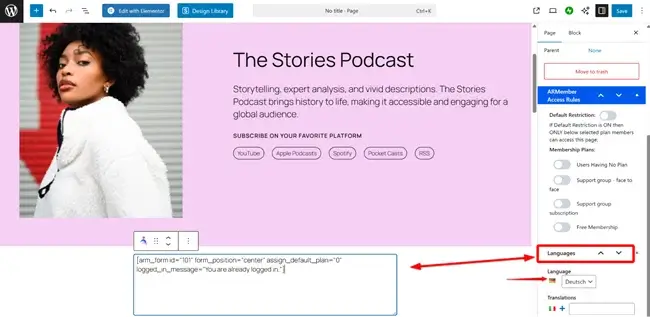
Step 10. Translate Plan + Signup pages
Sign-up pages can also be fully localized. So for adding your translations, here are the steps:
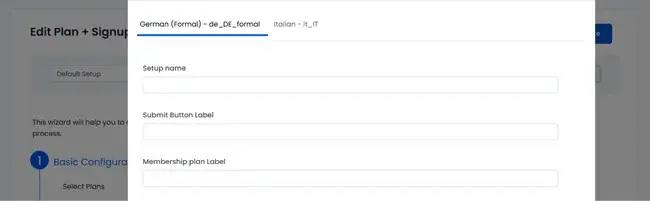
- Go to ARMember → Configure Plan + Signup Page → Add/Edit.
- Click Translate, choose a language, and update all fields.
Then, when you add a ARMember shortcode, its content is translated to the language chosen in your page settings of Polylang (or another plugin that you use).
So, this is how you translate your pages for the key things of your membership site on WordPress using ARMember, its Multi-language addon, and the WordPress translation plugin that you like.
Concluding: How to Build a Multilingual Membership Site on WordPress?
As you see, you can build a membership or subscription site in multiple languages using ARMember and its extension for integration with external multilanguage plugins. While we’ve used a free Polylang plugin for our tutorial, the principle is quite similar no matter which supported translation plugin you use. It’s going to be super easy to add your translations to the key forms, pages, and communications delivered by ARMember!
FAQs
Are multilingual sites allowed in WordPress?
Yes! You can create multilingual sites in WordPress. However, WordPress doesn’t come with in-built multilingual support so you have to use a WordPress translation plugin. If you are using the ARMember WordPress plugin, you can easily build a multilingual by integrating with popular translation plugins such as WPML, Weglot, TranslatePress, Polylang, and WPGlobus.
How to make a multilingual site with WordPress?
To make a multilingual site in WordPress, install a multilingual plugin or simply look for a plugin with translation addon like ARMember. Next, add your desired languages, and translate your pages, posts, menus.
Is multilingual good for SEO?
Of course! A multilingual site is good for SEO as it gains more website traffic from different regions and enhances user engagement. Moreover, It also improves your site’s global reach.
Which is the best multilingual plugin for WordPress?
Here’s the list of the best multilingual plugin for WordPress:
- WPML
- Polylang
- TranslatePress
- Weglot
- WPGlobus
What is the best membership plugin for WordPress?
ARMember is the best membership plugin for WordPresss, for unlimited number of membership plans. Moreover, it comes with 21+ payment gateways and 57+ in-built addons for robust features and functionalities.
Can I send membership emails in different languages?
Absolutely Yes! With ARMember’s Multi-Language add-ons, you can easily create and send membership email notifications in different languages.
Related articles:

Share this post