
Are you using the ARMember Plugin to power up your membership website? I must say, great choice!
Well, the membership plugin helps you provide a lot of features to your members. However, you must configure the setup and plan, for the visitors of your Website to actually see that you are offering memberships and exclusive plans.
With ARMember Plugin, it is very easy to set up your membership website, no coding needed. Let us quickly go through the steps and help you set up your site.
Configuring the Setup and Membership Plans
Once you have installed and activated the ARMember Plugin, you are ready to start with the Configure+Signup Page. On the left hand side panel, you would see the option of Configure Plan + Sign Up Page. It is available for both, Lite version and Pro version of the plan. Click on it to start going through the further mentioned steps.
Going through the Configuration Process in Detail
Before you start following the steps to set up your ARMember Wizard, have a rough idea of the plans that you want to offer. Have you thought of a name for various plans like Gold, Silver, Bronze or Beginner, Intermediate, Advance? If not, chalk out a rough idea so that the further process would be quick and clear in one go. Let us walk through the steps now.
1) Basic Configuration
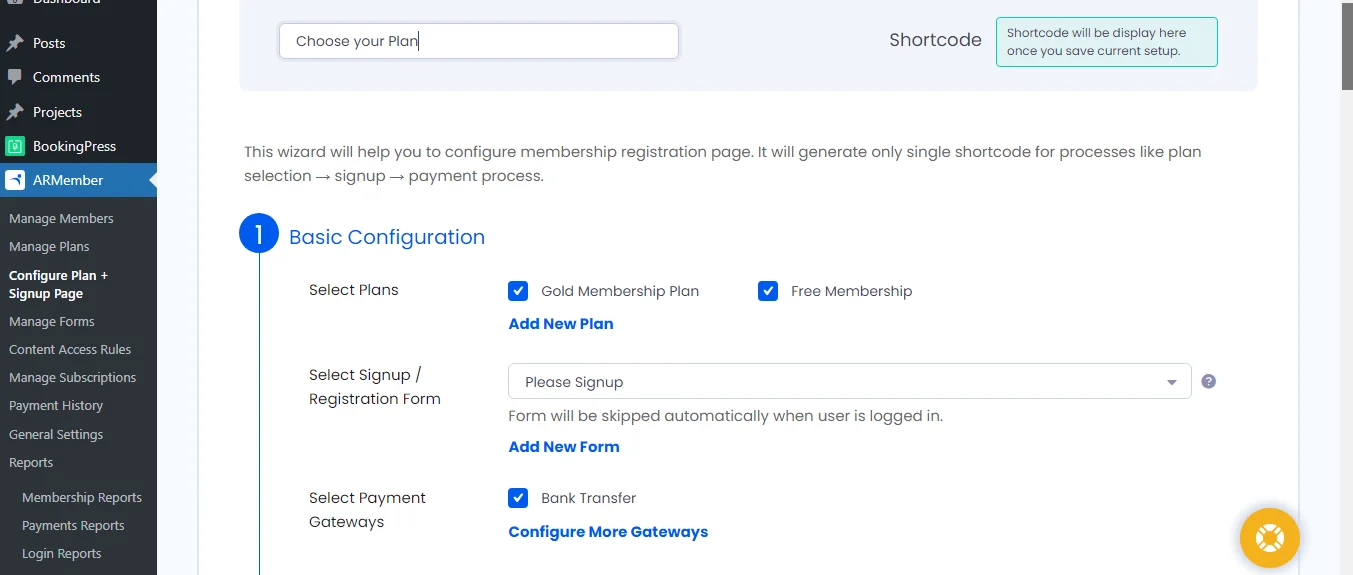
As you click on the option of Configure Plan + Sign Up, a new setup page would appear as shown below. Give a name to your setup. Further, you have to select a plan for which you are doing the setup process. If you want multiple plans to appear on your setup page, you can select multiple options as well.
If you intend to create a new plan, you can do it by clicking on ‘Add a New Plan’ under the option of Select Plan. This will help you add a new plan without hindering your setup. Add a plan name, description, plan type, price, and duration as required. The brainstorming session suggested earlier would be helpful here.
Further, select the sign-up form from the drop-down and payment gateways. You can configure more payment gateways from this page itself as per your requirement.
2) Create a New Plan with ARMember Setup Wizard
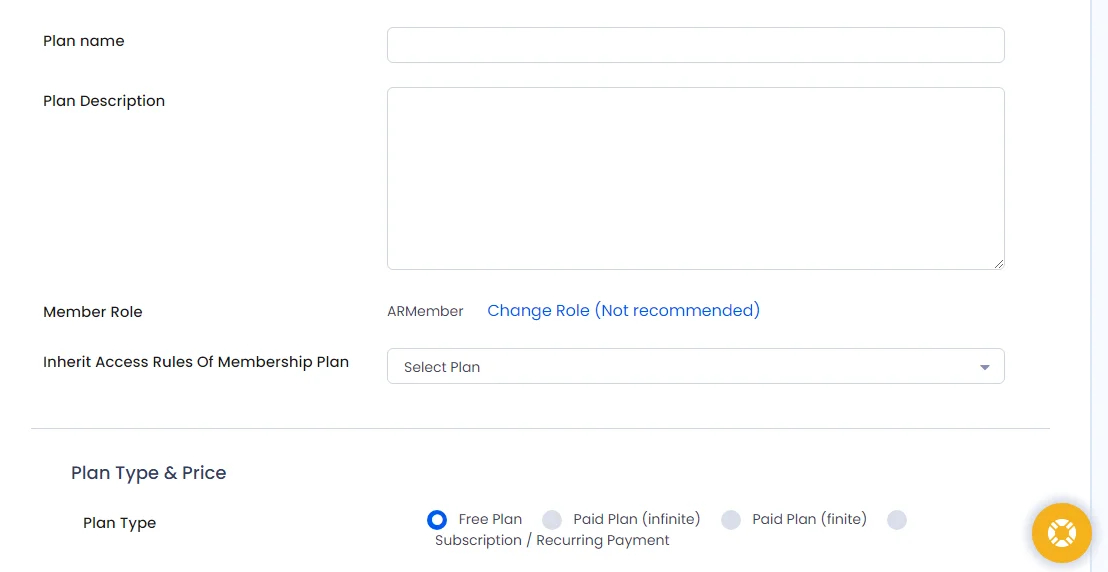
If you want to create a New Plan, here is a guide to help you do so during the setup process itself. Now, when you click on the Add New Plan option, a new window will open with the title ‘Add New Membership Plan.’ Fill in the options of Plan Name, Plan Description, Inherit Access Rules of other plans if required, and select the Plan Type.
The most important step is to select a Plan Type. There are four options available
- Free Plan wherein you just have to select and save the details
- Paid Plan (infinite) wherein a member pays a one time fee and has a lifetime access to your membership benefits. You just add a one-time price here in the Plan Amount Box./li>
- Paid Plan (Finite) is a fixed duration plan. Here, you need to set Plan Amount, Plan Duration, or Set a Fixed Expiration Date. You will also find options to set End of Term Action, Choose to provide Grace Period days, and even enable Upgrade Downgrade action.
- Subscription or Recurring Plan can be chosen wherein a user pays a fixed amount in fixed intervals to keep receiving the service. Here, you need to mention amount, billing cycle, duration of subscription and recurring time.
- Based on the Plan you select to create, its related options would appear for you to set up your best membership plan. Do not forget to click on save after adding all the details.
3) Exploring Other Options while Configuring Membership Plans
I am sure you have successfully created a plan and are done with the Basic Setup Configuration. Now let us move ahead to explore the Other Options of the setup wizard.
- Submit Button Label: Let’s update the text that comes over the Submit Button. You can customise the text to anything that suits your membership website like Let’s Go, Start the Revolution, Let’s Be Fit, Join Hands for Betterment, and so on.
- Similarly, you can update labels for Membership Plan, Payment Cycle Section Title, Payment Gateway Title, Labels for various payment gateways.
- You can also check the Summary Text that would appear after selection of plan and payment gateway. Make necessary changes if required.

4) Styling and Formatting the ARMember Setup
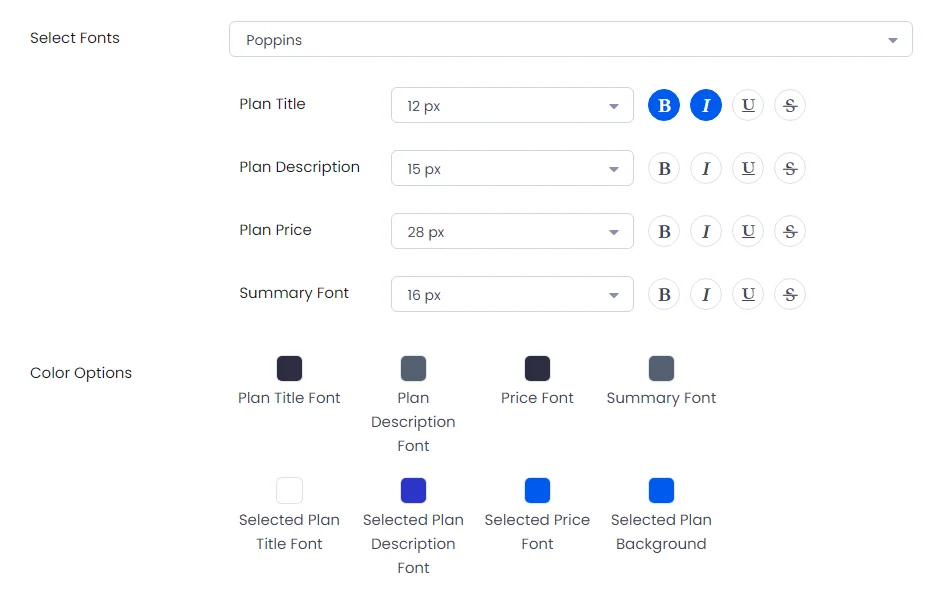
The next step is customising styling and formatting. Herein, you get to select the Plan Skin from the available templates. Let us explore the other styling and formatting options.
- The option of Two Step Sign-up would divide your sign-up process in two pages with the first page having plan and payment cycle selection with an option to click on Next to go to the second page of sign-up.
- You can hide the current plan i.e. not showcase members the plans which are already owned by them currently.
- You will find various other options like to position your plan selection area before registration form or after, choose the payment gateway skin, choose content width, plan layout, form position, payment cycle layout, payment gateway layout, font and colour style for each part.
- You can also add Custom CSS with the help of CSS Class Information
5) Save the Configuration Setup
Once you have made necessary changes and formatting in the setup, Save the setup from the bottom of your page. If you are unsure about the updates, choose the preview option. This would help you in having an idea of how your page would look in the front end. After looking at the preview, if you see a scope of improvement in the outlook, make those updates.
Once you are done with it, do not forget to click on Save.
6) Copy the Short code of Setup and Configuration
By clicking on Save, you will be taken at the top of the page. On the right hand side, you will see a short code. Click on it to Copy the Short Code.

7) Publishing the Membership Page with Short Code
We are very close to launching membership plans on your Website. You have saved the setup and copied the short code, right?
Now, go to pages and add a new page. Give a Title to your page and Paste the Short Code in the body. Publish the Page. Now, View the Page to see its final look. Your Membership Plan is ready to invite members with the help of Setup and Configuration Wizard of ARMember
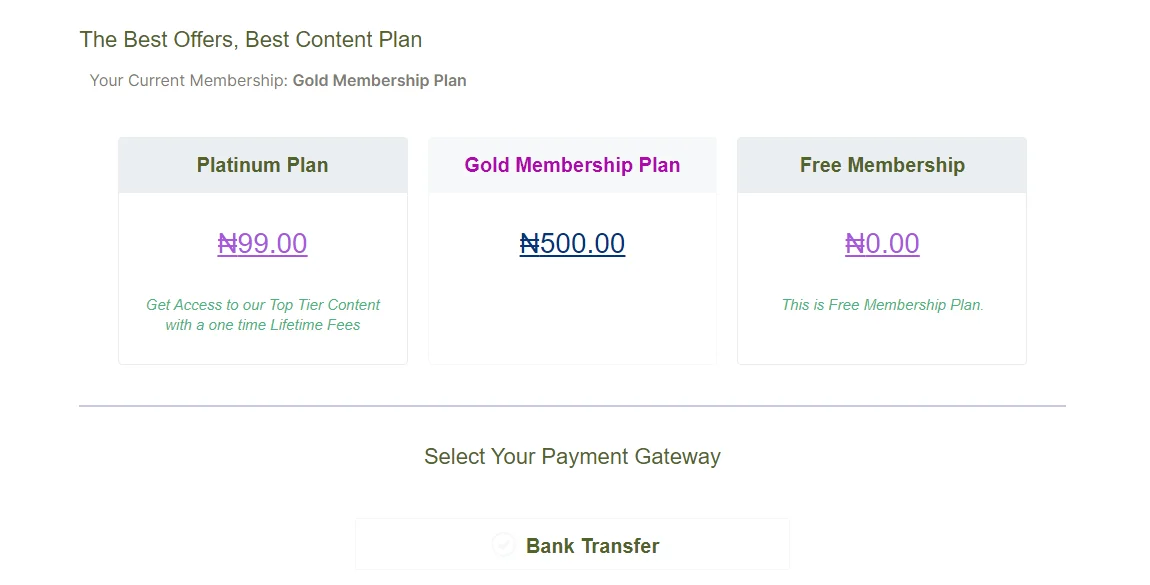
8) Check the Front End of Membership Website
If you wish to observe how the page will appear to a member, check the front end by logging in as a user. This will give you a better idea of page responsiveness.
Circling Back
Wasn’t it an easy breezy process to go through. Now you know, when I promised ARMember would be very easy to use and configure without needing any complex coding knowledge, I was telling the truth.
Get your membership plans active by configuring them. At any point in the process, do not forget to keep saving so that your progress is not lost. Don’t Worry, get going with your ARMember Pro Setup and the Repute Team will be there to support whenever there is a hiccup down the road.
FAQs while Setting up the Membership Website with ARMember
1) How can I provide Coupon Code Feature during the Setup Process?
Coupon Management is an add-on that you need to activate and configure by going to ARMember>Add-ons. Once you activate it, you will see the option of Coupon Management from where you can create or bulk create coupons in the Pro version of ARMember.
2) Can I Edit the Setup after Saving and Publishing it?
With ARMember, you can edit the setup by clicking on the edit icon in Configure+Signup Page. Whatever changes you make, will be applied automatically to your published page. Just update and view the page again to see the new changes. You can repeat this process as many times as you want without a worry.
3) I am unable to see the sign-up form in preview, will it be active?
The person who has logged in or administrator cannot see the form. They can directly see the membership plans and payment gateways. The form is for the new visitors who will fill their basic details and you can add them to your list.

Share this post